A hidden hatch under the tiles in the bathroom allows you to gain access to water, sewer or heating pipes for inspections and maintenance, as well as individual meters for paying utility bills. How to make a hidden inspection plumbing hatch yourself, read on.
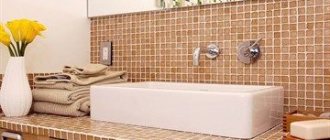
Hatch under the tiles for access to meters
Material for secret hatch
At the first stage, we will decide on the material from which the secret hatch under the tiles will be made with our own hands. Depending on how the wall or floor is finished, these could be:
- Plywood. We use it if you insulated the walls or floor of a room using mineral wool, cellulose fiber, polystyrene foam or polyurethane, and used plywood sheets as a covering layer, followed by the application of a decorative layer.
- OSB. We use this material if pressed chipboards are used to cover the walls and floors of the room.
- Drywall. The simplest and most effective way to level the surfaces of walls, build decorative partitions or walls when remodeling the space of an apartment, and arrange niches for laying communications is plasterboard. If this is your case, this is the material that will become the basis of a hidden hatch under the tiles, made by yourself.
- Metal. The hatch under the floor tiles must be made of strong, impact-resistant material that can withstand heavy loads. An iron door will have all these properties.
Let us fully explain the question that arises - what difference does it make, with the exception of the floor, what material the homemade inspection hatch will be made of? The difference is in the adhesive composition with which you will stick the tiles to the door. For drywall, for example, traditional tile adhesive is used. But ceramics are installed on an OSB board using a polyurethane-based mixture.
Cost of concealed plumbing hatches
Specialized plumbing equipment stores offer a wide range of hidden-mounted plumbing hatches. As a rule, the buyer makes a choice without thinking about the technical parameters and capabilities of the products, but only pays attention to the cost. However, low and high costs are not always guidelines for quality.
The price of an inspection hatch depends on a number of factors, including:
- type of system, design elements;
- dimensions;
- locking/unlocking system and hinge supports (press);
- quality and type of materials used.
The average cost of plumbing hatches in construction retail outlets can vary between 1300-4000 rubles. When assessing the cost and benefits of each product, do not forget about the brand name.
Master’s comment: “Yes, everything is correct for the price, they are sold within these limits. I’ll just add that the more often you plan to look into this hatch, the more reliable the design should be.”
The more well-known it is, has been on the market for a long time, and has an extensive catalog, the more likely it is that a hidden-mounted hatch will last for many years and will effectively perform its assigned tasks.
Fastening the inspection hatch with long screws
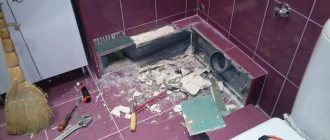
Installation of an invisible hatch under the tile in an inconspicuous place (behind the toilet, under the bathtub, in a hard-to-see corner), on drywall, can be done using long screws. Let's do it as follows.
- At the stage of assembling the frame from metal profiles for plasterboard, we install additional jumpers in the place of the planned inspection hatch, on which it will subsequently rest. When screwing the gypsum panels onto the frame, we leave an opening in a certain place so that the profiles for installing the door remain open and accessible for fastening.
- We cut out a door from drywall that will be 2-3 millimeters smaller than the left opening on each side, that is, the thickness of the tile seam. Looking ahead, we note that the size of the hidden hatch should be such that a whole tile or several tiles can be glued onto it, without trimming, in order to organically blend into the overall order of the rows. The easiest way to achieve this result is to first mark out a diagram for laying decorative tiles on the wall.
- We try on the cut out fragment to the opening. If everything is in order with the dimensions, we prepare the tiles. We try it on the door and make a drawing on the surface, according to which holes for mounting screws will be drilled - they should fit into the metal profiles of the frame. If the viewing window is small, and its location requires cutting the tiles, cut it exactly to the size of the door using a tile cutter or grinder. Mark the mounting holes.
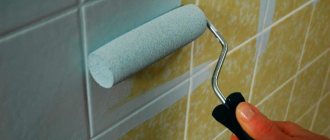
- Using a drill, carefully drill holes. They must be done in 2 stages: first we drill a hole through for the body of the screw, and then we drill it out a little to a larger diameter - to hide the screw head. Soak the ceramics for 7-10 minutes in water. Then we apply the adhesive mixture to it, spreading it with a comb and gluing it to the base. Carefully remove any remaining glue from the ends - they should be clean.
- After the glue has dried, we apply the finished structure to the prepared opening, cleared of any remaining mortar, and attach the screws. First, carefully roll them through the plasterboard base, and then screw them into the profile. After making sure that the hatch is in its place, we tighten the fasteners.
Work is done. All that remains is to sand the seams - but more on that a little later, since this procedure is the same for all types of installation of inspection hatches under tiles. A similar procedure for making a door from plywood or OSB board, depending on what became the basis for the decorative layer.
Tile
96 votes
+
Vote for!
—
Vote against!
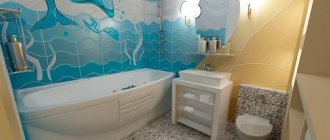
Installing an invisible hatch helps make the appearance of the bathroom more attractive. It is in the hatch that all the communication elements of the bathroom are hidden. Buying a hatch for a bathroom is an expensive process, and not everyone can afford it. But making a hatch with your own hands is much cheaper, although it requires considerable effort and time. We'll look at how to make a hatch under a tile and how to install a hatch under a tile below.
Table of contents:
- Hatches for tiles: features, purpose and installation advantages
- Varieties and photos of hatches for tiles
- Making a hidden hatch under tiles with your own hands
- Installation of a hatch under tiles: technology and instructions
Hatches for tiles: features, purpose and installation advantages
The main function of an invisible plumbing hatch is to hide all communications located in the room and provide free access to them at any time.
The main advantage of a tile hatch is its inconspicuousness against the background of the main interior. In addition, they combine the qualities of functionality and simplicity.
Among the advantages of installing hatches under tiles are:
- complete harmony with the interior of the room;
- maintaining the integrity of the cladding;
- the presence of durable doors allows you to use various types of finishing materials, including tiles;
- invisibility;
- duration of operation;
- ease of installation and construction;
- high level of reliability;
- ensuring free access to communication systems equipment.
Varieties and photos of hatches for tiles
There are several types of tile hatches:
1. Hatches for sliding tiles.
This version of the hatch consists of:
- frames;
- doors;
- castle;
- outer finishing layer;
- loops that connect it to the wall;
- regulatory mechanisms.
The main element of the hatch is a frame mechanism, for the manufacture of which tubular steel or aluminum is used. Aluminum is most often used, as it is resistant to corrosion, however, in cases where the hatch must withstand heavy loads, it must be made of steel.
Doors are most often made of the same materials as the frame. Its upper part is finished with moisture-resistant gypsum fiber or plasterboard. And finishing materials are applied to it. The perimeter of the door is equipped with insulating material that prevents moisture or air from entering the hatch. In addition, its presence protects the inside of the hatch from mold, dust or mildew.
The sliding version of the hatch differs from its other variations by the presence of a three-link hinge design. This ensures frontal and side door opening. The hinges allow you to adjust the position of the door in two variations.
An important element is the presence of a push lock, with which the door opens very simply and without much effort.
The use of sliding hatches is recommended if it is installed in a small room. This type of hatch is perfect for finishing with tiles, porcelain stoneware, mosaics and other finishing materials. If it is necessary to provide free access to the communication system, this type of hatch is used. This type of hatch is opened by minimally pulling the door and moving it to the side. This hatch is installed in the surface of vertical wall partitions, foam blocks, walls made of plasterboard, concrete, etc.
Such designs are perfect for both residential and public premises, as well as for installation outside buildings. There are two options for sliding hatches:
- hatches that open with a suction cup handle are installed if the room is decorated with materials;
- hatches, click type - used when finishing with mosaics, tiles with a relief or matte surface, to open this type of door you do not need a click handle, it opens with one click, in order to close this door you need to ensure its opening with a characteristic click.
2. Hinged hatch type - this option is particularly popular, since its design is the simplest and resembles ordinary hinged doors. Such hatches are used when finishing walls in a bathroom or toilet with semi-matte or smooth tiles. Inspection hatches for hinged tiles have enormous advantages over other types of hatches. It is this type of hatch that is most invisible after its installation. The tile is installed directly on the surface of the door.
This type of hatches is widely used for hiding water meters, thermostats, filters, siphons, etc. In addition, such a hatch will be an excellent place for arranging a safe or a secret shelf.
The design features of such a hatch include the following elements:
- welded frame;
- door frame;
- gypsum fiber board;
- holes for installing dowels and screws;
- hinges connecting the outer frame structure to the door.
In addition, to fix the hatch in a certain position, it is equipped with special locking latches.
3. Push-in hatches for tiles have high load-carrying capacity. By opening the door frontally, it is possible to prevent mechanical damage to the finishing material, in our case, tiles.
In relation to the technical design features, such hatches consist of:
- steel frame fixed in the opening using self-tapping screws;
- frames for the door, which is finished with gypsum fiber;
- a two-link hinge that regulates the opening of the door in different positions;
- locking mechanisms.
With the help of hinges, this type of hatch opens with one click. The door seems to stretch out from the wall, thereby ensuring that the hatch on it is invisible. The hinges are designed in such a way as to ensure that the door can be finished with any materials, including tiles. This type of door opening is the safest of all the above.
Depending on the location of the hatches, they are:
- wall-mounted - the most popular option, the easiest to access;
- floor hatches under tiles are more complex to install and operate;
- ceiling - used extremely rarely, although their arrangement is also possible.
The dimensions of hatches for tiles directly depend on its internal contents, the number of communications and items that are planned to be placed in it.
Making a hidden hatch under tiles with your own hands
To complete this work, it will take a lot of time and effort; if you do not have the skills to manufacture such devices, we recommend that you carry out the work with at least two people.
The easiest way to construct an inspection hatch is to use furniture fittings that are converted to fit the locking mechanism of the hatch itself. The system will require the presence of canopies and a pressure system, which will ensure easy opening of the hatch.
To make the door you will need plasterboard or gypsum fiber with moisture-resistant characteristics. If you plan to tile the surface in the future, it is better to choose the gypsum fiber option. It is this material that has higher adhesion to tile adhesive, and accordingly to the tile itself.
The hatch is assembled directly at the work site, since this procedure requires careful measurements and adjustments as all instructions are followed.
First you need to decide on the size of the plumbing hatch for the tile. When choosing a size, you should take into account the fact that the hatch should be made as small as possible. Since arranging a large structure does not make any sense.
The size of the hatch directly depends on the type of communications to which access is required. For example, if you plan to install a hatch to service a water meter, then for these purposes an area of one standard tile measuring 10x10 cm is quite sufficient.
If it is necessary to check communications in the form of a siphon, pipes, etc., then the size of the hatch must be increased to such a size as to ensure unimpeded access to them.
After determining the optimal size of the hatch, the actual work on its creation begins. The easiest way is to start by making a frame that will be located inside the hatch. Its manufacture is a fairly simple process that requires care in taking measurements. The frame is made of steel or aluminum angles and profiles. To connect them you will need a welding machine and experience working with it.
Next, the finished structure is installed in a niche and fixed in it using self-tapping screws. The next stage involves the manufacture of a door, for the frame of which it is enough to use OSB covered with gypsum fiber or plasterboard.
The door should have the same dimensions as the hatch.
Tip: Choose the size of the door taking into account the fact that it should fit whole tiles, with joints between them. That is, the door should be designed for one, two, four, six tiles.
When using OSB, try to choose a material with high density and a thickness of at least 12 cm, since the tiles require a certain rigidity to be fixed to the surface.
After making the door, the process of attaching the canopies to it, on which it will rest, follows. Please note that such a hatch is installed at the same distance as the wall; it cannot be recessed into it, as the integral appearance of the wall will be disrupted.
Please note that the door stop must be as rigid as possible. After installing the door and locking mechanisms, the tile laying procedure begins. The first tile is laid directly below the door. Take care to carefully calculate the vertical and horizontal rows of tiles. For these purposes, it is advisable to use a laser level. You should not grout the joints between the tiles laid on the door. This will be its only difference from the general interior.
Making a tile hatch with your own hands will be done efficiently only if all the above conditions are met.
Installation of a hatch under tiles: technology and instructions
There are several stages for installing a hatch under a tile:
1. Preparing the opening.
The opening under the hatch must be cleared of dust and dirt, and its dimensions must exactly match the parameters of the hatch itself.
2. Installation work.
Install the hatch into the previously prepared surface of the opening in such a way as to ensure that the plane of the door coincides with the wall on which the tiles will be located.
Please note that when installing a universal hatch with spring locks, you should extend the hatch two or three millimeters above the wall. Thus, after pressing the hatch, its tight fit will be ensured.
3. Fixing the hatch.
This process requires securing the hatch in the wall with dowels and screws.
Tip: Before fixing the hatch, check its levelness several times to avoid damaging the appearance of the wall.
If the frame is made of steel, then elements in the form of wooden blocks are inserted into it, which provide a strong connection and fixation of the hatch.
Next, the door is adjusted using special mechanisms that are provided for opening it. A special kind of plugs are installed on the side sections of the frames, improving the attractiveness of its appearance.
4. Finishing the hatch with tiles.
In hinged areas, the tiles are allowed to protrude by a maximum of 4.5 cm. In other areas, the tiles are allowed to protrude beyond the door by a maximum of 30%.
Tip: To ensure maximum adhesion between the tile and the door surface, it is recommended to prime the door before applying the adhesive. Please note that the tile adhesive must be of high quality; if desired, it is possible to use liquid nails.
It is prohibited to stick tiles to the hatch door with cement-based tile adhesive, since due to the high weight of the structure, there is a risk of deformation of the door.
In order to ensure even joints between the tiles, crosses are installed in them. Only after the glue has dried are they removed from the seams, and the door is opened by pressing.
To ensure sound insulation and sealing of the door, apply masking tape around the perimeter of the door. The gap is treated with sealant, after which the masking tape dries.
Tip: The sealant should be silicone based.
Please note that if the hatch has a pressure base, then not the entire space is filled with sealant, but only a 3-4 mm seam. Under no circumstances should the sealant get under the tile, otherwise there will be problems opening the door.
Using an elastic spatula, remove excess silicone. Remove the tape after the sealant has dried. After 48 hours, trim the seam at a forty-five degree angle.
Tip: To make it easier to open the hatch during its operation, you should cut the tiles on the wall, not on the door.
Hatches for tiles video:
Fastening the inspection hatch using dowels
If a niche for laying communications is cut directly into the wall, and the inspection hatch under the tiles will be mounted directly on the plastered wall, we will do the following.
- From the material at hand: plywood, OSB board or moisture-resistant plasterboard, we cut out a door that will cover the niche so that holes for fasteners can be drilled in the corners.
- We deepen the door into the wall so that during installation the decorative fragments glued to it are flush with the rest of the decorative layer.
- As in the previous method, we mark the tiles and drill holes in order to hide the heads of the screws.
- Place the tile on the door and let it dry. After this, we drill the mounting holes right through the base.
- We place the structure on the installation site, level it and mark the places for fastening on the wall.
- Using a Pobedit drill, we drill holes with a diameter that corresponds to the size of the dowel. We take a plastic dowel without a cap (which fits flush into the hole) and hammer it into place.
- We fasten the hatch into place through the mounting holes.
It is best to install the hatch under the tiles on the floor using this method, since only in this case the device is securely fixed and will not become loose or move if people walk on it.
Making facade tiles with your own hands
Installing a hatch on plasterboard boards
In this example, we will tell you how professional builders install a hatch in a bathroom. Initial data - the box with pipes and fittings is completely sewn up, the location of the taps and measuring instruments is drawn on the outer surfaces of the plasterboard boards, and the approximate size of the hatch is indicated.
Tools for installing a hatch
Hatch to be installed
For ease of installation, you can detach the door from the frame
Step 1. Mark the tiles along all the walls of the bathroom, taking into account the general laying rules.
Step 2. Start finishing the wall adjacent to the utility box. If necessary, slightly adjust the position of the tiles; this will not affect the final quality of the bathroom.
Step 3. Transfer the markings to the box, determine exactly the location and dimensions of the hatch.
Step 4. Cut a hole in the drywall to the desired size. To make the work easier, you can first use a grinder with a metal disc; as soon as a slot of sufficient length appears, use a hacksaw with fine teeth. Make sure that when making a hole, the metal frame installed for mounting the drywall is not damaged.
Step 5. Fix an additional profile around the perimeter of the hole to secure the hatch frame. It is screwed with self-tapping screws to an already mounted frame for plasterboard slabs. This is not difficult to do; the algorithm for fixing additional profiles is ordinary.
Step 6. Drill holes in the hatch frame to secure it to the installed profiles.
Frame holes (factory)
Step 7. Reinstall the hatch and open the door. Using a level, check the position of the structure and, if necessary, correct it using small wedges. Lock the hatch in the desired position.
Installing the frame in the opening
Step 8. Screw the frame to the metal profiles with self-tapping screws of the appropriate length. Check the position of the structure again.
We fix the frame with self-tapping screws
Step 9. Using special screws on the curtains, accurately adjust the position of the door, achieve smooth opening and equal clearance around the perimeter.
If the door has been removed, now is the time to put it back in place and adjust it
Checking the operation of the hatch door
Step 10. Close the hatch cover and begin covering the box with ceramic tiles. After the glue has hardened, trim the seams around the perimeter with silicone to match the color of the putty. The silicone has dried - cut through it to its full depth. We described above how this is done.
Installation with magnets
Making a magnetic hatch under a tile with your own hands is quite simple. The only way this method of fixation differs from previous methods is that instead of drilling holes for self-tapping screws, magnets are glued to the door, as you already guessed.
Learn more about how to drill tiles correctly.
A hatch is cut to the size of the niche, lined with tiles and installed in place. Along the edges of the opening, matching parts of magnets, or simply metal plates, are glued, which, when closed, fit tightly with the door magnets.
This method does not ensure complete immobility and the device can move downward under its weight. One little trick will help you avoid such problems. During installation, on the lower edge of the opening (this is the upper end of the tile located under the inspection window), it is enough to attach a fragment of a cross for seams using an adhesive mixture, with the help of which the size of the gap is adjusted. The door will rest on it and will not disturb the general order of the rows of cladding.
You can open such a hatch using a suction cup or a decorative handle attached to the surface (this option can be considered if the surface is rough and the suction cup does not stick to it). In the same way, you can install a floor hatch under the tiles, but only on the condition that it will not be walked on.
Functions
A bathroom hatch is a special device that is installed in the wall of a plasterboard box that masks pipes, water meters, valves and other plumbing equipment. It is a small door, opening which you can quickly gain access to communications without compromising the integrity of the finish. After installation, ceramic tiles, wallpaper, or paint to match the bathroom walls are glued onto the hatch to maintain the integrity of the interior. This mechanism is used to:
- Always have access to hot and cold water meters to read readings from meters and monitor their operation.
Easy access to sensors and pipes - Promptly eliminate with your own hands the causes of leaks and breakdowns in the sewer or water supply system of the bathroom.
- Organize a compact, unobtrusive place to store household chemicals, medicines or other household needs.
- Gain access to the siphon under the bathtub for cleaning and maintenance.
Important! Hatches are made of steel, plastic or wood, treated with an antiseptic and moisture-repellent composition. To ensure that the door remains invisible and blends into the wall, ceramic tiles or other material used to decorate the room are glued onto it.
Grouting joints
The seams are rubbed with gypsum grout.
With the exception of those located around the perimeter of the door. They are sealed with silicone sealant, the color of which is matched to the color of the grout. The seam is filled with silicone, and after complete drying it is cut with a knife at an angle of 45 degrees. As you may have already noticed, there is nothing difficult about making and installing an inspection hatch yourself. You need a little experience, useful tips and information (you can always find them on our website), and most importantly, desire. And then everything will work out for you.
How to make a hatch
So, if the question of the need to install an inspection hatch is quite obvious, then many aspects of installation may be unclear.
First of all, it is worth noting that there are two ways to go here:
- Use a ready-made factory version.
- Install the plumbing hatch yourself.
Each of the options exists and must be decided according to the situation. The fact is that factory hatches have standard parameters, but this may not always be appropriate. For example, you may not find a large enough hatch or resort to self-installation in order to save money. Be that as it may, both options require separate consideration.
Tools and materials
Such hatches can be bought in the store. All you need to do is assemble the structure, install it in the right place and perform the cladding. But for craftsmen who don’t want to overpay, there is good news: you can make such a hatch yourself. To bring this idea to life, you will need the following tools:
- furniture canopies;
- wooden beam 50×50 mm;
- moisture-resistant drywall or moisture-resistant plywood;
- push mechanism for doors;
- PVA construction glue;
- reinforced nylon mesh;
- facing material (tiles or tiles);
- tile adhesive;
- drill and screwdriver;
- pencil and tape measure;
- self-tapping screws;
- jigsaw or saw;
- screwdriver.
Selection of accessories by size
The shape of the products is usually square or rectangular. However, if necessary, you can order a model of any desired configuration.
The largest dimensions can reach 1800x2000 mm, however, this option is suitable for large plumbing-type units, since repairs will be carried out by several people with replacement, for example, of central pipes.
You can install the hatch in the opening using glue or self-tapping screws. When choosing specific sizes, you should take into account the size indicators of the niche itself. When it is already arranged, all that remains is to measure it correctly.
At earlier stages, if there is no niche, it is advisable to design it according to standard dimensions. This way you will eliminate the problem of finding the right model.
At the same time, it is necessary to clarify the size of the ceramic tiles, since experts recommend mounting a whole number of tiles on the door without the need for trimming.
Requirements for the viewing device
An “invisible” inspection hatch in a bathroom, regardless of design, must meet the following requirements:
- functionality - the dimensions and format of the hatch must ensure the possibility of servicing equipment hidden behind the partition;
- strength and rigidity - for long-term trouble-free operation and safety of the ceramics laid on it;
- tightness - in order to protect hidden communications and devices from open contact with water in the bathroom;
- heat and sound insulation of the door - to prevent the formation of condensation on the outer surface of the door and reduce noise from the movement of water (in the sewer riser);
- aesthetics - concealment in a closed position and arrangement of internal surfaces.
Invisible inspection hatch provides quick access to utilities
Failure to meet even one of the listed requirements will lead to a loss of aesthetics of the bathroom cladding and problems with the technical condition of hidden equipment.
Installation
You can install sanitary doors for the bathroom and toilet yourself. All it takes is a little effort and following the manufacturer's instructions exactly. Here is an approximate installation diagram, divided into several stages.
- Preparatory work. To begin, set up a plumbing closet. This is usually done at the location where the meters are installed. On this cabinet you need to install a frame for attaching a decorative hatch. If the base of the box is plasterboard, the frame is attached to the box with self-tapping screws. In the case when the cabinet is installed in a brick or concrete niche, the frame is secured with dowels and nails, and the gaps between the frame and the wall are eliminated with polyurethane foam. Please note that when using polyurethane foam, the door is disconnected from the frame for 24 hours, this is exactly how long it takes for the sealant to harden. Then the hatch is installed in place, the locking mechanism and hinges are adjusted.
- Facing. The finishing of plumbing hatches is carried out simultaneously with the cladding of the walls. It is worth considering the ratio of the sizes of the door and the tile. Usually a multiple number of tiles are used, or the hatch is closed with one decorative element. To ensure reliable adhesion of the door to the tile, you will need to pre-prime the surface. Liquid nails are used to glue the tiles. For high-quality fixation, glue is applied to 50% of the area of the mating surfaces. The adhesive should not fill the space between the frame and the door. After cladding, it will take several hours for the glue to harden, after which you can proceed to the next stage of work.
- Finishing. Unlike other walls, plumbing hatches are not rubbed down. The edges of the door are covered with plumbing tape, leaving a small gap. The remaining free space is filled with silicone sealant, while leveling the applied layer. Then the tape is removed and the sealant is left for two days until completely dry. After this, an incision is made around the perimeter with a construction knife.
Where are hatches installed?
Models can be not only wall-mounted, but ceiling-mounted and floor-mounted. The ceiling option is suitable for covering ventilation systems. They are placed on suspended structures, and therefore they should weigh little. It is better not to buy metal products. These hatches have a durable door and are equipped with a reliable locking mechanism.
Bathroom rod - tips on the correct selection, installation and adjustment of modern rods (100 photos)Glass for the bathroom: advantages of use, main disadvantages and recommendations for choosing glass elements for the bathroom (125 photos)
Wiring in the bathroom - 115 design photos, selection of the best schemes and optimal placement ideas
Floor structures are characterized by high mechanical strength and must withstand high loads. Durable material is used to make them.
A plus will be the equipment with additional stiffeners, clamps and shock absorbers. Increased attention is paid to the quality of seals.
Folding option
Used in situations where the door cannot be opened or moved. Therefore, the door is tilted downwards and then completely removed from the opening.
A hatch is a simple device that allows you to disguise communications in the bathroom without blocking access to them. The choice of a specific model depends not only on the size of the room, its design, but also design features.