Depending on the specific type, the cost of ceramic tiles can reach high values. Its rational use is one of the options for reducing the cost of finishing work. Correct calculations of needs are an effective way to save money. How to accurately calculate bathroom tiles and reduce waste? The work should be done in several stages.
Determining the required amount of ceramic tiles
Primary calculation (convenient calculators)
The method for this calculation is simple: you need to calculate the total area of the walls.
All you need is a tape measure and a calculator.
- First, we measure the height of the ceiling.
- Now you need to find the perimeter of the room - the sum of the lengths of all the walls. Let's measure them and add up the indicators.
- We calculate the area of the bathroom walls by multiplying the perimeter by the height.
- We divide the resulting area by the area of one tile (length multiplied by width) and obtain the number of elements required for covering the surfaces.
Example of primary calculation:
The bathroom has 4 walls, the length of the short one is 2.43 m, the long one is 3.7 m. The height of the room is 2.66 m.
We calculate the perimeter of the bathroom by adding the lengths of all the walls:
Perimeter = (2.43 + 3.7) × 2 = 12.26 m
We calculate the area of the walls:
Area = 2.66 × 12.26 = 32.61 sq. m.
Round to the nearest whole number, we get 33 sq. m.
Our convenient calculator will help you easily calculate the required area taking into account the doorway.
Therefore, to tile the walls in this bathroom, you will need 33 square meters. m of tiles. To purchase tiles, follow the link >>>
Let's count the number of tiles in pieces for this area.
Let the size of the product be 20 × 30 cm or 0.2 × 0.3 m.
The area of one cladding element is 0.2 m × 0.3 m = 0.06 sq. m.
Then the number of tiles for covering the entire room in this example will be:
33 sq. m: 0.06 sq. m = 550 pieces.
For a quick calculation, just enter the data in the form below.
Now you know how many tiles you need, you can choose and order!
You can calculate the number of packs of tiles, if this is more convenient in a particular case. For packaging, the manufacturer and seller usually immediately indicate the total area of material in it. Therefore, we simply divide the calculated area of the walls by the area of the tiles in the pack and get the number of packages required for tiling the bathroom.
The calculation is approximate and does not take into account trimming at the corners of the room, gaps in pasting and decor.
Room measurements
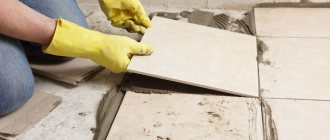
To calculate the tiles for the bathroom, you need to take a ruler and measure the room. That is, measure the length of all sides of the walls. It is easier to measure an area represented by a rectangle or square. In the first situation, two sides are measured, in the other - one.
If there are various curved areas in the room, all parts are measured. The results are recorded and a scale plan is drawn up. He will help in drawing up a design project for the renovation. On the plan you can indicate the installation locations of plumbing fixtures and furniture.
Select and buy tiles online
Anton Tsugunov , I have been doing repairs and finishing since 2003.
I prefer to buy tiles in an online store - it is very simple, convenient and safe. You can buy tiles without leaving your home. Most often I order delivery directly to the site, so as not to waste time and not “damage” the car.
In the online store you can find the exact specifications and real customer reviews. There is a photo of how the tiles look when finished.
Moreover, when I pay for the tiles with my card , I receive cashback of up to 30% of the purchase amount!
It turns out to be a double benefit! I don’t risk my health, I don’t waste time on the road, I receive the paid tiles at the time I specified and also save up to 30%.
You can select a tile by following the link>>>
Standard sizes
Standard sizes of tiles for a bathroom, kitchen or any other room are set within 15x15 cm.
The most common variations of square tiles are 10x10 and 20x20 cm.
For walls
Since only square and rectangular tiles are used for wall coverings, products in the 20x20 and 20x30 cm format are considered to be the standard. But the choice of standard tiles does not end there. The most common formats (in millimeters) include:
- 25x150;
- 75x150;
- 100x150;
- 100x200;
- 150x200;
- 150x225;
- 250x300;
- 275x400;
- 150x900;
- 300x900.
Important ! To buy tiles of the required size, you need to adhere to standard rules and calculate the area of the room whose walls will be tiled. Large panels visually narrow the space. The covering scheme and furniture arrangement are important.
For floor
The construction market offers a variety of models that can be joined together during tiled flooring. Because of this, you need to be more careful in choosing building materials. The finishing can be made from fragments of different shapes of the following standard sizes (in millimeters):
- in the shape of a square - 48x48, 100x100, 200x200, 250x250;
- in the form of a rectangle - 100x200, 150 by 200 or 300, 200x300, 300x400;
- in the form of a pentagon - 86.5x150, 98x170, 115x200;
- hexagonal - 150x173, 170x196, 200x230;
- triangular - 58x83, 68x97, 83x118, 98x139.
The assortment also includes non-standard tetrahedral and octagonal elements for floor finishing.
Detailed calculation: drawing up a sketch
For detailed calculations you will need a sketch of the bathroom. To compile it, you need to consider:
- what kind of tile pattern will be on the surfaces;
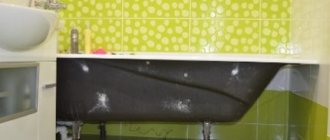
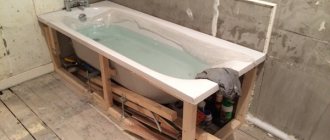
- places without tiles (for example, behind the bathroom);
- layout option.
The most popular tile designs:
- One type of tile, without decoration.
- Vertical and horizontal stripes.
- Chaotic inserts of piece decor on a tiled background.
- Using a ready-made panel.
- Breaking the walls into color blocks (for example, the top is one shade, the bottom is another).
Places that can be missed when laying tiles:
- behind the bathroom;
- for furniture;
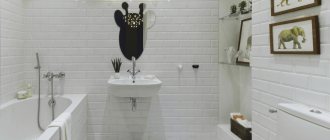
- behind the mirrors. Especially if you are planning only a mirror sheet, which is usually glued to an uncoated surface.
Economical option
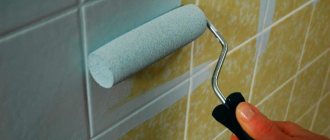
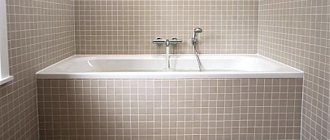
Only the wet area can be tiled, that is, the place of direct contact of surfaces with water - near the bathtub or shower. The remaining walls are painted with specialized durable paints.
The advantage of selective cladding is obvious - financial savings. Each square meter is not only the price of the tile itself, but also the cost of work and consumables. The downside is that it won’t be possible to make a rearrangement, only during the next repair. The decision is always individual and depends on the budget and characteristics of a particular room.
Instructions for use
Calculate the cost of toilet and bathroom renovation
It's very easy with our calculator. To do this, it is enough to know the dimensions of the bathroom and enter the correct values in the indicated columns. The type of housing (secondary market or new building) is important for calculations; the complexity of surface preparation depends on this.
What parameters are analyzed:
- Height, width of walls.
- Height, width of windows.
- Height, width of doorways.
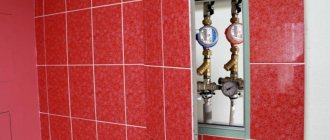
After this, the program will offer a visualization project for a typical room. Using the signs, you can select the type of work for different surfaces by checking the required boxes. The next step is to determine the plumbing and materials. Plumbing shut-off valves according to the proposed model will appear in the next window. Prices per unit will appear here, and total costs are being calculated.
Installation of plumbing equipment is the penultimate stage of drawing up an estimate on the toilet and bathroom renovation calculator
. A clear profile and signs will help you navigate your bathroom pattern. For user convenience, the system automatically highlights selected elements. Once all the necessary nodes have been specified, you should proceed to the final stage.
The last page of our calculator is designed as a list of selected works and the total amount of repairs. A breakdown into the sections “Cost” and “Consumables” will help determine the most significant expense items and clarify primary and additional items. If shortcomings are found in the process, the error can be easily corrected by going to the “Add work” section. The total amount includes a breakdown by section, which is convenient for analyzing the main expense items.
Turnkey bathroom renovation calculation online
will allow you to determine the exact costs, as well as the necessary sequence of manipulations. Using such a program is very simple, but possible errors must be taken into account, so to get accurate values, it is better to call the company’s manager by phone and he will help you calculate your bathroom in 5 minutes.
Types of layouts
When drawing up a sketch, you need to choose one of the tile layout options, which can be as follows:
- Seam to seam, or straight layout. This is the traditional, most economical way. The tiles are arranged in even rows, each next one is joined to the previous one at an angle of 90 degrees, both vertically and horizontally.
- Diagonal. The finishing elements are placed not at right angles, but at an angle of 45 degrees. The most expensive layout in terms of tile consumption, since it results in a lot of scraps.
- Laying with offset or “staggered” Similar to a straight line, but each row is offset from the previous one, usually by half the size of the finishing element.
Other types of layouts (herringbone, modular and others) are much less common than the three presented.
Schemes for laying tiles on the floor
The tile covering laid on the bathroom floor is thicker than wall tiles. This is necessary to increase the strength of the cladding.
Additionally, the outer decorative coating of the floor finishing material has a high degree of wear resistance, and a special corrugation or rough coating that prevents the user from sliding on it.
Anti-slip porcelain tile flooring.
In the vast majority of cases, floor tiles in stores have a standard size of 30x30 cm or 33x33 cm. Features of the layout for a bathroom or combined bathroom are:
- if there is a toilet in the bathroom, the seam should ideally start from its middle, as in the photo below;
Floor layout for a combined bathroom. - in the bathroom of a separate bathroom, the whole tile is usually laid from the corner closest to the entrance door, so that the trim is not visible under the bathtub and behind the pedestal/sink cabinet;
Layout from the door to the far wall. - if the plumbing fixtures are dismantled and removed from the room before finishing work, it is easier to perform a standard layout from the middle or from the center with identical cut tiles on the sides measuring more than ½ of the original values;
Standard layout with a dismantled bathroom. - The diagonal layout is convenient for rooms with non-parallel walls or masking builder mistakes, however, the number of scraps here is maximum; preliminary calculation is necessary so that they can be reused at opposite walls.
Diagonal floor layout.
In the latter case, the seams of the floor and wall covering are guaranteed not to converge by a large amount. Which, in this particular embodiment, increases the decorative value of the interior. There is no impression that the tiler made a mistake with the dimensions from the beginning.
Draw a diagram for each wall
After drawing up the sketch, you can begin the final calculation. To do this, you need to draw up a diagram of each wall that you plan to tile.
The scheme should include:
- the length of the wall and its height;
- places where there will be no tiles, indicating the size of these areas;
- decorative inserts.
You will also need values such as:
- length and width of elements;
- seam width.
Calculation of the amount of glue and grout
An important point that requires several practical clarifications. All compositions have a consumption per square meter of tile recommended by the manufacturer, but in practice it is rarely possible to meet the requirements; the actual consumption does not coincide with the specified one. Why?
Manufacturers mean that the tile is laid on a perfectly flat surface, the glue is applied with a comb spatula, the height of the ridges is several millimeters. But in life it often happens differently.
Applying tile adhesive with a spatula
The surfaces of the walls and floors are uneven; the difference in height can be 5 mm or more. It is possible to seal irregularities specifically under the tiles, but it is not advisable. Professional tilers eliminate such differences with glue. It is not applied with a comb evenly over the entire surface, but with a spatula only along the edges and in the center. The thickness of the glue can reach more than a centimeter, it all depends on the size of the irregularities.
Leveling the wall with tile adhesive
Then the tile is applied to the surface and its position is leveled by light tapping; the quality is controlled by a long, even strip and level. This technology does not have a negative impact on the performance of walls and ceilings and significantly reduces work time. But, of course, glue consumption increases.
Leveling the position of the tiles with a mallet
Practical advice. If the surfaces are smooth, then buy glue in accordance with the area of the walls and floors according to the manufacturer's recommendations.
If you plan to level the walls or subfloor with glue, then increase these values by about 20%. The exact data depends on the initial condition and your professional skills. If you have a little glue left, it’s not a problem, the cost of the material is insignificant, and it won’t cause any noticeable losses. The problem will appear when there is not enough glue, you need to go to the store again. Work is interrupted and repair time increases.
It is better if there is a supply of tile adhesive
Purchase grout depending on the width and height of the tile joint. The consumption is indicated on the packaging, there is nothing complicated in this case.
Technical information is always on the packaging
Specific values depend not only on the length and width of the tile, but also on its height. But this is all theory. The seams can have the same depth and there is no glue in them. Or vice versa, it becomes almost completely filled with glue, and the space for grouting decreases. Accordingly, less of it will be needed. Or vice versa, there will be voids at the very edges of the tiles - more grout is needed.
Grout consumption may increase, it all depends on the quality of the seams
tile adhesive
Calculation for direct layout
We count how many tiles will fit in a row.
To simplify the calculations, let’s immediately increase the size of the elements by the width of the seam. For example, the tile has dimensions of 35 × 25 cm, and taking into account the joint width of 3 mm, the parameters are 35.3 cm × 25.3 cm.
Let's look at an example:
Let the length of the wall (DL) be 235 cm. We will lay the tiles vertically, its width (W) – 25.3 cm.
DS: ШП = 235 cm: 25.3 cm = 9.28 pcs.
We round up to a larger whole value - to lay one row you will need 10 pcs.
The calculation for height is similar:
The height of the wall (WS) is 260 cm, the length of the cladding element (DP) is 35.3 cm.
VS: VP = 260 cm: 35.3 cm = 7.4 pcs.
Round up, we get 8 pieces.
Thus, to cover a surface of 260 × 235 cm with tiles 25 × 35 cm you will need:
Number of tiles in a row × number of elements in height = 10 × 8 = 80 pieces.
Similar calculations are performed for each wall.
After calculating the number of tiles, taking into account the layout, a grid of rows and columns is applied to the sketch directly on top of all existing designations.
How to take into account areas without tiles in calculations?
Let's take a door as an example. Let's turn to the diagram of the wall with the applied mesh.
Thanks to the real calculation of the arrangement of elements, immediately after applying the grid, you can see how many tiles cross the door. We count the number of whole elements that fall on the opening and subtract them from the total number. Tiles that partially crossed the door area are not subtracted.
We do the same with any area that remains uncoated.
How to adjust the result taking into account the decor?
The simplest and most economical option is if the decor has the dimensions of the background tiles. Then we replace the main elements in the calculations with decor (in rows, columns or individually), subtracting this quantity from the total.
Example:
On the already calculated surface there should be decor located vertically. Its size matches the parameters of the main elements.
The size of the wall in the tiles is 8 rows × 10 columns.
This means, taking into account the decor that will occupy one column, the main tile will have 9 columns by 8 rows, i.e. 72 elements. The decor will be represented by 8 tiles.
We do the same with decor located horizontally. Piece decor is simply subtracted from the total quantity.
If the decorative elements do not match the main ones in size, we use the calculation principle for areas without cladding (example with a door). We apply the decor and grid of the main tiles to the wall diagram. Then we determine how many whole products are at the intersection and subtract them from the total number.
Interesting Tile Design Ideas
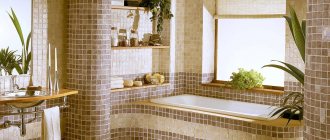
If you want to beautifully decorate your bathroom, then you should take a closer look and purchase tiles with a pattern or pay attention to individual interesting collections. Here are a few examples that will help highlight your interior design:
- It is not necessary to use only one product size. You can combine different sizes in several ways.
- Decorate your floor and wall tiles with interesting decorative elements.
- Do not choose only plain tiles in a standard format. Brighten up your bathroom with hexagonal tiles or an unusual color combination.
- Choose mosaic tiles made to look like a puzzle and place the whole picture in the bathroom.
- Make an insert or an entire wall of mirrored glass tiles.
In addition to such complex solutions, you can choose simpler ones, which will be much cheaper than the above options. Use photo tiles - they are usually medium in size and interesting because you can choose any design and have it digitally printed onto the tile. The method is popular among buyers.
Glossy medium format tiles Gabi from MEI factory
Calculation for the “Diagonal” layout
Accurate calculations for this option, taking into account decoration and omissions, are only possible using a diagram drawn to an exact scale.
After all the calculations, it would be correct to additionally multiply the result by 1.1. This allows for an error of 10%. This will save you from searching for similar ceramic tiles in case of errors in cutting, different colors and other troubles.
All these rules apply to tile calculations on any surface, including in the toilet and for tiles on the floor.
USEFUL INFORMATION: Features of installing plasterboard boxes in the bathroom
Where to begin
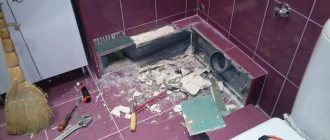
First of all, in the bathroom it is necessary to provide conditions for making accurate measurements of the room and interior. From all bases planned for finishing with tiles, remove any old cladding that has actual thickness - tiles with tile adhesive, PVC panels, drywall, lathing, etc.
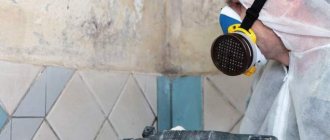
Plastered surfaces finished with paintwork, film or wallpaper must be checked by tapping. If the plaster under the finishing “bumps” in places, it is also removed - preferably completely, to the supporting base. When the plaster layer does not have defective areas and it is not planned to be dismantled, measurements can be taken over paint or paper - their thickness will not give a sensitive error.