Where should one start laying tiles in the bathroom according to construction rules? This question worries many novice craftsmen who independently carry out repair work in the house. Finishing surfaces with tiles has its own subtleties and nuances, which relate not only to the order of work, but also to technology in general.
When tiling a bathroom, it is important to follow the correct sequence
How to choose bathroom tiles
Before starting work, a tile layout plan is drawn up. The choice of design is important. Medium-sized tiles with a square shape are easy to install. It is more difficult to correctly lay a mosaic that includes many small elements of two or more colors and shapes.
Size and type
Tiles are now available in different sizes. There are mosaics on sale, the individual elements of which reach 3x3 and 5x5 cm. There are also larger versions of mosaic tiles. Such small tiles require careful preparation of the walls and floor. Its installation is complicated and takes more time.
Mosaic tiles are quite complex and require more time to install.
Large-sized tiles are also made, but not every beginner can cope with laying them. Large elements are more easily damaged. They are also more difficult to cut. It is best to use such tiles in large bathrooms, so that as many intact elements as possible fit on the walls and floor.
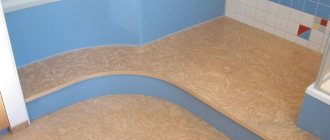
It is convenient to lay rectangular tiles measuring 40x60 cm on the walls. Such tiles are laid vertically. It can be combined with thin elements that are used to form dividing lines. It is easier to place elements measuring 60x60 cm on the bathroom floor.
Shiny or rough
Rough porcelain tiles can go well with a glossy finish.
There are both glossy and rough options on sale. Smooth, shiny tiles are easier to clean, but even small deposits of water stone and other contaminants are visible on them, so this coating requires careful care. When wet it becomes slippery. In addition, this coating reflects light, which is not always appropriate.
It is better to put rough tiles in the bathroom. Thanks to the features of its top layer, it gets dirty less and does not become slippery. Rough porcelain tiles are recommended to be laid on the floor. It is possible to combine glossy and rough coatings.
Texture, color and pattern
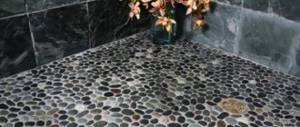
Nowadays tiles are produced in different shades and textures. There are many types of tiles that have both a textured and smooth surface. There are models with patterns in the form of floral patterns or abstractions. Decor imitating natural materials is also on sale, including:
- skin;
- concrete;
- slate;
- granite.
In the bathroom, the tiles can be embossed.
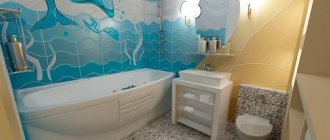
Often, tiles of several colors are installed in the bathroom, separated by a line of tiles of other sizes and styles. Dark brown elements are laid up to the middle of the wall. For the dividing line, you can use elongated beige elements with brown ornaments. The wall is covered with beige material from the middle to the ceiling. A combination of samples of other colors is possible. Both in the photo and in life, this design looks neat.
Grout
The decorative coating in the bathroom is exposed to moisture. Water getting under the tiles will lead to the formation of fungus and elements coming off. To prevent this, it is important to seal the seams correctly. It is not recommended to use cheap cement-based grout in the bathroom. It quickly cracks with frequent contact with water.
To prevent water from getting under the tiles, it is necessary to seal the seams correctly.
The best are two-component compositions based on epoxy resin, which repel water and do not change color. They are not affected by chemicals and fungus. The color of the composition is selected according to the darkest shade. You need to immediately purchase the required amount of grout for the joints (the calculator will help you calculate how much material will be needed in your work).
Preparatory work
The stages of surface preparation vary depending on what room is planned to be finished, the state of the work front and how long-lasting and high-quality the result is required. Main stages:
- checking the surface condition. To do this, you need to find out the type and condition of the old coating (if any) or the quality of the wall surface. Hardness and strength are checked by light blows with a hammer or chisel (the handle of any tool). If this level of exposure damages the surface, it needs to be stripped down to a more durable base. If the entire wall (floor, ceiling) does not have sufficient hardness and resistance to external influences, it is better to replace the partition or use plasterboard structures;
- stripping. It is required for any option of laying tiles in the bathtub, even if the renovation is carried out in a new building. When cleaning, the surface is freed from all fragile parts, dust, dirt, rust/dampness/mold stains, cracks and lacunae are sealed. If a humid atmosphere has led to the formation of mold or mildew, treatment with fungicidal and antibacterial agents is required before further work;
- alignment. For truly high-quality installation, a perfectly smooth, strictly flat surface is required. Any curvatures, irregularities, or protrusions will disrupt the installation pattern and complicate installation work. For leveling, you can use moisture-resistant drywall or beacon plaster (in case of significant unevenness). For mild unevenness and/or defects, ordinary plaster and subsequent putty are sufficient;
- putty and primer of the leveled surface. This operation is necessary to ensure high-quality adhesion of the tile adhesive (mortar) to the wall (floor);
- installation of tiles;
- grouting joints.
It should be noted that in old buildings with sufficient room size, leveling is faster and better done using plasterboard. This is due to the insufficient strength of old walls and the difficulty of dismantling and/or leveling them. The same applies to new buildings with uneven walls made of brick, foam or aerated concrete. If the space of the bathroom or kitchen is not enough and does not allow you to “steal” up to 15...30% of the area with plasterboard structures, the best option is with a relatively thin layer of plaster.
Interesting: both for insufficiently strong walls and for partitions (floors, walls, ceilings) made of plasterboard or wood, it is advisable to strengthen the surface under the tiles. To do this, a reinforcing mesh is placed under the layer of plaster (putty). Drywall works best with the polypropylene version of the mesh, brick and wood, old plaster partitions with metal.
Layout methods
Decorative coating elements can be placed in several ways on the floor and walls of the bathroom. There are simple installation methods that allow you to quickly lay tiles in geometrically correct rooms. If you have experience, you can use complex installation patterns. It is advisable to lay out the tiles in advance, taking into account the space for the joints.
The direct installation method is the simplest. It involves laying elements in even rows parallel to the floor. In this way, you can lay both rectangular and square tiles. This installation order is recommended for beginners.
Methods for laying tiles in the bathroom.
It is relatively simple to tile walls and floors using a brickwork pattern. In this case, every second row is mounted with an offset of ½ element. This method is more suitable for rectangular elements. The main disadvantage of the scheme is the need to cut tiles. This increases material consumption.
The option of laying tiles diagonally is more difficult to implement. It involves installing elements at an angle of 45° relative to the line of contact between the floor and walls. Most often this scheme is used for arranging floor coverings, but can also be used for walls. Square tiles are installed in this way. This scheme is better suited for large bathrooms, where a panorama of the intersection of lines will be visible. The installation method requires cutting elements. Due to increased waste, the final price increases.
To obtain an unusual coating, modular masonry is often performed. Square tiles are used in 2 sizes of different colors. Thus, a complex geometric pattern is laid out. The difficulty lies in the need to take into account the size of the seams.
Floor covering
Since renovation work begins from the bottom up, first of all, you need to tile the bathroom floor. You can start working according to one of the following principles:
- From the farthest visible angle . This is the traditional method. In this case, the first cladding element is laid from the most visible point, that is, from the corner that is located opposite the wall with the door. If this area is closed by a bathtub or shower, the feasibility of this principle is partially lost.
- From the threshold . This is the most common method. In this case, the process of laying tiles begins from the corner closest to the door. The rationality of using this method is determined by the fact that the back part of the bathroom is hidden by plumbing.
- From the center mark . This method is used extremely rarely and is more suitable for spacious bathrooms with an open central area. In this case, furniture and plumbing fixtures should be located along the walls in order to, if possible, hide the cut elements. The center of the bathroom is determined by marking. You need to determine the center of each wall and draw lines along these points. At the intersection, the central joint of the four tiles will be located, from which they begin laying.
Basic principles of laying tiles on the floor
How to correctly calculate the number of tiles
First you need to choose a tile design. You need to write down its dimensions. After this, you can start calculating. Measurements are taken of each wall, and the location of the bathtub, toilet and sink is determined. A detailed plan of the room is made. Each wall is drawn on a separate sheet. In this case, you need to respect the scale. This will allow you to determine the number of elements needed to decorate each wall, taking into account the seams.
The plan will help you accurately determine the number of trimmed elements. They need to be positioned so that they are least visible. The detailed plan helps determine the exact number of tiles. You need to add 10% to the resulting number. A reserve is needed, because when cutting, the tiles may split incorrectly.
What tile adhesive should I use?
Depending on how high-quality glue is used for installation, both the result and the quality of the entire work will depend. It is best to buy the adhesive recommended by the tile manufacturer. Typically, such information is given directly on the packaging of the material.
Use quality tile adhesive
The glue can be produced in the form of a ready-made mixture based on polyurethane or in the form of a dry mixture, which is diluted with water to a certain state. In the first case, the glue should be used immediately after preparation. In the second, as much glue as necessary is diluted, and the rest can be well closed and stored.
Important! The glue should be prepared strictly according to the instructions. It must have a certain consistency - it should not spread across the floor, but at the same time it cannot be too thick.
Tile adhesive Ceresit
For use in the bathroom, it is recommended to use adhesive that has water-repellent properties. This is due to the increased level of humidity in this room.
Calculator for calculating the amount of adhesive for laying tiles
Go to calculations
Prices for tile adhesive "Knauf"
Knauf tile adhesive
How to lay tiles in the bathroom with your own hands
By following simple rules, you can complete all stages of the work yourself. First you need to prepare the bathroom and buy tools and materials. The old coating must be dismantled. Before laying tiles, it is necessary to level the walls and floor. It is advisable to install additional waterproofing. After this, you can begin laying the coating.
Preparing the premises
The bathroom needs to be prepared for future tiling. Furniture and decor are removed from the premises. The hot and cold water supply should be turned off. It is advisable to carefully remove the heated towel rail, sink and toilet. It is not necessary to lay material under the bathtub, so it can be left untouched. After this, they begin to dismantle the old covering and prepare the walls and floor.
Before you begin laying tiles in the bathroom, you must turn off the hot and cold water.
Tools and materials
In addition to tiles, you need to purchase a number of building materials. First of all, compositions for leveling walls and floors are selected. You also need to buy mixtures for installing tiles. You should carefully study the manual that comes with them. There is a special adhesive for ceramic, porcelain stoneware and other types of tiles. You need to purchase a primer and waterproofing. Necessary tools and consumables include:
- building level;
- notched spatula;
- containers for preparing solutions;
- mixer;
- tile cutter;
- Bulgarian;
- corundum block;
- starting metal profiles;
- rags;
- crosses;
- putty knife;
- aluminum rule;
- square;
- rubber hammer;
- laser level;
- rubber spatula for grouting joints;
- brush;
- roller
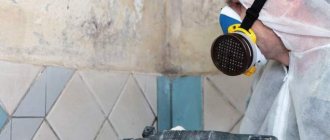
You will also need a vacuum cleaner and bags for construction waste. You need to prepare gloves, a protective mask and work clothes.
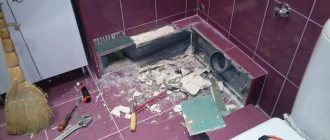
Dismantling the old coating
Before you start laying new tiles, the old ones must be removed using a hammer drill.
Laying tiles is not carried out on old flooring. If there are tiles on the walls, they need to be removed with a hammer drill. The device is used in shock mode. The tool is inserted under the lower edge of one of the elements.
Tiles, adhesive and poorly attached plaster are removed. Shards of tiles may fly to the sides, so you need to take precautions: wear gloves and safety glasses.
If the walls are covered with paint, it should be removed. A grinder with a special attachment is suitable for this. In places where the old coating is firmly attached to the wall, you can use a chisel and a hammer.
The walls and floor are thoroughly cleaned of dust and dirt with a stiff brush, as well as with a vacuum cleaner. After this, all trash is removed from the bathroom.
Leveling surfaces
The surfaces need to be leveled with a plaster mixture. Drywall should not be used in the bathroom, because it does not tolerate high humidity. First, level the ceiling and walls. The surfaces are pre-treated with a primer. Using a plumb line, determine the deviation from the vertical. Using a building level, guide beacons are fixed.
Application of guiding beacons.
After this, the plaster solution is prepared. First, it is thrown onto the wall with short, sharp movements using a ladle. The layer of plaster should be no more than 2-3 cm. After this, the surface is leveled using the beacon rule. In this case, you should not put too much pressure on the guides. You need to remove excess composition. Particular attention is paid to the formation of corners. They must be straight (90°). The remaining irregularities are rubbed with a trowel.
When the walls are leveled, using a laser level you need to make marks on the bottom of the walls along which the floor will be leveled. It is better to use a self-leveling compound. After this, the floor screed is poured. When the plaster and screed are dry, you can begin waterproofing.
Proper waterproofing
To waterproof bathroom floors and walls, it is better to use a penetrating mixture. Such compositions include:
- "Lakhta";
- "Penetron";
- "Isopron";
- "Hydrosmile."
Penetron.
Hydrosmile.
Lakhta.
Isopron.
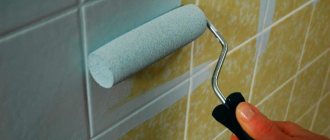
It is necessary to prepare a waterproofing solution. Using a brush, they should work on all corners. The walls and floor are covered with the composition using a roller. It is advisable to apply several layers of penetrating waterproofing.
Where is the best place to start?
Using a laser level to determine the bottom line of the first row of tiles.
The laser level is used to determine the bottom line of the first row of tiles. Starting metal profiles are installed along it. They will support the first row until the glue hardens.
There are no rules regarding the choice of where to start installation. Most craftsmen begin laying tiles at the level of the bathtub. However, if it is not adjacent to the wall, then you can start laying from the floor. The greatest difficulty is the installation of the first row of tiles. After this, you need to let the glue harden. This series will become the basis for subsequent ones. The covering is laid on the floor starting from the far corner.
We put the material
The tiles are attached with special glue. First you need to prepare a solution. Water is poured into the container, into which the dry mixture is added in small portions. The glue should have the consistency of thick sour cream. After this, you can begin laying the material. A thin layer of glue is applied to the wall. Use a notched trowel to spread it over the tiles. It should be pressed against the wall so that the glue under pressure is evenly distributed.
The bottom edge of the element should be located on the starting rail. Correct installation is checked using a building level. After this, the next element is placed. Crosses are used to control the size of the gap. When the first row of tiles is installed, vertical strips are installed on both sides. A cord is pulled over them - a horizontal guide for laying the second row. It is better to lay the cut elements in the corners.
After laying the walls, you can proceed to the floor.
After covering the walls, you can start decorating the floor. You need to start from the far wall. To control the location of the elements, a nylon thread is pulled, along which the first row will be installed in the future. A thin layer of glue is applied to the floor. The composition is distributed over the tiles with a notched trowel.
Floor tiles are being laid. Evenness must be controlled using a building level. If necessary, you can straighten the tile by lightly tapping it with a rubber hammer. If the tile is deeply embedded in the mortar, it should be removed and reinstalled. Using the level, all elements of the first row are controlled. Subsequently, the remaining elements are laid out on it until the entire floor is covered. Do not step on it until the glue has completely hardened.
Are crosses necessary for installation?
When installing tiles, crosses should be used. They help make the seams uniform. Crosses come in different sizes, resulting in the desired gaps being created. Without the use of these devices, there is a high probability of the formation of uneven seams. This will cause the rows to shift and the coating to look sloppy.
Crosses will be required when installing tiles.
How and when to rub seams
Both ready-to-use grouting compounds and dry mixtures that need to be diluted with water before application are available on the market. The highest quality grouts include:
- Kesto Kiilto.
- Kerakoll Fugalite Eco.
- Litokol Litochrom Luxury.
- Litokol Litochrom.
- Litokol Starlike.
- Mapei Kerapoxy Design.
- Mapei Ultracolor Plus.
Litokol Starlike.
Litokol Litochrom Luxury.
Kesto Kiilto.
Kerakoll Fugalite Eco.
Mapei Kerapoxy Design.
Mapei Ultracolor Plus.
The grout should be applied with a flexible rubber spatula or sponge. Some masters distribute this mixture with their fingers. The work must be done quickly until the composition dries. Before hardening, it is necessary to remove the remaining grout with a damp sponge. The cleaned tiles are wiped dry with microfiber.
Selection of tiles and related materials
The range of floor tiles is huge, and choosing right away is not so easy. When looking at samples, first of all pay attention to the following characteristics:
- tile thickness;
- presence of anti-slip coating;
- resistance to chemically aggressive influences;
- moisture resistance.
Bathroom tiles should not be slippery
The optimal thickness of floor tiles is 9-12 mm; in terms of shape and size, it is best to choose square tiles 200x200 or 300x300 mm. There are many varieties of figured tiles, which look very impressive and unusual, but their installation requires high skill. For the same reason, a beginner should not choose options that, when laid, form a complex pattern - this will require very precise calculations to adjust the pattern, and with a lack of experience this is not easy to do.
For beginners, it is better to choose classic tiles in the shape of squares
Floor tiles in the bathroom
The water absorption of the material should not exceed 4.5%, the friction coefficient, on the contrary, should be maximum - from 0.75. Such tiles remain safe even after water gets on them, which happens very often in the bathroom. Information about technical characteristics is always present on the packaging, so when choosing, carefully study the data.
Tile packaging
Pictograms to indicate tile properties
And do not buy tiles if the seller cannot provide a quality certificate - all trustworthy manufacturers have certified products.
bathroom tiles
In addition to the tiles, you will need to purchase glue, waterproofing materials, and grout for joints. It is best to use a cement-based adhesive: it is relatively inexpensive, easy to apply, provides excellent adhesion of the tiles to the base and is not afraid of moisture. Popular options are Ceresit CM 11, Eunice Plus, Weber vetonit ultra fix.
Adhesive for ceramic tiles Ceresit CM 11 Plus
Weber vetonit ultra fix
It is most convenient to use coating waterproofing (for example, Perfekta AquaStop), plaster (Ceresit CR-65, Knauf FLACHENDICHT) or impregnating (Penetron). These compounds are easy to apply and form reliable protection against moisture penetration.
Ceresit CR 65. Cement waterproofing mass
As for grouting, here you need to choose between cement and epoxy mixtures. Cement ones are cheaper, more convenient to apply, and are the best option for a novice master. Epoxy compounds are more durable and strong, but they are more difficult to work with.
Cement grout in a diluted state
Two-component epoxy grout
moisture resistant tile grout
Laying errors and how to correct defects
Defects must be identified and eliminated in a timely manner, because after the glue hardens, it will be necessary to break the tiles, and sometimes even dismantle the entire coating.
The tiles lay in steps and not in one plane
This defect occurs when the plane of the wall is disrupted. If the horizontal is shifted, then when laying, the vertical seams will also have a flaw. It can only be corrected before the glue hardens. To properly align the horizontal line, trimming the first row of tiles is often required.
If the violation was discovered too late, when the wall is almost covered, you should find the row where it started and then wedge the seams. The bottom row is straightened with wedges or matches, and the rest - with crosses of different sizes. The flooring may move. This happens when the angle of the walls is not straight. To fix the problem, you need to trim the tiles when laying the first row.
Tile fell out of row
Displacement of the element may occur if a cross was not inserted into the joint when laying the tiles. Less often, the problem lies in a manufacturing defect, in which the corner of the tile is beveled. In this case, the element must be replaced. If the problem is not a manufacturing defect, a cross should be inserted into the seam. The tiles are fixed in the desired position with tape. After the glue dries, the element will take the right place.
Tiles sink deep
The reason the tiles are too deep may lie in poor-quality application of the mortar. Most often this happens when elements are glued pointwise or the composition is applied only to the corners. In this case, individual elements may fail. To eliminate the defect, remove the element that is too recessed, apply glue evenly and install it again.
Dips in seams
This defect often occurs when using low-quality or too liquid grout. To eliminate the flaw, the seams should be cleaned. After this, fresh grout must be reapplied.
Making markings on the work surface
To reduce the risk of making mistakes when installing tiles, it is necessary not only to immediately select a laying method, but also to apply a diagram of how the tiles will lie on the rough base.
Important! The procedure must be performed only after the floors (if necessary) have been leveled.
Preliminary floor preparation
You can also sketch out various layout options on paper beforehand. This will allow:
- choose the optimal installation method;
- decide on the final appearance of the floor;
- outline the places where decorative elements will be located, if any;
- make certain adjustments if necessary.
When drawing up a tile layout project, it is necessary to take into account the actual dimensions of the room and the tiles.
Advice! Before gluing, the tiles are laid out on the dry surface of the rough base in accordance with the selected pattern - this will allow you to evaluate how it will ultimately look and help you choose the right pattern.
The tiles are laid out on a dry floor surface
The layout of the tiles on the floor must be drawn as accurately as possible; it is advisable to use a ruler and a marker so that nothing is erased and the diagram is depicted accurately. Smooth, sketchy lines are the key to ensuring that the craftsman will be able to avoid skewing the tiles. It is convenient to apply markings using a laser level.
Walls
An easy option for finishing bathtub walls with ceramic cladding is laying tiles from the floor covering:
- tiles of any format are used;
- sanitary ware (bathtub, sink) is installed after grouting the joints and is pressed against the cladding with its sides.
However, in this case, the home craftsman receives at least 3 joints (short side of the bathtub with the wall, long side of the bathtub with the wall, back side of the washbasin with the wall), which must be additionally protected from water leakage with plinths, corners, sealant, and other methods.
The most difficult part to implement is the method of laying tiles from the side of the bathtub.
Layout schemes
Regarding floor finishing, layouts on bathroom walls are much more complicated for a number of reasons:
- they contain more engineering systems, architectural and decorative elements;
- junction nodes are an order of magnitude higher;
- there are more visible places;
- rectangular tiles can be placed horizontally, vertically, diagonally.
For the wall behind the bathtub, the classic cladding layout is usually used:
- a solid tile is glued from the middle of the wall to the left/right;
- the corners are trimmed in such a way that the format of the trims along the edges is more than 2/3 of the whole size of the tile;
- a whole tile is laid from the side of the bathtub upward;
- the top row near the ceiling should preferably be more than 2/3 of its initial format;
- the bottom row of tiles should be of a similar size.
Attention: In typical separate bathrooms, the room dimensions are small. Therefore, borders and different colors of tiles along the height of the walls do not increase the decorative value of the interior, but, on the contrary, introduce dissonance.
The second difficulty of this cladding method lies in the standard size of the bathtub height - 64 - 67 cm. Within these limits, it can be adjusted with screws of standard types of fastening. When using homemade devices for mounting an acrylic, cast iron or stamped steel bowl, the height can be adjusted from 50 to 70 cm. The average value is considered to be the height of the side of the bathtub from the floor covering 65 cm.
Therefore, for the specified conditions, a limited number of tile sizes can be used:
- 2 rows – tile height from 33 to 40 cm;
- 3 rows – from 22 to 25 cm.
Layout of tiles from the side of the bathtub.
In this case, problems may arise with ensuring the transition of the horizontal seam to adjacent walls with inspection hatches and entrance doors.
Inspection hatch
The standard installation locations for sanitary inspection hatches are:
- a false panel covering the niche behind the toilet in a combined bathroom;
- a section of a gypsum plasterboard box of arbitrary height, masking the risers of cold water/hot water supply, sewerage;
- a homemade screen under the bathtub from the side of its visible long wall.
Depending on the relative size ratio, the configuration of the hatch and the plasterboard frame, the following solutions are used:
- one large tile on the surface of the hatch;
- two tiles on the corner hatch;
- trimming tiles on the wall and hatch door;
- several whole tiles.
Horizontally, the installation location of the hatch should already be adjusted to the seams of the tiles. Accordingly, water flow metering devices and shut-off valves are installed at the same height inside the niche, gypsum board box. That is, first a repair project must be prepared with a diagram for laying tiles of a specific size.
We recommend: What types of inspection hatches are there?
Connection between wall and bathtub
For a home handyman with low qualifications, the following sequence of actions is recommended:
- laying tiles from the second row on the walls;
- floor covering;
- gluing the first row with trimming.
In this case, when installing the bathtub, its sides are pressed against the tiled wall surfaces. Small cracks are sealed with sealant, self-adhesive border, plinth, fillet. A large gap on the side of 5 - 20 cm is masked by a shelf made of gypsum plasterboard, a plastic panel, or a PVC window sill.
We recommend: How to seal a large gap between the bathtub and the wall.
The horizontal joint does not need to be adjusted in height; tiles of any format or size can be used.
If tiling starts from the side of the bathtub, it is necessary to take into account the following nuances:
- a thin layer of sealant is applied under the bottom row on the side of the bathtub;
- after hardening, this material retains its plasticity and compensates for temperature expansion.
The bowl of the sanitary fixture is embedded in the wall covering. On the one hand, this increases the strength of the installation, the stability of the geometry during operation, and does not allow water to leak over the side. On the other hand, the maintainability of plumbing fixtures sharply decreases, which is very important in the case of an acrylic bathtub.
We recommend: How and with what to seal the joint between the bathtub and the wall.
Decorating the screen with tiles
The stationary screen is made either using frame technology from sheet material, or laid out from brick or tongue-and-groove panels. There are several design options for stationary screens:
- blank flat panel;
Dull screen. - a niche near the floor under the user’s feet;
Screen with footwell. - central part beveled inwards;
Beveled screen. - the wall is flush with the side of the bowl;
The screen has a complex shape. - widening the sides of the bathtub.
The screen is wider than the bathroom.
Making niches or slopes for feet in modern renovations is considered bad form, because firstly, no one washes things in the bathroom today, and secondly, it does not look aesthetically pleasing.
We recommend: How to make a screen under a bathtub from tiles yourself.
Decor elements
In typical apartments, the space inside a separate bathroom is, in principle, not enough to create original design projects. Usually one wall above the bathtub remains free. Therefore, decorative elements are installed exclusively in that space.
Decorative elements can include mirrors, designer heated towel rails, plumbing fixtures, and columns made of tiles of a different color.
Laying
Depending on qualifications, wall geometry, and other factors, laying tiles on walls is done in several ways:
- on the entire wall;
- decent;
- ledge from bottom to top.
The first option is used by professionals:
- the tiles are cut to size for each row, taking into account the width of the vertical joints;
- tile adhesive is applied to the wall and leveled with a “comb”;
Applying glue to large surfaces. - the wall space is filled with tiles close to each other;
- then the master moves the cladding apart with crosses, forming rows vertically and horizontally with the same seam width.
Quick tile installation.
The ordering technique allows you to align the seam on all walls at once and periodically monitor its alignment in the future. The ledge can be used to glue tiles with unequal sizes and geometry defects.
From the floor covering
This technique requires highly qualified tilers. The slightest deviation in the level of the floor covering will inevitably affect the quality of wall decoration. The technology looks like:
- marking the level with a string or laser level on all walls at once along the upper edge of the first row in the highest area;
- row laying with alignment of seams using crosses or SVP systems.
Due to the overhang of wall tiles over the floor covering, even significant defects in the flatness of the floor become invisible.
Laying scheme
Before you start laying tiles in the bathroom or toilet, you need to decide on the location of the tiles. To do this, you should draw a design on paper and make the necessary calculations.
Next, you should make even markings on the wall, moving the tiles from top to bottom without mortar. It is necessary to mark the position of each tile, thereby determining the future position of the tile. The bottom row will be correctly laid out last of the cut pieces.