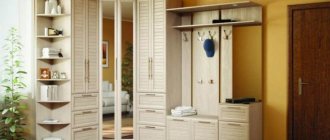
There are times when you want something new in your home environment. However, this does not mean that you will have to perform expensive procedures. Today, thanks to modern materials and technologies, you can give a room a new look, opening up unusual possibilities. One of the options is stencils, which can be used to decorate furniture, ceilings, walls and other surfaces. They allow you to apply drawings of completely different content.
In modern design, stencils are often used to decorate a bathroom or other room, because working with them is easy, and the aesthetics can pleasantly surprise. Therefore, if you want to make a special interior with your own hands, using a stencil is the right way.
Application
Decorative stencils make it possible to achieve the same effect as vinyl stickers. However, they have a significant difference - they are applied to any surface, even rough ones. As a rule, they are used on a single-color base. Multiple colors can be used to create more vibrant images. In this case, it is better to use quick-drying compounds so as not to wait a long time before applying new paint.
Stencils are a plastic sheet or paper on which a design is cut out. With their help, you can apply an image with acrylic paints. For walls, you can choose a stencil of any style. In addition, using the same pattern in different conditions can give different results, because it depends on the lighting, background, method of application, and so on.
The size of the drawings may vary. If you need to apply a large design, you may need several stencils.
For residential premises
The living room and bedroom can be decorated with a large stencil design. This is much more harmonious for large rooms. With the help of one stencil you can create an exclusive pattern on the walls and this does not require any special skill. Plastic with a cut-out pattern is attached to the wall using masking tape and, after making a color print, is transferred to a new place on the wall. This is how the entire wall is decorated step by step.
An ornament applied using a stencil will decorate the walls at the border with the ceiling or at the baseboard. The ornament looks no less organically in places where the functional zones of one room are separated.
To apply a design, you don’t always need to remove the wallpaper; you can clean the walls and apply stencil painting, and this will be a design solution for decorating the walls.
The largest area for activity with a stencil in hand can be found in the children's room. Here you can decorate everything with drawings! Be patient, paint and have a supply of drawings. Cats, cats, birds, a swarm of butterflies, trees and flowers will coexist perfectly in the nursery. Cool and funny cartoon characters will happily settle on the bedside table, headboard, or closet doors in the children's room. Literally anything can be decorated! The floor in the nursery is no exception, because it is so interesting to roll cars along the painted road.
How to make a stencil with your own hands can be found on the Internet. For cutting you will need a special knife with several attachments, a hard transparent sheet of plastic and templates according to which the stencil will be cut. Templates can be made of paper or cardboard. The drawing from the template is transferred to plastic using an alcohol felt-tip pen or marker, and then cut out along the given lines.
Kinds
Nowadays, creating a stencil is not difficult even for an ordinary user. But previously, such a procedure took a lot of time, so it was used much less often.
Stencils for decoration can be divided into the following types:
- Simple. In this case, single-color images are created.
- Combined. The stencil consists of several layers, thanks to which you can get multi-color designs. One layer of stencil - one paint.
- Reverse. In this case, paint is applied around the slots, resulting in something like a negative drawing.
- Volumetric. The picture turns out three-dimensional. For this, a polymer film is used. To give the image volume, putty is put into the slots.
What are stencil designs?
Do-it-yourself decorative stencils are templates that are made on durable cardboard or a metal sheet. The pattern elements are distributed onto the surface of the material, and then the marked parts are cut out and form holes. In the future, these areas will be painted in contrasting colors.
Stencils can be multi-layered or single-layered. The latter are performed in one template overlay. Multi-layered options are often used in street art. Different types of paints are used for painting: acrylic, enamels and water-based.
Choice
There are several options for how you can get a drawing:
- you need to find a photo of the pattern or draw it, print it and cut it out yourself;
- purchase a ready-made sample;
- order a product from a specialized enterprise;
To obtain a stencil you will need colored or transparent vinyl film.
Making stencils for painting
It is conventional to divide stencils for painting into two types: disposable and reusable. The material used as the basis for the product also depends on what type they are intended for. Also, the multidirectionality varies depending on the type of decor.
DIY home decor in floral style
Decorations in the form of flowers on the wall remain in trend today. They are often used to decorate a kitchen in a classic or style. In addition, such art looks great on perfectly smooth walls in living rooms. Ornaments and patterns in the form of stencils can be printed ready-made.
Bedroom and children's room
In these rooms, comfort is valued above all. Therefore, all drawings should be neutral and calm. Butterflies or floristry in delicate tones are suitable for decorating a sleeping area in.
PHOTO: yandex.ru
To decorate a children's room, templates with cartoon characters and any characters will be useful. Of course, it is necessary to distinguish boys' hobbies from girls' hobbies. Be sure to consider the opinions of teenagers when choosing templates for creating drawings.
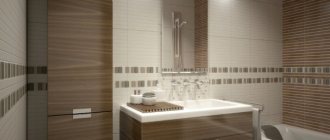
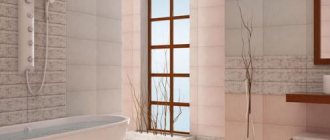
Kitchen and bathroom
In dining rooms or small apartment kitchens, decor will become a relevant option for decorating thematic images. For example, on an empty wall it is advisable to depict cutlery, dishes and other similar images.
PHOTO: dekoriko.ru
In decor, it is better to give preference to a marine theme. These include various images of dolphins, algae or other marine life.
PHOTO: stroypomochnik.ru
Loggia and balcony
Always considered individual. There are no restrictions on the design and cladding of the walls. However, techniques such as decoration using stencils are considered popular. Here you can use templates for drawing animals, unusual natural motifs and ornaments.
PHOTO: interiorsroom.ru PHOTO: tr.aliexpress.com
Preparing the stencil
You will need:
- film;
- sketch;
- pencil or marker;
- sharp knife.
The drawing should be copied onto film, then the image should be cut out along the contour. In this case, you should choose simple pictures, without small elements. Another thing is professional equipment that allows you to create a wide variety of stencils for the bathroom. A cutting plotter is used for this.
It should be noted that the created stencil must first be tested by applying the image to paper using it. This will confirm that the final image is applied correctly. Such a test will not take much time, even if the drawing is multi-colored, because acrylic paint is used for this.
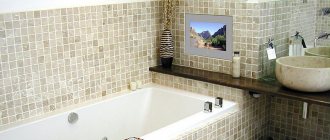
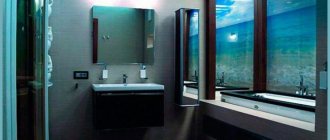
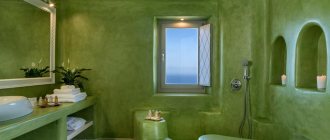
Stencil as a bathroom design element
Stencils for bathroom walls
A stencil is a good way to add originality to the design of a bathroom, with your own hands and without high costs. What makes this decorating method especially charming is the fact that a unique finish can be given to the most common materials, such as ceramic tiles, and bathroom decor elements and equipment.
After all, you can apply a pattern or design (and later change it) to any surface of the bathroom:
- Walls
- Doors
- Ceiling
- Shower doors
- Bath curtain
- Mirror (or a section of the wall around it)
- Decorative bath screen or outer wall
Naturally, before choosing a stencil and starting work, you should decide on the nature of the design, its size and places of application. Next, you can select a specific template type.
A successful combination of stencil and color of accessories
Based on this feature, stencils are divided into:
- Simple - one sheet of stencil + 1 paint, you can get a monochromatic image. As an option, you can apply the same pattern in different places in different colors or shades.
- Combined - each layer of the drawing is performed on a separate sheet. By using successive layers of the set and different paints, you can create multi-colored and quite complex paintings.
- Reverse - when the paint is applied not in the slots of the pattern, but around the stencil.
There are also three-dimensional stencils made from PVC film several millimeters thick. However, since such drawings are made using the technology of filling a template with putty, the advisability of using them in a humid bathroom atmosphere is highly questionable.
However, if you wish, you can then tinker with covering the three-dimensional pattern with acrylic paint or a special waterproof varnish.
Stencil selection
Next, you need to decide how the drawing will be obtained.
There are several options here:
- Draw/find a ready-made pattern, print it and cut it out yourself
- Buy a factory-made product at a hardware store
- Contact a specialized company with a ready-made sketch
- Use the services of the same company, but at the same time order the development of a design for the stencil there
In any case, now all stencils (except three-dimensional ones) are made on transparent or colored vinyl film.
To make your own stencil you will need:
- Finished sketch on paper
- Pencil or marker for copying
- A piece of vinyl film of the appropriate size
- Sharp knife or special tool for cutting vinyl
The image is first copied onto vinyl (of course, in this case it must be transparent), and the paper version is placed underneath. Then cutting is done along the finished contour.
Stencil cutting job
Based on this feature, stencils are divided into:
- Simple - one sheet of stencil + 1 paint, you can get a monochromatic image. As an option, you can apply the same pattern in different places in different colors or shades.
- Combined - each layer of the drawing is performed on a separate sheet. By using successive layers of the set and different paints, you can create multi-colored and quite complex paintings.
- Reverse - when the paint is applied not in the slots of the pattern, but around the stencil.
There are also three-dimensional stencils made from PVC film several millimeters thick. However, since such drawings are made using the technology of filling a template with putty, the advisability of using them in a humid bathroom atmosphere is highly questionable. However, if you wish, you can then tinker with covering the three-dimensional pattern with acrylic paint or a special waterproof varnish.
Stencil selection
Next, you need to decide how the drawing will be obtained.
There are several options here:
- Draw/find a ready-made pattern, print it and cut it out yourself
- Buy a factory-made product at a hardware store
- Contact a specialized company with a ready-made sketch
- Use the services of the same company, but at the same time order the development of a design for the stencil there
In any case, now all stencils (except three-dimensional ones) are made on transparent or colored vinyl film.
To make your own stencil you will need:
- Finished sketch on paper
- Pencil or marker for copying
- A piece of vinyl film of the appropriate size
- Sharp knife or special tool for cutting vinyl
The image is first copied onto vinyl (of course, in this case it must be transparent), and the paper version is placed underneath. Then cutting is done along the finished contour.
With specialized companies everything is much simpler - you can cut out designs of very complex shapes on a plotter. By using multiple colors, all the desired layers of vinyl will be cut with very high precision, allowing you to faithfully reproduce the design on the target bathroom surface.
Advice!
When the required stencil is obtained in one way or another, it is worth checking it on a sheet of paper or a piece of wallpaper.
The acrylic paints used dry very quickly. Therefore, “running in” the stencil will not take much time, even if it is multi-colored.
At the same time, you can get acquainted with the features of different tools when applying paint, and gain confidence that the wall or other surface of the bathroom will not be damaged.
The process of checking a finished template
Necessary tools and materials. Work process
To apply a stencil to any surface you will need:
- The actual stencil
- Special glue for fixing it to the work surface
- Paint application tool
- Construction tape (to protect the area around the stencil)
The area where the drawing is to be applied should be thoroughly wiped from dust and marked with a pencil. Then the vinyl is glued to the wall according to the markings using glue.
Drawing work
Advice!
Professionals recommend using glue, since other fastening methods may not provide adequate fastening reliability and may damage the pattern when removing the template.
The glue method guarantees all this and leaves no traces behind.
The tools most often used for applying paint are an aerosol can (providing a highly uniform coating), a brush with short, stiff bristles, a paint roller or a sponge. The latter allows you to create a pattern with a gradient.
The paint should be sprayed from a can from a distance of approximately 30 cm; a minimum of paint should be applied to the remaining tools. This is done to avoid drips and other design defects and to obtain a uniform coating. The acrylic hardening time is about one minute, after which you can safely remove the stencil.
If it is possible to dismantle the target surface (for example, a bath curtain or mirror) while applying the pattern, it is better to do this, since this way there is less chance of paint getting onto areas where it is not needed. In addition, working horizontally is always easier than working vertically.
In general, the work of applying a pattern or design is not particularly difficult and requires only accuracy and adherence to technology. In this simple way, you can create individual decor and gain the opportunity for self-expression for all family members, especially children. For those who are not confident in their abilities, there are stickers on the walls in the bathroom, usually made of vinyl. Working with them is even easier than with stencils, and the result is no less impressive.
Drawing
You will need:
- stencil;
- glue to secure the stencil;
- masking tape to protect the surrounding surface;
- brush, roller or sponge.
Before application, the surface must be cleaned and degreased. Next, the stencil is glued in the bathroom in a certain place. Then paint is applied. The layer should dry, after which you can make another one, if necessary. Then the stencil can be removed.
Tips before painting
Before starting a job, you need to make sure that certain conditions are met.
- From the moment of wallpapering, at least 2 days must pass for it to dry thoroughly. Better yet, wait all three days.
- Remember that when painting wallpaper for the first time, you will need to apply at least 2 layers, otherwise there will be differences and bald spots that may go unnoticed during work. New layers are always applied after the previous ones have completely dried - the instructions on the package will tell you the exact time.
- Fiberglass wallpaper must be primed before painting. For paper and non-woven fabrics such preparation is not required.
- It is necessary to remove all traces of glue from the surface of the wallpaper, otherwise the paint will apply unevenly and bald spots will appear, which will then be very difficult to remove.
- The paint should have the consistency of liquid sour cream. If, upon opening the lid, you see that it has thickened, add water, but not more than 5% of the total volume.
- The optimal air temperature is +17… +22°C.
All the colors of the rainbow
Alternative to stencil decoration
For example, instead of using a stencil, you can use the decoupage technique, which will require:
- multi-layer napkins;
- PVA glue;
- brushes;
- acrylic lacquer;
- scissors.
The procedure is performed as follows. Cut out the desired decor from napkins. We remove their lower layers, and the cut out pattern is applied to the bathroom wall. Next, glue is applied with a brush. When it dries, you can varnish the surface.
The main thing in this matter is desire, then you can decorate the walls of any bathroom in a non-standard and attractive way. Additionally, you can look at the proposed photos, which will allow you to choose the most optimal option.
Working with the template
You need to know how to properly use made stencils for DIY decoration. During the work you will need:
- stencil;
- special glue;
- tool for applying paint (brush, sponge);
- aerosol or acrylic paint.
Before using stencils for walls, the surface must first be prepared. Dust and dirt particles are removed from the wall. If possible, wash or wipe with a dry cloth; it is permissible to use a vacuum cleaner.
After completing the preparatory work, markings are applied. It is more profitable to use a level. Thanks to him, it will be possible to apply the ornament absolutely smoothly without defects. If the image is simple, for example letters, they can be immediately applied to the wall. However, it is better to practice beforehand. To do this you will need whatman paper or old wallpaper. Using a pre-made sample, you can not only train your hand, but also choose the optimal color.
Ready-made stencils can also be purchased in stores. To manufacture the product, the manufacturer uses a polymer film, which is distinguished by functionality and reliability. The material washes out well, is not damaged, and allows you to experiment.
It is better to use special aerosol glue to fix stencils on walls. It leaves no traces, does not damage the wallpaper, and does not cause it to peel off from the surface along with the template. During the process, you need to carefully and evenly spray the glue over the stencil. Then it is pressed well against the wall. Particular attention should be paid to places with subtle transitions.
DIY painting technology
The process of painting wallpaper is no different from working with other types of surfaces. In all cases, you will need to prepare the room, choose the right paint, and ensure that you have the necessary tools. Painting the walls is carried out clearly in stages, observing the drying time of the primer layers and the setting period of all materials. To paint wallpaper without streaks and rough color transitions, you must strictly follow the technology.
How long after gluing can I paint?
You can paint the wallpaper only after the glue has completely dried. Manufacturers of paint mixtures and canvases recommend waiting at least 48 hours. If you apply paint ahead of schedule, you can ruin the decorative finish. With a high probability, simple wallpaper will become stained and may even come off the wall. The movement of the roller will provoke the pulling out of the fibers from the glass wallpaper.
Drying time is affected by many factors. This is the room temperature, humidity, type of paintings, presence of drafts. Recommended conditions for rapid drying are temperature 18-25 ° C, humidity - no more than 70%, windows closed. It is very difficult to notice deviations in such indicators without special devices in a house or apartment. The first signs of high humidity are foggy windows.
Surface preparation
Preparation work for painting wallpaper is an important stage that should not be skipped. The entire decorated surface must be clean without signs of mold or damage by microorganisms. The slightest moisture should be removed with a dry cloth and the wall should be allowed to dry thoroughly. Dust and cobwebs must be swept away with a dry brush or vacuum cleaner.
Some types of wallpaper must be coated with a water-repellent coating before painting. Using a roller or brush, distribute the composition over the entire surface, not forgetting the corners and other hard-to-reach places. After complete drying, you need to seal with masking tape all possible places where the paint comes into contact with other surfaces - baseboards, ceilings, slopes.
Primer
In addition to water-repellent impregnation, a primer must be applied to the wallpaper before painting. This procedure will help reduce the consumption of the paint mixture, strengthen the fibers of the main wall decoration, and minimize the appearance of stains and color unevenness. To apply the material use a brush or roller. The following compositions are used for priming paintings:
- Latex based. Used to impart strength to heavy bases of mineral origin. The mixtures are quickly and deeply absorbed into the surface, leveling out distorted relief of any size.
- Reinforced acrylic compounds. They strengthen loose materials well, dry quickly, and are odorless.
- Special glue for priming. The thick mixture is diluted with water in certain proportions. Apply with a roller, dry and re-treat the surface.
Tips for applying paint
The thickness of the paint layer when first applied depends on the type of wallpaper and the expected result. It is better if it is moderate, without swelling and streaks. Each subsequent coloring will deepen the shade and make it richer. If the paint is applied unevenly, the appearance can be corrected by going over the area again until the mixture begins to thicken. The resulting smudges must be shaded with a dry sponge and repainted.
It is better to use a roller to paint wallpaper. A brush will only be needed to apply minor strokes. You need to move any painting tool from top to bottom, from the ceiling to the floor. Thanks to a simple technique, brushstrokes will not be noticeable in clear lighting in the kitchen or in a dark hallway.