You can replace a heated towel rail in the bathroom yourself if you first inspect the old system, find out the principle of its operation and the method of heat supply. Permission from the housing department will be required in the case when, for installation, it is necessary to disconnect the entire riser from the hot water supply or move the device to another location.
Tools for work
In order to do the work of replacing the dryer yourself, you will need the following tools:
- angle grinder (grinder);
- thread cutting tool (die);
- perforator;
- building level;
- adjustable wrench.
Fastenings and connecting elements are most often included in the heated towel rail kit. Depending on the type of finishing, the design and size of the device, the diagram and method of its connection, additional tools and materials may be required. Therefore, it is better to think through a technical solution to these problems in advance.
When connecting an electric heated towel rail, you will need tools for laying the cable and socket - a screwdriver, staples, a multimeter.
Choosing a new heated towel rail
How to change a heated towel rail in the bathroom with your own hands in the fastest and easiest way? The replacement process will cause the least amount of complications if the new model is not very different from the old one. What should you pay attention to here?
The most important parameter can be considered the distance between the eyeliners. If it matches, then there is no need to modify the water supply system to the device, and this is the most difficult and costly part of the work when replacing a heated towel rail. All manufactured varieties fit into a standard range of sizes between supply pipes: 400, 500, 600, 700 and 800 mm. Having carefully measured the distance between the connections of the old heated towel rail, you can go to the store to buy a new one.
Another important point. There are two types of heated towel rails: the heating element can be in the form of a ladder or a coil. Changing one type to another is problematic: hot water is supplied to the coil from the side, and in the ladder model - from above or below.
The dimensions of the heated towel rail and the mounting location are not decisive. Even a mismatch in the diameter of the supply pipes is easily eliminated with the help of adapters.
USEFUL INFORMATION: Which water filter to choose for an apartment
Step-by-step instruction
First you need to clarify the type of device being replaced and its connection type. Depending on the method of connection, dryers can be water or electric, and by design they are panel devices in the form of a “coil” or “ladder”. When replacing a heated towel rail in the bathroom with your own hands, it is better to replace it with a similar or similar model.
Water devices are connected to hot water pipes or to the heating system. The first method is preferable because the coil will be warm whenever there is hot water. In the second case, it will heat up only during the heating season.
The advantage of an electric heated towel rail is its independence from power systems. It works all year round and can be installed anywhere.
Preparing to replace a heated towel rail
From among the devices offered by the retail chain, we will purchase a dryer and mounting elements, taking into account the installation method, the diameter of the connected pipes and the assigned tasks. We will inspect the structure being replaced in advance and find out how to connect it to communications. Let's measure the distance between the water inlet and outlet. It is best if the new heated towel rail has the same gap as the previous one. Otherwise, you will have to change the design of the dryer and buy additional fittings.
The dryer can be connected in parallel or in series with respect to the riser pipes. If it breaks the flow of water, then to replace it you need to call a housing department plumber and temporarily disconnect the riser from the hot water system. Only a representative of the operating organization has the right to do this.
Installing a heated towel rail parallel to the supply pipe with a jumper device does not interfere with the circulation of water in the riser. In this case, it is enough to disconnect the dryer from the hot water system by turning off the taps and directing the water flow into the riser.
The finishing of the connection point is important. It can occur in the groove (a more complex option), or outside. To do this, you may need to purchase the necessary materials, for example, drywall or tiles to mask the joint.
Diameter discrepancies are easily resolved. Adapters are used to connect such pipes.
Thus, to solve the problem of replacing a heated towel rail in the bathroom with your own hands, you must first do the following:
- purchase a heated towel rail of the desired design;
- collect the necessary tools;
- think over and draw a diagram of installation and finishing;
- prepare materials and components.
Dismantling the old installation
If the old heated towel rail is installed using a threaded connection, it can be easily removed by unscrewing the nuts and screws. When the old device is connected by welding or it is no longer possible to unscrew the thread, you will have to cut off the heated towel rail with a grinder. To do this, we will shut off the water in the riser by calling a plumber from the housing maintenance organization.
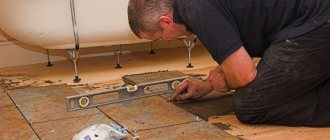
When cutting the thread, you need to leave bends so that a new device can be connected to them. The incision site must be positioned strictly vertically. To do this we use a building level. On the remaining ends of the pipes we will make small chamfers at an angle of 45°. This will make threading easier.
We will also cut off the old heated towel rail mounts with a grinder.
Connecting new equipment
Using a die (cutter), we cut the threads on the saved bends, having previously lubricated them with machine oil. This should be done carefully, gradually turning the lever half a turn, then a quarter turn back, etc. We apply markings in the place where the heated towel rail mounts are installed, placing it against the wall. Using a hammer drill, we drill into the wall at the designated points. To connect the elements of the system, an “American” is used, i.e. fitting with union nut. Compaction is done with flax strands or Unipak paste. Tighten all nuts with a wrench.
Using Bypass
Installing a jumper allows you to turn off the device in offline mode. When repairs are made due to damage or malfunction of the towel dryer, coolant still circulates in the riser through a spare channel - the bypass. Water distribution is done using tees.
A ball valve is installed between the jumper and the dryer. At the second output end a Mayevsky valve is installed to bleed air.
How to check connection quality
After installing the device, water is gradually supplied to it to check the tightness of the connections. This must be done slowly to avoid water hammer.
Installation and installation of a new towel dryer
Do-it-yourself installation of a heated towel rail in the bathroom involves the following steps:
- Selection of installation type - water, electric or combined.
Electric towel dryer - Select the connection method - to hot water or a heating riser.
Connecting a heated towel rail to a heating riser - Fixing a pre-assembled structure (coil-towel rail), purchased at a hardware store, onto brackets and connecting the ends of the installation to a hot water or heating riser.
- Calculation of the distance from the wall to the axis of the aluminum coil pipe, which depends on the diameter of the pipe itself. For example, if the diameter of the coil pipe is less than 23 mm, then it is recommended to take the standard distance to the wall at least 35 mm, with a larger pipe diameter - more than 50 mm.
- Checking the tightness of the coil mounted on the brackets.
- When installing the coil, observe a special slope (about 5-10 mm) so that the water coming from the heating riser or hot water pipe moves according to the pattern from top to bottom.
Note! If you want to make a more accurate calculation and find out how to replace a heated towel rail in the bathroom, it is recommended that you familiarize yourself with SNiP 2-01-01-85. Remember that the slightest inaccuracies in installation can lead to unpleasant consequences.
This event is quite complex and responsible, so if you are unsure of your capabilities, it is best to entrust the change of the coil in the bathroom to professional plumbers. They will perform the installation efficiently, with a guarantee, much faster than you and for an affordable price.
Installation of electric heated towel rails
The installation is carried out similarly to the wiring arrangement for any electrical equipment in the house. A groove is made for the three-core cable (groove). A wire is laid in it with fastening strips or buckles. It connects to a box with clamps. The blue conductor is neutral, the yellow-green conductor is grounding, the bright conductor is phase. The heated towel rail is grounded and connected to an RCD (residual current device) or differential circuit breaker. Install the socket. The cable is laid in corrugation.
Basic list of materials for replacement and stages of work
In order to replace a heated towel rail in the bathroom, you will need:
- the product itself;
- brackets;
- PVC pipes;
- machine for welding and soldering PVC pipes;
- hammer drill, wrenches, building level, tape measure and marker;
- scissors for cutting PVC pipes;
- connecting PVC - fittings and couplings;
- ball valves (2-3 pieces), including the Mayevsky valve.
Replacing a heated towel rail with your own hands involves performing the following work plan:
- Purchase of the structure itself and all necessary materials.
- Carrying out preparatory work.
- Dismantling a used heated towel rail.
- Installation of bypass jumper and ball valves, as well as welding of PVC pipes.
- Installing a heated towel rail in the bathroom and connecting the structure to the system.
How to remove a heated towel rail?
Old models do not suit owners mainly because of their unattractive appearance. They are replaced with modern ones that better suit the interior. It is important to do the work correctly; if installed incorrectly, the heated towel rail may heat up unevenly, not heat up at all, or disrupt the water supply system throughout the riser.
Removing the old device begins with turning off the hot water supply and draining the water from the system. It is best to do this on a weekday to avoid conflicts with neighbors.
It is easy to dismantle the heated towel rail if it is mounted on threaded connections. They need to be unscrewed and the device removed. If it is welded to the riser, you will have to cut it off with a grinder. In this case, you need to leave some of the pipes on which the new heated towel rail coil will be attached.
Disposal of an old drying plant
Before replacing a heated towel rail that has expired, you need to install bypass jumpers and ball valves. This procedure is necessary so that in the event of an unforeseen situation, you can easily turn off the hot water supply to the heated towel rail.
After all, if a sudden leak occurs in a pipe, the emergency service will not arrive immediately, and the liquid that has escaped during this time may well damage not only your repairs and bathroom equipment, but also simply flood the neighbors living below you.
In fact, the jumper is an ordinary PVC pipe, which is most often mounted vertically at the connection points (input/output) of the heating riser to the heated towel rail. At the same time, ball valves (so-called shut-off valves) are fixed at the ends of the heated towel rail itself, which, if necessary, will block the flow of hot liquid passing through the entire structure without disrupting the circulation of the main riser in the system.
To remove air plugs from the system into the jumper itself, it is recommended to install an additional Mayevsky valve. Dismantling the old Soviet heated towel rail - the coil - is carried out by cutting with a grinder or unwinding the connecting elements from the main riser with a wrench.