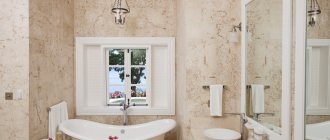
Painting bathroom tiles is easy ↑
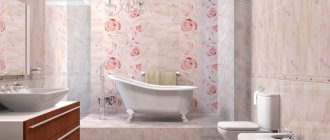
When you want to decorate those boring tiled walls, the simplest thing your imagination suggests is to paint them! Of course, you can just take and paint the tiles in the bathroom, or you can do it beautifully and highly artistically. For example, you can paint not the entire tile, but in parts. Your tile was white, but now it’s multi-colored. Look how unusually the walls of the bathroom are painted.
Coloring tiles in a checkerboard pattern
This is not just a checkerboard arrangement of colors, this is surrealism on the wall! It's not difficult to do this. First, choose the paint colors you want. The paint should be for tiles or glass, otherwise your artwork will quickly come off the surface of the tile. Before painting, the tiles must be degreased and dust free. That's all, actually. Next, you paint the tiles with a brush, sponge, roller - whatever is more convenient for you. To make the lines smoother, apply masking tape.
Technique for painting tiles with masking tape
But why is strict geometry necessary? You can draw whatever you want. All you need is imagination, paint and a brush. The technique is the same: degrease the surface and paint with tile paint or acrylic.
Painting on tiles with a brush
You can create such beauty in an Asian style in your bathroom using paint and brushes.
Drawing on tiles covering the entire wall
Painting tiles with your own hands: video ↑
Decorating ceramic tiles
- First things first, understand that decorating your tiles is not a task that necessarily requires seeking professional help—and you can do it alone with the right materials. Before you begin, make sure to clean the tiles and degrease them with appropriate products.
- Keep the tiles as clean as possible and try not to touch them as they will become greasy. Alcohol is good at removing grease, oil and dirt in general. Once you have cleaned your tiles, you can select the ones you want to work with and clearly outline them with your design choices. This is important as you may not want to draw on every tile and can work with a variety of designs rather than monotony.
- You will need the following tools: sponge, some household cleaner, paints (air-dry enamel and acrylic), ceramic tiles, brushes, glaze (enamel), polyurethane or water-based varnish, stencils, plate (disposable).
- If you're new to design, it's best to practice on (plain) paper to test your skills before you start. You can always rely on stencils to help you. A disposable plate will act as your palette where you can try out different paint colors before decorating your tiles.
- Next, you can decorate your tiles as you practiced before. Take care to wash your brush with water every time you change colors and dry it with paper towels. Allow your designs to dry before glazing them with appropriate materials.
Vinyl stickers and stencil ↑
One way to “revive” cold tiles is to use stickers (vinyl stickers). The choice is wide: you can purchase stickers of any shape, color and size in a specialized store. Along with them, the tube contains instructions and the tools necessary for gluing.
These stickers are resistant to moisture and detergents. Images of dolphins, sea turtles, swans, mermaids and decorative fish can transform a bathroom beyond recognition.
Durable plastic stencils will be a worthy addition to stickers. They are placed tightly against the wall and painted over with moisture-resistant paint using a sponge. The pattern of seaweed and wave scallops will harmonize perfectly with sea-themed stickers.
This is important to know: before applying stickers or applying a pattern with paint, the tiles must be degreased.
Colored stickers bring ceramic tiles to life
Making artificial tiles
In order to make tiles with your own hands, you can use a variety of compositions. Let's consider two options: tiles for interior and exterior decoration of facades.
Manufacturing of gypsum decorative tiles
This material is suitable for interior cladding collections and for creating exterior decor. Gypsum is the most popular composition due to its ease of use, the ability to give any shade and a high degree of adhesion to wall panels. To produce decorative facing stone you will need the following tools and materials:
- matrix;
- drill with mixer attachment;
- mixing bucket;
- a tray or other flat surface for drying products;
- brushes;
- spatulas;
- white plaster;
- washed river sand;
- citric acid powder;
- PVA glue;
- a mixture of wax and turpentine;
- warm water;
- dye.
All processes require space, so you should clear out the work area with a perfectly flat surface and a workbench. To produce large quantities of material, prepare drying racks.
And now some tips for mixing plaster:
- You need to add dry gypsum powder to water, and not vice versa.
- The gypsum mixture sets extremely quickly; after 5-7 minutes the solution will be “dead”, so if prolongation of viability is required, citric acid is added to the composition before hardening at the rate of 0.6-0.8 g of crystalline powder per 1 kg of gypsum. You need to dilute lemon juice in water, then add the solution to the gypsum composition when mixing.
- The composition must be prepared in small quantities, especially when using a single form of the matrix.
- Adding sand is a necessary element of product strength. The sand fraction of 0.01-1 mm is selected depending on the type and type of artificial stone.
- After kneading, the composition should have the consistency of thick sour cream, lazily flowing from a spoon, but not falling into lumps.
- Composition standard: for 1 kg of gypsum 100 g. sand, but can be changed.
- PVA glue acts as a plasticizer, which can also slightly extend the viability of the composition.
- The gypsum should be diluted with water in a ratio of 1.5:1, and 1 liter of water includes all the liquid, including the one in which the lemon is diluted.
- Water is immediately poured into a bucket and, if necessary, pigment is added - everything needs to be mixed thoroughly.
- Now you can add a measure of plaster, then mix again.
- Next, sand is sent into the bucket and mixed again.
Important! The matrix is prepared before kneading begins. Coat silicone and plastic with a mixture of wax and turpentine, and coat polyurethane with a special compound.
Gypsum-sand tiles “Skala”
This material is in deserved demand and popularity. Artificial stone with an imitation of natural pattern is well suited for decorating internal and external wall panels, the lower part of the facade, well logs, and other surfaces. So, do-it-yourself decorative tiles, production in stages:
- To prepare the material you will need a number of components. The dosage must be observed extremely accurately so that the products meet the required parameters of quality and strength. What do you need:
- 5 kg of GVVS-16 gypsum (weigh);
- 1.5 kg of dry coarse sand;
- 2 liters of warm water (room temperature);
- 30 gr. black color powder;
- 45 gr. yellow special dye-color;
- 400 ml of water in which 1 pinch of citric acid is diluted.
- Mix water and color in a bucket.
- Pour sand into the plaster and mix the dry mixture thoroughly.
- Add water with lemon to the tinted water - you will end up with 2.4 liters of liquid that needs to be mixed.
- Mix the liquid mixture with the dry ingredients and stir with a drill attachment at low speed for at least 5-7 minutes.
- Tint the form with dry pigment, applying the powder with a brush to areas of the matrix locally. You need to apply the pigment to the edges and bottom, this will create a textured pattern on the finished product.
- Shake off excess dry pigment by turning the matrix over and shaking slightly.
- Place the form on the desktop, preferably placing a flat plywood sheet of the same size under the matrix.
- Place the solution into the matrix in portions, filling all deepening points of the relief.
- Lift the mold together with the plywood sheet by one edge and shake several times so that the composition spreads evenly over all folds.
- Then lay out the rest of the mixture, which is already drying a little, so the total volume is slightly above the edge of the mold - this is normal.
- Having laid out the remainder, the matrix should be shaken a little (not too much) again by moving the plywood sheet. Quickly remove excess mortar from the top using a spatula.
- Clean the upper part of the walls very carefully so that after the composition dries, the tiles can be easily separated.
All that remains is to wash the tools so that the plaster does not dry out, and wait 20-25 minutes for the gypsum mixture to dry. It is better to check drying by hand - heat should come from the tiles (thermal reaction). While the composition is drying, you need to find another sheet of plywood, the size of the matrix. Place this sheet on top of the matrix, grab the entire structure by the bottom sheet and turn it over so that the bottom is on top. Carefully remove the backing, grab the matrix by the corner and remove it from the finished product. This is how tiles of artificial stone, which you made yourself, remain on the plywood sheet.
The mold for making stones should also be inspected and cleaned of any remaining pigment or mixture. However, if the preparation process is not completed, the pigment does not need to be cleaned, but the finished product must be sorted. Set aside tiles with flaws, but do not throw them away - the fragments are well suited for tiling corners and other inconspicuous areas. Once the required batch is ready, the stones can be arranged in a pattern, choosing the most successful option. By the way, tinting is allowed during the laying process or before it. The color is applied with brushes of different widths to create a picturesque and “natural” picture of rock fragments.
Advice! After cladding, the material is coated with matte varnish, especially for external work. Gloss will make it look unnatural, so glossy varnish is rarely used. It is not necessary to varnish the interior lining.
Making tiles using cement
This composition is more widely used, since cement is higher in terms of strength and practicality. To make concrete artificial decorative material you will need:
- Gray cement M200-M400 or Portland cement;
- Washed dry river sand;
- PVA glue (possible without it);
- Color.
As for the workplace, it also needs to be selected with a perfectly flat surface and racks for drying products. But the process of preparing decorative tiles may vary: if the stones are in the form of cobblestones, then you can do without a mold, but for the tiles you will need a matrix. Standard for the mixture composition: 3:1 (1 part cement, 3 parts sand). The dry mixture is stirred and warm water is gradually added. To increase plasticity, PVA is introduced at a rate of 50 g. per 1 liter of sand-cement composition. During the mixing process, pigment is added, but its quantity is determined only by eye, by adding portions and thoroughly mixing.
How to make stone for finishing walls or paving paths?
The presented technology for the production of decorative tiles for paths and wall cladding differs only in that for paths blocks of a flat surface and shallow relief are made. What should be done:
- Fill the matrix with the prepared solution, periodically shaking it back and forth so that the mixture spreads evenly over the folds.
- As soon as the matrix is half filled, run a wide spatula over the surface, collecting excess solution and cleaning it from the walls - this procedure is necessary when pouring into a general mold.
- When pouring a single deep matrix, the composition is also laid halfway, then reinforcing mesh or rods are applied, and then the rest of the composition is laid out - you need to level it along the upper edge of the form.
- After the composition has already cooled down, but retains its plasticity, strokes can be applied to the surface (with a nail, rod) to ensure better adhesion to the surface of the wall panel.
- The first stage of drying takes at least 12-24 hours. Then the finished products must be removed from the mold, leaving to dry for another 14 days. If the matrix is intended to be reused, the mold must be washed with soapy water and dried.
- Clean the finished stone from dust, coat it with paint of the desired shade, but only if tinting during the mixing process is not enough. The option of painting finished tiles is more difficult if batch similarity of elements in color is required.
The use of durable varnish, which covers the product after drying, is effective only for exterior decoration. This varnish will protect the material from external influences and extend the life of the artificial stone.
Making cobblestones
Despite the fact that ceramic material can be used in any way, imitation cobblestones are in fashion. Artificial decor is especially liked by people who decorate their garden plots with alpine slides or oriental gardens - here you can’t do without cobblestones. But in order not to drag heavy stones, we suggest making an excellent imitation. The direction is called “Art Concrete” and to make it beautiful you will need:
- Cement mortar (as above);
- Foam plastic 100-150 mm thick for cutting out shapes;
- Fiberglass reinforcing mesh;
- Foam sponge or polyethylene for shaping texture;
- Foam adhesive (spray foam or cement-based tile adhesive);
- Sandpaper with coarse and medium grains;
- Acrylic paints;
- High quality atmospheric varnish.
Now you can get started:
- Cut and glue foam panels to the desired size.
- Once the mold has dried, cut out a “stone” from it - this can be a blank for a round, trapezoidal or any other sample.
- Wrap the form with fiberglass mesh, repeating all the bends of the future sample, but you can also fix the mesh with foam or foam glue.
- Prepare cement mortar. Instead of mixing cement and sand, cement-based tile adhesive is often used, used for exterior work or for complex substrates. The mixture is sold in dry form in stores, and must be mixed according to the instructions. The adhesive composition is flexible, making it easier to work with. And to make the cement-sand mixture plastic, PVA is added to it (50 grams per 1 liter of mixture).
- Apply the mixed composition onto a foam mold on top of the reinforcing mesh. It is better to do this not quite evenly in order to “draw” the relief of the stone. But you can make the “boulder” smooth, for which, after applying the composition, walk over the surface with a gloved hand or place a thick polyethylene bag on top of the solution and level the entire wet surface.
- As soon as the base is covered with a layer 15-20 mm thick, you need to wait for the composition to dry. This is approximately 30 minutes.
- After half an hour has passed, you can give the surface a textured relief using a sponge or polyethylene. Simply apply on top of the mixture, making folds and bumps.
- As soon as the mixture has dried, turn the mold over and seal the “bottom”. Wait for the “bottom” area to set, but not dry, place the sample on a flat surface and press slightly. This will help create a smooth surface for stability of the finished product.
- Now, without waiting for the mixture to dry completely, treat the surface with sandpaper - the procedure is carried out 3 days after applying the composition to the reinforced form of the “stone”.
All you have to do is wait for it to dry completely, which takes 10-12 days. But if the cement composition is applied in several layers, you should wait until each layer dries before applying the next one. As soon as strength is achieved, you can begin decorating, having first cleared the mold of dust and debris, you can rinse the surface with water and let it dry. You can paint artificial stone with a composition from a balloon or use acrylic paints. The color should be applied twice to cover the relief in all areas. But imparting naturalness depends on sanding - the surfaces of the folds are lightened, but the depths remain darker, it looks very beautiful.
After all the procedures, the “stone” is washed and dried again, and then varnished for protection. It is recommended to renew the varnish coating once a year to prevent cracking and deterioration of the material. Understanding the production technology, it is easy to determine the decoration - stones made independently can decorate not only walls, but also flower beds, and “boulders” well hide the hatches of drainage and water intake wells.
Decorating using decoupage technique ↑
Today this technique is very popular. It consists of using three-layer napkins to create decorative elements. The process can be presented step by step as follows.
- Using scissors, cut out the decor (usually a plant element) from a napkin.
- We remove the two lower layers and apply them to the tiles under the ceiling (do not go lower: there is a high probability of damage), after which we apply PVA glue on top of the element with a brush. The formation of air bubbles and folds should be avoided.
- After the glue has dried, we apply moisture-resistant acrylic varnish on top of the decor.
Despite the protective layer of varnish, this decor will not last long in an aggressive, humid environment. This allows you to change it periodically and thereby add variety to the interior.
Filling the room with interesting accessories ↑
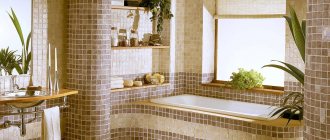
The bathroom can be equipped with unusually shaped towel holders, stands for soap and toothbrushes. In a plumbing store, you can choose models that match the style and color of the tile, successfully harmonizing with the ornament on it.
Decorating the bathroom with paintings and mosaics is a great way to make the interior elegant
Curtains with a thematic pattern can also serve as a decorative element. A large mirror with a beautiful frame will make the room bright. The frame can be decorated with decoupage elements. The tiles will sparkle with new colors if you hang pictures on the walls and complement the interior with shelves with flowers.
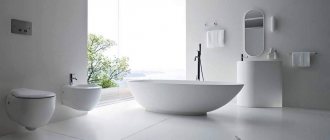
Caring for a white bathroom
In order for the room to please with its beauty, it is necessary to keep it clean, adhering to the following rules:
- Caring for surfaces will not be very troublesome if all finishing materials are easy to clean. For this reason, it is not recommended to purchase products with a very deep relief, which becomes easily dirty and difficult to clean.
- Surfaces must be resistant to cleaning agents and detergents.
- To make soap scum less noticeable, it is better to use finishing materials with a matte surface near the bathtub and sink.
- Modern stretch ceilings look very beautiful, but they are difficult to clean. Dirty suspended ceilings will spoil the overall impression of the room and give it an unkempt appearance. It is better to paint the ceilings, cover them with plastic panels or tiles with a matte surface.
- It is advisable to hide water and sewer pipes behind panels made of moisture-resistant plasterboard or plastic. It is better to use plasterboard and cover it with white acrylic paint. Over time, plastic loses its foamy whiteness and acquires a yellowish or grayish tint.
- It is advisable to select the highest quality plumbing fixtures. The coating of a high-quality sink and bathtub will not crack if objects are accidentally dropped. It is easy to clean without the use of strong detergents and is kept in perfect condition.
- The seams between the tiles must be grouted with special antifungal and antibacterial grout. If bacteria or mold grow in them, the seams will take on an untidy gray tint.
The editors of santehnikportal.ru recommend spreading a rug at the entrance to the room to keep the tile seams on the floor clean longer.
So, a white bathroom creates the impression of cleanliness and nobility, but such a bathroom must be carefully and promptly looked after. Good ventilation, a repaired plumbing system and high-quality moisture-resistant building materials will help make maintaining a room in light colors less labor-intensive.
We use seashells ↑
Marine style is the most popular in bathroom interior design. You can decorate tiles with natural or plastic shells using hot glue: by gluing these decorative elements next to stenciled images of seaweed or simply around the perimeter of the room or on the frame of a mirror, you can create a unique interior design. To make the shells even more original, you can decorate them with acrylic paints.
Decorating tiles with shells is a great idea for creating a “sea” landscape
Do-it-yourself voluminous decor
An interesting way to radically change the usual bathroom environment. Here various items serve as decorative elements:
- multi-colored beads;
- stones, rhinestones;
- shells;
- buttons;
- coffee beans;
- pieces of glass
Using them you can decorate areas of a tiled wall or several individual tiles. It is convenient to attach the elements with superglue, hot glue or acrylic varnish.
You decide for yourself which elements to use; you are limited only by your own imagination.
More often, seascapes are created in the bathroom, decorating, in addition to the walls, the floor and the bathtub container. The whole room looks like a sea grotto or sandy bottom.
Mosaic for bathroom decor ↑
Stores that sell ceramic tiles always have discounted broken tiles on sale. There you can always choose several interesting specimens for making mosaics, which you can use to decorate your bathroom, replacing an expensive border. To do this, perform the following steps:
- Using a marker on the tile, we outline the geometric shapes that will need to be cut out;
- Using a glass cutter and special wire cutters, we cut out the intended elements;
- Using waterproof glue, we attach the tile fragments to a nylon mesh, laying out a pattern invented in advance;
- We attach the made mosaic to the wall using tile adhesive;
- After drying, use colored grout to seal the seams.
Panel on the wall made of broken tiles
Renewing seams
It is not necessary to dismantle outdated tiles. It is expensive, labor intensive and time consuming. To update the bathroom interior, sometimes it is enough to clean the grout.
The tile joints gradually darken, losing their original color and becoming dirty. They are affected by high humidity inside the bathroom. Darkened grout spoils the appearance of the tiles and the entire surface of the wall. You can fix this in various ways:
- remove the old grout and treat the seams with new;
- paint over the seams with special pencils or a construction marker;
- paint the seams.
However, you can combine the two options if the old grout looks terrible. First, dismantle it and install a new one. Then, after waiting for the layer to dry, paint it. In construction, such paints have a wide range of different shades.
It is more convenient to paint over old seams with a marker, but this option is considered temporary and lasts 1-2 weeks.
Rules for cleaning damaged areas
It is easier to update old, but intact sections of tile joints. What to do with damaged areas, how to clean them?
Basic Rules:
- carefully remove the damaged area using a sharp tool;
- Clean the seam area with a vacuum cleaner;
- If minor damage is detected, replace the grout locally.
Beginners should enlist the help of an experienced tiler.
Complete replacement
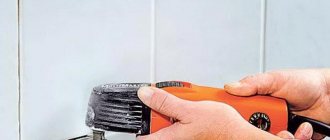
A complete replacement of the old grout is carried out mechanically. First, the surface is treated with a scraper, removing the grout layer. Work carefully. If the old grout has a cement base, it is better to treat it with an acid cleaner before dismantling it. This will speed up the process.
The seams will have to be completely replaced immediately, without long breaks, so it’s worth calculating the forces in advance.
Replacement process:
- clean the surface, at the same time removing dust from the opened seams;
- treat them with a brush, trying to scrape out the fragments stuck there, vacuum the dust, and remove the old grout;
- wash the seams using a simple soap solution or a special product, let them dry;
- Use a spatula to carefully apply new grout.
If the tile joints were initially considered a decorative element, then select a tint grout. For example, the tiles are white and the joints are blue. Replace the color of the old coating, and the room will be transformed.
Decorating old tiles ↑
There are ways to decorate the interior of a bathroom not only by tiling with new tiles and decorating it with decorative elements. Old tiles can also be restored to their original attractive appearance. To do this, carefully, using a slightly blunt tool (so as not to damage the enamel), clean the seams. Mold often appears in these places, so treatment with an antiseptic composition is necessary. The cracked tiles need to be removed and replaced with a homemade mosaic.
To remove the tiles, use a chisel, hammer, or chisel. In order for such mosaic inserts to look logical, it is necessary to sacrifice several whole tiles, arranged in a checkerboard pattern, but with some randomness. We also fill the vacant spaces with mosaics.
Mosaics made from broken tiles may look better than store-bought ones
You can decorate old tiles using another type of mosaic, which is obtained using a stencil and paint. For this use:
- acetone;
- sandpaper No. 100;
- level;
- roulette;
- breadboard knife;
- brush or foam swab;
- masking tape;
- epoxy gloss paint;
- strengthening primer.
Mosaic from broken dishes
You will also need protective equipment: gloves, mask, goggles. Old tiles in places where decor is applied must be degreased and lightly sanded with sandpaper. Then, using a level, you need to stick masking tape onto the tiles in several rows. Using a simple pencil we apply geometric (it’s easier) patterns. Using a breadboard knife, cut them out, and degrease the free areas again with acetone.
Using a foam rubber swab and acrylic paint of different colors, fill the cut out areas. After the paint has dried, the masking tape must be completely removed. Using these simple methods, you can transform the tiles in the bathroom, spending a minimum of money. You can combine various design techniques, but it is important not to overdo it: everything should look harmonious. And then your bathroom will look no worse than those for which expensive materials were used.
Video instruction
The best posts
- What tools are needed to install self-leveling floors?
- What tools are needed to install self-leveling floors?
- 25 of the most original mirrors
- Which gas heater is best for a summer house, owner reviews
- Do-it-yourself ceiling made of plastic panels - instructions (photos and videos)
- Plastering a brick wall with your own hands
- Do-it-yourself ceiling made of plastic panels - instructions (photos and videos)
- How to make TRX sports loops with your own hands
Related article: How to make a smokehouse with your own hands
