How to lay tiles in the bathroom correctly, how to calculate, where to start laying? This question is faced by craftsmen who plan to lay tiles with their own hands; below we provide step-by-step instructions that will help any beginner to independently calculate and tiling the bathroom.
Heading:
- Toilet tiling
- Choosing which method of laying tiles in the bathroom suits you
- Laying tiles on the wall with your own hands (video)
- How to properly lay tiles in the bathroom - instructions
- Calculation of the number of tiles
- Preparing to lay tiles in the bathroom
- Laying tiles on bathroom walls
- Laying tiles on walls video
- How to lay tiles in the bathroom video report
- Bathroom tile color scheme
- A little about bathroom style and design
- Modern bathroom design video
Not being a specialist, but wanting to gain experience in construction technologies, the best idea in terms of starting training is tiling a toilet. The reason for this is quite simple - the toilet room is usually small in size, so even if something goes wrong, you can always call a specialist who will fix everything, and your financial losses will be minimal. Therefore, the article below is about the main stages of laying tiles in a toilet. Let's begin.
Why make a screen under the bathroom?
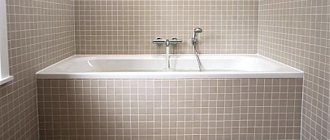
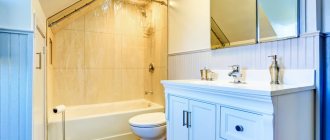
The walls and floor in the bathroom are tiled, and the plumbing is installed in its place and connected to communications. Everything looks great. The only problem that spoils the view is the space under the bathtub from its side down.
In order for the interior of the room to look harmonious and complete, it is necessary to somehow close the bathhouse itself and the pipes connected to it.
The main purpose of the decorative screen under the bathtub is to hide the unpresentable-looking legs and outer side of the bathtub from the eyes of the owners
If the bathing plumbing is made of acrylic or plastic, then in most cases it looks quite decent from the outside. On the contrary, cast iron or steel products do not please the eye. They must be decorated from the outside, otherwise the bathroom will not look too neat.
Housewives often store detergents and other household essentials under the bathroom. It is advisable to cover all this, as well as communications, with a decorative screen.
A screen like this is a great way to hide what is unnecessary and not too beautiful to look at. All these jars, bottles, rags and pipelines will be securely hidden behind it from people’s view.
If the bathroom is tiled, then it is recommended to make the screen under the bathtub from it as well. This way the design of this room can be decorated in a single, complete style.
The main thing when installing this decor is not to forget about the need to have access to communications. You will need to make a hatch in the screen, through which in case of leaks you can get to the pipes for repair.
The procedure for carrying out facing work
Where to start tiling the walls and floor of a bathroom, what determines the accuracy of the work, what devices are used to ensure high quality tile laying? More on this later.
Bathroom tiling
There are certain rules and techniques for conducting work, known to experienced craftsmen. With some skills, tiling a bathroom with good quality yourself is also quite possible. Here are some important recommendations:
- Work begins, as a rule, from the farthest corner, located on the side opposite from the entrance. First of all, lay the tiles on a flat horizontal surface of the floor - this sequence makes it possible to use the laid layer as a base surface when facing walls.
- Before laying the first vertical row, the tiles must be installed (without glue) along the surface of the wall - this will make it possible to determine the number of intact tiles and those to be cut in the row. It is not advisable to plan to lay thin pieces of tiles less than 3 cm wide, which are quite difficult to cut due to possible cracking.
- You can apply glue either to the back side of the tile or directly to the wall - both methods are quite effective and each master chooses an option that is convenient for him. The most common application is to apply adhesive to the wall.
- The applied glue should dry a little (up to 10 minutes) until it reaches the required condition. After this, the tiles are pressed one by one tightly onto the wall in the places where they are laid, holding them for a while and tapping them with a rubber hammer, thus evenly distributing the applied glue. Correcting the placement of tiles on the wall and aligning the seams is also done with a hammer, using marking crosses and a level. After installation, you must allow the glue to dry completely and only then can you start grouting the joints.
- Depending on your own preferences, the color of the grout can be different; most often you choose a shade that matches the color of the tile. To grout the joints (fill the joints with a fugue - grout mixture), use a rubber spatula, moving it at an angle to the laying plane and in the diagonal direction of the wall. It will take some time for the grout to dry, after which you can wipe the surface of the laid ceramic layer with a damp cloth or sponge, erasing unevenness and excess grout.
Laying tiles on the bathroom floor
Tiling the bathtub - the photo gives an idea of the possible installation methods - is done in the same order as the walls.
Possible design options
Bathtubs vary in shape, material and functionality. But the methods of decorating the space underneath them using tiles are the same in all cases. It is necessary to make a reliable base for the tile, and then glue it according to all the rules and rub the seams.
When installing a decorative partition, you must remember the need for a niche for the feet, and also do not forget about the hatch, which facilitates access to sewer pipes
Structurally, screens under the bathroom can be:
- with hinged or sliding doors;
- removable or permanent;
- with retractable drawers, designs with or without shelves;
- deaf and with a niche at the bottom for feet.
The easiest way to lay tiles is under the side of the bathtub. When using it, you do not have to waste effort on carefully aligning the new edge.
It is enough to lay the top row of tiles under the side of the bathhouse or vertically flush with it. An additional plus is that the frame and rough surface for gluing ceramics in this case will also be easier to make.
If you decide to use ceramic tiles to line a niche under the bathroom, then the easiest way is to make a blank solid screen out of it without any frills. However, in case of blockages and leaks, it will not allow access to communications. It will need to be torn down and then re-decorated. It’s difficult to call such a decision thoughtful.
A blank tiled screen is easy to install and looks elegant, but if the bathtub siphon gets clogged or the pipes under it burst, then this decor will have to be destroyed without the possibility of restoration
A more practical option is with an inspection door or window. When installing such a screen, a technological hole is provided, closed with a plastic hatch or a removable panel the size of one tile. It turns out both presentable and practical.
Screens with sliding or swinging doors made of tiles are extremely difficult to make. The tile must be glued to a strong and undistorted base. But in the case of openable and closed door leaves, this is impossible to achieve. The tile will inevitably fall off from such a surface.
The bathtub is often used for bathing babies and washing clothes. At the same time, you have to stand close to her. If there is no niche made near the floor or the screen does not have a downward slope downwards from the edge of the bowl, then there will be nowhere to put your feet in this situation.
Standing nearby, you will have to bend deeper, unnecessarily straining your back. When decorating a bathtub, be sure to provide a recess for the feet.
Types of designs and materials of manufacture
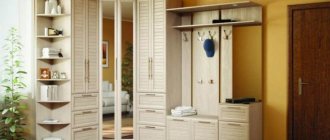
The bath screen cabinet offers the following options:
- Buying ready-made. Suitable if you have a standard bath. In this case, just measure its parameters and go to the nearest store;
- Individual order. You will need this approach if you have a semicircular, corner or any other bathtub with atypical dimensions and shapes. You will have to measure a lot more. Consider all corners and rounding locations. By measuring simultaneously at the top and bottom, you can identify areas of crooked flooring. Next you will need a schematic sketch and a good manufacturer. You can also hire a specialist to take measurements.
When choosing a material, consider its resistance to water:
- Plastic. A good, budget way to decorate a facade. The material is completely neutral to moisture. Not afraid of heat. Avoid options that are too cheap and thin. They may contain toxic inclusions. When heated, such plastic will begin to poison you with volatile emissions. Minimize mechanical impacts on the surface of the planks. They will quickly become covered with multiple scratches. If treated with care, it will last a long time without losing its natural gloss;
- Glass. For these purposes, it is better to abandon real float glass. If desire is louder than reason, use multilayer triplex. The plate will contain several shockproof films at once. Glass will not break into pieces when broken. It will only become covered with a network of cracks. Not afraid of water. It is advisable to choose tempered glass. They won't care what temperature they heat up to. Still, synthetic analogues are preferable. Plexiglas, colored hardboard, fiberglass. They are distinguished by less fragility and reduced weight. The strength is significantly increased;
- Metals. Another reliable way. Choose only corrosion-resistant varieties. These are stainless or chrome steel, aluminum, titanium coated parts. You can use mirror-polished metal. This way you will additionally get rid of drips and difficult to wipe off “fingers”. The material is distinguished by high strength and long service life;
- MDF or LMDF. Do not be fooled by the fact that these are the most moisture-resistant wood boards. They will require additional water-repellent coating. This is due to the close proximity of the source of splashes. Lack of protection can cause deformation of the valves with jamming or breaking;
- Wood. Only the hardest varieties (beech, oak). Mandatory treatment with antiseptics and varnish. This approach will not turn your cabinet under the bathroom into a breeding ground for fungus and mold.
In screen sizes, the widest range can be in length. This parameter can range from 105 cm (miniature) to 190 (heroic bath). An increase in length is accompanied by the need to choose a more durable frame. In this case, it can be equipped with support legs. There is no such significant variation in height. This parameter can vary from 50 to 60 cm. But, first of all, focus on the dimensions of your bathtub.
Dull and monolithic
A solid screen is the simplest and fastest solution for a bathtub. The disadvantages include the monolithic nature of the entire structure. With further operation, it may be necessary to replace or repair the sewer system; for this, the solid structure will have to be dismantled.
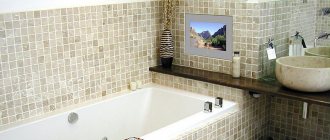
With a wide side or not
Sometimes a wide side is made around the bathroom. It turns out that it is somehow inserted into the case. On the one hand, this is convenient - you can put something on the sides and, from an aesthetic point of view, the bathtub fits more harmoniously into the interior. Example of a bathtub screen with a wide side
But not everyone can afford to allocate a large space. Bathrooms are usually not pleasing with their size and an extra 10-15 cm can be critical. In addition, this type of installation may be inconvenient for older people. To get into the bath, you have to take a long step, which is not always possible for them.
Expert opinion
Roman Vasiliev
Builder, repairman
But this option has one more positive point: under the bathtub you can make shelves of large width. They can be open or with sliding/hinged doors.
Functional bathroom screen with shelves
Similar shelves are made without a wide side, but their depth is much less. Although, maybe this is not a minus, but a plus - there will be less different things collected, it will be easier to take something out and put it away.
Foot recess
It is more convenient to clean the bathtub or wash clothes in it if the screen has a recess for the feet. Its depth can be small - 10-12 cm is enough, width - about 35-45 cm. Such dimensions allow you to reach the walls and the opposite side without strain.
Expert opinion
Roman Vasiliev
Builder, repairman
We’ve decided on the dimensions, all that’s left is to choose what it will look like. The easiest square notch to organize. It can be made from brick, aerated concrete and profile.
A small rectangular recess for the feet
The non-standard variation looks more interesting - the entire screen is made of two levels, with the upper part hanging over the lower part (pictured below). In this option, you can mount a moisture-resistant LED strip for illumination. It should be interesting. On two levels - unusual
The next option is to make part of the screen tilted. In the case of a profile, this is easy to implement - with brick - almost impossible, with aerated concrete - possible, but difficult Frame for an inclined plane
Sheathing with plasterboard
What does the result look like?
Another option is to raise the top edge of the screen above the floor a few centimeters. It will turn out to be on legs and there will be no problems with legroom. But there are problems with cleaning. You can’t pull the cladding high - it’s unsightly, but if you leave a small gap, how can you clean it? Problem. The screen under the bathtub can be made not to the floor
In general, from all these options you can choose something most suitable for yourself, although they also make a blank, flat screen on the floor.
Hatches for inspection
The screen under the bath must have a removable/opening part through which you can access communications. There are several possibilities to do this. The first is to install a plastic hatch. Not everyone likes its appearance, but it is the simplest and cheapest option. Plastic plumbing hatch
The next possibility is to make a removable panel that will be attached to the frame using magnets. Not to say that this option is difficult to implement, but it requires more experience - you need to calculate the installation location of the hatch so that whole tiles can be placed on it. Instead of a hatch there is a removable panel
Expert opinion
Roman Vasiliev
Builder, repairman
One thing: if you grout the seams with a light paste, the hatch will still stand out. There is no grouting in this place, but there are small gaps that are very noticeable against a light background. On dark tiles with dark grout, the gaps are almost invisible
The most technologically advanced, but also the most expensive way is to install special hatches for inspection. They are of two types - folding on chains and rotating. Types of inspection hatches for laying tiles
These hatches, unlike plastic ones, are designed for laying tiles on them. If installed well and calculated correctly, it is not easy to see. This is what it looks like when closed
Opens like this
Convenient to work
Don't miss: Installing a bathtub - on tile or under tile? How to install a bathtub under tiles
Methods for opening facades
When organizing a door opening system, the most optimal are:
- Folding. They are attached at the bottom and tilt outward at an angle of 45°. A very convenient and reliable way. You can get any item from the shelf directly from the bath. If treated with care, they will not create operational difficulties;
- Sliding. The doors move sideways along horizontal grooves. They slide behind adjacent doors. You can only open it from the side of the bathroom. Must be equipped with front fittings;
- Retractable. Often, several drawers are placed below the doors. It is very comfortable. Capacity increases significantly;
- Removable. This door is not attached to the facade panel. You will have to remove it by hand. Reinstallation into the grooves is also a manual process. Not very convenient, but it eliminates the hassle of rusting fasteners.
Choosing ceramics for a bathtub panel
Ceramic tiles with glaze are impervious to moisture and durable. It is easy to maintain and install. Its only drawback is the fragility of the glazed layer; it easily cracks when struck. But if you don’t throw heavy objects at the tiles, then this problem is not so relevant and significant.
The markings on the box allow you to quickly navigate the assortment of ceramic tiles; for a screen in the bathroom, a cheap wall-mounted one that is not frost-resistant will suffice
The dimensions of most baths are modest. It is recommended to choose small or medium sized tiles for decorating the space underneath. Large slabs will have to be cut, which means extra residue and potential losses from cracking of the glaze due to inaccurate cutting.
You can also use mosaics to cover the screen. However, laying out a pattern from small elements is time-consuming and labor-intensive. It’s easier to choose ready-made mosaic modules in the form of sheets of fiberglass mesh with ceramics already glued to it. They will simply need to be cut out and fixed to a partition made of plasterboard or brick.
Materials for making the screen
The material of choice for the bathroom screen is plastic. It is convenient to use monolithic types of polycarbonate (opaque, colored, etc.) or PVC panels. Less suitable are MDF and gypsum board, plywood or fiberboard. When choosing fences for the bathroom, you need to use the most moisture-resistant types.
Screen made of plasterboard.
Don't miss: Laying tiles in the kitchen with your own hands. Selection of tiles and related materials for the floor, various DIY installation schemes in the kitchen
Laying ceramic tiles
Brick walls are installed as a base under the tiles or a rough gypsum board screen is assembled. The tiles are installed using standard moisture-resistant tile adhesive:
- you need to start from the open part of the bathtub or from its free corner, from above, so that the cut elements are under the sink, against the wall, near the floor, etc.;
- to maintain uniform seams, use dividing crosses, inserting them in the corners between the plates;
- when the glue sets, the crosses are removed and the seams are filled with special grouts with antiseptic and hydrophobic properties.
Expert opinion
Roman Vasiliev
Builder, repairman
In addition to tiles, the bath screen can be finished with mosaics, natural stone, porcelain stoneware, etc.
Features of using MDF panels
The material is not moisture resistant enough for use in the bathroom. Before installation, it is advisable to treat all sections with water-repellent impregnation so that the canvas does not deform when exposed to water. The outer side of the panel is laminated and is resistant to drops and splashes, as well as high humidity. For a bathroom, you need to choose MDF with a protected underside of the sheet (most often painted).
Installation begins with attaching the starting profile for walls made of plastic panels (U-shaped). It is fixed to the top bar or profile so that the top edge of the MDF can be driven into the recess. If you do not plan to install a plinth on the floor around the bathtub, you can fix the lower edge in the same profile, filling it with sealant or glue. Fastening to the frame elements is carried out from the inside, using short self-tapping screws for gypsum boards.
Finishing the screen with plasterboard
Making a screen or base for tiled cladding from gypsum plasterboard with your own hands is no more difficult than other architectural elements. The sheets are cut according to width and length measurements, and then mounted on the frame with short self-tapping screws. The head of the fastener must be recessed into the surface of the material.
Expert opinion
Roman Vasiliev
Builder, repairman
After installing all the sheets, the joints are glued with reinforcing tape and putty. The holes from the screw heads are also smoothed with putty. After installing the gypsum board, it is necessary to paint the surface or tile it, since the material does not have sufficient moisture resistance.
Cladding with plastic panels
Plastic panels are convenient not only for wall decoration, but also as a basis for a screen under a bathtub. When using this material, you can decorate rooms in a single color scheme and style. For installation, the same profiles are used as for fastening to the walls (starting and finishing), and the lathing is performed by placing 2 horizontal strips along the height of the bowl (distance about 30 cm)
The work is done like this:
- fasten the starting molding using a stapler;
- a corner or starting profile is placed on the outer panel, inserted into the guides at the top and bottom;
- carry out to the outer corner or close to the wall;
- fixed to the sheathing elements from the side of the wide mounting flange;
- insert the next panel into the recesses of the moldings (with the short flange towards the already installed part), connect tightly, closing the joint, fix the wide flange on the sheathing and repeat until the work is completed.
If the last panel in a row needs to be cut to width, measure out the required size, cut off the excess material, and cover the cut with molding.
Features of using wooden panels
Wooden screens can be assembled independently from lining, thin boards, etc. First, the panels are prepared and then mounted on the frame. Various manufacturing options:
- blinds (with inclined slats fixed in a frame);
- panel (shaped canvas in a frame);
- panel boards (made of tightly fitted boards);
- carved (from planks with notches), etc.
The choice of variety depends on the style of interior design.
Expert opinion
Roman Vasiliev
Builder, repairman
Any wooden screen must be impregnated with a water-repellent agent before installation. All surfaces must be coated with varnish or paint.
Installing a wood screen is easy:
- paneled fabric or blinds are used as hatch doors, etc., securing them on hinges;
- fixed frame-type parts are fixed directly to the frame parts using self-tapping screws (you can screw them in from the inside if the external finish should not be damaged);
- screens without frames can be assembled directly on the frame, adjusting the parts to each other and fixing each with self-tapping screws.
The protective lining of a clapboard bathtub can be done vertically, horizontally and obliquely. Wooden cladding gives a modern bathroom a resemblance to a sauna or Russian steam room.
From timber and plywood
The first screen option is quite budget-friendly. To make this model, complex professional tools are not needed. There is also no need to drill the floor or walls.
In the process of work you cannot do without:
- moisture-resistant plywood 10 mm thick. The size of the shields depends on the dimensions of the bathtub and the height of the side, as well as how much it is planned to raise the screen relative to the floor;
- wooden beam with a cross-section of 50x20 mm - the length of the products will also depend on the installation location;
- 4 hinged hinges for doors - the height of this fittings should be 50 mm;
- nails or self-tapping screws to connect parts into a single whole;
- 2 adjustable legs;
- 2 furniture handles and screws for fixing them;
- special varnish for covering wood or paint for painting the screen;
- hand hacksaw for wood;
- construction square;
- hammer;
- roulette;
- electric drills;
- brushes for applying varnish;
- screwdrivers;
- workbench type work surface. You can use several stools.
Manufacturing stages
- We take measurements and make design details. Three panels - a middle one - stationary and two side ones, acting as doors, bars to create a frame.
- We lay out the beams on the workbench - the top one on the wide edge and the bottom one on the end side. Three plywood panels are laid on top of the beams at intervals of 5 mm. The beam should protrude 5 cm along the edges of the laid out panels. In this place, you need to fasten vertical bars, which will act as additional stiffeners and as a surface for attaching the hinges.
- We fasten the stationary middle part with nails or self-tapping screws. The caps of the fasteners need to be slightly recessed into the plywood and then putty in these places.
- Next, we fix the side bars, which will become the final element of the screen frame.
- We turn the screen over in order to install hinged hinges on the side bars. We make marks, retreating 100 mm from the bottom and top, after which we drill holes with a drill of 2-2.5 mm.
- We mount the legs on the lower block. They must be adjustable.
- We mark and fix the handles. You can use furniture fittings, but options that can be recessed into the panel are better suited. You will not touch such handles, they cannot be damaged.
- We treat the surface with moisture-resistant varnish. This will protect the wood from moisture and direct splashes. Alternatively, you can paint the screen or cover it with self-adhesive film.
Expert opinion
Roman Vasiliev
Builder, repairman
Rout the edges of the plywood using a hand router, multi-cut files, or sandpaper. This will make the doors look much neater!
Made from plastic panels
One of the most affordable and comfortable in terms of complexity of execution is a screen made of plastic lining. The panels are attached to a wooden frame, to which adjustable legs are attached. You can limit yourself to installing lamellas in guides. But such a structure will not have sufficient rigidity, and if desired, it will be easy to move it with your foot, especially on a tiled floor.
Let's look at how to make your own screen from PVC panels. To add rigidity, use special guides and clips with which the lining will be attached. The guides must be attached to the wall. You will also need an L-bar. Install it along the top and bottom of the formed screen.
Attaching PVC panels to the guides and creating a structural frame from the starting strip.
To create a frameless plastic screen, use:
- PVC panels of the desired color and width. You can find out how many strips you will need only after measuring the installation site;
- 2 guides – equal in length to the future screen;
- clips for fixing lamellas;
- starting bar for all sides of the screen;
- glue “liquid nails”;
- tape measure, scissors, jigsaw for cutting plastic.
We make a screen from plastic panels
Progress:
- Taking screen sizes.
- We assemble the panels on guides into a single whole.
- We distribute the glue pointwise along the line and along the front side onto the top starting strip.
- We put the starting panels on the finished screen - side and horizontal.
- We install the assembled structure, gluing it from below to the drawn line, then press it to the front inner part of the side of the bowl.
From polystyrene plates
Surprisingly light and comfortable, but at the same time very durable material. Sold in the form of slabs of various sizes and thicknesses. The surface is covered with a mesh and treated with an adhesive composition, which ensures reliable adhesion to the cladding. Makes it possible to assemble screens of any arbitrary shape.
The manufacturing technology is as follows:
- we take measurements;
- cut out the slab of the required size using a hacksaw or knife;
- we coat the places of future joints with walls, floors and tiles with tile adhesive;
- We apply the slab to the floor and walls, and then level it. Screw in a few screws and use them as handles;
- Apply glue to all places where the slab meets the floor and walls, and after drying, proceed to covering the slab.
Made of brick
The base of the screen can be brickwork.
To build the wall you will need:
- bricks;
- cement mortar - to prepare it you need to mix cement with sand 1:6;
- Master OK;
- container for mixing the solution;
- drill with a construction mixer attachment.
Progress:
In the process of creating a partition, bricks must be placed on edge. Most often, masonry is done in 1/2 or 1/4 bricks. This will create a narrow wall that is strong enough to support the cladding without placing excessive stress on the floor. When forming the first row, we remove 2-3 bricks from the center of the structure to leave room for the future recess for the feet. Subsequently, you will also need to leave an opening for installing an inspection window.
After the solution has hardened, plaster the surface and level it. After this, stop work for 2-3 days - this will be enough for the masonry to shrink and the solution to finally set. If you do not take this pause, the tile may fall off.
Brick foundations require virtually no repairs and are not deformed. They retain their strength for many decades. But such a screen also has significant drawbacks - it blocks access to the pipes and makes it impossible to use the space under the bathroom.
Nuances of gluing tiles
The final cladding of the partition formed under the bathtub is done using tile adhesive or liquid nails. The first option is applied to the back side of the tile with a notched trowel, and the second option is applied from a tube at several points along the perimeter and in its center.
The first tile of the tile is glued in one of the upper corners and leveled using a level, the rest will be placed next to it
To prevent the tiles from floating to the sides, plastic crosses are inserted between them, allowing you to accurately control the size of the seams between the tiles. The latter, after completion of the cladding, are subject to mandatory grouting. Otherwise, water will get under the ceramic through them, which will sooner or later lead to its falling off.
Drywall
An alternative to brickwork is gypsum board. The advantage of this base is low cost, ease of work, lighter weight of materials and the ability to create any shape. The last factor is especially relevant in cases where a shaped acrylic bathtub is tiled.
Drywall is used exclusively for moisture-resistant types. The sheets are attached by screwing to a metal frame made of profiles installed around the perimeter of the screen. Since the weight of the tile is considerable, the structure is strengthened with the help of additional transverse slats.
The distance at which the profiles are installed coincides with the level of the bathtub wall, that is, the top bar comes close to the bowl under the sides.
The tiles are laid only on moisture-resistant gypsum plasterboard
Related article: Correct connection of a heated towel rail
After installing the frame, sheets of plasterboard are screwed on. It is also recommended to treat them with an antiseptic and prime them. Additionally, attach a sickle mesh.
Construction of a removable screen
In addition to rigidly fixed structures, to decorate the space under the bathroom, make a removable panel.
To create a mobile screen you will need:
- OSB;
- tile;
- furniture legs adjustable in height;
- slats 20x40 mm to create a frame for supports.
First, a piece is cut from the OSB sheet with such dimensions as to completely cover the side of the bathtub. Only they make it slightly smaller in height, about five centimeters. The feet should fit freely into this gap from below. After cutting, the frame is stuffed onto the OSB, and the legs are attached to it.
The base of the removable screen for a bathtub with tiled cladding is made of oriented strand boards, which, due to their internal structure, are durable and resistant to moisture
Tile tiles are glued onto a wood base using standard technology using sealants and grout mixtures. After grouting the seams, the resulting screen can be placed against the bathtub and the legs can be adjusted so that it stands level in its place.
By twisting the supports, its upper edge must be pressed against the side of the bath from below, then this decorative panel will stand motionless.
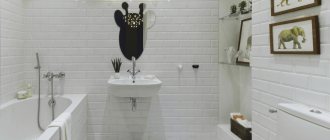
Features of using tiles
Tiles are most often placed on the floor and walls of the bathroom to protect the concrete base from water damage or mildew. This coating creates a durable waterproofing layer that is highly resistant to aggressive chemicals.
In construction stores you can find tiles of any color, size and surface texture, from inexpensive collections made in Belarus to products from Italian craftsmen. To finish the bathroom you will need tiles for the floor, walls, as well as, at the request of the customer, decor and borders to create more complex compositions. Laying tiles has the following features:
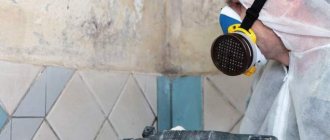
- Before laying tiles on the floor or walls of the bathroom, the surface to be tiled is carefully prepared. The old, deteriorating coating is removed down to the concrete base and then leveled. Since the seams between the tiles do not hide, but emphasize the curvature of the walls.
- Laying ceramic tiles in the bathroom should not be started from top to bottom, as in other rooms, but vice versa. Professional craftsmen first tile the floor of the room, and only then the walls.
Laying tiles on the floor
Note! When planning a bathroom renovation, first calculate the required number of tiles. To do this, measure the room, calculate the surface area, and then divide it by the area of one tile. Please note that often the size of the tiles that are laid on the floor differs from those on the walls. To ensure that there is enough material for trimming and fitting according to the design, 10-15% is added to the amount obtained in the calculation.
Bathtub cladding of complex shapes
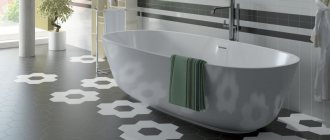
If the bathhouse has curved contours, then a regular screen with tiles cannot be installed on it. The plasterboard base can be made of any shape. But then it’s unlikely to be possible to glue large ceramic tiles to it. Ceramics does not bend, it can only be broken.
However, it is quite possible to cover a screen with a complex configuration with arched outlines using mosaics. Its small pieces are ideal for this purpose. It is not afraid of moisture and will last in the bathroom for many years.
Mosaics can be used to cover a bathtub with any contours; it allows you to easily follow all its curves and bulges
For cladding a bathhouse or jacuzzi, both mosaics in the form of individual pieces and ready-made modules on a flexible mesh are suitable. The first method is labor-intensive and long. It is much easier to use modules with mosaic elements already pasted under a given pattern. With their help you can easily follow the contour of the bowl.
In addition to tiling, there are various options for decorating the space under the bathroom. One of the original methods is a mirror screen. Alternative methods for creating a screen and technologies for their implementation are described in this article.
Types of bathroom tiles
Today, building materials stores can please their customers with a huge assortment of models, varying in color, shape, density and module size.
The design of finishing a bathroom with tiles depends on the chosen interior style and the wishes of the apartment owner.