A bathtub sparkling with pristine cleanliness is the pride of any housewife. But, unfortunately, over time, the enamel coating deteriorates: cracks and chips appear, and rusty smudges form. To restore the respectable appearance of your plumbing fixtures, lost during long-term use, you can organize the restoration of the bathtub enamel, on your own, without the involvement of specialists. For work, special coloring compounds or liquid acrylic are used. If you don’t want to work with caustic substances, you can solve the problem by installing an acrylic liner. Each method has its own advantages and disadvantages - they should be taken into account when starting to work at home.
Where does the damage come from and is it necessary to deal with it: repairing chips in the bathtub
Whatever one may say, more often than not, people ask the question of how to repair a chip on an enameled, cast-iron, or other metal bathtub. All this is because acrylic bathtubs do not have an iron structure inside and even if they are damaged, there is simply nothing for rust and corrosion to corrode. Moreover, it is worth understanding that the price of a metal bathtub will be much less than one made from other materials, and the tendency to damage the enamel is only a small return for excessive savings. True, if you use the bathtub carefully, clean it exclusively with suitable products, and also avoid shocks and other strong mechanical influences, then it can serve faithfully for many years, and without any problems.
Photo from the site: dizain-vannoy.ru
Most often, damage appears immediately, even during the replacement of the bathtub, or renovation of the bathroom itself. After all, it’s so easy to drop pliers on a brand new, snow-white surface, and then, lo and behold, even a hammer. To prevent this, you just need to cover your bathroom with bubble wrap, thick cardboard, foam rubber, old blankets, in general, you can use anything, and you can secure the improvised packaging with regular adhesive tape.
pros
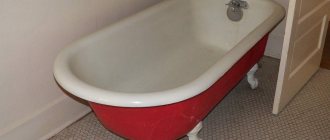
Cast iron has been used to make bathtubs for quite some time. The material is valued for its positive properties. The advantages include:
- Strength, durability, resistance to sudden temperature changes. The cast iron product retains its temperature for a long time, so the water cools slowly, and there is no need to add hot water.
- Maintains shape and does not sag. This is due to the rigidity of the metal and thick walls. Since the bathtubs are quite heavy, they do not need additional supports, since they are securely fastened to the legs. In addition, subsidence and changes in position are eliminated.
- Anti-corrosion coating of the product - so it retains its appearance for a long time. The enamel lays down in an even, smooth layer, shines for a long time and does not scratch.
- Easy to maintain and clean. Since the enamel lays down smoothly and evenly, dirt hardly accumulates on it. The coating is resistant to damage - it can be cleaned with almost all detergents.
- Excellent sound insulation. There is virtually no noise when bathing in the shower or when drawing water.
- Unlimited service life. If you use your bathtub correctly, it will last much longer than other bathtubs.
- The presence of hydromassage, handles and other additions. But they are only available in modern models.
Many people have cast iron bathtubs at home, and most people like them for their high quality. And if damage appears on the product, you can fix it yourself.
Ugly chip on the bathtub: how to repair it and whether you need to bother at all
Some people believe that any damage to a bathroom, especially a metal one, does not require any repair at all and is not worth bothering with. Of course, you will need to spend your own precious time on work, which modern, overly busy people are constantly running out of, so why create unnecessary difficulties for yourself. In addition, making the chip completely invisible, that is, it will hardly be possible to completely restore the surface.
Worth considering
There is a myth among people that repaired chips in enamel and cast iron bathtubs are susceptible to corrosion much more severely than if the damaged area is left untouched. This is not true, and if everything is done correctly, the rust will disappear for a long time, and your bathroom will last for a very, very long time.
First of all, you need to fully understand that it will not be possible to do exactly the same as it was before, even before the damage, primarily because industrial enamel is baked in an oven at extremely high temperatures. You definitely won’t be able to repeat a similar process at home, and even if you start heating the chip with a household blowtorch, you can only make it worse. However, if nothing is done, then it will definitely not get any better, and the damage will grow by leaps and bounds, and soon the bathroom will be completely out of order and then you will no longer need to think and worry about how to repair the chipped enamel on the bathtub, and it will be enough to simply throw it away and buy a new one.
Painting
So, how to repair a cast iron bathtub? For this, the painting method is used. If there are a lot of chips and cracks on the surface, and there is also rusty, limescale deposits, repairs with a “patch” will not work. To restore the appearance of a heavily damaged product, paint is used. Before applying dyes, the bowl is cleaned of dirt, the enamel coating is removed, degreased, and then dried. The following means are used for processing:
- Liquid acrylic. The product includes 2 components - liquid acrylic and hardener. It is applied to the inside of the bowl using a pourer or a roller. Coating a cast iron bathtub with acrylic is a simple process. The coloring composition dries within 3-5 days, during which it is forbidden to wet the surface with water or touch it. The layer will be even, smooth, glossy. This coating lasts at least 8-15 years without turning yellow, since the thickness is at least 6 mm. The acrylic coating of the cast iron bathtub is of high quality and has a neat appearance.
- Epoxy enamel. It contains a base, a hardener and a plasticizer. The mixture is thick, viscous, and sets quickly, so it must be processed quickly and carefully. The enamel should be applied with a soft roller, natural brush or aerosol. Polymerization is carried out within 7 days. The bath should not be used during this time. The coating will be thin, hard, and fragile, so it will last no more than 5 years.
To repair a cast-iron bathtub, it is advisable to choose liquid acrylic, since it is much easier and smoother to apply compared to epoxy enamel. The disadvantage of this method is the high price and long drying time. Repairing a cast iron bathtub with acrylic is one of the most popular methods.
From simple to complex: how to repair chipped enamel on a bathtub without much effort, skill or knowledge
It is clear that you always need to start doing your job, starting with the simplest solutions, and only if they do not help, can you move on to heavy artillery, that is, look for ways of greater resistance. So, while we live in Russia, problems will definitely not arise, since the people here are inventive and smart. That is why the domestic industry, adapting to the indefatigable immunity to all sorts of craftsmen to call for money, produces a wide variety of kits and kits for home craftsmen. Moreover, kits for emergency “treatment” of a bath are also no exception.
Photo from the site: krasimvannu.ru
The most popular kit on the market, which contains everything needed to restore a chip in a bathroom, is the Cramer brand, well known to all true professionals. That is, if you are tormented and tormented by the question of how to repair a chipped enamel in the bathroom, then you should definitely purchase such a set and not fool yourself with unnecessary worries.
Keramik-Email-Acryl Reparatur-Set for everyone whose hands grow from the right place
So, first, it’s worth understanding what is included in the notorious set, and what you need to know when purchasing this particular product.
- Putty mixture, which is offered in two containers - a plastic tube (tube), as well as a tin can, like for paint.
- A plastic spatula, which you will use to mix the putty solution, as well as seal the chip itself.
- Paper with an abrasive surface, or in common parlance simply sandpaper. Moreover, the kit comes with both metal and acrylic bathtubs. In the first version it is brown, and in the second it is grayish.
- The final step is spray paint in a can, which is also suitable for metal enameled surfaces and for acrylic, that is, in fact, plastic bathtubs.
A chip in the bathroom down to the metal: how to repair it, simple instructions for using the kit
It is worth considering that other manufacturers also offer similar kits for emergency bathroom repairs in an assortment, and what is described in our article is not a panacea at all. You yourself can choose what to give preference to, so you should read the instructions, composition and other details very carefully, even if you are not very strong in this.
Photo from the site: sandizain.ru
- First of all, you need to clean and degrease the chip, especially if we are talking about how to repair a chip on a cast iron bathtub. First you need to thoroughly remove all traces of dirt in the chip, and not miss the moment of removing the rust. The more efficiently you do the preparatory work, the more reliable the final result of your work will be. It would be optimal to also purchase an American corrosion remover called WD-40. It acts almost suddenly and with extremely high quality. If you don’t have something like this at hand, you can use simple Domestos, especially when it comes to repairing chips on an acrylic bathtub.
- Next, you will need ordinary soda, which can be used to thoroughly degrease the surface, after which you will need to wipe it dry or wait until it dries itself. Ordinary acetone also works well to get rid of traces of grease, especially if emergency repairs are required on an acrylic bathtub, the crack of which has already become clogged with dirt.
- The proportions for mixing the putty base (tin can), as well as the hardener (plastic tube), are usually indicated on the packages themselves. But most often they leave it at thirty to one. You need to mix extremely carefully, and it will be a real crime to overdo it with the hardener, so carefully monitor the proportions.
- Apply the solution to the previously prepared chip and level it with a plastic spatula, which is usually included in the kit.
- You will have to wait from half an hour to several hours; in our version, even thirty minutes will be enough, and smooth the unsightly surface with sandpaper. You will need to work as a grinder until the transition between your improvised enamel and the original coating is completely felt under your fingers.
- All that remains is to paint the chipped area with spray paint and you're done. However, here you need to be extremely careful, do not rush to pour a lot of paint, but it is better to spray it gradually, in layers, until the differences are no longer noticeable.
Information for your information
When working with professional kits, you need to understand that you can touch the freshly painted area with your hand only four hours after the last manipulations. The enamel will completely harden only after forty-eight hours, but all instructions do not recommend using the bath for its intended purpose for four days.
Using acrylic
Acrylic processing is performed as follows:
- We need to prepare the bath.
- Then the acrylic is diluted using a hardener, as described in the instructions on the package.
- You should remove the siphon from the bath and place a container there - excess acrylic is poured into it, which will then be used.
- The top edge of the product should be watered with acrylic. After the jet reaches the middle of the wall, you need to move the jar with acrylic around the perimeter until the entire circle has been passed.
The bathtub must be watered around the perimeter. It is important that the stream hits the middle of the walls. You need to work continuously, otherwise the acrylic may set in some places and there will be streaks. Drying takes 1-4 days. Typically, instructions for applying paints are indicated on the packaging. Although such a procedure is always carried out according to the same scheme, each manufacturer may have some nuances that should be taken into account when working.
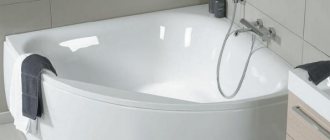
A chip appeared on an acrylic bathtub: what to do with porcelain patches
Many folk craftsmen have long developed many home-grown methods for dealing with chips in bathrooms, and what we will discuss now can be used for both ceramic and acrylic bathrooms. Even if you have a large crack in your acrylic bathtub, real masters will tell you exactly what to do. This old-fashioned method is incredibly simple, and even a child can cope with the task.
Crack in an acrylic bathtub: how to seal it, how and why
Photo from the site: mywishlist.ru
First of all, you need to thoroughly clean the area of the crack or chip using sandpaper, and then degrease it with acetone or even gasoline. It’s also worth getting a few pieces of porcelain that exactly match the color of your bathroom; this will only be important for the aesthetic side of the matter, so you can use any if you need it urgently, but there is no suitable color.
The broken porcelain shards need to be thoroughly crushed in a mortar, you can even use a kitchen mortar, it won’t hurt. The result should be a white, fine and homogeneous powder. The area of the chip or crack should be carefully lubricated with epoxy glue, and the resulting porcelain powder should be poured onto its surface immediately before it hardens. All that remains is to “trample” and smooth the solution with a spatula and wait for it to dry. It is not recommended to rub the surface with sandpaper, so it is worth making the surface of the patch as smooth as possible right away. However, you must understand that it is better to use the first option we proposed than to repair a crack in an acrylic bathtub, because sooner or later the epoxy will still fall behind and everything will have to be done again.
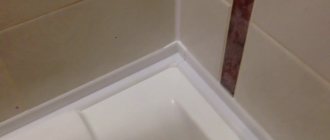
Crack on aryl liner
If the liner is cracked, then this is a reason to think about dismantling it and installing either a new liner, or filling it with self-leveling acrylic or enameling. This is due to the fact that when the liner cracks, water inevitably gets into the air bubble and foam between the liner and the bathtub itself. After some time, the leaking water begins to extinguish, producing an unpleasant odor. Therefore, do not put off the problem of a cracked liner, but contact us, we will solve this problem! :)
Cozy and warm acrylic bath: repairing cracks, videos and comments
If none of what is proposed suits you, and the question of how to repair a chip in an acrylic bathtub still remains relevant, you should devote even more time to the issue. There are plenty of unreliable methods and methods, but you should always be prepared for the fact that soon everything will have to be redone. But you can always pull out something valuable from piles of slag, so let’s look at another quite interesting, and even more reliable method, unlike the previous one.
How to seal a crack in an acrylic bathtub with dry whitewash
As is clear from the name of the subsection, the work will require dry white paint, as well as BF-2 glue, which can be easily purchased at any store. Moreover, it is worth knowing that this is a rather labor-intensive method, but it is definitely worth it.
Photo from the site: sandizain.ru
- Without a doubt, any work must begin with cleaning and degreasing areas of chips or cracks.
- Apply a fairly thin layer of BF-2 glue to the surface of the crack or chip.
- The sticky and liquid surface of the glue should immediately be sprinkled with whitewash and carefully smoothed with a spatula or just a brush.
- The glue sets in about two hours, and when this happens, you need to repeat the entire procedure until the surface can be leveled.
It is clear that after applying each layer of glue and whitewash you will need to wait two hours. Otherwise, the desired effect will not be obtained. Among other things, the bathroom will be usable no earlier than after four days, and this must be taken into account. However, those who want to achieve results will definitely achieve it, so try and experiment, and you will always have time to throw out the bathtub.
Care
In order for the bathtub to remain like new for a long time, it is necessary to properly care for it. To do this, use these tips:
- After use, the product should be washed with a sponge and non-abrasive detergent.
- Many people think that you need to rinse with running water. This needs to be done, but you also need to wipe it dry.
Fresh stains can be easily removed with regular soap foam. Old stains can be removed using baking soda, vinegar, bleach or laundry soap. The listed products are ideal for a modern bath that has durable and non-porous enamel.
Do not use abrasives or compounds containing concentrated acids. Do not use metal brushes or blades. Heavy dirt, limescale, and rust can be removed with special products that are sold in hardware stores.
Advantages and disadvantages of self-leveling coating
The acrylic coating is highly durable and therefore can protect the bathtub from external mechanical influences and significantly increase its service life. The method of applying it is quite simple and even if you have no experience in carrying out such work, difficulties will not arise. The coating is smooth and quite thick, thanks to its ability to fill unevenness and minor surface defects. There are no pungent odors during application and therefore no respiratory protection is required. However, the drying time can be at least three days. Restoring an old cast iron bathtub in this way will be very expensive.
Polishing instructions
Stains from an enamel bathtub will disappear if you rub it with toothpaste.
- The bathtub should be cleaned with a sponge soaked in water and a small amount of detergent. It is not recommended to use products with abrasive components, formaldehyde (formic acid), ammonia, or washing powder. Such detergents may cause the surface to become dull.
- The detergent is evenly applied to the surface of the bath for 10 minutes. After this time, the surface is wiped with a damp sponge and rinsed with water. If the contamination is quite strong, the procedure will have to be repeated.
- Wax polish is applied to the walls and bottom of the bathtub and gently rubbed with a soft cloth.
- Stubborn stains can be removed from the enamel using detergents, toothpaste or silver polishing. Apply a small amount of any of these products to a soft cloth and rub the stain.
- Scale stains can be removed with lemon juice or vinegar.
- The aerosol is sprayed onto chrome parts and washed off with a stream of water, then wiped dry.
- To remove small scratches from the enamel, the acrylic bath is washed, the scratch is treated with sandpaper, then an abrasive polish is used, and lastly, a wax polish.
Hydromassage bath
To keep your hot tub clean, it is recommended to do a deep cleaning once a week.
To polish a hot tub, you need:
- Fill the bathtub with warm water with detergent dissolved in it. Run the hydromassage system for 5 minutes. After turning off, leave the water in the bowl for another 10 minutes. After that, drain the water.
- Fill the bowl with clean water again and turn on the hydromassage for 5 minutes to rinse the bath. Drain the water and continue polishing in the previously described order.
The entire work of updating the enamel will take about 3 hours, and the result will last for 10 years. During the polishing process, a layer of acrylic about 0.2 mm thick is removed from the surface. This will have virtually no effect on strength, since the bathtub is 7 mm thick.
Nuances
If you are enameling a bathtub, it is advisable to apply 2 layers with a brush or roller, and the final layer with a spray gun. Then the coating will be smooth, and the quality will remain for 5 years. When using toxic or flammable substances, rubber gloves and a respiratory bandage must be used. Even if your bathroom is renovated, you should take proper care of it. Then the product can last for many years. Therefore, the next repair will be carried out not because the plumbing is unsuitable, but because of the desire to update the situation.