The global Internet contains a huge number of articles, all kinds of answers to your questions. There are a huge number of answers on the topic of how to install a bathtub. Unfortunately, most articles provide only a general idea of bathtub installation. Our experienced repair instructor will tell you how to install a bathtub correctly, paying attention to the important points. After which you can install the bathtub without errors.
There are several ways to install a bathtub. They are all different, but the basic installation principles are the same. The bathtub is installed on bricks, hung on corners screwed to the wall, and of course on its original legs.
Install the legs
The first step is to attach the legs, which are usually included in the kit. To do this, turn the bathtub upside down without removing the packaging from the sides, and assemble the brackets according to the instructions. Depending on the material of the bathtub, the legs and their fastenings differ.
Acrylic bath
YouTube channel Cersanit Romania
These bathtubs have a special reinforcement insert made of plywood in the lower part, onto which the mounting plates are attached with screws, and the threaded rods of the legs are screwed to them.
You need to mark the mounting points in accordance with the instructions, then drill holes for the screws to the specified depth and tighten them with a screwdriver. To avoid making holes in the bathtub, use only the supplied self-tapping screws that have the calculated length.
Steel bath
YouTube channel “Alexander Cherepitsa”
Steel analogues are equipped with a pair of support-lodgments, which are glued with double-sided tape and pressed down with the weight of the bathtub. Another fastening option is four separate legs, fixed with special hooks on the bottom.
YouTube channel “Ruslan Viktorovich”
In the first case, it is necessary to degrease the surface with white spirit or another solvent and stick the supports. In the second, put the legs on the hooks and tighten them together with studs and nuts.
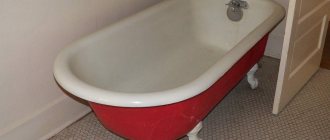
Cast iron bath
YouTube channel Craftstroy
Cast iron bowls also have four separate legs, which are attached to protrusions specially cast on the bottom with holes for bolts.
To install, you need to align the legs with the protrusions, secure them with bolts and nuts and tighten them with a wrench.
Sealing of connections and joints
The next step in sanitary work will be sealing the joints between the walls and the bathroom. When moisture gets into the cracks, bacteria, mold or mildew can develop. If the cracks are narrow, no more than one and a half centimeters wide, you can use silicone sealant: just put on gloves and walk the material along all the joints. After this, use a wet finger or a soft, non-sharp spatula to remove excess. Sealant can be transparent, white or colored. If the gaps are large and wide, it is necessary to use sealing tape, ceramic or plastic corner. Before sealing, be sure to clean the surface from construction debris and dust, dry well and degrease the surface of the joints.
Many people think that grounding is a waste of time. The bathtub is made from an alloy of steel and carbon. Therefore, it is necessary to equalize the potential using a grounding conductor. Some bowls have special plates for securing the conductor with a small bolt. When installing an old cast-iron bathtub, in which grounding is not provided, it is easy to do it yourself. To do this, use a wire with a copper core with a cross-section of 2.5 sq. mm. One end of it is stripped and clamped with a leg nut, and the other is connected to the grounding circuits of the room.
Assemble drain fittings
The siphon and overflow system have the same design, regardless of the type of bathtub. As a rule, fittings are supplied with it. Otherwise, you need to immediately purchase the missing product in the store.
YouTube channel "Alexander Cherepitsa"
Study the assembly diagram specified in the instructions. Put the pipes in place and tighten the union nuts, having previously installed O-rings on all connections. Next, a rubber gasket is put on the siphon and the entire structure is pressed to the drain hole with a screw through the protective grill.
YouTube channel “Ruslan Viktorovich”
In the same way, the upper pipe is attached to the overflow hole on the bathtub. If the siphon has a drain valve rather than a regular plug on a chain, then a rotary handle is installed on the overflow grid according to the assembly instructions.
Step-by-step installation of a cast iron bathtub
Having decided to install it yourself, you need to consider each of the stages of this work in more detail.
Leveling the floor in the bathroom
Before installing a cast-iron bathtub with your own hands, you must first prepare the room itself and, in particular, the floor on which it will subsequently be located. Thanks to this, it will be possible to protect the product from possible damage and chips during repair work.
Depending on the shape of the bath, its further location and the overall interior of the room, it is advisable to level the floor and walls. If you plan to lay tiles on them, then the elements should be laid before this work is carried out. In some cases, the tiles are laid up to the height of the bathtub, which makes it possible to increase the strength of fixation of the product to adjacent wall surfaces and ensure its higher stability. After laying the tiles in the required areas, you can begin installing the plumbing fixtures.
Connecting bath components
All actions must be carried out with extreme caution to avoid scratches on the surface of the tiles and the top enamel coating of the bathroom. During the work carried out, you can resort to the use of soft cloth, which will allow you to prevent accidental damage to the floor covering and the product itself when connecting components and turning the product from one side to the other.
Initially, you need to carefully turn the cast-iron bathtub on its side, thanks to which you can comfortably connect the siphon and other components intended for draining water. If it is not included in the basic configuration, then you need to purchase it separately.
Then you should assemble the siphon, which is fixed to the hole located at the bottom of the bathroom. Folding it is quite easy.
It is important to properly install the rubber gaskets and use seals before tightening the nuts. Its installation to the product must be done as follows:
- The folded siphon should be fixed to the hole located at the bottom of the bathtub, which serves to drain the water.
- Next you need to install the optimal size rubber gasket.
- Finally, you need to screw the siphon from the outside and its mesh from the inside.
Then you need to assemble the top overflow, which acts as a hole, which prevents the product from overflowing with water, located on the wall of the bathtub. It allows you to drain excess liquid. To assemble it correctly, you need to connect the overflow outlet.
The corresponding element should be fixed to the hole on the side, having previously placed a seal between it and the wall of the bathtub. The outlet is increased on the water supply side.
This element is fixed to the inside of the product using a special bolt that passes through the overflow hole. By means of it, the lid with holes for water is simultaneously secured to the bathtub from the inside.
It is only necessary to combine the current overflow with the main siphon, which can be done using a special pipe, which is supplied in the kit. It can be corrugated, consisting of plastic or another variety.
Next, you need to fix the upper overflow outlet to the pipe, which then needs to be connected to the siphon, with a special nut, making sure to place the rubber seal supplied in the kit. This will eliminate the possibility of future leaks. In addition, there is a hole on the other edge of the siphon to which you need to screw the outlet pipe to enter the sewer pipe.
If the siphon and sewer pipe have different diameters, then you can use a special cuff. It is made in the shape of a cone. After treating with sealing grease, it should be put on the siphon pipe, which in most cases has a diameter of 40 mm, and installed in a 50 mm socket of the sewer pipeline.
Basically, with such a connection, leaks do not occur, but if they do form, then it is necessary to fill the assembly with sanitary sealant.
The siphon and overflow for the bathtub can be made of plastic, brass or aluminum alloy. In any case, it is necessary to carefully connect the elements to each other, using gaskets and seals. In addition, the nuts must not be overtightened, as this may cause damage to some of the components.
The floor siphon for the bathtub can be with or without inspection. The first option is much more convenient, since if a blockage occurs, you can unscrew the lid and remove all accumulated debris.
The height of the siphon is generally small, which is why it is convenient to install it under the bottom, but one key rule should be taken into account - the distance from the bottom of the product to the floor covering should be at least 14.5 cm.
If the mixer will be located on the bathroom, then you can now begin installation, and then use flexible hoses to connect it to the water outlets.
Important! You need to remember about static electricity, which can harm your health. It is formed when a stream of water collides with the edge of the bathtub. To avoid electric shock, it is necessary to install an electrical potential equalizer, which is in the form of a metal wire or plastic, which is supplied in the kit.
If it is not available, you can resort to using ordinary steel wire, the diameter of which is at least 5 mm. One of its edges must be connected to the second overflow, and the other must be connected to a water pipe or grounded.
Note! When grounding the bathtub, all connection points must be fully cleaned to a shine and insulated using window putty or tape.
Installing legs and leveling the bathtub
Basically, height-adjustable elements are installed on cast iron bathtubs. It is only important to comply with a certain norm:
- The distance from the top side of the bathtub to the floor covering should be at least 0.6 m.
- If the product will be used by a small child or a disabled person, the height should be at least 50 cm.
Note! When installing a bathtub, the height may be higher than normal, but it must not be less than the specified values.
Installing the legs is much more comfortable when the product is located in a lying position. After carefully screwing them using special bolts and nuts that are supplied with the bathtub to the existing mounting points, you can turn it over.
Before installing the legs, you need to consider what flooring they will be located on. If there is a possibility of them scratching the tiles, then you should put special pads made of plastic on them.
In some cases, in buildings with weak floors, the legs of a cast-iron bathtub are placed on wood boards, which makes it possible to achieve uniform distribution of the load over the floor surface. This solution is not optimal for rooms in which the product is installed on open-type elements with no screen.
A bathtub with screwed supports can be turned over and mounted on legs, during which extreme attention must be paid to the stability of the structure. To do this, use a building level to align the upper edges of the bathtub exactly in a horizontal position.
Note! The installed bathtub should have a slight slope towards the drain hole. In accordance with the standards, this indicator should reach 2 cm per 1 m of product length.
Next, you need to fix the bathtub in its intended place, having first made sure that there are no leaks at the connection points and that water has completely drained into the drain hole from the filled container. To do this, you need to place paper or a dry rag under it, fill the product with liquid and perform an inspection. If there is even a small leak, a characteristic wet spot will appear on the underlying material.
In addition to the legs, which are supplied with the product or purchased separately, there may be a need to fix it with a strong support. In such a situation, you should install the bathtub on bricks.
Mounting the bowl and sealing the joints
After installing all the components, sealing the components and the stable horizontal position of the bathtub on legs, you can begin the last stage, which consists of installing the container and sealing all seams and joints, which is important for products located close to the walls.
If the bathing vessel stands at some distance from them on open legs, then you only need to tightly fasten the supports with waterproof polymer glue. Thanks to it, the stability of the bath is ensured and the possibility of changing its position during the washing process is eliminated.
When laying tiles up to the height of the product in the wall, you need to make a recess in the form of a trench into which you should insert its side. It is important that the edge of the bathtub does not go deep into the wall, since in this case it will be less convenient to use and the appearance will also deteriorate.
In addition, you should not immediately remove all excess, carefully wiping the surface of the product. It is recommended to first protect the enamel of the bathroom by wrapping it with film.
All small joints and gaps should be sealed with cement or foam, and silicone sealant should be applied on top.
In some cases, a special corner made of plastic is used as finishing, which is easy to glue. It has a good appearance, but quickly loses its attractiveness and ceases to provide tightness against water penetration. A more suitable option is to create a tight junction of the tiles on top using grouting material.
After sealing all the joints, you can install the screen and tiling.
During this work, it is important to consider free access to the inspection of the siphon, since during the period of operation there is a possibility of leaks and blockages in the pipes. To do this, in most situations, a free space is first left for the inspection hatch.
Try on and display the bathtub
YouTube channel Cersanit Romania
After installing the drain fittings, the bathtub is ready for installation. But before you finally fix it, you need to level the product and mark the border of the side on the wall for subsequent fastening.
To do this, move the bathtub into its place and, adjusting the height of the legs, check the horizontal position using a level. There is no need to make any slopes towards the drain: they are already provided by the manufacturer.
The height of the bathtub is selected according to location. As a rule, the distance from the top of the side to the finished floor is approximately 60 cm. The main thing is that the siphon is 3–5 cm higher than the sewer socket, otherwise the drain will quickly become clogged.
YouTube channel Cersanit Romania
After preliminary alignment along the sides of the wall, you need to draw a line with a pencil. This mark is useful for mounting wall brackets and stops.
Mount the wall mount
Massive cast iron bathtubs stand confidently on legs and do not require additional fixation. But light steel and especially acrylic ones are also attached to the wall for reliability.
Acrylic and steel bathtubs
YouTube channel Cersanit Romania
Such bathtubs are most often fixed with brackets in the form of hooks on which the bowl is hung. Homemade metal profile stops for drywall are also used, which perform the same function.
YouTube channel "Alexander Cherepitsa"
In both cases, the fastenings are installed on dowels, for which holes are drilled. Using the line of the top of the bathtub, mark the holes for the stops so that they are strictly under the edge of the sides and evenly distribute the load.
Cast iron bath
Products made of cast iron weigh from 80 to 200 kg, so they stand reliably and do not require additional fastening.
Choosing a location for installation
First you need to allocate a place for the bath. If there is an old one there, it needs to be dismantled. Before dismantling the bathtub, you need to make sure the quality of the supplied communications. Pipes can burst at any moment, then water will flood the floor and/or the neighbors below. Dismantling is best done with an assistant. In this case, it is necessary to follow safety rules: work in closed shoes and trousers made of thick fabric.
The choice of location for installing the bathtub is determined taking into account its type, shape, and size.
Types of bathtubs according to installation method:
- wall;
- free-standing;
- built-in
The first type is installed in the corner of the room against the wall. When an error is made in the calculations and the bathtub does not fit into a certain area of the room, the solution is to punch a groove (recess, groove) in the wall and insert the side of the bathtub into it.
If the model is freestanding, sometimes the drain hole may be right in the center. This must be taken into account when preparing the place. Communications are most often recessed into the floor so that they are not so noticeable.
To install a built-in cast iron bathtub in the floor, you need a specially made recess or podium. The solution to this issue must be sorted out during the design of the room. In private mansions, the bathtub is often located near a panoramic window.
Install mortgages
If the bathtub comes with a factory-installed screen, then the design already includes all the necessary fasteners. If not, you will have to install embedded parts into the front side, to which the screen frame is then attached.
YouTube channel “Ruslan Viktorovich”
To do this, you need to cut a piece of a wooden block and glue it to the inside of the side with silicone sealant or polyurethane foam. If the bowl is adjacent not to three walls, but to only two, another block should be secured to one of the free sides.
Some acrylic bathtubs already have ready-made embeds in the form of pieces of timber along the perimeter of the sides. If you see such pieces of wood, it means you can do without additional inserts.
How to bring a bathtub indoors
Only two people need to carry a cast iron bathtub. First, measure the door opening. If the font does not fit into it in width, then it is turned over so that the drain is located on the side. If it doesn’t work like this, you will need to disassemble the door frame. The floor in the room must be covered with soft material. This will protect the coating from scratches. The bathtub is placed in a vertical position, leaning against the wall. If possible, it is better to lay her on her side.
Make thermal insulation
Acrylic and cast iron bathtubs retain heat well and do not require a layer of thermal insulation. Steel ones, on the contrary, cool quickly and are also very noisy when drawing water. Therefore, before installation, polyurethane foam, spray insulation or automotive sound insulation is applied to the bottom and walls of such bathtubs.
YouTube channel “Ruslan Viktorovich”
To do this, turn the bathtub over, wipe it with a damp cloth and cover it with foam, moving like a snake from bottom to top. The average consumption per bowl is 2–3 cylinders. The foam hardening time is 3–4 hours. After this, you can install the bath.
YouTube channel Valiev Andrey DIY
Sometimes, before applying insulation, the bathtub is pre-pasted with automotive sound insulation. The surface is degreased with a solvent, then the protective film is removed from the adhesive base of the sheets. After heating with a hairdryer, the sound insulation is glued to the bottom and walls of the bathtub, and then rolled with a roller.
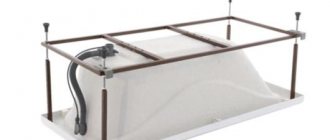
How to fix a bathtub if the walls have low load-bearing capacity
If attaching the bathtub to the walls is not an option (plasterboard or foam block, just an old crumbling wall), you can only create a reliable base on which it should be installed. One option is a pedestal, described above. Often it is supplemented with a frame that supports the front side. This is where the maximum load usually occurs, so a frame is assembled, which is attached to the floor with dowels, even if tiles are laid on the floor. When installed, one of the sides has a reliable support, which provides the necessary stability.
The retaining wall for the front side is made of timber, plasterboard profile . You can weld it from a profiled pipe, a corner with a small shelf.
If you cannot fix the bathtub to the walls, you need to make a reliable base for installation on the floor
The second option is a welded frame made of profiled pipe, which is welded to the size of the bathtub. It “sits” on the frame, and it, in turn, is rigidly attached to the floor using the same dowels. The gaps between the wall and the side can be closed in any available way, but this is not what will hold the bathtub, namely the frame.
For shock absorption and noise reduction, you can use rubber gaskets - made of hard rubber. Or boards like in the photo. They can also hold the container from the sides. This way of fastening the bathtub to the floor is reliable. She's definitely not going anywhere. Using the same principle, you can make a frame for a free-standing bathtub, and trim and decorate it to your liking.
Place the bathtub in place and secure it
YouTube channel “Pavel Sidorik”
Now you can finally install the bathtub in the prepared place and fix it using the selected fastener option, as well as seal the joint with the wall.
To do this, silicone sealant is applied to the wall just below the previously marked side line with a snake. Then the bathtub is carefully pushed into place. The sides adjacent to the walls are placed on installed brackets or profile stops. The bowl is pressed for a tight fit so that the sealant is slightly squeezed out.
Connect to the sewer
YouTube channel “Repair in detail”
After installing the bathtub, the siphon is connected to the sewer pipe using a corrugated pipe or a rigid pipe with corner fittings. The latter option is preferable: dirt accumulates much less on smooth pipes.
The rubber seals of the fittings are treated with a special lubricant or ordinary detergent, and then simply connected to each other. If there are doubts about their quality, the joints can be coated with silicone sealant to be sure. But keep in mind that disassembling them in case of replacement will not be easy.
Do not forget about the slope necessary for good drainage! The siphon should be 3–5 cm higher than the sewer entrance. With a smaller drop, the water will drain, but due to blockages the drain will have to be cleaned more often.
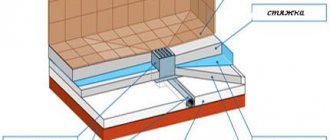
Make a support pillow
Cast iron bathtubs have sufficient rigidity, while lightweight acrylic and steel ones can bend slightly under heavy weight. And although manufacturers allow installation exclusively on legs, for greater reliability, many craftsmen install a support cushion made of brick or gas blocks under the base of such bowls.
YouTube channel "Pavel Sidorik"
To do this, take a full bath of water. Then the floor is slightly wetted, bricks or gas blocks are laid under the bottom. They are attached to the floor and to each other using cement mortar. There should be about 5–7 mm from the top of the pillow to the bathtub - this space is filled with polyurethane foam. If the layer is larger, then over time it may sag and the support will stop working.
Complete hardening of the polyurethane foam takes about a day. All this time, the bath must be filled with water, otherwise the foam, as it expands, may raise the bowl.
Common mistakes made during installation
They are often formed due to failure to perform certain actions properly or in the correct sequence, taking into account certain nuances:
- The bathtub is not leveled horizontally using a building level. In this case, water may flow poorly or slowly through the drain hole, and the product itself may be in an unstable position. If there is this error, you must immediately resort to correcting it, since a bathtub with incorrect installation cannot be used.
- Tightening the screws. As a result, chips or cracks may form. After a certain period of time, you will need to replace the bathtub with a new product.
- It is not recommended to place thick rubber pads under the legs. If they are present, the bathtub will spring back during washing and after a few months its edges will move away from the walls of the room. In addition, water will begin to penetrate through these gaps and flow behind the product itself. To eliminate such a defect, you will need to spend a significant amount of time and money, as well as make considerable efforts.
- Lack of grounding. When installing the electrical potential equalizer, it is necessary to ensure a tight fit to ensure reliable contact.
- Using a siphon without inspection or lack of access to it due to cost savings. If a blockage occurs or something breaks down, significant efforts will be required to eliminate the breakdown.
- Too deep insertion of the sides of the bathtub into the wall. Bathing in a product with such an installation is less convenient, and it also interferes with fixing shelves or installing a seat. This nuance must be taken into account when cutting it into the wall in order to avoid mistakes.
- Tile shelf on the foot side. If it is present, during operation, water will fall on it and flow onto the surface of the floor covering. If a larger slope is observed during installation, the placed shampoo bottles will slide off.
In addition, during the installation of the bathtub, other mistakes may be made that can cause damage to the appearance. For example, if silicone or cement that gets on the surface is not removed in advance, then in the future it may not be possible to remove it.
Having learned how to install a cast-iron bathtub with your own hands and following all the specified steps and nuances during its installation, you will be able to do everything correctly and avoid a number of possible mistakes.
Video:
Mount the screen
After the work is completed, the space under the bathroom is covered with a screen. This can be a ready-made complete decorative panel, a purchased universal screen, PVC panels, as well as tiles on plasterboard mounted on a frame.
YouTube channel Cersanit Romania
The factory screen is attached to the walls and sides with latches, like a bathtub: holes for fasteners are marked according to the diagram in the instructions and fixed with dowels. The screen is then placed on the hooks and held in place.
For homemade versions, a frame is pre-built from wooden beams or metal profiles. The upper part of the frame is attached to wooden embedded sides, the lower part is attached to dowels or silicone sealant to the floor. Next, racks are installed between them in increments of 40–50 cm.
YouTube channel "Alexander Cherepitsa"
When laying tiles, the frame is pre-sheathed with sheets of moisture-resistant plasterboard. A screen made of PVC panels and other linear materials is attached directly to the frame.
If the screen is not removable, it is necessary to install an inspection hatch in the siphon area for maintenance. It is important to position the window so that access to it is not blocked, for example, by a washbasin cabinet.
List of required tools
- Building level.
- Long ruler or rule.
- Marker or chalk.
- Hammer, screwdriver, wrenches.
- Roulette.
- Putty knife.
- Silicone sealant.
- Grinder with a diamond blade for concrete.
- Hacksaw for cutting sewer pipe.
The entire underside of the cast-iron bathtub is hidden behind a false panel made of bricks and lined with decorative ceramic tiles with a hatch for servicing the drain-overflow system
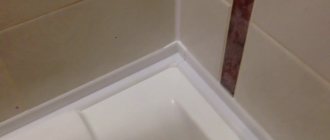
Design the side joint along the contour
YouTube channel Cersanit Romania
The final touch in installing the bathtub is sealing the joints using silicone sealant. It is better to choose a white composition to match the color of the bath. Transparent will not look very neat.
Apply a layer of sealant along the contour of the bathtub, and then lubricate the sides and wall with soapy water so that the silicone does not smear when leveling. The excess is removed with a special spatula or a plastic card with a cut corner.
9. Checking the quality of assembly and installing grounding
Now the test bath needs to be filled with water and then the plug removed. If water appears under the drain, you need to check and tighten each nut. Run the test again. If water appears again, change the siphon.
Many people think that grounding is a waste of time. The bathtub is made from an alloy of steel and carbon. Therefore, it is necessary to equalize the potential using a grounding conductor. Some bowls have special plates for securing the conductor with a small bolt. When installing an old cast-iron bathtub, in which grounding is not provided, it is easy to do it yourself. To do this, use a wire with a copper core with a cross-section of 2.5 sq. mm. One end of it is stripped and clamped with a leg nut, and the other is connected to the grounding circuits of the room.