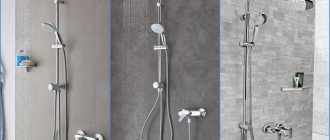
Installing a shower cabin in the bathroom made the room more comfortable, and hygiene procedures faster and more enjoyable. But bad luck, at a certain moment you notice that the cabin has leaked. We will tell you now what to do if the shower stall is leaking.
A leak in a shower stall is a very unpleasant problem , because you may not notice it right away, and moisture will accumulate for a long time in a certain part of the bathroom and harm not only the finishing material, but also your health. Yes, that’s right, because if the shower stall leaks and water accumulates under the tray, then mold can form, which has an adverse effect on humans.
This can only be avoided if the bathroom has high-quality air ventilation, hoods are installed, systematic cleaning, ventilation, and so on are carried out. Otherwise, a shower stall leak may not be detected for a long time, which is the most unpleasant side of the problem. But, if you see water leaks on the walls or floor, you can solve it simply.
Why is it leaking from the shower stall?
The reasons may vary. First of all, the cabin may leak due to improper installation of the pan
When installing, it is important that the edges of the pallet fit snugly against the wall. In addition, some types of pallets have their own characteristics that must be taken into account during installation.
Often the shower stall constantly leaks due to a broken faucet or damaged water supply hoses. If this is the problem, then to eliminate the leak, the failed elements should be replaced.
However, most often shower stall leaks occur due to insufficient sealing of the seams. Even at the installation stage, the shower stall is carefully sealed, but over time, gaps can form, resulting in leakage from the shower stall. To eliminate this problem, resealing is necessary.
A clogged drain can also cause a leak. Therefore, it is necessary to monitor the cleanliness of the pan and prevent various debris from entering the drain.
The shower stall is leaking
for many reasons. To find out, you need to know well the features of all types of cabins. In addition, to eliminate a leak, it is often necessary to disassemble and reassemble some elements. Therefore, such work should be entrusted to professionals. Our technicians will quickly and reliably fix any leak, seal the seams, and also help you select spare parts. You can invite a specialist to your place by phone or online.
When the shower stall is assembled, or even has been in service for more than one year, it is possible that it will begin to leak. What to do in this situation, what actions to take? Let's look at the answers to these questions.
What to do if the shower enclosure comes unglued
Another common situation is the shower enclosure coming off the wall. There are several reasons:
- the sealant dried out and hardened over time;
- the sealant has washed out over time due to long-term use (this usually happens with low-quality compounds);
- The shower cabin has a very flimsy tray that was deformed and because of this the corner moved away from the wall.
To fix the problem that caused a leak for this reason, you need to do the following:
- If the sealant dries out, it is necessary to loosen the fasteners, remove old residues and install new sealant.
- In the seam areas where the sealant has washed away, you can lay a new compound. First you need to thoroughly degrease everything. You can buy sealant in a tube or a special bottle for a gun.
- If the pan is loose, you need to securely fix it, and only then apply fresh sealant in the leakage areas.
Operating procedure
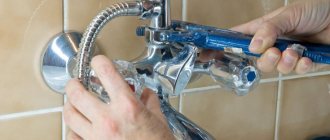
1. Using a wrench, pliers, or an adjustable wrench, remove the nut that secures the shower head. Do not apply excessive force; the nut may crack. And it’s good if it’s just a nut! If you overdo it, you can break the watering can and, worst of all, damage the pipe.
It will be easier to unscrew a “stuck” nut if you apply white lithium grease (for example, WD-40) to it and leave it for an hour. If nothing helps, you should think about replacing the entire shower - this is in any case cheaper than eliminating the consequences of rough unscrewing.
2. Remove the rubber gasket that is located inside the shower head and inspect it. If the pad has dried out and shrunk, or if it leaves black mucus on your fingers, it's time to replace it.
3. The new gasket must be the same size as the old one. so it's better to take it with you to the store as a sample. It also makes sense to buy several gaskets “in reserve”.
It hardly makes sense to change them for preventive purposes, but if the shower starts to leak, the problem can be solved instantly.
4. Install a new gasket into the shower head. It should go in with little effort. Make sure the gasket is level.
5. Wind plumbing tape onto the threads. It is better to use Teflon winding; it is a little more expensive than usual, but this slight difference in price is fully justified. The winding must be wound in the direction of the thread
Please note that the winding is wound only on the thread, without going onto the smooth parts. You need to wrap it tightly enough
The required number of turns is determined “by eye”: the thread should still be noticeable, but not sharply protruding.
To start, make no more than 2 turns. Excessive winding can cause a poor connection and therefore leakage.
6. Screw the shower head on by hand without tightening it too much.
7. Check! If there is no leakage or leaks just a little, you can tighten it, take a wrench and tighten the nut more. Just don't overtighten!
8. If the leak remains, you will have to rewind the thread. You may even have to choose a stiffer tape, especially if the threads are very worn.
9. Well, if several attempts are unsuccessful, you should stop them and change the shower.
Exactly the same steps:
- Replacing the gasket
- Wrapping with plumber's tape
- Assembly and testing
will also be required if a leak is detected at the junction of the shower head and hose.
https://sanvanich.ru
How to fix
All damaged spare parts must be purchased. This is a siphon, connections, mixer or fittings.
Fum tape
To insulate threaded connections, plumbers use fum tape. It is a soft white rubber wound on a spool. Sold at most hardware stores.
To undo existing connections, you need a gas or adjustable wrench (depending on the configuration). The fitting or faucet is usually held with a second wrench to get the connection in the right place. All old fum tape is removed, a couple of layers (if necessary) of new one are wound. After assembly, the connection will stop leaking.
Insulating tape for threaded elements
Tow and sealing paste
Plumbing tow can still be used where fum tape does not help. With one caveat - at the present stage of technology development, it is customary to lubricate the thread with sealing paste (for example, Multipak). The advantage of the paste is that it protects tow and bronze from external factors and does not affect water quality. The threaded connection is easy to disassemble and reassemble. Sealing paste provides a high level of tightness.
The Multipak parameters are:
- Maximum water temperature: +85 degrees.
- Maximum pressure 16 bar.
But the most important thing is that after assembly it is possible to adjust (rotate) the connection without losing the tightness up to an angle of 45 degrees.
Silicone plumbing adhesive sealant
Installation of a siphon is not complete without plumbing glue. The pallet is finished around the perimeter. If necessary, you can do the same procedures over the perimeter of the corner.
How to use? Adhesive sealant is most often sold in bottles with a pointed nozzle. The design varies. Sometimes it is a soft tube, reminiscent of the well-known Moment, but more often it is a hard syringe flask with a pressed bottom. It is not necessary to buy a gun for these cases, unlike “liquid nails”. You can press the bottom even without this. Many designs provide for this.
Silicone sealant for siphon
Silicone glue is a transparent viscous paste. It must be applied along the rim when installing the siphon into the sewer pipe. Many formulations are truly universal. For example, it is believed that plastics do not adhere well, but many compounds easily cope with this task. In order not to be unfounded, here are the characteristics of KWIK SEAL:
- Has good adhesion to:
- Plastic.
- Concrete.
- Ceramics.
- Plexiglas.
- Rubber.
- Any metals.
- Cardboard.
- Paper.
- Tree.
- Stone.
- Coating properties:
- Resistant to mold and mildew.
- Waterproof and seawater resistant.
- Resistance to ultraviolet rays.
- Resistance to aggressive media and oils.
The adhesive provides the substrate with corrosion protection and is durable. In our case, the qualities listed are important for the reason that the composition will sometimes be exposed to cleaning alkalis and various detergents, including hygiene products. The glue works well on tiles (ceramics) and plastic, as well as metal. Unfortunately, the translators did not bother to figure out whether there was adhesion to the paint, including acrylic, which covered the pallet. But the answer should be positive for the reason that acrylic is also a polymer (plastic).
In this case, the perimeter of the pallet and corner is finished with glue as necessary. A plastic profile of a suitable shape (T or G) can be placed along the wall to hide the boundaries of the materials. The glue gains volume well, so cracks of any size can be processed. By the way, cracks in siphons and sewer pipes can also be covered up. In this case, it is recommended to put a clamp on smooth surfaces or wrap them with reinforcing (loose) fabric to form an impermeable bandage.
Leak in the cabin
What to do if you see that water is actually accumulating under the pan? First you need to determine the cause of the leak. It could be:
A deep crack in a pan cannot always be repaired. Sometimes you have to change the pallet.
- Cabin depressurization. A very common breakdown that leads to the formation of puddles. If low-quality sealant is used during the work or waterproofing work was carried out improperly (on a dusty and damp surface), then the cracks at the joints begin to let water through. Take a closer look to see if there are any visible defects or peeling of the sealant. If this particular problem has caused the shower stall to leak, then buy a high-quality waterproof sealant and seal the defect. Follow the instructions for applying the product indicated on the packaging.
- Low shower tray. This problem rarely occurs with hydroboxes, but the shower cabin can leak if the threshold at the tray is too low. It is almost impossible to solve such a problem. Just try to turn on the water not at full strength.
- The drainage system is leaking. If the fasteners are loosely tightened, then water from the cabin will not flow into the sewer, but under the pan. To make sure that it is the drainage system that is leaking, you need to close its hole and draw in a little water (if the height of the pan allows this). Let it sit for about an hour. If there is no water under the cabin, then open the drain hole and observe. If water starts to flow out, the problem is that the pipes are installed incorrectly or are loosely fastened.
- Pallet crack. For a long time it can go unnoticed and leak only when a person with a large weight enters the cabin. It is not always possible to fix this problem. If the crack is too deep or on a bend, the pan may need to be replaced.
- Problem with the door. Sometimes shower doors do not close tightly, have gaps and uneven glass. In such cases, moisture gets onto the floor. This problem is solved by a specialist when studying the cause of the leak. The cabin always leaks in one place. The leakage is aggravated when vertical massage jets are used in the cabin.
- The hydromassage panel is leaking. On the back wall of such a panel, very often there is no tray under the nozzles. They are the ones that leak. It is better to discuss this problem when purchasing a box, since there will be no one to file a claim after the purchase, and you will have to constantly wipe away the puddles that have accumulated under the pan.
A low sump threshold can cause the floor to flood; this cause cannot be eliminated.
If your shower stall is leaking, the first thing you need to do is look for the cause. If the cabin is leaking, but you cannot independently determine the cause of the breakdown, contact a master plumber. With hydroboxes, it is sometimes necessary to remove the side panel of the tray to check the condition underneath.
The situation when moisture remains invisible to the owners is more dangerous, since it will not be possible to identify the problem in time and eliminate it. As a result, mold will cover fairly large areas of the wall.
Add site to bookmarks
- Choice
- Installation
- Finishing
- Repair
- Installation
- Device
- Cleaning
Localization
Based on the nature of the leak, it is not always possible to say with certainty where exactly the fault lies. Except for the case when it is clearly gushing from the water supply. Here the analysis of the situation is short-lived: you need to close the ball valves near the meters and see if the malfunction has been resolved. Repairing the eyeliner is not very difficult. You don't have to call a plumber for this.
Sewage system
Most often, the source of the leak is hidden. What to do? Take a plug for the pan; if not, replace it with a piece of soft rag and plug the siphon tightly. Take some water. In the meantime, wipe off any spillage from the floor so that it does not leak to the neighbors. The pan itself rarely leaks, but the siphon nut comes off from time to time. And then a thin stream oozes onto the floor. Although this is initially caused by changes in temperature and physical exertion, as events progress, neither the first nor the second is no longer required.
Sewerage for shower cabin
Usually with a flashlight you can see exactly where the leak is. Some trays have an overflow drain. It flows no less here. In this case, the check takes place in two stages:
- Water is poured only ten centimeters. In order to check the lower part of the siphon.
- The fullness of the pallet is brought to the overflow hole. This is how emergency drainage is checked.
There is a third case, but it is less common. More precisely, it is very, very rare. In this case, the sewer itself or the siphon entrance to the pipe is leaking. Well, you never know, the plumber carelessly poured sealant or accidentally moved the pan (or on purpose). If the siphon is rigid, this will certainly lead to the formation of cracks or even its destruction. The same thing sometimes happens when you try to tighten a plastic nut using a gas wrench if you do not hold the siphon. This is especially fraught with a hole in old plastic, which cracks easily.
In this case, water will flow even without it coming from the pan. If possible, dry the entire length of the pipe with toilet paper, then wrap the suspicious areas. Please note that a thin stream flows easily along the inclined segments. Therefore, locating the correct site may be difficult. With mechanical deformations, there may be several leak points, which complicates the localization process.
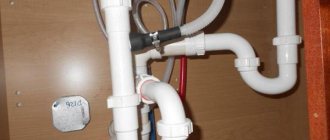
Water pipes
It doesn’t always pour out of a bucket here. Sometimes a small crack forms in the sleeve, through which moisture gradually filters out. Often it can flow right down the bathroom wall or shower tray. The liner cannot be repaired. Of course, an experienced plumber will wrap it with fum tape, but this is not the case when you need to save money. If the supply line breaks, the water drains until you turn off the ball valves near the entrance to the apartment (where the water meters are located) from the riser.
Supplying water to the shower box
It’s rare, but it happens that threaded connections are to blame:
- At the entrance of the supply line to the riser.
- At the junction with the shower stall.
Here, in any case, you will have to dismantle the corner, and there it will be easier to localize the leak. It is enough to leave the last section with the mixer connected and just look at it with overhead light. The greatest difficulties here await owners of complex boxes with hydromassage and a steam generator. But this is a completely separate conversation.
We do not take into consideration the case when the mixer itself is leaking, because the reason will then become obvious.
Pallet
Most pallets are made from sheet steel. If for some reason the paint on the bottom peels off and moisture gets in, the corrosion process will not take long to occur. Despite the protection applied at the factory. Rarely can the pan itself leak. This fact can be established by the fact that the connections and drainage part are in perfect order.
Box with hydromassage
This is a separate conversation, because there are a lot of designs. Let's consider the mechanical one first. There are several regulators here - one for each pair of injectors. All fittings are combined with liners. It can leak absolutely anywhere. But the most important thing is not the fact that you will be able to find spare parts. Therefore, you should ask your dealer for the relevant information before purchasing. And also inquire about the availability of service centers.
It is difficult to give definite recommendations. Especially if there is a steam generator. In this case, you need to act especially carefully, because the shower stall is connected to a high voltage source.
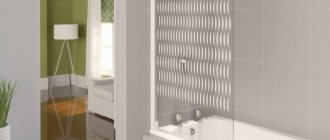
Shower enclosure perimeter
The shower enclosure (enclosure) is usually placed directly on the tray without any fastening. It's not surprising that the leak sometimes starts right here. The problem only manifests itself during washing. Some women throw a tantrum at the sight of a puddle on the floor. The problem must be resolved.
What to do if the shower stall is leaking
- Choosing a shower tray type
- Pallet installation
- Sealing seams
Shower stalls can be classified as simple plumbing fixtures. However, the simplicity of their assembly quite often becomes the reason for ignoring multiple tips designed to help in operation. As a result, the shower stall leaks and users face great discomfort.
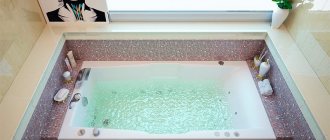
Diagram is an example of the dimensions of a corner shower stall.
A leaking shower stall is a very unpleasant problem that you won’t notice right away. Gradually, moisture will accumulate in a specific part of the bathroom and cause harm not only to the finishing material, but also to human health due to the formation of mold.
This can only be avoided by installing high-quality air ventilation and hoods in the room. Moreover, it is advisable to systematically clean and ventilate the bathroom. Otherwise, the problem may not be detected for a long time, which, in fact, will lead to the most unfavorable consequences. Thus, if you notice streams of water on the walls, you should immediately take care of resolving the problem.
Exhaust and siphon leaks
What is possible if the shower stall leaks in the outlet area?
| Circumstance | Debugg |
| A very tightly tightened gasket under the outlet is missing | Tighten the screw in the center of the grille |
| Displacement of the outlet relative to the center of the hole in the pan | Loosen the screw, center the outlet, tighten the screw |
| Loose connection between siphon and outlet or between siphon and bellows/elbow | Tighten the connection; if necessary, replace the gasket under the union nut |
| Cracked outlet or siphon | Replace a faulty part or a whole set of strapping |
An important point: before you go for a new harness, do not be too lazy to measure the distance between the bottom of the pallet and the floor. The height of the siphon should be slightly less than this distance - otherwise it will simply be impossible to install it without dismantling the pallet.
Pan diagnostics and repair
The base of the cabin plays one of the key roles: it holds the entire mass of a person and water is drawn into it. If the shower cabin is leaking from under the tray, then the cause is most likely a crack that has formed. Repair work is much cheaper than replacing the entire pallet. There are some disadvantages: in most cases the seam is very noticeable, but steel and cast iron models are generally better to replace. If you are planning a replacement, then acrylic and artificial marble are best suited.
To diagnose the quality of the pallet, they check whether the bottom bends under the weight of your body. Even with a slight bending (about five millimeters), you need to change or install new stands.
Often, a leak can be caused by a clogged drain system. It is advisable to take a drain with a circular cross-section along its entire length. If it has a different shape, it is replaced with a new one. And the sooner this is done, the better.
Repair cost
The cost of repairs will depend on the complexity of the work and the number of spare parts and materials needed to fix the breakdown.
Replacing the doors will cost the most, sometimes it is easier to buy a new shower cabin than to restore the old one. Replacing the pan and drainage system will also be expensive, especially since you will also have to pay for the services of a technician. You can clean out blockages and treat joints in the shower stall with sealant yourself. Such repairs will not cost much.
Please note: it is worth buying a high-quality sealant based on silicone. It will help compact the existing layer and prevent moisture from getting out.
Many stores provide a guarantee for shower cabins and if a defect or breakdown is discovered within the appropriate period, you must contact the seller and then the repair will be carried out at his expense.
Leaking walls and roof
If the shower stall leaks at the joints, the integrity of the structure is compromised.
A leak can form at the site of soft seals - cords on the doors, or hard joints - the places where parts are connected.
Important! If the cord itself is leaking, it will have to be replaced. It will definitely not be possible to revive him
When the shower stall is leaking at the seams, the action plan is quite simple:
- Unscrew the screws at the junction of the cabin elements;
- clean the remaining sealing agent without damaging the body of the parts;
- wipe the future joint areas dry;
- apply a thin layer of sealant;
- fasten the elements together.
Leaks at the junctions of the cubicle walls and the wall are eliminated by using additional sealants - plumber's rubber, mounted on fixing silicone.
If the faucet in the shower stall is leaking, and other plumbing elements are leaking at the junction with the shower body, then use gaskets and sealant.
DIY pallet installation
First you need to protect the surface of the pallet from scratches and damage.
It is important to ensure that the pallet is level and the legs of the container fit snugly to the floor surface.
When purchasing a pallet, close attention should be paid to the material of the product and its design. Over time, under the pressure of weight, the pallet bends and a leak may form at the junction with the wall. Also, be careful when choosing a fixing sealant. It must be of good quality and meet operating requirements.
After you have done the installation, you need to lay the sealing cord.
Seals for shower cabins
To make sure there are no leaks at the joints, you can pour water on them.
When sealing a shower stall with your own hands, a video of which can be viewed on our website, it is best to use the sealing cord included in the kit. It is applied to the junction of the pallet and the walls of the cabin. To seal other elements, use adhesive sealant. Depending on the design of the cabin, you can use white or colorless silicone.
When sealing the pan, close attention should be paid to the drain system, since a leak of this nature will be very difficult to detect.
General rules for sealing joints
The problem with a leaking shower stall can be eliminated on your own if you adhere to the basic, fairly simple rules:
- All parts of the shower enclosure are installed in their places and secured.
- The connections are coated with silicone sealant until the entire booth is assembled. The fasteners should be located “outside” in relation to the place where the sealant is applied.
- The cabin elements are sealed, connected and fastened with bolts or screws. The next step is to seal the facial seams. Residues of silicone are removed in their raw form, carefully, without damaging the surface of the shower.
- The sealant must be used at the junction of the cabin parts with the sealing gaskets. They will serve as additional protection.
- If a leak is discovered after the shower has been completely assembled, then thoroughly dry the entire surface before reusing the sealant. This will ensure a tight fit of the silicone.
- Even after eliminating the problem, it is worth monitoring the integrity of the defective wall and monitoring the reappearance of the leak.
Attention! Not only the butt seams of the pallet and walls, fences, doors, but also additional plumbing equipment: pipes, hoses, siphon must be airtight. Sometimes it is enough to replace a few parts and the problem will be solved
But repair work will have to be done constantly
Sometimes it is enough to replace a few parts and the problem will be solved. But repair work will have to be done constantly.
A shower cabin is a multifunctional plumbing invention that allows us to turn a standard water procedure into pleasure with a multi-level shower, steam bath and even hydromassage. But over time, any technological equipment breaks down and requires repair, and the shower cabin is no exception.
Ten ways to make your shower seal airtight!
Tightness, absence of leaks along doorways, joints and joints of glass panels - this is a whole set of “pitfalls” both for designers designing glass shower cabins and for installers building them. The article is also addressed to users of shower enclosures. Those who care about practical use and providing a comfort zone.
Recently, the trend for glass showers continues to gain momentum. And many want to make money on this wave of popularity. Some market players are dishonest about customer expectations. They simply don’t talk about obvious problems. For example, they advise you to save your budget and use budget fittings and seals. But with use, everything will become apparent over time - the fittings no longer look attractive, the gaskets become noticeable, the door no longer locks in place. But for now the hinges are shiny, matching the plumbing fixtures. And the suppliers promise that it will last long enough. But puddles began to appear near the shower.
The appearance of a puddle on the floor even after a five-minute shower significantly increases the risk of slipping. Concern arises - how not to flood the neighbors? Of course, the question of eliminating the puddle will get pretty annoying first of all. If only they had immediately provided for the use of German fittings and Pauli seals. Many problems could have been avoided for quite a long period.
When can the aesthetic experience of a customer's purchase go bad? - can immediately after the first shower. A puddle appeared on the floor, and sometimes more than one. Then the stage of searching for weak points and eliminating possible leaks begins. A partition, even one perfectly made according to measurements of the installation site, is not a submarine. Here it turns out that everyone has their own concept of tightness... We do not accept silicone sealant for consideration - it will soon turn yellow and the glass partition will turn from a status art object into a hotel shower room with a stale appearance. What features of glass showers are considered? Showers with free entrance are no longer needed - these are aristocratic designs for very spacious rooms with mandatory preliminary design of the floor structure and drainage.
What influences sealing? There are many factors. Showers flush with the bathroom floor and specially built pedestals, shower trays, with or without a rim - each design has its own advantages and reasons. The height of the glass fencing is at least 2 meters. Where is the watering can installed? — does it pour directly onto the canvases and joints? How is water drained from glass? Professional trimming of seals - here the principle of overlap of the upper seal with the lower one must be observed. Flowing water leaves a limescale deposit over time. There were cases where the texture of finishing materials was not taken into account. Let us remember the saying: “Water will always find its crack.” We apologize in advance for such a short list and description; for this we will prepare a separate article with recommendations from leading design and installation companies and partners.
How are glass shower enclosures sealed?
1.
The walls and floor are crooked, the glass is also not ideal. Plastic seals for glass are already installed. This is the first, standard method of sealing; you have provided for it in advance. Based on advice or experience. Yes, they are too noticeable on the glass, they are purple and thick. But without them it’s just a flood.
2.
Install PVC magnetic seals on the glass of the shower enclosure door. Yes, because of the black magnetic door they are immediately noticeable, but the door is pressed against the fixed panel much more reliably. At the same time, the streams turn from a river into thin streams, especially noticeable at the bottom of the glass partition and in the places where the hinges are attached to the glass.
3.
If the PVC profile fits tightly to the glass along the vertical joints, then along the lower edge of the shower partition the gap cannot be completely closed, since it may be different in different areas along the line of contact between the glass panels and the floor. A profile in the form of a soft tube is more effective. There are also models of seals with a soft inclined ebb.
4.
Many types of Pauli hinges have the ability to adjust the position of the glass door. Thus, the hinges of the Pontere series allow you to adjust the height by up to 7 mm!
5.
In the hinges of the series: Farfalla, Papillon, Pillango, Flinter, special grooves are provided for the sealing profile, thanks to which the seals are installed without cutting, along the entire vertical edge of the glass. Thanks to the integrity of the seal, in addition to aesthetics, the likelihood of water splashing around the bathroom is significantly reduced. The wide range of Pauli sealing profiles allows you to solve the problem even with gaps of 29 mm! To ensure that the waterproof profile does not interfere with the opening of the door, the design of the Nivello series hinge has the ability to lift the door by 6 mm when opening.
6.
The Pauli collection of accessories for glass shower enclosures includes several modifications of the waterproof profile and transparent acrylic threshold, which prevent leakage on the floor. To connect them along the perimeter of the cabin, special degree tips are offered in the center of the tray and an extensive line of right and left tips, depending on the cabin configuration and the location of the door handle.
7.
The Papillon series hinges are characterized by magnetic closing of the door and its constant pressing against the side glass panel in the closed position of the cabin.
8.
In the use of loops of the special Fluture series. They are attached to the glass not through holes, but into a clamp. Due to the ability to move the glass in the hinges, you can adjust the gap to almost zero, even if the geometry of the blade is not ideal. In addition, the overlap of the door and screen glass serves as additional protection against water splashes and provides natural ventilation for the shower room.
9.
Pauli fittings offers discerning customers a magnetic chrome door flap that bridges the gap between the glass door and the wall. In addition to the seal, it prevents the glass door from falling into the rather cramped cabin space.
10.
Application of the Pauli clamping profile. The clamping profile is not new on the Russian shower fittings market. However, it is not recommended to install all models in a thermally humid shower environment: mold and an unpleasant odor will appear. Pauli glass fittings are designed specifically for the aggressive environment of showers: there will be no unpleasant consequences. The completeness and elegant appearance of the glass structure is given by the end caps, which are fixed with special inserts, and not with glue, as in Chinese counterparts.
Bonus
Aesthetic appearance of the shower stall. Long-lasting aesthetics are ensured by Pauli seals. Plastic - light, elastic, small in size. In magnetic profiles, the magnet is in white covers, making glass joints less noticeable compared to Chinese-made products. Easy installation on glass, wear-resistant, versatility to suit application conditions. The profiles are resistant to UV radiation and contain fungicidal antifungal additives. We have profiles for doors, for the ends of blind sashes on the wall side, sealing gaps, sealing the edges of bathtubs. There are profiles with a short fit on the glass, but only for glass 8 mm thick. Transparent or black. There is a special self-adhesive profile based on the 3M company. There is also a universal set of magnetic seals with an arbitrarily specified angle between glass panels, recommended for sealing joints in non-standard configurations of shower partitions and difficult construction conditions.
The variety of means for achieving the tightness of a shower stall from Pauli completely solves the problem of sealing joints and interfaces without the use of silicone. With these recommendations, you will receive a high-quality shower enclosure in the form of a stylish glass art installation with excellent performance characteristics. It remains to add that the list is incomplete. Pauli is constantly one of the first in the world to introduce new fittings and accessories for glass showers. And we will add relevant information.
Causes and their elimination
Depressurization of joints
A common cause is poor quality seam sealing. There are always certain gaps between structural elements, especially if the installation is not performed at the proper level. In this case, you should either replace the sealing elements or reapply the sealant so that all loose connections disappear.
When sealing a shower stall, special attention should be paid to the junction of the glass and the frame. This is where leaks are most often discovered later.
It should be noted that it is better to choose silicone sealant. It can be colored, transparent or white.
Instructions
So, before processing the joints around the perimeter of the shower stall, you should first assemble it. Next, using a sealing cord (included in the kit) and sealant, you need to seal all the joints so that water cannot penetrate beyond the boundaries of the cabin.
It should be noted that it is better to remove the remaining sealant while it is still wet. This will prevent the seal from being compromised. You can do this yourself, using, for example, a sharp stationery knife. Remember that before treating the surface it should be prepared. All joints must be dry and clean. This is the only way to guarantee the reliability of the connection of materials.
If the shower is leaking just a few years after the start of use, then it is worth checking the main elements for wear. After all, their integrity may be violated. Therefore, you need to use the cabin carefully, periodically clean it and monitor the tightness of the connections.
Other reasons
In addition to depressurization, there can be many reasons why a shower stall leaks. For example, the problem may be in the water supply and drain hoses. In this case, they need to be tested and the specific location of the leak determined. These are most often the junction points. In some cases, the hoses themselves may leak. Then they will have to be changed. However, it is better to buy not the first ones you come across, but well-known manufacturers. This will be the key to their reliable and durable operation. Therefore, this way you can protect yourself from similar problems in the future.
Also, do not forget that the cause of a shower stall leak may be poor quality assembly. But such problems should appear the first time the water is turned on. If this happens, you need to determine where the shower stall is leaking, and then disassemble it to this stage
When reassembling, you should pay most attention to this place, use sealant more carefully
Scroll
First, let's try to list possible malfunctions.
- Leakage of the shower stall at the joints with the walls only appears if a sufficiently strong stream of water hits the corner.
- The cabin can also leak at the border of the doors or walls and the tray.
- The outlet and the siphon underneath can also create problems.
- A faucet leak can be the result of a fairly large list of various faults.
Let us clarify: water can flow not only into the pan or onto the floor due to a leak in some connection or seal. Just as often, water flows from the shower and faucet at the same time due to a broken shower switch.
- The shower hose is not a very durable design; Often, after a couple of years of operation, water begins to flow not only from the watering can, but also from the cracks in the armor.
Typical cause of a leak.
- Finally, the holes in the watering can often become clogged with suspended matter and overgrown with lime deposits. The problem, strictly speaking, has nothing to do with leaks, but also needs a solution.
Design and necessary tools
The shower hose is the most frequently broken part of the shower; most often it begins to leak.
The design of the shower hose is a rubber tube placed in a metal sleeve. There may be no metal hose; in this case, the hose is a tube made of flexible plastic. The quality of the rubber part will determine the service life of the entire hose. The service life of a rubber tube, in turn, depends on water and is 5-15 years. Rubber tends to harden over time, the elasticity of the material decreases and this leads to the appearance of cracks and tears. These tubes are simply replaced. It is difficult to look for a replacement rubber tube for a shower, since most often replacement ready-made hoses with a metal sleeve are available for sale. And the cost of such a hose is not very high. Replacement is also carried out if the hose has a rusted metal sleeve. The aesthetics of such a faucet are generally worse, and rust can get on the enamel of plumbing fixtures, which is quite difficult to remove.
Before completely replacing the shower hose, you can try to repair it yourself, unless, of course, it is completely old.
To repair a shower if it breaks, you will need the following tools:
- adjustable wrench;
- screwdriver;
- knife.
This minimum will be a sufficient set, since it is not very difficult to troubleshoot problems with your own hands.
ways and reasons for elimination
Cabin leaks
What to do if the shower stall is leaking - at the connections between the walls and the tray or at the junction of the stall walls with the main wall?
The circumstance is obvious - loose connection of adjacent surfaces. The solution is no less obvious: the gap is filled with sanitary silicone sealant for the shower stall. It is better to be transparent: it does not darken over time, unlike white.
A caveat: the seam cavities must first be cleaned of dirt and lime deposits. This is easy to do by filling it with Domestos or another alkali-based gel; After this, the remaining product is washed out with a stream of water, and the groove is dried for at least 24 hours.
Sewer leak
Here is a list of common drainage problems and ways to solve them.
| Malfunction | Circumstance | Solution |
| Leaking from under outlet | Release shifted; the gasket under it is loosely clamped | Loosen the screw holding the grille, center the outlet, gasket and tighten the screw again |
| Leaking at one of the prefabricated connections | The thread is broken; the overtightened union nut burst | The siphon changes completely. The price of the assembled product starts from 150 rubles; searching for individual spare parts does not justify itself |
| Leak at the junction with the sewer pipe | The ring seal in the socket has lost elasticity | Replace the seal; as an option, the connection can be sealed with sealant after drying and thorough cleaning |
Mixer leaks
Let's assume that water is pouring onto the floor or into the shower tray through the faucet in the bathroom. Who is to blame and what to do?
To begin with, it is worth localizing the location of the leak.
Here are the likely options:
- Leakage along the valve stem when the tap is open . The circumstance is wear of the oil seal or rubber seal. The rubber ring is replaced with a new one; the seal is refilled.
Helpful: Use only graphite seal. Oily oil is produced very quickly in warm water.
- Leakage on the switch rod . Both the circumstance and the solution are entirely similar to the previous case.
- Leaking from under the gander nut (spout) . The circumstance is again wear of the ring gasket. It is treated by replacing it.
Hint: Gasket sets are easy to find at any plumbing store.
- Leaking from under the eccentric nut (clip) . When the water is shut off, both nuts are unscrewed, after which new sealing gaskets are replaced under them.
Another likely option is a leak from the gander or shower when the taps are closed. The list of probable circumstances is quite diverse: in most cases, with screw valves, replacing the gaskets is enough, but ceramic ones require complete replacement.
A special case: if the screw valve rotates, this indicates a broken thread on the rod or in the body. Obviously, in this case, only replacing the axle box will help.
Finally, quite often water flows from the shower and from the faucet regardless of the position of the switch.
- With push-button switches, the problem in most cases is a partially destroyed valve. Either the valve with a stem or the switch is completely changed to an analogue one.
- In lever switches with a barrel, leaks in most cases are caused by wear of the barrel with gaskets or its guides. Unfortunately, the guides are an integral element of the case; in this case it requires replacement. A characteristic indicator of such a breakdown is limited movement of the lever.
- Ball switches do not actually fail naturally; If you tried to turn the lever with ceramic plates jammed by scale or sand, the cartridge needs to be replaced. To access it, simply unscrew the screw securing the handle, remove it and unscrew the nut hiding the cartridge.
Shower hose leaking
What causes a shower hose to leak? This is due to the fact that its rubber core, hidden under the armor, has lost its elasticity and become brittle, which inevitably leads to the appearance of tears and cracks.
In this case, the instructions for troubleshooting the problem yourself are quite obvious:
- We get a new core.
- Unscrew both hose nuts.
- Using a knife, we take out one of the liners. The core can then be removed from the armor.
- We take out the second liner and pull a new rubber tube onto it.
- We stretch it through the armor and insert the first liner.
- We press both liners into the armor.
- Having installed the gaskets under the union nuts, we put the hose in place.
Clogged holes in the watering can
They can be cleaned by shaking out the removed watering can; If the holes are overgrown with lime, the watering can should be soaked for half an hour in a bowl with Beliznoy or an aqueous solution of Domestos prepared in a 1:1 ratio.
In addition, the holes can be cleaned with a straightened paper clip or a needle. If, for the convenience of the procedure, the watering can must be disassembled, in order to access the screw securing the mesh, it is often necessary to first remove the plastic plug masking it in the center of the mesh.
A couple of less common watering cans with a mode switch are disassembled using a different method: with the switch fixed by hand, the mesh is simply unscrewed counterclockwise.
Leaking fixed parts roof, walls in the shower stall
Fixed parts leak less often, the reason is a violation of integrity. As a rule, water flows at the joints of parts or the inlet and outlet of cold and hot water.
Leaking cord seals
Seals can be of two types:
- soft (cord according to door movement);
- hard (at the joining of parts).
If the cord leaks, resuscitation measures will not be effective, so save time and change the cord immediately. If there is a leak at the junction of body parts, it is necessary to separate the parts by unscrewing the screws. Remains of sealant are removed from the parts without touching their body using a sharp knife. Fixing the problem is simple: apply a thin layer of colorless silicone to the dry, cleaned parts to be joined, and then connect the fasteners.
If there is a leak at the junction of the cabin and the walls, an additional seal is used - plumbing rubber bands, which are lubricated on both sides with silicone and then installed in the seat.
What to do to avoid leaks
Problems with cabin leakage appear not only as a result of its long use, but also improper installation of its parts will also lead to leakage. For example, failure to comply with all requirements during installation of the pallet. It is important to follow the installation instructions.
- The pallet must be installed tightly against the wall.
- The coincidence of the socket of the sewer drain and the drain pan is a strictly mandatory condition.
- The angle between the walls of the shower and the room is 90°. Therefore, the walls are leveled at the height of the cabin.
When the pallet is installed, the following steps are performed:
- The pallet height adjustment legs are strengthened.
- Connection to the drain is made.
- The horizontal position of the structure is maintained.
After installing the pallet, the seams are sealed. A special sealing cord is used for this. It comes with a shower cabin. It is inserted between the glass and the cabin body.
Coating the connecting elements with sealant is carried out from their inside. When the elements are already in place, a thin layer of sealant is applied to the front side. The excess is removed before it dries. All gaskets of the structure must be treated with sealant.
Leaking shower doors
You can watch the video to see what to do when the shower stall is leaking on the door. This is a fairly common question.
When the door is sliding, you first need to check the condition of the rollers and guides. It is necessary to find the gap while the door is moving. Sometimes it is worth removing the door and replacing the defective rollers, although they may well be repairable.
There are no components to eliminate defects in guides, but it is possible to manufacture them from stainless steel, directly according to the diameter of the pipe. This method will take a lot of time and effort. But this way they save money on buying a new pallet.
Replacement will depend on the type of structure and the material from which it is made. For example, curved glass is the most expensive. But today, numerous workshops offer their services for replacing curved glass doors. If the glass door is simply flat, then replacing it will not be difficult.
It is very easy to correct defects in swing doors. Often the problem is in the fastening loops. Leaks are eliminated by adjusting or replacing them.
Cleaning products
To clean the head of a regular or more difficult to clean rain shower on your own, you can use:
- special chemicals;
- folk remedies.
Application of chemical compounds
How to clean a shower sprayer from limescale and scale deposits? The easiest way is to use household chemicals, which differ:
- speed of cleaning;
- absence of negative impact on the body and other structural elements;
- efficiency.
The most popular means are:
- Cillit Bang;
- Toilet duckling;
- Mister Muscle;
Lime remover
Cleaning of scale and lime using household chemicals must be carried out in accordance with the instructions indicated on the packaging and in compliance with all safety rules.
Folk remedies
How to clean the inside of a watering can in the absence of specialized products? You can use traditional methods, among which the following are popular:
- vinegar. To carry out the procedure, use 7% vinegar. The use of essence is prohibited, as it negatively affects the body of the plumbing fixture. Cleaning is done as follows:
- the solution is prepared;
- all elements of the watering can are immersed in the solution for 6 – 10 hours (can be left overnight);
Using Vinegar
The elements are washed with running water.
For greater efficiency, the vinegar solution can be periodically heated to a temperature of 55° - 60°C.
- lemon acid. Cleaning is carried out according to a similar scheme. For full effect, it is enough to soak the watering can in the solution (1 sachet of citric acid is required for 1 liter of water) for 2 – 3 hours;
Technology of using citric acid
- a solution of soda, ammonia and table vinegar. For 1 liter of water you will need 3 tablespoons of soda, 350 ml of 9% vinegar and 150 ml of ammonia. For quick effects, it is recommended to heat the prepared solution to 60°C. Cleaning time ranges from 40 minutes to 1 hour;
- oxalic acid. In extreme situations, with a high degree of contamination, cleaning can be done using a solution of oxalic acid, which is purchased at a pharmacy. To prepare the solution you will need 1 liter of water and 2 tablespoons of acid. Processing time is 20 – 60 minutes.
Aggressive cleaning agent
When cleaning plumbing equipment by any means, it should be carried out exclusively with rubber gloves, since acid and other active substances can damage the skin of your hands.
After complete removal of contaminants, reassemble in reverse order.
When assembling, it is important not to forget to install all the O-rings and, if necessary, seal the connections of the shower head with the shower hose
To ensure that cleaning of plumbing equipment does not take much time, it is recommended to carry it out once every 6–8 months (if filters are available) and once every 4–5 months if such equipment is not available.
What to do if the doors in the shower stall are leaking
Let's start with the fact that doors can be hinged - swinging and on rollers - sliding. In sliding doors, the first thing to do is visually diagnose the condition of the guides and rollers. If there is any doubt, the door is removed by removing the locking stops, and the defective rollers are replaced. The roles can be revived.
It is more difficult to restore the guides, since there are no components. But there is experience when parts were made from stainless pipes. The pipe is bent along a radius, and the pallet is secured using through screws. The method is labor-intensive, but there is no need to buy a new pallet.
It is a rare case when the geometry of a segment door is violated or destroyed. The most expensive element in shower stalls is. The only way to reduce the cost of replacing an element is to send it to specialized glass workshops. On swing doors, defects occur on the fastening hinges. The repair consists of the following - adjust or replace the hinges.
Leak diagnostics
The appearance of puddles under the cabin only indicates the presence of a problem, but does not explain the reason for its occurrence. If the inspection of the shower stall did not provide an accurate explanation of the leak locations, do not despair, but show some technological tricks. Place paper under the bottom of the cabin; the drops that appear will indicate the location of their origin. If drops flow down uneven surfaces, then starch will help you. Apply white powder to the dry suspected leak area. Starch that has changed color under the influence of water will indicate the exact location of the problem.
Shower stall leaking
? This can be fixed! Experienced craftsmen will quickly deal with such a nuisance. They will determine the cause of the leak and carry out the necessary work to fix it. If you find that your shower stall is leaking, seek professional help as soon as possible. Otherwise, further operation may result in more serious problems. Our technicians have extensive experience working with shower cabins, so they will fix any problems professionally and quickly. You can leave a request on the website or by phone.
Main reasons to contact us:
- Our specialists work with shower cabins of all types and brands
- We guarantee an individual approach to each case
- Our company's specialists will perform the work efficiently and in the shortest possible time.
- You pay for the work only after it is completed
- Our specialists will come to any district of Moscow and the nearest Moscow region
Door depressurization
For the production of doors, bases made of acrylic, plastic or tempered glass are used. With careless mechanical impact, microcracks may appear on the surfaces, which cause a violation of the tightness of the doors.
Photo: Depressurization of corner doors
The depressurization of the unit depends on the tightness of contact of the structure’s doors, taking into account the swing or sliding door opening mechanism.
- If there are rollers, it is necessary to carry out diagnostics by visual inspection for gaps when moving the door leaves. If the cause of the leak is due to defects in the roller mechanism, it must be replaced by first removing the stops. If there is a malfunction in the guides, it must be taken into account that they cannot be repaired; they must be replaced with new elements.
- In swing-type models, the cause may be a loose fit of the door hinges, which need to be adjusted or replaced with new ones in case of a defect.
If the product leaks due to a loose fit of the device parts at the joints, additional sealing of the seams will be required. To eliminate leakage, you will need to treat the joints of the parts with silicone sealant. The treatment must be carried out on a previously dried surface so that the silicone fits tightly and does not allow moisture to pass through. If excess silicone forms in the connecting seams, it must be removed before it dries.
Diagnostic work
When water leaks from under the shower stall, it can be difficult to determine the location of the leak. It is not always possible to identify a defect after a simple inspection of the booth. There is a technological trick - a sheet of paper is placed under the pan, the drops will be approximately oriented to the location of the leak or indicate the direction of search.
Starch is used to detect leakage. With its help you can detect even the most inconspicuous and hidden cracks and gaps. It is worth turning off the water taps. The cabin is completely dried and a thin layer of starch is applied to “doubtful” areas. The product will change color when exposed to moisture, after which work can begin to repair the leak.
Causes of clogging
The main reasons for a clogged shower head are:
- low quality of supplied water. Due to the quality of water, limescale deposits form on the body of plumbing equipment, which leads to a gradual reduction in the passage holes;
- the absence of filters in the water supply system that can retain particles of sand, rust and other pollutants at the entrance to the system.
Filtration of water before supply to plumbing
To reduce the frequency of shower head cleaning, it is recommended to install equipment made of copper or stainless steel. Plastic products are more susceptible to clogging with small particles, while steel products are more susceptible to corrosion.