No matter how carefully you take water procedures, drops of water will still splash on the walls and floor in the room. This increases the risk of falling because the tiles become slippery and create dampness in the room. The bathroom screen is designed to solve these and other problems. Unlike ordinary curtains, which look cheap and sometimes tasteless, installing a screen will favorably emphasize the design of the room and the taste of the owners.
What should you consider when choosing a screen?
To choose the right screen for a bathroom, you should take into account a number of important nuances and features of different types of structures.
- Before installing the screen, you need to take all the necessary measurements and choose a structure so that there is a small gap for ventilation between its top edge and the ceiling.
- If the walls have distortions or unevenness, it is better to give preference to partitions that are equipped with adjustable hinges.
- Adequately assess the size of the room - hinged screens and “accordions” are suitable only for large rooms.
- Transparent screens are the best option for small bathrooms, as they do not “steal” free space.
Sandblasted transparent screen
- To determine the reliability and durability of the structure, it is recommended to pay attention to the quality of the fittings: rollers, hinges, fasteners.
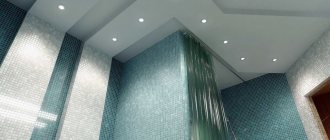
- For combined bathrooms, matte or colored screens are better suited, but do not forget that they may require additional lighting in the area where hygiene procedures will be carried out.
Matt screen
One of the most important aspects of the reliability and durability of the screen is proper installation, which does not require special skills or knowledge, but requires care, precision and careful adherence to instructions.
When is the decision made on a combined screen?
A screen for a bathtub of a combined type combines movable and immovable elements, that is, one part is stationary framed, the second is frameless, opening.
When deciding on the type of design of a screen for a bathroom, it is worth remembering the rating of materials for the screen itself, because you need to take into account ease of care, durability, aesthetics, and light transmission.
Top materials for the screen:
- Glass. Durable, durable material, not afraid of aggressive environments, does not rot. This material does not contribute to the formation of microbes and fungi. Easy cleaning with glass cleaner. The appearance does not change for a long time. There is no need for additional lighting, since the screen transmits light well from the main source in the bathroom. The advantage of glass is its low level of thermal conductivity. The cost of the material is confusing.
- Plastic. Cheaper in cost than glass, but not as strong and durable. It may be necessary to install additional lighting since the plastic is opaque.
- Polycarbonate. A material that is gaining popularity. It is relatively inexpensive, stronger and more beautiful than plastic. Polycarbonate is first in the rating in terms of safety.
Manufacturers of modern materials are introducing many innovations to improve safety and simplify the care of materials for making bathroom screens. Antibacterial and antifungal coating will increase the safety of home residents, and anti-plague spraying will prevent the settling of dirt, dust, and salts.
Step-by-step instructions for installing a sliding glass screen
The installation of sliding screens may have some distinctive features, but in general it follows the same principle. First you need to prepare the tools necessary for work:
- fastening elements (bolts, dowels);
- drill or hammer drill;
- silicone sealant and a special gun;
- screwdriver;
- building level;
- roulette;
- masking tape.
Screen Installation Tools
A sliding partition kit usually includes guide profiles, a rail that secures the structure, glass sections, fittings, and special gaskets that protect elements from moisture.
Step 1. First, you need to attach the profile that secures the screen to the wall. You need to remove the rail from it, adjust its position using a level and mark the installation points on the surface.
Remove the rail
Marking rail attachment points
Step 2. Drill holes at the marked points. If the walls in the bathroom are tiled, it is better to use special drills for tiles. Painting tape will prevent the drill bit from sliding across the surface of the tile. To make the fixation as strong as possible, it is recommended to make more than two holes into which dowels will need to be inserted.
Apply masking tape
Drill holes
Hammer in the dowels
Step 3. Apply silicone sealant to the back of the profile and attach it to the wall with screws.
Apply a layer of sealant
Pin your profile
Step 4. Fix the glass on the installed profile, tighten the fasteners, but not too tightly so as not to completely block the glass panel.
Insert glass into profile
Tighten the side fixing screws
Step 5. The remaining gap is necessary for installing the seal - it is put on the bottom of the glass, after which the panel can be completely fixed by tightening the screws until they stop.
There must be a gap between the glass and the bathtub so that the seal can be put on
Step 6. Place special insulating caps on the fasteners.
Install decorative covers
The gaps that remain between the screen elements and the wall should be filled with silicone sealant. It takes about a day for the composition to harden, that is, during this period it is better not to use the bathroom.
Apply silicone sealant
Level the sealant
Use the shower within 24 hours, when the sealant has dried.
Installing a bath screen with your own hands.
Main features of the product
I think you have tried more than once to take a bath without splashing water around. No matter how hard you try, water splashes on the walls and floor. This is inconvenient and poses a threat to your health. You can solve this issue with the help of bathroom curtains, but often they are not entirely practical for everyday use. Then a screen will come to your aid.
A bathroom partition is practical, convenient and stylish
It has the following advantages:
- protection against splashing water;
- ease of cleaning;
- aesthetics.
The main disadvantage is the price. The cost of a partition is much higher than that of curtains.
But it will serve you for many years. Let's take a closer look at its features.
The screen will perfectly protect against splashing water when you bathe your child.
Step-by-step instructions for installing a framed plastic screen
Another common option for bath screens is plastic structures on an aluminum frame. Assembling such screens is also a fairly simple task - to complete it you will need the same tools as in the previous case, but the algorithm for performing the work looks different.
Step 1. Assemble the main part of the screen, that is, attach the fixed elements to the horizontal ones using special screws, which usually come with the screen.
Step 2. Insert the sliding door into the upper part of the frame profile, align it with the lower part and snap the bearing into place.
Step 3. Mark places in the walls for attaching vertical guides and drill holes.
Step-by-step instructions for installing a framed plastic screen, step 1-3
Drilling holes for vertical guides
Step 4. Attach the vertical guides to the screen frame.
Step 5. All places where the structure will adjoin the walls must be treated with silicone sealant.
Step 6. Place the screen in place and secure it with fasteners, and put special pads on them.
After the sealant has dried, attach a handle to the screen, carefully cut the protective film around the perimeter and remove it.
Step-by-step instructions for installing a framed plastic screen, step 4-6
Don't forget to remove the protective film
What kind of screen to make: with or without a frame?
The first question that needs to be answered before you start making a screen is what exactly do you want to see in your bathroom: a product with a frame or without? To decide, find out what the differences are between these two options.
Frame screen for bathtub
The frame screen structurally consists of two elements: a rigid profile made of aluminum or plastic and internal panels made of polystyrene, glass or plastic. The panels can be either stationary or move along the frame on rollers. These screens are quite massive, so they are only suitable for spacious bathrooms. But they protect the room from splashes as reliably as possible.
Frameless bath screen
Frameless screens , on the contrary, are a single canvas without a framing profile. They are great for small bathrooms where it is inappropriate to use large structures. Having assessed the photos of bathroom interiors with frameless screens, you will understand why they are also called airy - visually they are very light. Frameless structures can be stationary or folding.
Step-by-step instructions for making a screen
You don’t have to buy a screen for the bathroom, but make it yourself - making a simple design from plastic will not require much labor, serious expenses or special skills.
To do this, you will need several sheets of transparent plastic, an aluminum profile of the required length, a decorative handle and fasteners. In addition, you will need to stock up on some tools:
- a hammer drill with several attachments;
- grinder or hacksaw;
- painting knife;
- screwdriver;
- building level;
- pencil, ruler, tape measure.
The order of work when making a simple screen is as follows.
Step 1. Measure the dimensions of the future structure, taking into account that there should be free space for ventilation between its upper edge and the ceiling.
Step 2. Make appropriate markings on the plastic sheets, cut out the screen elements, clean the edges and attach the handle. Cut guides to the required length from the aluminum profile.
Step 3. Using a level, mark the mounting points for the guides on the walls, drill holes for the dowels, attach the profile to the wall surface, having previously lubricated it with sealant.
Step 4. The lower guide must be attached to the side of the bathtub with the same sealant, and the composition must be allowed to dry thoroughly before proceeding to the next steps.
After all the profile elements are secured, you can try to insert the plastic part into the resulting frame and make sure that it does not wobble and moves easily along the guides.
DIY screen
Advantages
Sliding frameless screen
The design features of modern bathroom screens used as protective screens for showers provide them with the following undeniable advantages:
- such a screen perfectly protects the room from splashing while taking a shower;
- the transparency of the material of the screen structure does not create a feeling of congestion in the bathroom space;
- thanks to a special water-repellent coating, this product does not require special care;
- The aesthetics and attractiveness of most shower screen models allows them to fit perfectly into the interiors of modern bathrooms.