Installing any plumbing equipment in the bathroom - be it a sink or a bathtub, a hydrocabin or a shower compartment - requires a solution to the issue of sealing the gap between this equipment and the wall.
The complexity of this event largely depends on the scale of the problem and the time of implementation - during the renovation process or in an already used bathroom.
Where does the gap come from?
Before deciding how to close the gap between the bathtub and the wall, you need to understand how big the gap is and how it appeared in the first place.
- The bathtub is small compared to the size of the opening under it. If the length of the container does not match the dimensions of the niche, you will either have to select a larger model or do something with the dimensions of the opening.
- The walls are not level. This problem often occurs in houses where internal partitions are made of blocks or bricks. However, ready-made plumbing booths in high-rise buildings are also often “pleased” with littered corners and curved surfaces. Everything is simple here - you have to level the wall. This is necessary not only to eliminate the gap, but also for subsequent normal wall cladding.
- Uneven edge of the bathtub itself. It is rare, but it happens in cast iron or steel cheap models. Unfortunately, this defect cannot be corrected; you will have to fill the gap with something.
- It is not possible to move the bathtub close to the wall. If the width of the gap is too large, conventional sealing methods are not suitable; an insert must be made.
In any case, the size of the gap and its shape - flat or with expansions/constrictions - greatly influence the choice of sealing method. A gap of 2…3 mm can easily be eliminated with sealant or cement mortar, 3…10 mm will require the use of mounting foam or a small spacer, and wide “dips” can only be eliminated with the help of inserts and sealing.
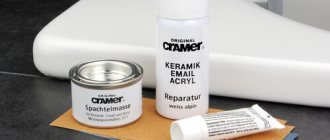
Silicone sealant
If the gaps between the font and the wall are not significant, they resort to a simple, economical method - silicone sealant. This type of material can effectively hide all cracks up to three centimeters. If the gap is larger, the method is combined with installation foam.
Sanitary compounds show additional benefit. They not only prevent moisture and external leaks from entering, but also fight the formation of mold.
It is important to follow a certain sequence:
- Clean the surface properly;
- Perform degreasing;
- Protect all surfaces with mounting tape;
- Prepare the cylinder for work;
- It is advisable to use a gun for application;
- Fill the gap in one smooth motion;
- Apply the second layer;
- Prepare the soap composition;
- Use a finger or a brush to level with soap/
Work can be done with a brush, spatula, or finger. Carefully remove all excess.
The material is best used as a final treatment. Even with high-quality application, the service life of such a coating will not be long at all. There is a high probability of developing fungus, mold, and bacteria. As a rule, after a year the composition will darken. This is the first sign of the presence of bacteria.
Preparing to install a bathtub
To reduce the size of the problem and make it easier to seal the seam, you must perform the following procedures:
- Be sure to level the walls and floor of the bathroom. A horizontal skew of the bathtub (one edge or corner is higher than the others) will in any case create difficulties during operation, but in addition it can lead to the appearance of a gap after installation. This is due to the fact that under the weight of the collected water and the person in the container, the bath may settle and the sealing of the joints will be broken;
- check that the dimensions of the bathtub and the opening/niche under it match. If necessary, you can adjust the dimensions of the niche by chipping the walls. This is done when the dimensions of the bathtub along the edges are slightly, literally 2...10 mm, larger than the size of the opening. With this installation method, the bathtub “fits” its sides into the body of the wall;
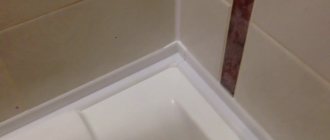
- waterproof the walls above and below the sides of the bathtub, and better yet, on the floor.
After such measures, the width of the gap between the bathtub and the wall can be reduced to 1...5 mm.
How to seal the gap between the bathtub and the wall
The most popular methods of closing a gap are:
- cement mortar, in pure form or with inserts from other materials;
- polyurethane foam (similar);
- sealant - only for narrow cracks (up to 5...8 mm) or in combination with other materials;
- borders and inserts made of metal or plastic;
- self-adhesive curb tape;
- panels made of plastic or other materials, with additional sealing of joints (with wide gaps, more than 20 mm);
- cladding with tiles, mosaics, and other materials according to the design of the bathroom with a pre-installed support insert and sealing of joints (gap 20...30 mm or more).
The choice of a specific method depends on the skills of the repairman, his budget, as well as the time of work and the required duration of operation of the protection. So, if you need to seal a gap in a rented apartment or temporarily seal a bathtub in your own before major repairs, options 1, 3, 5 are suitable.
Below are more detailed instructions on how to eliminate the gap in general and seal the joints.
Flexible self-adhesive border
If the gaps are not significant or there is simply a desire to improve aesthetics, you can resort to adhesive-based borders. A set of such material usually includes a small tool for carrying out the work.
The substance is a moisture-resistant element with an adhesive base. It is important to prepare, degrease, and ensure the surface is completely dry.
The adhesive side is pressed tightly against the joint surface. Work can be carried out manually or using a tool.
The option is fast, economical, but has a number of features. Firstly, it approaches the quality of surface finishing. Secondly, it won't last very long. The service life of such a coating is hardly close to years. But replacing it will not be difficult or costly.
How to fix a joint between a bathtub and tiles using cement
When choosing this method, you need to remember that cement gradually breaks down under the influence of water, so you either need to protect the material from water with something on top, or use this method as a temporary solution.
Sequence of work:
- the surface of the walls and bathtub is cleaned of dirt, grease, debris, and moistened for better adhesion to cement;
- the width of the gap is checked - if the gap is more than 2...3 mm, the solution will flow (fall out) down. Filler is inserted into wide slots. This could be an elastic tube of suitable diameter (slightly larger than the width of the gap), cut strips of porous rubber, or even just a rag soaked in cement mortar;
- a cement mortar of the thickness of sour cream is mixed (the proportions can be found in the article);
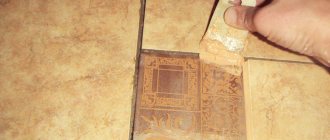
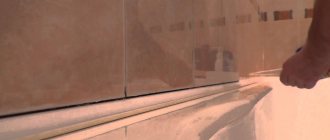
- The prepared solution is first placed in the gap, after which it is removed as much as possible from the surface of the bathtub rim. Ideally, the seam should not protrude beyond the level of the upper plane of the bathtub - this will help to better disguise it during further finishing. A good option is to make a smooth transition from the side to the wall, as shown in the illustration.
Below is shown the WRONG way to seal a gap with cement - the side is made very massive, extends beyond the boundaries of the upper plane of the bathtub, and has a loose connection with the side and walls. This happens if a very dense solution is used and the rules for gradual hardening of the mixture are not followed.
Such a “seal” requires additional sealing.
Important: in order not to subsequently wash the bathtub and the wall from particles of cement mortar, it does not hurt to seal the surfaces next to the place where the seam is created with masking tape. This method of surface protection is suitable for almost all sealing methods. If you are installing a new bathtub, you can partially leave the packaging film on it, securing it with masking tape or tape so that it does not move during operation.
After the solution has completely cured (depending on humidity and temperature, as well as the amount of solution, the process may take 2...10 days), sealing with moisture-resistant material and finishing are performed.
Mortars for sealing gaps between the wall and the bathtub
So, there are several main types of mortars used to connect the bathtub and the wall of the ablution room. At the same time, the effectiveness of each of them is as high as possible. Let's look at them in order later in this section.
Old-style mortars gave a similar result over time, so their use was abandoned
Polyurethane foam for sealing gaps
Perhaps every householder, as well as every housewife, is familiar with polyurethane foam. This product is often used to seal various cracks, joints, holes, passages, etc. in rooms where there is a constant presence of high air humidity.
However, working with polyurethane foam is not as easy as it seems. You need to have that same “diamond eye” and the keen sense of a real repair specialist to guess how much foam to spray into the joint, because during its drying the initial volumes will increase by about 3-5 times.
Polyurethane foam for sealing cracks is often used in the bathroom, as it is moisture resistant
It is best to use fine-pored construction foam for sealing joints in the bathroom. It is much better suited for such small gaps; it successfully fills gaps whose width is about 1 centimeter or more. In this case, it is better to choose a foam whose packaging specifically states that:
- it is moisture resistant;
- The material is made on the basis of polyurethane.
There are two categories of construction foam that you can purchase at the store. Let's look at them in the table below.
Table 1. Types of polyurethane foam that can be purchased in the store
| View | Description |
| Household | Household polyurethane foam is produced and sold in packages that are convenient for amateurs to use. With its help, you can perform simple work related to sealing small seams of various types, in particular the joints between the bathroom and the walls of the room in which it is located. The cost of household polyurethane foam is reasonable. |
| Professional | Professional polyurethane foam has completely different properties. It is more plastic and requires construction skills to handle it competently. In addition, in order to fill any seam with it, you need to have a special construction gun. Professional foam is more expensive, however, it can also seal large holes without loss of quality. |
Comparison of household and professional polyurethane foam
Prices for polyurethane foam
Polyurethane foam
So, let's try to seal the joint between the bathtub and the wall using this material.
How to seal the joint between the bathtub and the wall in the bathroom using polyurethane foam
Step No. 1 - getting ready to seal
So, let's start by getting ready for work. To do this we will need to do the following.
- Wear gloves, an apron and safety glasses to work with the product without contact with exposed skin or mucous membranes, and also to avoid staining your clothes.
- Seal the wall of the room and the side of the bathroom with construction tape or masking tape so that any foam that gets on them does not have to be removed with special means.
- Prepare a gun if you purchased construction foam, or simply shake a can of household foam to seal joints.
Attach masking tape to the edge of the bathtub and the wall so as not to get everything dirty with foam.
Step No. 2 - apply material to the joint that requires sealing
So now take the foam, shake it again. Then remove the protective cap from the nozzle of the gun, if equipped, and begin to apply a small amount of this material evenly and leisurely, but not slowly, along the entire length of the crack. So, if three walls of yours do not fit tightly enough to the bathroom, then we need to seal all three at once.
We take our foam and carefully begin to apply it to the joint
Prices for a sealant gun
Caulking gun
Then, immediately, you need to remove excess layers of material that have fallen on the tiles or sides of the bathtub, in those places where you did not stick the protective tape. You need to wipe off the foam quickly, otherwise you will be tormented later in removing it from the area where it sticks.
Step No. 3 – cut off the foam and refine the gap
Now we will need to wait for some time. The period for complete drying is completely different for all foams. So, it can range from 1 hour to 8 hours.
Once complete drying occurs, you will need to trim off the excess foam, leveling its height with the level of the sides of the bathtub.
Afterwards, it will be necessary to free the adjacent wall, as well as the bathtub, which we covered with special tape, from the pasting.
After drying, the foam will need to be cut off and the gap closed with something.
After trimming, the so-called refining of the resulting gap is carried out. It is assumed that a sealant will be applied over the polyurethane foam and some material will be installed that will cover it.
Apply sealant
Apply sealant
Video - Beautiful joint between bathtub and tiles using polyurethane foam
Cement mortar for filling gaps
Also, to seal the gap, cement mortar is used, which remains in large quantities after repairs. Please note: it is categorically not suitable for use when sealing holes larger than three centimeters, since, unlike construction foam, it is unable to stand on its own.
You can also seal the gap the old fashioned way, using cement mortar.
If you still intend to work with a wide gap using the material in question, then you need to come up with some kind of stand for it. The most common wooden strip, which is attached to the bottom of the opening, is perfect for this, and can also serve as a stand for ceramic tiles.
Rail for wide gap
Let's look at the instructions on how to seal the gap between the bathtub and the wall, using the material that interests us.
How to seal a gap between a bathtub and a wall with cement mortar
Step No. 1 – preparatory stage
So, at this stage you need to do the following:
- treat the wall, which is located opposite the crack, with a special primer that has deep penetration properties for better adhesion of the mortar to the wall;
- dilute the cement mixture with water, following the directions written on its packaging.
Remember that we are sealing a gap, so the mass should be much denser than usual, so add less water.
Dilute the cement mortar according to the instructions, and remember, it should be thicker than usual
Step No. 2 – apply the solution
Now we take a special small spatula and begin to apply cement mortar to the joint we are interested in, while simultaneously leveling the mass being laid out. We do this carefully and carefully so as not to stain any adjacent objects or surfaces.
We now apply the prepared solution to the entire length of the opening we are interested in.
Step No. 3 – final processing of the joint
Now you need to leave the treated joint until completely dry. In addition, after the material has completely dried, rub it gently with sandpaper to smooth out any unevenness, and then decorate it to avoid:
- destruction from soaking;
- occurrence of mold, etc.
Wait until completely dry
Remember, this method of sealing cracks is best suited for narrow cracks, since when a person uses the bathtub, it itself, as well as everything adjacent to it, moves and is subject to mechanical stress. Since cement mortar loses its elasticity as it dries, it will quickly collapse if it is filled with a large empty space. In addition, high water temperature will also affect rapid destruction.
Of course, masking the gap will help slow down this process a little, and in principle it is needed in order to make the bathroom look more presentable. We’ll tell you how to set it up a little further in the article.
Prices for cement and basic mixtures
Cement and base mixtures
Sealant as a material for sealing the gap between the bathroom and the wall of the room
Sealants are building materials that are used for sealing cracks, seams, fastening small parts and other various purposes. In order to work with sealant in our situation, it is necessary to select a product that:
- withstands humidity;
- copes with temperature changes;
- has an elastic structure;
- is not exposed to other negative influences of the external environment.
Sealants are quite often used in bathrooms to seal joints, as they are moisture resistant
In addition, it is desirable that the composition of this product include some kind of antiseptics, since the fungus grows most quickly in the cracks and joints of the walls of the bathroom and bathtubs. The thing is that water constantly collects here, creating favorable conditions for the growth of fungus. Antiseptics protect the material from damage by the desired microorganisms, although such a coating will still require constant care.
Some sealants contain antiseptics that prevent the growth of mold.
The cost of one tube of sealant (and this amount is enough for you to finish the bathroom, as they say, completely) varies on average from 200 to 400 rubles. The tubes or tubes we are talking about end with grooves, through which it is very convenient to dose the product into the joints.
So, let’s look at the principle used to seal joints using silicone sealant.
How to seal a joint in a bathroom using silicone sealant
Step No. 1 – preparation
First of all, we will need to prepare the workspace by doing the following:
- degreasing the wall on which work will now be carried out;
- degreasing the edges of the bathtub.
Using a special product, degrease the walls and ends of the bathroom before applying sealant.
Then take your tube, cut off its spout, focusing on the width of the gap between the tub and the wall. The closer to the end of the spout you make a cut, the smaller the amount of substance released and the thinner the line.
Step No. 2 – apply the product
Gently pressing on the tube or special gun, apply the product into the gap that we want to seal. There is no need to rush, the sealant hardens slowly, it’s better to do the opposite, do everything carefully and measuredly, then the layer of material you lay out will look natural and even attractive.
Apply the product carefully, using your finger to push it to the desired places and compact its layers
Step No. 3 - seam processing
In order for the seam to look beautiful and neat, you will need to smooth it out after laying out the sealant, you can just use your finger, or you can use a thin wooden stick. It is better to wet your finger in a soapy solution first so that the sealant does not stick to it.
Level the sealant
Processing of sealant seams can only be done if the required seams are small in width. This material is not suitable for large cracks.
To ensure that the material reliably seals all the cracks, you can apply it in several layers, and then simply squeeze them all with the same finger.
At the end of the work you will get such a neat and pleasing result to the eye.
Prices for silicone sealant
Silicone sealant
Sealing with cement using inserts (for large gaps)
If the empty space between the edge of the bathtub and the wall is too large, you will have to use auxiliary measures - for example, special supporting elements.
Among such elements are:
- brick or concrete blocks, whole or in fragments. They are either inserted into the gap by surprise (in small pieces), followed by sealing the gaps with cement mortar, or laid out in the form of a wall using the same mortar;
- metal brackets and beams. Typically, in this case, moisture-resistant sheet material is laid on top of them.
Next, the resulting flat surfaces are finished with tiles, and the joints between the tiles and the side are sealed with other materials.
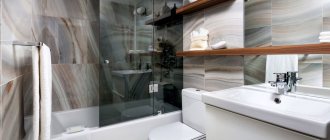
Design methods
When remodeling a bathroom, the question often arises about what sequence to carry out the work so that in the future there are no water leaks at the junctions of the tiles and the bathroom. Specialists in this field offer a large number of options on how to solve the current problem and can provide the best methods to solve your particular problem.
Planning to use the bathtub for a long period allows you to install the sides to the wall. When the plumbing is carefully fixed, you can begin to lay tiles and process the connecting joints using grout. But this solution also has some nuances. This completely eliminates the possibility of water leakage, which is a significant advantage. But the disadvantages of the method of caulking the joints between the tiles and the bathtub is the likelihood of disruption of the tile laying at the junction due to the poor stability of the bathtub.
If you unexpectedly replace this piece of plumbing, you will need additional financial investments and time/effort to dismantle the tiles and reinstall them. In addition, the chance of finding finishing materials from the same collection is too small, and for this reason, replacing a bathtub can trigger a complete renovation of the restroom.
Expert opinion
Roman Vasiliev
Builder, repairman
It would be much more effective not to “embed” the bathtub into the wall, but to use special materials to seal the seam between the tiles and the bathtub.
The following options are very popular:
- Use of tile grouting material.
- Solution.
- Using polyurethane foam.
- Treatment with silicone sealant.
- Installation of curbs.
- Installation of curb.
Each of these methods has its own advantages and disadvantages, which can be avoided if you use several methods simultaneously. After reviewing it in detail, you will be able to choose the best option for your situation.
Drywall and other panels
This method of solving the problem is only suitable if the surface of the panels is carefully protected from water, because even moisture-resistant drywall cannot withstand direct contact with water and constant high humidity.
GKL requires good waterproofing at the ends of the sheets and painting with waterproof paint on the reverse side; OSB panels, chipboard, fiberboard, wood - high-quality waterproof impregnation. The panels are laid on a prepared frame, wooden (also impregnated) or metal. Typically, this method of closing the gap is used in conjunction with installing a protective screen under the bathtub.
The panels are also finished with tiles, waterproof paint or high-quality plastic.
Polyurethane foam
A very quick and popular way to eliminate a gap, including one of irregular configuration and quite large width. The installation is very simple:
- the edge of the bathtub and the wall nearby are cleaned of dirt and debris, protected from foam with masking tape (it is better to cover the entire bathtub with film);
- after shaking the container, the spout is inserted into the slot and the required amount of foam is blown out;
- The finally frozen foam is carefully cut with a knife to the level of the side of the bathtub.
Important: foam does not completely prevent water seepage between the side and the wall! The seam sealed in this way must be finished on top and additionally sealed!
How to seal a seam between a bathtub and a wall using a ceramic border
This method will not work if there is a large gap between the bathtub and the wall. It is acceptable for a gap of 15...40 mm. Ceramic borders are usually purchased complete with facing tiles. It can also be purchased separately, based on roughly similar color and design.
In addition to the border itself, manufacturers offer connecting corners, and often finishing (end) elements.
The advantage of using such a ceramic plinth is that you can seal not only the joint between the wall and the bathroom, but also the corner between the walls. It is important that the surfaces are perfectly smooth.
You can also use frieze tiles or border tiles.
They are installed in the same way as regular wall tiles, using cement mortar or glue. Addition – mandatory seam sealing.
What is a gap near a wall and how to avoid it
If you have already installed a bathtub before, then you should know that all models on the market correspond to a standard size range. Thus, long bathtubs are most often sold:
- 1.5 meters;
- at 1.7 meters.
Unfortunately, with regard to the construction of residential buildings, and specifically the arrangement of apartments, equally clear standards for bathrooms are not implied. Quite often, the wall to which the ablution container is supposed to be installed is short or, on the contrary, excessively long.
There are no standard bathroom designs, so often there is empty space between the bathtub and the wall
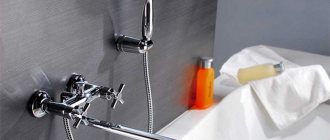
Please note: in this case, the best way to avoid the appearance of a gap near the walls, as well as unnecessary costs and, in general, any other headache, would be to replace the traditional bathtub with:
- miniature seated model;
- shower stall.
Shower stall placement option
You can do it another way: use a hammer drill to punch a niche in the wall, and place one of the edges of the bathtub inside it. This unusual way out is rarely used, because:
- it is required that the wall initially has sufficient thickness;
- you will have to figure out exactly how to make this hole in the wall aesthetically pleasing.
In this case, you can very conveniently and beautifully beat the gap by creating a box from plasterboard, which is then covered with tiles, the same ones that were used to decorate the floor or walls. As a result, you get the space you need, and a kind of cabinet for it, on which it is very convenient to create various kitsch for bathing.
Preparing the bathtub box
Finishing the box with ceramic tiles
However, more often than not, the length of the walls turns out to be much greater than the same parameter for various models of bathtubs made of:
- acrylic;
- become;
- cast iron, etc.
In this case, the very joint that interests us is formed between the bathroom and the walls - a crack, the width of which can be several millimeters or one and a half to two centimeters.
General unevenness of walls and corners should also be taken into account. The sides of the room simply cannot be completely ideal and coincide in all cases with the norm of 90º. That is why the gap we are interested in, also known as a gap, most often occurs on all three walls to which the sides of the bathtub are directly adjacent. In this case, the gap can be:
- smooth throughout its entire length;
- intermittent, especially if there are any bumps or, conversely, pits on the walls.
How the gap is sealed will depend on how big it is
Provided that the width of the gap on the end side is more than three centimeters, you can also hide it using a false wall. If the parameter we are interested in is approximately 10 centimeters, then we can create an add-on. But the small distance, represented by 1-2 centimeters, is still better compensated by using various construction fluids and other devices. We will consider which ones later in the article.
Metal corner corners for cladding
This method is applicable at the stage of creating the cladding. The metal corner is attached to the wall so that its bottom shelf fits snugly against the side of the bathtub. Next, the bottom row of tiles is inserted into the groove of the corner or directly onto it (depending on the design).
Sealing is necessary, because otherwise dampness will penetrate under the tiles and gradually destroy the adhesive composition.
Corner
If you decorate the walls in the bathroom with tiles, purchase a special insert along with it - an inner corner made of plastic or aluminum. It is fixed tightly above the bathtub, and tiles are already installed on top.
The main advantages of this method are reliable sealing, hygiene, and aesthetic appearance. Disadvantage: installation only during repairs. You won’t be able to use this method in a finished bathroom.
You will need: a corner, a utility knife or saw, tile adhesive, tiles, grout. How to install a corner in the joint between the bathtub and the tile:
- Mark and cut the planks to the desired size.
- Apply tile adhesive to the wall.
- Install the corners.
- Insert the first row of tiles into the grooves of the glued corners and glue them.
- Lay down the remaining rows and leave for a day.
- Decorate the joints with grout after the glue has dried.
The photo shows an example of installing an inner corner under a tile
Plastic borders
This method is one of the simplest and is possible even with a fully installed bathtub and a tiled wall. In fact, it is a relatively flexible plastic profile that is glued to the joint between the side and the wall using sealant.
There are two main types - overhead (left) and insert (right) profiles. They are used depending on the width of the gap and the location of the bathtub in relation to the wall. If the joint is tight, you can refuse to use sealant, simply insert the profile “with tension” into the cleaned gap, but it is still better to attach the plastic plinth to the sealant.
Sealing
In all of the methods described above for sealing a gap, there was advice to cover the gap with sealant. This is almost always special silicone or similar materials.
Narrow gaps can be sealed with silicone without additional measures to eliminate the gap; if there is a large free space, it will only be an addition to the main measures to eliminate the problem.
Important: before filling the seam with sealant, it is necessary to protect the surfaces from contamination, since it can be difficult to wash off silicone even from enamel and glazed ceramics.
A strip of silicone inserted into the seam is smeared, rubbing into the gap so that water has no opportunity to penetrate where it is not supposed to.
The excess is cut off with a knife or a special tool.
The sealant is selected to match the color of the facing tile or bathtub; most often a white or transparent version is used.
Temporary measures
If a gap appears unexpectedly, and there are no plans to carry out repairs in the near future, you can use a budget-friendly and quick, but, unfortunately, not very durable method of sealing the seam - using self-adhesive tape.
The tape is simply glued over the joint so that the fold falls on the line separating the two surfaces. The procedure is very quick and does not require much effort or skill.
The surface, of course, must first be cleaned and degreased - this will improve adhesion and help the tape last not 8...12 months, but at least two years. However, the duration of use also depends on how actively the bathroom is used.
You can watch the installation process in the video.