A bathtub installed on ordinary legs is not able to withstand a heavy structure for a long time. And after a couple of years, the screw fastening will begin to loosen and lose its functionality.
Therefore, the choice of many falls on the strongest supports from brickwork. The contact zone with this installation is much larger, and therefore it is attached much better. How a bathtub should be installed on bricks correctly, and what is important to know, will be discussed in the article.
Advantages of the method
From the photo, installing a bathtub on bricks looks attractive. This method is suitable for fastening containers made of steel, acrylic, cast iron, which can be done independently. It is advisable to choose a red solid brick that can withstand heavy weight, exposure to water and harmful microflora.
Although every bathtub has standard metal legs, craftsmen install plumbing fixtures onto a brick base. This is necessary to evenly distribute the load and ensure greater stability. This installation method has the following advantages:
- Sustainability. During installation of structures, high-quality stability is ensured. This indicator is especially important for steel and acrylic products, which are light in weight. Models made from these materials, if fastened poorly, wobble, wobble, and slide, which is unsafe.
- Protection against wall deformation. A solid base that supports the bottom prevents deformation of the walls, so the enamel can last a long time. The walls of thin-walled structures deteriorate from weight, causing the enamel coating to crack and then peel off. This method eliminates noise during water collection, which is usually observed with metal bathtubs.
- Versatility. Brick legs are installed on all bathtubs, regardless of weight, shape, size. In addition, the method will help raise the container to any height.
Installing a hot tub on bricks yourself will cost more than mounting it on standard legs. Costs consist of the price of bricks and cement-sand mixture. Since the least amount of material is needed to create brick pillars, this method is not much more effective than the classic one.
How to make a base for a brick bath?
The method of laying the base depends on the type of tank, its weight and size. There are several ways to install a support. First of all, these are columns. For this method of constructing supports, a minimum of building material is used. Only cast iron bathtubs are placed on such supports, since the walls of an iron or acrylic bathtub in this case are deformed under loads.
The second method is called the podium. In this case, masonry is laid under the bottom of the tank, which exactly repeats the shape of the bathroom. Using this method of support, the product is securely fixed and becomes resistant to any type of load. It is suitable for all types of baths. But at the same time it is considered very expensive due to the amount of building material required.
The support built around the perimeter of the cast iron bathtub is suitable in combination with standard legs. In this case, the tank receives double support - the legs hold the bottom, the brick holds the walls. But when installing a bathtub on this support, it is important to take care of access to communications. Before covering the bathtub, leave a small window, otherwise later difficulties will arise with servicing the sewerage system.
Masonry options
Masonry under the bathtub is different. This is determined by the specifics of the room, the characteristics of the bath, production needs, capabilities and imagination of the person. The following types are popular:
- Two supports in the form of small walls. Usually they are made with a concavity at the top in the shape of the vessel.
- A solid pedestal that serves as support for the base.
- Brick walls around the edges of the tank. This type is often used during the installation of a corner acrylic structure.
There are no significant differences in the technology for creating these masonry structures. The differences are only in the amount of material and the amount of labor. Although debris will still appear during bathroom removal, cleaning and preparation are considered essential procedures.
If you plan to install a brick base, but an old bathtub is placed, dismantling is carried out first. The work must be done in special clothing and protective equipment. This job is dirty. Before dismantling, communications are turned off: the water taps are turned off. You also need to take out supplies and accessories.
Furniture is removed from the room, plumbing and sanitaryware are dismantled. The room is cleared of anything that will interfere. Often, when dismantling a bathtub, a major renovation is carried out, so tiles, tiles are removed, paint and other facing materials are removed. Everything is done quickly. These works allow for high-quality repairs.
Preparation
Installing a bathtub on bricks without legs with your own hands begins with preparatory work. You should pay attention to floor leveling and waterproofing. If tiles are to be laid, cement mortar is needed for strength. Installation of an acrylic bathtub on bricks, like a steel container, is carried out using the same technology.
Due to the weak construction adhesive mixture applied using the ridge method, small voids remain under the tiles. This position should not be allowed to prevent the tiles from cracking or breaking under the weight of the bathtub. The walls are tiled with tiles when large structures are installed. The service life of the bathtub will be long if the work is done well.
Articles on the topic
How to put a zero on a foundation with a brick - methods, instructions, advice from masons
Service life of a brick house and how it can be increased?, instructions, advice from masons
How to plaster a brick base of a house - stages of work, instructions, advice from masons
Switching from brick to sandwich - installation, pros and cons, instructions, advice from masons
Skirting on a brick wall - is it necessary, how to fasten it, instructions, advice from masons
Electrical wiring diagram in a brick house - how to do the wiring, instructions, advice from masons
Columnar brick foundation - technology, disadvantages, instructions, advice from masons
Thickness of plaster on brick - external and internal finishing, instructions, advice from masons
Reviews ()
Why is it required?
Installing a bathtub on bricks is not a new solution; this method has been in demand for decades. This is a reliable method in which the structure is securely fixed, stable, will be installed in the required place, and will be used for a long time.
As can be seen from practice, bricks are a more durable option than the “original” legs that are included in the kit. After 10-12 years, the supports become warped, after which deformation of the product is observed, due to which the water does not completely drain into the sewer after water procedures. If a bath is taken by a fat person, then only with brick supports will you be sure that the product will withstand. Over time, the legs rust, which does not threaten the bricks.
Materials
To install a bathtub on bricks with high quality, it is not necessary to buy a lot of expensive electrical accessories or cheap materials. To do this you will need:
- bricks - at least 15 pcs.;
- sand, dry cement, containers for obtaining the mixture;
- sealant;
- metal profile, grinder, self-tapping screws;
- trowel;
- level;
- protective rubber gaskets.
The sealant should be taken as a tape sealant, which simplifies the work of sealing the seams. Bricks should be red or white, which do not have voids inside. Protective gaskets are only necessary for a steel bathtub, and the number of bricks is increased, since the weight of such a structure is greater. A level is needed to install the container horizontally.
Construction of supports for a cast iron bath
Plumbing equipment made of cast iron is still very popular today due to its high heat capacity. Due to the large weight of the product, to which the weight of the person using it is added during operation, if there is insufficiently reliable support, the bathtub may warp. As a result of this, the angle will be violated, there will be a possibility of depressurization of the node connections, and the drainage of water into the sewer system through the drain hole will also worsen.
A person of almost any build can use a cast-iron bathtub, which was installed on bricks, without worrying about the bowl warping or that its walls will bend.
The structure acting as a support can be made as follows:
- on two separate platforms;
- in several columns along the edges and corners of the bowl;
- in the form of continuous brickwork around the perimeter of the plumbing equipment.
Due to the large weight of the product, its installation using this method should only be done in pairs with someone. The process itself must be carried out in a certain sequence in stages.
Required materials and tools
To properly install a cast-iron bathtub on bricks, you do not need to have a huge amount of expensive electrical equipment or building materials. In the latter case, this task requires only the following:
- bricks (minimum 15 pieces);
- sifted river sand and dry cement;
- container for preparing the solution;
- sealant;
- self-tapping screws
Preference can be given to both white silicate and red burnt bricks. It is only important that they have no voids inside.
Tape sealant should be used, with which it will be much easier to seal the seams.
The tools you need are:
- trowel;
- building level;
- Bulgarians.
To avoid the formation of chips in the brickwork between the bottom of the product and the upper side of the constructed supports, you can lay special protective gaskets made of rubber.
Preparing the base and taking measurements
Before installing the bathroom on bricks, it is necessary to remove the floor covering to the initial base. If necessary, cracks in the floor should be cleaned and treated with cement mortar. If the base base has uneven surfaces, then it is better to fill the screed using any available method, which will be much more practical and simpler than adjusting the position of the product while placing pieces of wood or something similar under it.
In addition, you need to decide in advance what specific place the bowl will occupy in order to find out its future location in relation to plumbing equipment, water sockets, drains and other devices. It is also necessary to first measure the distance from the rear end of the product to the opposite wall of the room.
When performing measurements you need to determine:
- length and width of the bathroom;
- the depth of the bowl (if it differs from different sides, then its measurements should be taken from both edges);
- the distance from the probable area of installation of supports to the ends of the product.
When taking measurements, please note that the height of the upper side of the bathtub will be 55-70 cm. The exact height can be determined in accordance with the comfortable conditions for using the product by people of all ages, body types, as well as, if necessary, those with limited physical capabilities .
If the height of the front stage reaches 17 cm, then on the back side it should be raised 2 cm higher. If the bowl is initially designed with a slope to allow water to drain without any obstacles, then there is no need to construct racks at different heights. This is not required, since some reduction towards the drain is made during the manufacture of the product itself.
After taking measurements, you should also mark on a piece of paper the distance in centimeters from the bottom of the bowl to the overflow hole.
Laying on cement mortar
The cement-based mixture used must be diluted with sand in a ratio of 4:1. Water must be poured during mixing until the solution acquires the consistency of thick sour cream.
After laying the first row of bricks on one support until the mixture reaches the required strength, the masonry should be leveled using a level. Then you can begin installing the second row, which also needs to be aligned horizontally, like the third.
At the last level of the supporting structure on the sides outside the masonry to a height of half a brick, it is necessary to lay out the composition. For high-quality adhesion of the cement mixture to the material, it is necessary that at least 2 days pass between the construction of the racks and the installation of the bathtub on them. Otherwise, under the large weight of the metal product, only the constructed supports will be displaced or destroyed.
In addition, there is another solution, during which you can build a solid brick stand. Its construction should be carried out in the free space between the 4 legs of the bath. A solid stand has the appearance of a straight platform with hollows into which the bottom of the product fits comfortably. When laying it out, it is also necessary not to forget about the slope to the side of the drain.
Installation of siphon equipment
Before fixing the bathtub on the supports, you should install a siphon with an overflow. For convenience, before carrying out these actions, the bowl should be placed on its side. The drain hole for the siphon is equipped with silicone gaskets and treated with sealing compounds.
The bowl must be installed on a leveled base, using a level as a guide. The outer side of the bath should be 0.5 cm from the inner side. This will prevent water from pouring over the top of the bowl.
Next you need to connect the outlet pipe of the siphon to the sewer pipe. After this, you need to connect the drain to the sewer hose, which can be done using 2 methods:
- Tough. Plastic pipes with elbows at an angle of 45 and 90° are used.
- Flexible. Using a movable corrugation made of plastic.
To ensure a reliable fit of the outlet pipe to the sewer pipe, the connecting components must be pre-treated with sealant. To fully seal the holes and prevent water leaks during the process of draining liquid from the bowl of the applied mixture, it is necessary to provide the optimal amount of time for final hardening and hardening.
Before installing the bathtub on the bricks, in the places where the product comes into contact with the support, it is necessary to lay gaskets. Having placed the bowl on the racks using a level, you need to make sure that the sides are in the correct horizontal position in the longitudinal direction.
If the bathtub does not have special recesses along the length of the sides for water to drain, then when checking the level across, a slight deviation should be revealed. In this case, the installation of the product must be done so that the outside edge is located higher than the inside, which is adjacent to the wall by about 0.5 cm. Thanks to this deviation, it will be possible to reduce or completely avoid water droplets hitting the floor surface.
Fixing the bowl to the walls of the room
The sides of the product should be located as close to the walls as possible. To check its stability, you need to take the bathtub by the edge and make several movements from side to side, trying to swing it.
In the opposite situation, when the product is moved from its place, it is necessary to inspect the supports and, if necessary, place a piece of brick under the bowl, fixing the new parts with a cement-based mortar or tile adhesive.
If necessary, the edges of the structure are secured using metal profiles, the installation of which should be carried out using dowels and self-tapping screws. Often craftsmen fill voids only with cement mortar or tile adhesive.
To increase stability, the adhesive composition can also be used to open the side surfaces of plumbing fixtures adjacent to the wall. Thanks to this edging, it is possible to seal the seams and make them firmly connected to each other.
To check the installation is correct, the first thing you need to do is fill the bowl completely with water, and then drain it. In ideal condition, the liquid should drain quickly and freely, and there should be no leaks at the joints. Slow draining of water indicates a misalignment.
Finishing the plumbing
How to implement it depends on the interior of the bathroom and personal preferences. Cladding can be done in the following ways, using:
- moisture-resistant plasterboard sheets;
- porcelain stoneware or ceramic tiles;
- wall panels made of PVC or plastic;
In addition, you can install a screen under the bathtub, which is sold ready-made, which will be much easier.
Note! When choosing, you should give preference exclusively to cladding that can withstand the effects of dampness.
You can lay tiles using cement mortar or a special adhesive composition for tiles. To increase the adhesion of the finish to the walls, the surface must be opened in advance with PVA glue diluted with sand.
You can start using the bathroom after the cement-sand mortar has completely hardened. Basically, this requires waiting from 2 to 5 days.
Location in the room
Before installing the bathtub on bricks, you need to make sure that the container fits snugly against the wall. Otherwise, water will pour into the distance between it and the structure, which will cause mold to appear. The ends of the container should touch the walls tightly, so after installation the gaps must be filled with sealant. It is important to determine at what height it is more profitable to place the structure. The indicator will be equal to the height of one brick.
The bathtub must be tilted towards the drain to prevent water from stagnating. It is advisable to create brick racks, and the height of the rear ones should be 19 cm, and the front ones - 17. If the container is made taking into account the slope for drainage, then there will be no need to lay out racks of different heights.
Installation of supports
We continue to install the bathtub on bricks with our own hands. When measurements have been taken and the placement area has been marked, we begin to prepare the sand-cement mortar. For this you need cement and sand in a ratio of 1:4.
First, the first row is laid for one support and leveled until the mortar is dissolved. This procedure is carried out by level. Then bricks of levels 2 and 3 are installed. At the end of the construction work, 1/2 bricks should be placed on the mortar along the outer parts so that there is a recess in the shape of the bathtub. It takes a day to harden.
Do not rush to place the bathtub on dry masonry; first you need to install a siphon with an overflow. To do this, turn the iron bowl upside down and use any sealant to treat the water holes. Then the siphon with overflow is installed independently, and then the container is installed on a brick pedestal.
Construction of supports for a steel bathtub
Plumbing equipment made of steel weighs an order of magnitude less than that made of cast iron, but for this reason it is less stable. In most cases, legs are supplied with these products.
Installation of a steel bathtub can be done using 2 methods:
- Using only bricks as stands without the use of legs or auxiliary structures.
- Combination. During installation, not only bricks are used, but also legs.
The construction of additional supports can also be done by erecting a pier.
The choice should be made in accordance with the location of the bath. When a steel product is adjacent to one of the walls of the room, it is necessary to construct a partition. If it borders on 3 walls of the room, then brick supports are sufficient.
Required materials
During the work carried out, it is necessary to have:
- bricks;
- concrete grade M400;
- metal profile;
- moisture-repellent impregnation;
- roll guerlain;
- tile adhesive.
Guerlain is a rolled material that consists of foamed polyethylene, and its base is bitumen sealant. With its help, it is optimal to insulate steel.
Steel bathtubs have a significant drawback, which is the generation of additional noise during its filling with water. To reduce it, craftsmen advise treating the product with polyurethane foam on the outside of the bowl. For this purpose, about 1.5-2 cylinders with a capacity of 65 liters are required.
Support legs for increased height
In some situations, there is a need to raise the bowl above the normal level from its top to the leveled floor covering. This happens when carrying out repair work if a water-heated floor system was previously installed. If the builders made a mistake with the location of the drain or if there is a desire to make a small adjustment to the height of the product.
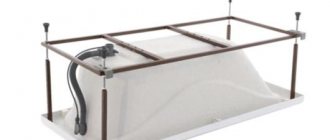
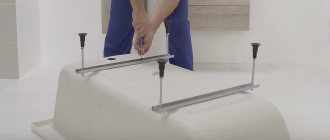
When installing on magnifying supports, you first need to screw the legs to the bottom of the bowl. To do this, they need to be inserted into specially made holes and secured using connecting components.
After determining the future location of the bath, you can begin to measure it. To do this, you need to measure the height of the area between the bottom of the bowl and the floor covering, as well as the width between the legs. Based on the measurements, you need to mark the locations for the brick supports.
Their height must be made such that the distance from the upper side of the bathtub to the floor reaches 55-70 cm. In most cases, it is optimal for auxiliary racks of 1-2 bricks.
The distance between the supports being constructed must correspond to the dimensions between the screwed legs. Due to the lighter weight of steel baths, it is advisable to additionally erect low columns in the center of the bowl. The shape of the racks should be made in accordance with the dimensions of the bottom of the product, since there are a wide variety of them on the market:
- oval and beveled;
- rectangular products with slightly rounded corners;
- triangular shape.
Laying bricks under the counters should be done in the same way as when constructing structures for cast iron bathtubs.
If the shape of the bottom of the bowl makes it possible to create supports, the upper side of which has not a semicircular, but an even configuration, then to create a uniform plane of the base, you can resort to the use of moisture-resistant plywood sheets.
To do this, you need to make a “cushion” of cement on top of the racks. Its top layer should be laid with pre-cut moisture-resistant sheets of plywood.
The bowl must be installed on top of the constructed structure after the cement mortar has completely hardened.
Treating a steel bathtub with polyurethane foam
It is most convenient to carry out this process when the product is positioned bottom up.
Before treatment, the surface should be wiped with a damp cloth or sponge. Application of polyurethane foam must be done around the perimeter of the bowl, gradually opening small areas of 0.5 square meters. m.
By resorting to the use of a special gun during work, you can significantly reduce consumption, since it is convenient to regulate the amount of material coming out and the level of its expansion.
Excess mixture can be trimmed without any difficulty after it has hardened using a construction knife. When opening the bottom of the bowl with polyurethane foam, the places where installation on brick supports will be carried out in the future should be skipped. This must be done because after a period of time the material can sag and the stability of the product will decrease.
Sealing spatial gaps
After installing the bathtub on the racks and connecting the siphon to it, as well as the drain and overflow, you can begin to process them.
To seal the resulting cracks and increase the level of adhesion of the edges of the plumbing equipment with the cement composition, the bricks must be covered with roll guerlain. The fabric layer present in the material acts as a compensator between the body of the product and the cement-based mixture.
To remove air zones between surfaces and improve the adhesion of materials, one layer of tile adhesive should be applied to the interlayer. Small gaps are easiest to treat with liquid cement diluted with the above mixture.
To increase adhesion between the bottom of the bathtub and the hardened brickwork, fill it with polyurethane foam. The joints between the sides of the product, the decorative screen and the wall must be treated with transparent sealant. Once dry, it will be almost invisible.
Features of installing an acrylic bathtub
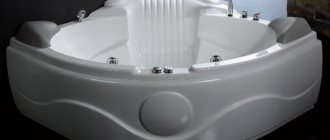
Their installation should be carried out in a similar way. For these structures, which are light in weight, there is no need to construct complex racks. In its usual form, the supporting frame for an acrylic bathtub consists of a flat pillow located under the bottom and pillar-shaped racks fixed on the sides of the sides.
To construct a frame support in accordance with the dimensions of the product, you need to outline the outline of the masonry. In this case, special attention must be maintained to maintain a gap of 1 cm between the sides of the bowl and the racks. It is convenient to use installation hooks in places where they abut the wall.
Once the solution has hardened, the product should be placed inside the constructed frame. Finally, the gaps between it and the outer walls of the bowl need to be treated with polyurethane foam.
Having learned how to install a bathtub on bricks, you will be able to do all the work with your own hands correctly and avoid a number of possible mistakes that can lead to warping and other defects, thanks to which you will be able to comfortably use plumbing equipment for many years.
Video:
Installation
Before installing the iron bathtub on the bricks with your own hands, you need to place gaskets. It is advisable to do the work independently by two people, or even better – by three people. First, a level is placed at the bottom of the container. The structure is then lowered onto the bricks.
A bathtub is installed level this way only if its design is classic - the bottom is horizontal. If the bottom is made with a slope, then the level must be applied not inside, but outside. The procedure is performed slowly, without haste. It is important to ensure that the edge fits snugly against the walls.
The next step in installing a meter-long steel bath on bricks will be to check the strength and stability. You need to grab the edge of the container and pull it gently to the side, as if rocking. If movement is observed, then the structure is uneven, then you need to inspect the work and place a piece of brick; if necessary, strengthen it with mortar or glue. If desired, the edge can be glued to the wall with a profile or fixed with dowels and screws using a profile.
Fixing and installing the pipe
To install a steel bathtub on bricks, additional support points are needed, since bathtubs are light and unstable. It is advisable to make a wall or brick racks under each of the 2 nearest corners. If the container is adjacent to the wall on only one side, then it is necessary to build walls, and if the steel vat is limited on 3 sides, then brick columns are needed.
The next step in installing an acrylic bathtub on bricks is to attach the drain to the sewer pipe sleeve. You need a plastic pipe and an elbow with angles of 90 and 45 degrees. A flexible plastic corrugation is connected to the sewer outlet. This must be done tightly so that nothing leaks out when the water is drained. For a tight fit, sealant is used. It needs time to dry and harden, otherwise it will not be able to properly seal all the holes.
Installation of a cast iron bathtub on bricks is carried out according to the above rules. After this, the reliability of the connections must be checked. To do this, fill the container with water and open the drain, after which you carefully monitor what is happening. It is important that water is removed quickly and freely, in the area of the joints and under the bathtub so that it does not drip. The check is performed 2-5 times, after which the structure should rest, and then you need to repeat filling and draining the water.
Recommendations
It is important to follow the process of installing a bathtub on bricks. Errors can lead to negative consequences:
- The top of the product should not be higher than 60 cm from the floor. Many novice craftsmen make mistakes in this, which shortens the service life of the product.
- It is necessary to pay attention to the angle and direction of tilt. This is required to correctly calculate the placement of sewer pipes. Errors can lead to difficulties with draining water. Typically the difference between the heights of the sides is 2 cm.
- When forming a pedestal, it is important to take into account the dimensions, configuration of the product, as well as the material. The most difficulties will be with cast iron and metal structures. They are heavy, which creates a load on the base.
- You should not fix the bathtub immediately after completing the brick support. Drying is done first.
- Sometimes, using construction foam, not only the brick base is processed, but also the outer part of the product. This is necessary for high-quality sound insulation. It is not necessary to coat an acrylic product, since it already has good sound absorption.
- You can adjust the angle of inclination using pieces of bricks and cement mortar. If you have to work with an acrylic container, it is important to ensure that the sharp corners of the brick fragments do not puncture it.
We measure dimensions for installing a bathroom
It is important to accurately measure and mark the location for the bath using measuring instruments. This should be done only after purchasing it, because... We need clear measurements, not approximate ones. Also, measurements need to be taken not only before installation, but also during it.
The first step is to take the correct measurements. Use a tape measure or measuring tape. We need parameters for width, length, depth. If the depth is different in several parts of the bathtub, measure it several times. You also need to measure the space from the ends to the brick supports. Your bathroom may vary in length, but the standard approach is to keep the distance between bricks around 50cm.
For best results, you need to check that the measurements are correct. To do this, you need to find out the length of the bathtub, measure 25 cm in different directions. Brick stacks should be installed under these places in the future. It is also useful to measure the distance from the water drain into the sewer, to the very bottom.
