Modern manufacturers of sanitary equipment offer consumers a huge selection of bathtubs, both in design and functionality, and in manufacturing materials. But all these products cannot be considered exclusive; only bathtubs created with one’s own hands exist in a single copy. It is impossible to make a bathtub from metal yourself, but there are options for producing structures from polymer materials. Making a polymer bath is very difficult; it will require a lot of time and knowledge of special technological processes. Due to the difficulties described above, such baths are extremely rarely made independently. It is much easier to make baths from concrete or brick and then line them with ceramic tiles. We will consider these two options in detail in the article.
DIY bath
Required tools and materials
Construction painting mesh Wire Sand concrete Mosaic Brick Ceramic tiles Board Primer Bitumen mastic Fittings Tape measure Rule Hammer Shovel Trowel Concrete mixers Show all
Some people have an original and practical concrete bathtub installed in their bathrooms; any of us can make such a font with our own hands. If you wish, you can also build a brick structure for receiving water procedures.
- 2 Let's get started - the first steps are simple
- 3 Prepare and pour the concrete mixture - how to do it right?
- 4 Bringing the concrete bath to condition - instructions
- 5 Brick font - do you need such a design?
- 6 How to make a brick bath - step by step guide
Concrete font - installed for centuries
Now plumbing stores are ready to offer their customers a wide variety of bathtubs made from modern and classic materials. But some people are not satisfied with the available range of such products. They want to install a durable and truly unusual bathing structure in their home. A concrete or brick bath will probably suit them.
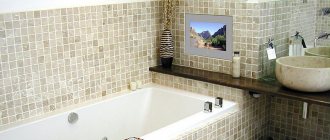
Such bathtubs can highlight the original design of the bathroom. And most importantly, you don’t need to spend a lot of money on buying any exquisite (and, naturally, expensive) bathtub. Self-made concrete fonts are lined with plastic or ceramic mosaics. It is also possible to use ordinary tiles for these purposes. But only for cases when you are building a bath without any special frills - with right angles or a classic configuration.
Concrete structures are uniquely durable.
Concrete font
They have been in use for decades. And the process of their construction takes relatively little time and is simple. The operation of constructing a concrete bath consists of the following stages:
- Development of a drawing of the font and purchase of the required materials.
- Preparation of the base and installation of the formwork structure.
- Forming the bottom and walls of the bathtub.
- Giving the bathing structure the desired shape and plastering the structure.
- Bath lining.
Important! You need to immediately decide what material (tiles, mosaics, liquid acrylic, paint) you will use for cladding the finished structure. The method of plastering the font depends on this.
If you use mosaic elements, the bath can be made with rounded shapes. But in the case of finishing the structure with ceramic tiles, it is better to avoid smooth lines, since it is almost impossible to fix a sufficiently large tile on such a font.
Please note that plastering the surface of a concrete bath that is planned to be treated with liquid acrylic or paint must be done using a special reinforcing mesh. In addition, it is recommended to add special additives to plaster compositions for such purposes. They will provide the mixture with the proper strength and at the same time the required plasticity.
Minuses
The disadvantages of plumbing fixtures made from wood include:
- high cost (natural ingredients are always more expensive than artificial ones);
- requirement for careful care. It is not recommended to wash pets or wash clothes in a wooden bath, because wood actively absorbs the smallest particles and detergents, which can subsequently negatively affect human health;
- Another disadvantage is that it is not recommended to wash too thoroughly in such plumbing fixtures, since human body fats are absorbed into the wood, which can damage its surface.
Let's get started - the first steps are simple
We clean the place where we plan to install the bathtub. At this stage, you need to clear the site down to bare concrete - the structure under construction will become an integral part of your bathroom. After such careful preparation, apply a couple of layers of primer to the site to ensure high-quality and reliable adhesion of the walls of the room and the floor base to the font being built.
The next step is the formation of the frame of the future structure. For this purpose, metal rods with a cross section of about 7 mm are used. They should be used to create a single structure for the outer wall and floor. The frame, in addition, must be attached to the load-bearing walls.
Pro tip! In bathrooms with small areas, it is advisable to place a concrete bath between opposite wall surfaces so that the existing load-bearing walls become part of the bathing structure. Then you will need to build only one wall (external). This means you can save a lot of building materials and complete all construction activities as quickly as possible.
Concrete bath
You also have the opportunity to build a corner bath taking into account the specified principle. In this case, the corner of the bathroom will serve as the internal walls of the font. And the last wall is made in the shape of a semicircle or at an oblique angle from wooden formwork. Everything is simple and reasonable.
Then we proceed to the construction of formwork from boards. You will need OSB sheets or flat bars (with their help you will form the walls of the concrete font), wooden panels, the already mentioned metal reinforcing rods and special wire (mounting wire) to create a solid frame.
Using all these materials you create the skeleton of the structure. It should be strong and without cracks. It is important. Through the cracks, the concrete mixture will escape from the formwork, which will reduce the quality of the work performed. Additionally, you can lay the formwork (walls, bottom) with thick construction film. It will increase the level of tightness of the bathtub frame.
Preparing and pouring the concrete mixture - how to do it right?
We will make the solution from sand and M-400 cement. The ratio of these materials is 3 to 1. Add water little by little to this sand-cement mixture and constantly stir the composition. As a result, you should get a solution that has the consistency of good (homemade) sour cream.
Before pouring concrete, decide on the points where the technological holes of the future bathtub will be placed. It is also worth making sure that there is enough space left for servicing the siphon during the operation of the font.
Use plastic pipes for water supply and drainage. Install them before you start pouring the concrete mixture. You can immediately install a siphon, connect it to the sewer network, and then firmly concrete it.
Plastic pipes for supplying water to the bath
Let's start filling. First, concrete is supplied to the bottom of the structure - the mixture must cover the entire skeleton of the font. Next, we form the bathtub wall from the concrete composition (the solution for these purposes can be made a little thicker).
We complete the pouring by tapping in different places on the formwork. Perform the procedure with a small hammer. Tapping creates vibration, which promotes uniform distribution of the mixture throughout the formwork structure.
Leave the building for three days. There is no need to cure the concrete any longer. In 72 hours it will become strong enough and quite suitable for subsequent processing - plastering.
Is wood afraid of water?
We know that the presence of water is the most important condition for the existence of life on earth. A tree, during its growth and development, also needs regular watering and absorbs liquid in significant volumes.
According to scientists, approximately 200 million trees grow even at the bottom of artificial reservoirs. And this is about one percent of the world's wood resource.
Environmentalists believe that transporting wood by water is harmful to nature, but it is still used
But even after the tree is cut down, its contact with water can continue. Whips and logs are floated down rivers, transported to the place of further use. They are even processed using the flooding method.
For example, oak, after several years spent in a flooded state, acquires special strength. Even before the processing stage, the cost of such material is very high.
It turns out that wood is quite compatible with water. But what she doesn’t like is frequent changes in temperature and humidity. We all know that an oak barrel filled with water swells. If you leave it for a long time without liquid, it can dry out and become unusable.
Bringing a concrete bath to condition - instructions
After 3 days, dismantle the formwork (the procedure should be performed as carefully as possible, remember that the concrete has not yet become completely monolithic) and plaster the font. At this stage of work, you level all the surfaces of the bathtub and give it the planned configuration. Activities are carried out using the rule of small geometric dimensions and a construction trowel.
After plastering, creating rounded or right angles and leveling the structure, treat it with a primer. Now you need to wait about 10 days. They are needed for final drying and hardening of the solution.
Plastering a concrete bath
There are mere little things left. It is necessary to properly tile the bathtub. Before doing this, apply a primer to all its parts (preferably in two layers). The mosaic gives the bath an attractive appearance. It is used for bathtubs with rounded corners. The mosaic is first mounted on a fiberglass reinforcing mesh, then the adhesive is applied to the concrete bath with a notched trowel and part of the mosaic is installed. It needs to be lightly pressed into the surface.
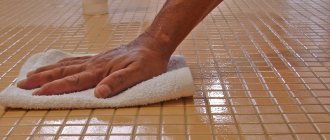
Then place the next piece of mosaic trim. The whole procedure will be quite long and painstaking. But you will have a font with an impeccable appearance. After installing the entire mosaic, grout the tiles (the seams between the finishing elements) with special compounds. You were able to make a bath with your own hands!
Brick font - do you need such a design?
Brick baths are built quite rarely. They are usually built in the following cases:
- If you are planning to turn a standard bathroom into a combined bathroom.
- If the swimming room in your home is large (you can make not just a bathroom, but your own brick pool).
- If you want to create an exquisite and very original bathroom according to an exclusive design project.
Brick bath
Before you start building a brick bathtub, think carefully about whether you need it. This type of font has several serious disadvantages. Its construction requires knowledge of the rules for laying bricks. The operation itself takes quite a long time (especially when a structure of complex shape is being built). And caring for a brick bathtub is significantly more difficult than caring for a concrete, cast iron or acrylic product.
But a brick bath has many advantages. It is very durable and easy to use (usually the depth of such bathtubs is greater in acrylic or cast iron bathtubs). And the cost of its construction, with a competent approach to the work, will be quite affordable.
Manufacturing technology
Plumbing fixtures made of wood are made in completely different sizes and shapes, and the quality can also be very different.
For the production of wooden bathtubs, special moisture-resistant tree species are used. Russian manufacturers most often use:
- oak;
- pine or cedar;
- nuts.
Foreign manufacturers use equally high-quality wood species , for example, wenge or zebrawood, which have a high level of moisture resistance and a low level of wear, making it durable. That is why earlier, and sometimes even now, these rocks were used for shipbuilding.
Today, before starting to make a bath, the wood is abundantly impregnated with antifungal solutions and, therefore, bathing in it is completely safe for health. In addition, various antiseptics and strengthening solutions increase the protective characteristics of the material, which allows it to maintain its original appearance for a longer period.
Assembling the plumbing begins with attaching small wooden boards to each other, which makes it possible to experiment with the shapes of the future bath. After this, the surface is polished and a layer of harmless varnish is applied to it, which performs protective functions.
Every year, manufacturing technology improves, new processing methods and means appear, which allows you to improve the quality and time of use of your plumbing fixtures.
