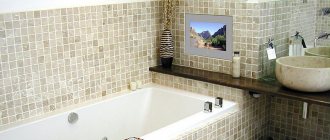
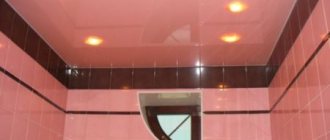
A suspended (suspended) ceiling is one of the most popular options for finishing a bathroom, and this is not surprising: this design is resistant to moisture, looks good and is not too expensive. Moreover, installation does not take much time. Let's consider all the stages of installing a suspended ceiling in a bathroom.
False ceiling in the bathroom
Choosing a material for finishing the ceiling in the bathroom
Let's look at the main types of suspended ceilings, their strengths and weaknesses.
Table. Types, advantages and disadvantages of suspended ceilings.
| Ceiling view | Advantages | Flaws |
| Rack and pinion | Moisture-resistant, easy to clean material | The appearance of such a ceiling is inferior to other types of finishing - such as cassettes |
| Ceiling made of plastic lining | Like slats, plastic panels are moisture resistant and easy to clean | As a rule, such a ceiling also has a very budget-friendly appearance. |
| Plasterboard ceiling | Environmental friendliness, ease of processing of the material, affordable price, the ability to paint it in any color | Drywall is not very resistant to moisture, so this ceiling may not last long |
| Cassette ceiling | Easy to install cassettes | Relatively high price |
The procedure for assembling the ceiling and the necessary tools
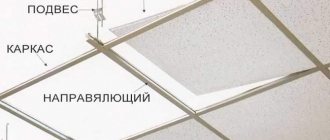
In order for the structure to be strong, it is necessary to mount it on a reliable foundation, which will consist of three parts: the initial, main and longitudinal additional frames.
The main stages of installing plastic panels on a bathroom ceiling include:
- installation of wiring for spotlights;
- marking;
- installation of the initial frame around the perimeter of the room;
- installation of the main frame along the entire perimeter of the ceiling;
- installation of an additional longitudinal frame;
- installation of slats, plastic lining, drywall or cassettes.
Set of hand tools for installing suspended ceilings
Tools you will need:
- ruler and pencil for marking;
- perforator;
- knife, hacksaw or metal scissors, glass cutter, jigsaw, grinder, construction knife for cutting finishing materials to the desired size;
- drill with a crown (to drill holes in the panels);
- screwdriver for tightening screws.
This is an incomplete list; depending on the type of frame chosen and the material that will be attached to it, other tools may be needed.
Installation of spotlights
If you leave the installation of lamps for later, you may encounter an undesirable situation: for some reason the connected device does not work and in order to figure it out, you have to disassemble the newly installed ceiling again. Therefore, it is much more reasonable to install the lamps during the installation of the suspended ceiling, immediately checking their performance.
Location of spotlights on a suspended ceiling
If the lamps generate too much heat (primarily this is typical for conventional incandescent lamps), the lamps must be wrapped in heat-resistant thermal insulation (basalt wool).
Frame for installing panels
There are three main materials for assembling the frame:
- tree;
- plastic;
- metal.
A wooden frame is not suitable for a bathroom, since this material is not resistant to constant exposure to moisture and will begin to warp and rot over time. Even if you carefully treat the wood with protective compounds, there is every chance that these problems will not be avoided.
Prices for suspended ceilings
suspended ceiling
Frame for suspended ceiling
Plastic , on the contrary, does not deteriorate at all in a room with high humidity and does not rot. However, plastic has a significant drawback - it lacks strength, so a ceiling assembled on a plastic frame may be too short-lived.
The best option, which is chosen by almost everyone who assembles a suspended ceiling, is a metal profile frame . This design is durable, reliable and safe, it is easy to install, and it will serve for a very long time.
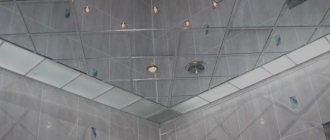
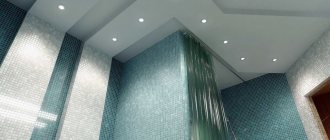
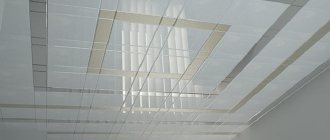
Suspended ceiling installation
Types of ceiling canvases
Stretch ceilings are divided into two types based on the type of material used - fabric and PVC. The first type is made of fabric impregnated with a polymer composition, which ensures its moisture resistance. This fabric looks attractive, has a long service life, and a wide variety of colors. In addition, the material is very durable and resistant to low temperatures. Despite all these qualities, fabric ceilings are not suitable for bathrooms: they allow water vapor to pass through, which accumulates as condensation on the ceilings.
fabric ceilings
Comparison of stretch ceilings
Colors of fabric stretch ceilings
PVC ceilings are made from polyvinyl chloride film, elastic, vapor-tight, and perfectly smooth. The color range of such ceilings is incredibly rich; any image can be made on film. The strength of the film is inferior to fabric, and it is a little more difficult to attach, but this particular material for the bathroom is the optimal solution.
Film for suspended ceilings
PVC film for suspended ceilings
PVC stretch ceilings
Film stretch ceilings differ from each other not only in color, but also in texture. Thanks to the latest technologies, in addition to glossy and matte canvases, other, more decorative options are now being produced.
| Surface type | Characteristics |
Matte | The most budget option, reminiscent of a smoothly plastered surface. It is usually produced in light pastel colors; it does not reflect light and therefore does not irritate the eyes with glare. Ideal for lovers of traditional classic interiors |
Glossy | The canvas is varnished, giving the ceiling a spectacular and eye-catching look. The glossy surface visually increases the space, so it is great for small bathrooms. The color palette is very wide; bright contrasting colors, as well as dark-colored canvases, are especially popular |
Satin | Semi-matte surface with a soft silky shine. The canvas has light reflective properties, which gives the room a very cozy look. Usually available in pastel colors |
Metallic | Surface with imitation gold, silver and steel coating. The material has high reflective properties, almost like a mirror. This ceiling looks very impressive and unusual. |
Perforated (carved) | The film has decorative cutouts of various shapes and sizes, forming a pattern. The ceiling structure consists of two or more such films stretched parallel to each other at different heights. The topmost layer is always solid, which eliminates the accumulation of moisture on concrete floors. This version of the stretch ceiling is the most original and effective |
pvc ceilings
Any of the types described above is excellent for photo printing, but most often the image is applied to film with a glossy surface. The drawing can be absolutely anything, from abstractions to personal photographs, so the choice is limited only by personal preferences and the correspondence of the image to the bathroom interior.
Ceiling with photo printing
Drawing on a suspended ceiling
Installation of wiring for lamps
There are several basic nuances of installing lamps and wiring for them that must be kept in mind.
- The distance between lamps that use incandescent lamps or energy-saving lamps must be at least 10 cm. For lamps with LED and halogen lamps, this figure must be at least 5 cm.
- It is better to run a separate wire to power each of the lamps, because in this case a lot of wiring will be needed, but if something happens to one of the lamps, the others will continue to burn.
- Wiring in the bathroom must be located at least 1.5 m above the floor level.
- In order to avoid short circuits, each wire must be placed in a corrugated pipe. In addition, in this case there will be no need to disassemble the ceiling if something happens to the wiring. To replace the old wire, it will be enough to insert a new one into the pipe so that it comes out on the other side (at the place where the lamp is installed).
- You can secure the wires to the suspended ceiling using clamps. In this case, their length should be such that the ends hang down 10-15 cm below the level of the frame. In this case, it will be convenient to install lamps.
- The installation box must be below the intended ceiling level, in which case you will have free access to it at any time.
Installation of wiring for lamps
Important! You need to connect one wire to the switch, which will be located in the bathroom, and several wires from the switch to the lamps in accordance with the number of lamps.
Some types of slatted ceilings
The design of all types of suspended structures is similar. Design models can be:
- open type;
- solid;
- closed.
Open ceilings are made of slats. The gaps between them remain open. In solid structures, the gaps are closed with overlays. Closed structures are characterized by a tight fit of the panels. With this installation, the gaps become invisible.
Types of slatted ceilings.
The best option is a design with a ventilated space between the base and the flooring. This method protects against mold. A successful construction is made from perforated panels. All moisture easily evaporates through the holes.
Reiki is conventionally divided into:
- German;
- Italian;
- French.
German versions have clear edges without rounded corners or chamfers. Italian profiles have rounded shapes and smooth transitions. French products occupy an intermediate place. There are strict lines along with rounded chamfers and corners.
Parts differ in materials of manufacture:
- plastic;
- Cink Steel;
- aluminum;
- wood.
Plastic panels are the cheapest. They are protected from moisture and do not corrode.
Steel products are more expensive than plastic ones. To protect against corrosion, the metal is coated with polymers of different colors. Color shades give the panels an attractive appearance.
Slat options.
The best option for slats is aluminum. They are not afraid of moisture and temperature changes. With a thickness of up to 0.5 mm, the parts remain lightweight and can be mounted without problems.
Wood is not recommended for bathrooms in any form. It can be replaced by a metal or plastic simulator.
The ceiling panel can be chosen in any shade and degree of surface gloss. The choice ranges from matte products to mirrored ones. Mirror surfaces in the bathroom look impressive, but not everyone likes them. Reflections flickering on the ceiling cause irritation for many residents, so you need to choose the lath carefully.
Assembling a starting frame for a suspended ceiling
The first step is to mount the starting frame (other names are wall or edging profile). This is the basis on which the entire suspended ceiling will be assembled. For the construction, you need to use a U-shaped profile if plastic panels or drywall are supposed to be fixed to the frame, and for a slatted profile, both U-shaped and L-shaped are suitable. A corner is usually used for finishing with cassettes.
Step 1. Make markings by drawing horizontal lines on the walls 10-20 cm from the main ceiling. You can also use a painter's cord to mark. The lines must be very even, because this determines whether your entire ceiling will be even.
Step 2. Cut the metal profile into pieces of the required length so that each of them can clearly fit along the perimeter of the walls. If you use the U-shaped option, you first need to cut the sides or shelves, then bend the metal profile in the direction opposite to the shelves and cut off the part that is located between them - the back. If the profile, on the contrary, turns out to be too short, you will have to attach two or even three pieces to one wall.
Step 3. Drill holes for self-tapping screws in the metal profile. They can be placed at a distance of 0.5 m from each other.
Assembling the starting frame
Step 4. Attach the profile to the wall along the previously marked line, drill holes there at points that correspond to the locations of the holes in the profiles.
Step 5. Install dowels into the walls, and then screw screws or self-tapping screws into them.
Ceiling frame prices
ceiling frame
Starter frame for suspended ceiling
If you use a U-shaped profile, it must be butt-joined in the corners of the room. To do this, you need to widen the sides of one of the profiles using pliers, and then insert the shelves of the other between them. Two pieces of L-shaped profile can be installed overlapping, that is, in such a way that the bottom side of one overlaps the bottom of the other.
Video - False ceiling in the bathroom. Frame assembly
Features of the room and choice of material
The bathroom is characterized by two features:
- Quite stable temperature regime;
Reference: according to SanPiN 2.1.2.2645-10, the optimal temperature in a bathroom or bathroom is 24-26°C. In the cold season, it is allowed to reduce it to 18°C.
Temperature standards from SanPiN
- Significant fluctuations in humidity. Immediately after you take a hot shower, the relative humidity in the room may exceed 100% (in this case, the bathroom is filled with steam); but in just a few minutes, thanks to the ventilation, its level will drop to the average level in the apartment.
This implies the main requirement for the materials we use: the suspended ceiling for the bathroom should not be hygroscopic (absorb moisture).
Wall panels made from polyvinyl chloride fully comply with this requirement. PVC does not absorb water and tolerates long-term contact with it well: just remember that this plastic is used for the production of pressure and sewer pipes.
PVC is used for the production of sewer pipes and fittings for them
Yes, products made from the polymer we are interested in have a significant coefficient of thermal expansion; however, we found out a little higher that a fairly stable temperature is typical for a bathroom, so there is no need to worry about the appearance of gaps between the panels.
Are suspended ceilings in a plasterboard bathroom afraid of fluctuations in humidity? The author, based on his own experience, assures you that gypsum board is perfect for a bathroom or toilet.
But with two caveats:
- The plasterboard ceiling should not come into contact with water. With prolonged moisture, gypsum swells and loses mechanical strength. If we are talking about a sloping attic ceiling located at a small height above a bathtub or shower stall, it is better to prefer other, more moisture-resistant materials;
The sloping ceiling above the bathroom will inevitably be covered with splashes when taking a shower
However, the problem of gypsum board contact with water can be solved by using waterproof paint as a final coating. The author of these lines painted the ceiling of the combined attic bathroom with rubber water-based emulsion, which is positioned by the manufacturer as a waterproofing material. Four years after commissioning, the ceiling retains its impeccable appearance.
This paint makes the ceiling surface waterproof
- Bathroom ventilation should be quite efficient. Prolonged exposure to damp air will have the same effect on drywall as direct contact with water.
Exhaust hood in the ventilation duct will completely solve the dampness problem
A special case
If you are periodically flooded by neighbors upstairs, plasterboard suspended ceilings in the bathroom are a bad idea. In the best case, after the next flood you will have to make cosmetic repairs; in the worst case, you will have to completely dismantle the deformed or partially collapsed ceiling.
Consequences of gypsum board flooding
In contrast, bathroom suspended ceilings made from vinyl wall panels can withstand flooding well. After the next municipal disaster, you will only have to wipe the plastic from drips.
Installation of the main frame
To construct the main frame, the following are used:
- traverses (stringer tires) - if the ceiling is finished with slats;
- PP profile 60×27 mm or CD profile - for ceilings made of plastic lining and plasterboard ceilings;
- L-profile - for cassette ceilings.
Symbols for metal profiles
Assembly of the main frame takes place in five stages.
Step 1. Make marks on the walls at the points where the profiles or stringers should be located. The first one can be placed at a distance of 30 cm, and all subsequent ones - in increments of 1 meter. If you plan to use heavy finishing material, such as metal cassettes, the distance should be smaller - about 0.5 m.
Step 2. Mark the ceiling using a painter's cord and attach the hangers to it.
Suspension mounting diagram for mounting a plasterboard ceiling
To do this, tighten the screws in the right places so that they stick out approximately 0.5 cm, and wrap the cord first around the profile at the level at which the end mark is located, then pass it around the screw, and then again around the profile and next screw.
Metal suspension with sound insulation
Step 3. The next step should be to install the suspensions on the main ceiling. Screw the metal profile segments to the ceiling, which will act as hinge joints, and then insert the hanger hooks into them.
Step 4. Attach the profiles or stringers to the hangers. Also, the profiles of the main frame must be fastened to the starting one, the only exception being rack and cassette ceilings - in this case it is not necessary to connect them into a single structure.
A clear example of a slatted ceiling design unit
Step 5. Adjust the length of the hangers so that all profiles or stringers are located at the same level. If you want to get a flat ceiling, you need to approach this step very carefully. To do this, you need to use a mounting thread, securing several of its rows 1-2 mm below the level of the main frame. If one of the profiles or stringers comes into contact with the thread, the suspension or suspensions on which it is supported must be carefully adjusted.
Assembling the main frame
Important! If the stringers you use are shorter than the length of the room, you need to fasten them in one row of 2 pieces close to each other. Then the hangers will need to be placed no more than 30 cm from each of the edges of the traverse.
A short profile can be extended using plug-in connecting elements: the ends of two profiles are inserted into such an element and then mounted using self-tapping screws.
Armstrong ceiling prices
Armstrong ceiling
Construction of an additional longitudinal frame
An additional frame is usually made from profile sections. They are connected to the main profile at an angle of 90 degrees so as to form quadrangles. The longitudinal frame can be secured to the main frame using special locks. If drywall will be attached to the frame, the additional frame is attached to the base frame using special crabs. They are put on the main profile from above, after which an additional profile is applied, the antennae are bent and screwed onto self-tapping screws.
This is what a finished frame looks like for installing a suspended ceiling
Selection and correct marking of suspended ceiling height
The most significant disadvantage of a suspended ceiling is that it reduces the actual height of the room after its installation. During installation, they try to achieve a minimum deviation of the actual height of the room from the calculated height for a suspended ceiling. This difference is dictated by the height of the supporting structure, the height of the lighting elements and the ventilation efficiency of the sub-ceiling space, but the minimum recommended deviation is 10 cm. When choosing a height, it should be taken into account that the lighting elements located inside the suspended ceiling should not come into contact with the ceiling of the room. The gap between them should be at least 1 cm.
If the ceiling in the room is uneven, select its lowest point and from there measure the calculated minimum values for installing a suspended ceiling.
At this stage it is necessary to use a level, preferably a water level.
The markings are applied to all walls of the bathroom in one continuous line.
Attaching the slats to the frame
Step 1. Calculate how many slats will be needed to cover the entire ceiling. If necessary, cut the last of them lengthwise so that it fits clearly between the penultimate batten and the wall, closing the remaining gap. A plastic panel must be cut with a special knife; for a metal panel, you will need a metal knife.
Slat ceiling installation diagram
Step 2: You may also need to trim the slats to length. They will fit into the end profile more easily if they are 3-5 cm shorter than the length of the room.
Step 3. Cut holes in the panels for the lights. To do this, you can use a jigsaw, knife or metal scissors.
Step 4. Place the first strip on the stringer so that it fits into the profile mounted on the wall.
Step 5. After this, one by one, insert all the other slats into the end profile, turning them slightly in a diagonal direction, and attach them to the stringer, pressing until they click.
Step 6. Immediately after you install the panel with the hole for the light, run the pre-wired wire through it.
Sequence of installation of a rack ceiling
Step 7. If the ceiling design you choose involves the use of interpanel profiles, install them during the installation of the slats. In order to do this, you must first pass one end between the panels, and then the other, pressing on it so that the element fits securely into place.
Step 8. The final step is connecting the lamps and installing them in the prepared holes. To install the lamp, you need to squeeze the antennae, insert it and press well.
Make a hole for the lamps using a cutter of the required diameter
Prepared hole for lamp
At this point, the installation of ceiling slats can be considered complete.
Panels
How are suspended ceilings in a bathroom made from vinyl wall panels assembled?
Materials
The plastic suspended ceiling for the bathroom is mounted on a frame that is almost identical to the frame under the gypsum board.
There are only two differences:
- The step between the hangers can be increased to 80 centimeters: honeycomb panels are lighter than plasterboard and create less load on the sheathing;
- The step between PP profiles should be reduced to 40-50 centimeters. With a large pitch of the sheathing, the panels may sag over a couple of years.
For obvious reasons, putty, serpyanka and primer are dropped from our shopping list.
Instead, the following will be added to the list:
| Image | Description |
| Plastic baguette. It can be replaced with a starting L-profile for panels, but in this case the junctions with the walls will look less neat. Another solution for abutment design is a foam ceiling plinth. |
| Actually the panels. The most impressive look is the ceiling made of single-color glossy seamless panels of maximum width (370 mm). |
| Liquid Nails. They will be needed at the final stage of ceiling assembly. |
The ceiling edging in the photo is made with the starting L profile
Please note: to attach the panels to the sheathing, you can use the same metal screws that connect the profiles to each other.
Tools
In order to assemble a suspended ceiling for a bathroom from PVC panels, we will have to supplement our toolkit with an angle grinder with an abrasive cutting wheel. This is an ideal tool for cutting cellular PVC: the cut is smooth, without burrs or cracks. Holes for lamps are cut with a stationery knife.
The grinder cuts plastic without chips or cracks
Soffit holes can be easily cut with a utility knife
Fitting panels to the frame
So, we have to install suspended ceilings in the bathroom: step-by-step instructions for assembling it are at your service. We will analyze the fastening of panels with plastic baguette edging.
- We cut the baguette to length and attach its shelf to the PNP profile along the perimeter of the bathroom with self-tapping screws. Without a baguette, only one wall remains (with a shorter length). For more reliable fixation, before fastening, you can apply a strip of liquid nails to the profile;
- We cut the panel so that it is 2 centimeters shorter than the distance between the long walls of the bathroom;
- We insert one end of the panel into the baguette until it stops (its width is the same 2 cm), then insert the second end one centimeter into the baguette on the opposite wall and insert the long edge of the panel into the plastic baseboard on the short wall of the bathroom;
The first panel is inserted into the baguette on three sides
- We fasten the panel lock protrusion to the sheathing profiles with 9 mm self-tapping screws and press washers;
Attaching the lock to the sheathing
- We fasten the remaining panels in the same way;
- We cut the last panel in width so that it is one centimeter narrower than the distance from the edge of the penultimate panel to the wall;
- We cut out and place a piece of baguette on the edge of the panel facing the wall;
- Apply liquid nails to the baguette shelf;
- We connect the panel with the previous one (to insert it into the lock, use suction cups or a spatula), align the baguette along the wall and glue it to the PNP profile. The installation of the suspended ceiling in the bathroom is complete.
Installation of the last panel
Repair
How to disassemble a plastic ceiling to replace a damaged panel?
To do this, you need to pry with any sharp tool and tear off the last-glued baguette along with the outer panel from the profile. Then the panels are unscrewed from the sheathing and removed one by one until you reach the area with the defect. Assembly is carried out in the same order as during installation.
Plastic ceiling disassembled to the defective area
Installation of plastic panels on the frame
Plastic panels are similar to slats, but they are attached differently.
Step 1. First of all, you need to fix the starting strip or a special ceiling plinth with a groove for attaching the panel near the wall.
Step 2. Next, you need to install the first panel, first inserting one, then the other end into the groove of the baseboard or starting strip and pressing firmly so that the product fits securely. The fourth side must be secured with self-tapping screws.
Installation of plastic panels on a metal frame
Step 3. All subsequent panels are installed in the same way, one after another.
Step 4. If the last panel turns out to be too wide, it will need to be cut with a jigsaw or grinder, adjusted to the desired size, and installed like all the others.
Assembling a suspended ceiling from plasterboard
Installation of plasterboard sheets onto a prepared frame takes place in five main stages.
Step 1. If necessary, you need to cut the finishing material to the required size. To do this, you need to put it on the floor and mark it with a pencil. Having made the necessary measurements and drawn a line along which the cutting will be done, you need to attach a metal ruler to this line and, holding it firmly with your hand free from the mounting knife, place the tip of the knife on the line. It is not necessary to use a metal ruler; any substitute with a sharp edge will do. Being careful, you need to cut the cardboard exactly along the line. After this, you only need to trim it at the bend.
After this, you only need to trim it at the bend.
The cut sheet is bent and finally cut at the fracture site
Step 2. Drywall must be attached to the frame using special screws. They should be placed at a distance of 20 cm from one another.
Step 3. After all the panels are installed, they must be covered with primer.
Step 4. When the primer dries, you need to seal all seams, joints along the walls and places where self-tapping screws entered the plasterboard sheets with putty.
Prices for jigsaws
jigsaw
Installation of drywall sheets
The final steps are leveling the ceiling if necessary, painting and gluing the ceiling plinth.
Installation of cassette suspended ceiling
Once the frame is assembled, installing the cassette ceiling is very simple. If you have chosen a ceiling with an open frame, the cassettes must be placed on top in the cells. If necessary, they must first be cut to the required size: mineral ones can be cut with a jigsaw, glass or mirror ones can be cut with a glass cutter soaked in kerosene.
Cassette suspended ceiling
Another option for a cassette ceiling in the bathroom
White cassette ceiling
Suspended cassette ceiling
For ceilings with a hidden frame, aluminum or steel cassettes are usually used. There are special fasteners on their sides with which they are snapped to the bottom of the frame. You need to start with the outermost row, and then add subsequent rows one by one.
How to attach PVC panels to the ceiling?
You will find detailed instructions here. You will also probably be interested in an article about the technical characteristics of the Armstrong suspended ceiling.
At first glance, it may seem that installing a suspended ceiling is a complex and time-consuming process, but in reality this is not the case. You just need to start by purchasing the necessary materials and making markings on the ceiling, and then do all the work step by step, avoiding unnecessary haste and following the correct technology. If you do not have experience installing such a ceiling, it can really take quite a lot of time, but you will certainly like the result - a new beautiful ceiling will be pleasing to the eye and will serve you for many years.
Which ceiling to choose
The choice of ceiling design should be determined by technical conditions, but even more so by considerations of bathroom design. The most categorical condition, it seems, is the low height of the room, which limits the height of suspended structures. An amateur designer of a future ceiling must understand that reducing the volume of a small bathroom will dramatically reduce its level of comfort.
For the minimum possible loss of volume, you need to adopt a plasterboard ceiling system with frame fastening on brackets, without hangers, or one of the slatted structures made of aluminum or plastic, installing them close to the ceiling.
If the possible loss of height is not significant, you can choose any design and refine this choice with design considerations. Here are some key factors to consider:
- The larger and more intense the visible ceiling structures, the greater the impact they have on the space and the smaller the space appears
- Bright, warm and hot color tones visually seem closer, reducing the space and vice versa - cold grayish-bluish tones of low intensity move away and the room seems larger
- You need to be careful with a mirrored ceiling - a bright, contrasting and intense reflection above your head will never enlarge the room - it can make it twice as rich and it is possible that you will soon want to remove the mirrors from the ceiling
- A ceiling with a geometric “load” in the form of suspended ceiling structures can be made lighter by making the walls heavier, using dark contrasting tiles on them, powerful decor - against the background of such walls the ceiling will become weightless.
Among the technical features, users may be interested in the 100% resistance of aluminum and plastic from any influences in the bathroom, which cannot be said even about moisture-resistant drywall - it may not withstand a serious “bath” load, just like the finishing layers made on it. Many people are deterred from using drywall by the necessary qualifications, without which it cannot be installed and then finished properly.
But all prefabricated ceilings can be done by a home craftsman alone with confidence and quality,
Thus, in a small bathroom, aluminum or plastic structures may look a little heavy, but they will ensure the complete safety of the ceiling for a long time. A plasterboard ceiling will obviously give a more delicate result, but its operating mode needs to be monitored.