Decoupage is an interior decorative technique that can be used to decorate any objects in the room. The technique is simple, used by professional designers and amateurs. It looks like an applique. Fragments of paper or fabric are applied with glue to various surfaces, including glass, tiles, wood, and ceramics. Decorations using this technique look impressive on the surface of tiles, on the outside of the sink, or on the bathroom door.
Decoupage allows you to update different objects in a room using designs cut out of paper or fabric. The most popular image motifs are floral, sea, landscape. Fish, dolphins, crabs, starfish and other inhabitants of the deep sea look great in the bathroom. Plumbing fixtures are decorated with mosaics, Gzhel, and abstract motifs.
Benefits include:
- the opportunity to create a unique interior in the bathroom;
- no high costs;
- there is no need to involve outside specialists, you can do it yourself;
- the opportunity to update any item by decorating it with a pattern.
Other ways to decorate a bathroom door ↑
To update and decorate your bathroom door, you can use any of many other methods:
- Simple coloring. In order for the painting to be effective, and for the door to be updated and look perfect, you need to work on it: remove the old paint, go over the surface with sandpaper, and fill in any unevenness with putty.
- Painting in several colors. The surface is also prepared and painted in two colors, which can be combined according to your wishes or the designer’s sketch. To save money, you can buy a can of white paint and two dyes.
- Drawing using a stencil. Decor can be applied using a stencil. You can buy them ready-made or order them from a workshop. The stencil is applied to the surface and painted over. To prevent paint from flowing under the stencil, it must fit tightly.
- Photo wallpaper made to order. Based on the size of the door, you order any image you like, prepare it yourself, or order it from a designer who will offer you his own option. Printed on self-adhesive vinyl film, they will provide additional protection against moisture.
- Stickers. You can select (create) images on a painted surface, print them and stick them. You can cut out figures from a single-color self-adhesive film and stick them in the form of an ornament or an abstract composition.
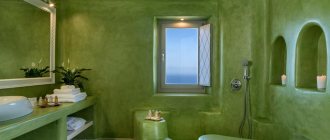
Cool green color in bathroom interior design creates a feeling of freshness and cleanliness
There are many other options for decorating a bathroom door. Everyone chooses equipment to their liking and budget, suitable in style to the interior of the bathroom. Creativity is a state thanks to which all the best, bright and real awakens in a person. But, if the process is not as important to you as the result, then it is better to contact a specialist who is fluent in this or that technique. For the result to be perfect, it is not enough to be an artist at heart; you need talent, knowledge and skills.
Stages of work
Decorations on the tiles can be made before laying the tiles or already on the finished wall. Any surface must first be degreased and cleaned of dirt and dust. The process takes place in several stages.
- Decorative elements are cut out of the material to fit the size of the tile.
- The surface of the bathroom wall must be thoroughly degreased. To do this, you can use acetone or a solution containing alcohol.
- The glue is applied to the back of the paper or prepared surface. In the second option, there is less risk of damaging the image. If the paper is thick, then the adhesive base is applied to both the tile and the decor. If tissue paper, textiles, and napkins are chosen for decoupage, then the decorative elements are covered with glue on top. It is worth making markings in advance to prevent streaks.
- The surface of the paper and fabric must be smoothed with light movements in the direction from the center to the edges to prevent the formation of air bubbles under the coating.
- After the glue has completely dried, the tile is varnished one or more times to consolidate the result. This work is convenient to do with a brush or roller. Subsequent varnishings are carried out after the previous layer has completely dried. It is not recommended to use the bathroom at this time, otherwise the humidity will prevent the glue from quickly hardening.
Doors, wood, plywood and other materials with a rough surface are treated with sandpaper; smooth ones just need to be wiped with a solvent. Then you need to prime or paint with acrylic paint of a suitable shade. As decoration, you can use special cards for decoupage, postcards, photographs, and computer printouts. The image is glued and neatly smoothed out. After complete drying, you can apply a beautiful background and varnish 2-3 times.
If the tile is decorated before laying it on the walls, and not all of it, but only part of it on one side, then you need to carefully monitor the symmetry of the pattern during installation. If the motif is complex and consists of several elements, then you should first draw it on paper, then number the individual parts of the sketch and the original. It is advisable to outline the contours of the drawing with a sharp pencil, this will avoid mistakes. Pre-painting with pearlescent varnish creates an unusual shimmering texture of the image. When choosing vintage images, it is advisable to use craquelure varnish, this allows you to achieve an aging effect in the bathroom.
Required materials and tools
Any decoupage master class begins with what tools and materials are needed for this. After all, without them, the method cannot be implemented efficiently and fully.
So, you will need translucent paper (plus a printer) or a napkin with a pattern. A special ceramic firing agent will also come in handy. You need enough ceramic tiles to fully place the design. You will also need acrylic varnish and paint. To apply them use a brush.
Scandinavian
She prefers white or similar shades (any light colors) in her interior. This visually significantly increases the space, which is why this style is loved. Light colors should be present in furniture, plumbing fixtures, and accessories. Wood and stone are unacceptable for a Scandinavian (except perhaps for decorative items, of which very few are allowed here). The lighting is moderately bright. Any modern materials will suit it. This style has a strong commitment to color. One of the most common color schemes is a combination of yellow and gray with white.
Scandinavian bathroom style allows for contrasting decorative elements
A minimum of design elements is the hallmark of the Scandinavian style
Designer's advice. If the room is too small, mirrors placed on opposite walls will create an infinity effect.
Mirrors will expand the visual boundaries of your bathroom
Choosing plumbing
A spacious bathroom is every designer's dream. For such rooms, all shades are acceptable. Creating comfort with your own hands in a small space is a real art. You should think about what the final decor of the bathroom will be at the stage of selecting plumbing fixtures and finishing materials:
For a large room, a corner bath would be appropriate, in addition to which you can install a shower. A luxurious sink with decorative sides, magnificent mirror inserts in a massive frame will look great in different interpretations. If the bathroom is small, then you should purchase a one-sided standard model or even limit yourself to a compact shower stall. Is the room narrow and rectangular? You can install shortened modifications of bathrooms, the standard length of which is 1 m 20 cm. In this case, additional space will appear allowing you to place a washing machine
Owners of modest-sized bathrooms should pay attention to hanging furniture and sanitary ware.
There are many size ranges for plumbing fixtures. For a large, solid bathroom, it is worth buying at least a standard sink - about 65 cm long and 45 cm wide.
Arranging a small area will require more effort: it is worth looking for ergonomic analogues of the usual equipment: mini-washbasins with dimensions of 37 by 23 cm or modest sinks - 50x41 cm. In many cases, corner modifications will help free up space. There are also toilet models with smaller bowls and a built-in flat tank.
Those who intend to do the work with their own hands should pay attention to the presence of optimal spaces: there should be a comfortable distance of at least half a meter in front of the toilet, and about 20 cm on the sides. The standard height of the sink is 80 cm, and for a convenient approach it is worth organizing passage 70 cm
After selecting the plumbing fixtures and designating their location, you can think about finishing materials and select the right type of textile.
DIY craftsmanship
When decorating a bathroom with your own hands, it’s the little things that matter: harmoniously selected soap dishes, toothbrush holders, towels, hooks, storage boxes, curtains, laundry baskets...
Any attribute can become the subject of a colorful design - the main thing is to fit them organically into the existing interior.
The assortment on the market is replete with the variety of fittings and ready-made designer accessories offered. There are plenty to choose from!
Candles, vases, artificial or fresh flowers will complete the look. Pebbles and shells look organic – a marine theme.
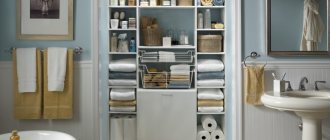
Wicker containers, boxes, and baskets for storing everyday items, textiles, and household supplies are spectacular and at the same time convenient.
Do-it-yourself production is also encouraged: there is room for imagination and creative self-expression!
Unusual vases made from decoupaged transparent jars, hand-painted curtains, and rugs knitted from matching threads add coziness.
The main thing is not to overdo it and maintain a single style look!
