The bathroom is the face of every home, the appearance of which speaks of the wealth, thriftiness and style of the homeowners. The central place in the bathroom is occupied by the bathtub, which is used for hygiene procedures or washing. The selection and installation of a washing container is the most important stage of renovation in this room. To save money on calling a professional technician, you can install the tank yourself. In this article we will tell you how to secure a bathtub so that it does not wobble, but stands steadily.
Fastening methods
Steel bathtub mounted to the wall
It is possible to install a steel bathtub securely and stably. For this purpose the following are used:
- brick base;
- polyurethane foam;
- insert into a niche;
- metal corners;
- frame made of metal profile.
In all cases, except for the construction of a brick base, the bathtub is also installed on complete legs.
Video story about how to install a bathroom on a tiled floor ↑
In order not to tempt fate and the bitterness of disappointment, it is better to immediately turn to specialists. The craftsmen will help you develop a project, select materials and carry out all the work on installing plumbing fixtures that will last for many years and will not cause any trouble.
Washing in a bathtub that shakes under your feet is still a pleasure. And in order for it to stand and not wobble, additional measures are needed. How to fix a bathtub, what fasteners to use, how to fix the legs on a tiled floor - all this is below.
Installing legs on a bathtub
Legs come in different designs. The easiest way to install is paired ones: two supports are connected by a metal concave strip that follows the shape of the bowl. They are attached to the inverted bathtub with one screw, and spacers are installed between the legs and the bowl. The kit may include legs on a self-adhesive base, the installation of which is also easy. It is more difficult to fix metal supports, which are tightened in pairs with pins.
The installation procedure is as follows:
- Plugs are attached to those parts that will be adjacent to the bowl.
- Then, a horseshoe-shaped bracket is inserted into the grooves located on the fold of the main part with the hooks facing up. On the reverse side, press the hooks with pliers.
- There are metal loops on the parts, and protrusions on the outside of the bathtub body. The legs are installed so that the protrusion is in the loop.
- Then a pin is inserted into the special holes and secured on both sides with nuts.
All that remains is to screw the metal pin legs with rubber heels into the holes provided for this purpose.
Raising to your feet
Often, factory bathtubs come with special legs that are attached directly to the plumbing structure. However, their length is not always enough. What to do if the factory legs for the bathtub are very short? It's very simple: you should buy new, longer screws.
At home, you collect 1 leg, and then take it with you as a sample to the nearest plumbing supply store, or to the market. There you search and buy screws with the length and thread size that suits you. Then, upon returning home, simply replace the purchased screws with factory ones and install them on the bathtub.
When purchasing, you should pay attention to the quality of the product. Remember the load that the legs will hold - this is a bathtub filled with water in which a person is sitting. For good stability of the bathtub and the safety of your household, you should only choose products from trusted companies.
This method will allow you to raise not only standard bathtubs, but also original models with designer legs. Raising the bathtub this way is quite easy, and the new screws will be almost invisible.
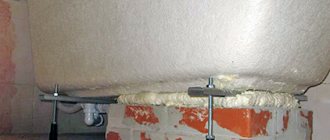
Polyurethane foam
Installation of the structure using polyurethane foam
This is the easiest way to secure a steel bathtub so that it does not swing. The only disadvantage is the high consumption of polyurethane foam:
- The bowl is first placed on its legs, leaving a gap of one centimeter against the wall.
- Connect the drain.
- Fill a bowl with water.
- Fill the space between the bottom and the floor with polyurethane foam, taking into account that the composition gradually expands upon contact with air.
Be sure to leave access to the siphon.
Insulation of a steel bath
Insulation of the font with polyurethane foam
It’s clear how to fix a metal bathtub; now it needs to be insulated. The need for this action is determined by the thinness of the walls of the iron bowl and the high quality of thermal conductivity. Insulation of a steel bath can be done in two ways:
- Foam the outer surface of the bowl with regular mounting foam. This must be done without skipping and as carefully as possible. If, after the final insulation, additional decoration of the font is planned, the foam needs to be leveled.
Advice! After complete hardening, the foam can be painted, sewn up with plastic, or protected in some other way.
- The bathtub bowl is framed with wooden/steel/plastic guides, creating the appearance of a lathing (frame). Then the structure is tiled. So, when filling a bathtub with hot water, a thermos effect is created, that is, the air space between the bathtub wall and the tiles heats up and retains heat.
Thermal insulation of a steel bath is not difficult, but necessary. A well-known decorative technique is leveling polyurethane foam with the effect of creating relief plaster, followed by painting with waterproof enamel.
Foaming a steel bathtub is not at all difficult, but if you want to achieve the perfect effect, silicone sealant is applied on top of the foam. The method guarantees ideal heat retention, which means that the consumption of boiling water will decrease several times.
Installation on bricks
For laying a brick base, it is better to use fired material that is resistant to moisture, since there is high humidity in the bathroom.
You will need:
- bricks - approximately 20 pieces per two supports (depending on height);
- cement mortar (for half a bucket of M400 cement, two buckets of sand);
- trowel;
- drill with mixer attachment;
- roulette;
- pencil;
- level.
The side should not be higher than 70 cm, so that you do not have to make a podium with steps. From this calculation the height of the brick base is determined.
Instructions for implementation:
- To make the necessary markings and take measurements, install the bathtub on the legs in the place and position in which it will be after installation on the bricks. At the same time, mark with a line the place where the plumbing fixtures come into contact with the wall, and measure the distance from the bottom to the floor. It is not necessary to set a slope towards the drain, since it was already created when the bowl was cast.
- The bathtub is then removed from the room.
- Considering that the width of the standard model is 70 cm, the length of the base is determined to be 60 cm, since it should not be larger than the bath itself. The masonry will be 2.5 bricks long, based on a standard length of 24 cm.
- If the installation height is 16-17 cm, then two rows of masonry are enough, since the height of the brick is 7 cm, plus take into account the thickness of the mortar and the required gap between the base and the bottom - approximately 1 cm. More brick parts are placed along the edges of the top row, adjusting them to the shape of the bowl.
- Prepare cement mortar by mixing cement with sand and gradually adding water to it. You can replace some of the material with tile adhesive to make the solution more plastic.
- Lay a base consisting of two or three supports and allow the cement to harden for 2 days. Then lay a layer of mortar on the base, repeating the shape of the bowl, but slightly increasing the thickness of the layer in the center. The places adjacent to the wall are also treated with cement.
- Place the metal bath on the base and press it into the wall. Excess cement is immediately removed before the solution sets.
You can also lay columns of bricks around the perimeter, fixing them on edge, and from the outer edge of the bathtub it is advisable to lay out not just pillars, but a screen from bricks. This installation method is used both separately and in combination with foundation masonry.
Practical tips for attaching a clawfoot bathtub to a tiled floor
Once the clawfoot bathtub is securely attached to the tiled floor, repair work and dismantling of plumbing fixtures become significantly more complicated. In order not to create problems for yourself while using the bathroom, do not rush to start work, carefully study the recommendations of professional plumbers. What should you pay special attention to?
Stack of water. It depends not only on the parameters of the siphon, as many inexperienced builders think. The main condition of the stack is that all curved siphon tubes and the drain in the bathtub must be located above the level of the sewer pipe. The greater the height difference, the faster the water will drain. The rapid flow of liquid automatically cleans the pipelines, as a result, you will have to do preventive inspections and repairs much less often. Before attaching the bathtub, raise the adjustable feet as far as possible. At the same time, make sure that the comfort of use does not deteriorate; the distance of the sides to the floor should be in optimal values and not make it difficult to use the bathroom.
Slope of sewer pipes
If possible, replace corrugated flexible siphon connection hoses with smooth plastic pipes.
Bath siphon
Working with flexible hoses is much easier; there is no need to strictly observe the dimensions; they can always be bent into the desired position. These are the undoubted advantages of such elements. But they also have a significant drawback. Dirt quickly accumulates in the folds of the corrugation; it will not be possible to remove it from there simply by washing; you will have to disassemble the siphon.
Corrugated pipes clog quickly
Frequent disassembly of the siphon can cause damage not only to the rubber seals, but also to the threaded connections. As a result, serious damage occurs, requiring complete replacement of the device. It is extremely difficult to carry out this work on a bathtub firmly attached to a ceramic floor. It is necessary not only to lie down under the bath, but also to perform all work with extreme caution in conditions of limited visibility and accessibility.
Practical advice. To increase the reliability of using the bathroom, it is recommended to buy siphons without a separate sump. It brings more problems than it is worth. Buy those types of siphons in which the function of a sump is performed by an ordinary bend of the tube. Such a device does not allow unpleasant odors to enter the room, becomes clogged much less often and, if necessary, is simply cleaned. There is no need to disassemble the siphon, just clean the pipe with an ordinary rubber plunger.
The siphon is plastic, the sump is represented by a curved pipe
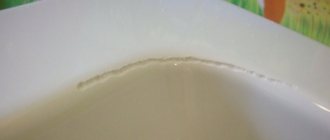
Try to buy bathtubs from imported manufacturers. Domestic ones, unfortunately, are often of poor quality. This applies not only to enamel, but also to geometry. Check the corners of the sides with a long square; in domestic products they are rarely straight. An error of just a few tenths of a degree over a long bath length turns into several millimeters. Due to this, a wedge-shaped gap is formed between the side and the perfectly flat wall. It is not recommended to seal it with silicone sealant; the errors become too visible. You have to use special plastic or ceramic baseboards for bathtubs, and they should be mounted only on fixed surfaces. At the slightest vibration, the corners come off; re-gluing them without securely fixing the bathtub is useless.
Ceramic bath skirting board
Plastic bath skirting board
Keep in mind that all repair work in the premises being used is much more difficult and expensive than taking timely measures to prevent problems from arising during operation.
To increase the area of support of the legs on the ceramic tiles, you can use various durable pads. But this mounting option is only suitable for those bathtubs that have decorative screens. It is much safer to lay tiles for outdoor use; they have increased physical strength.
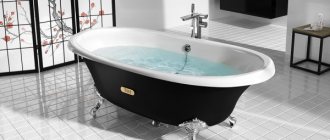
Be very careful when attaching the legs of freestanding bathtubs. The best option for such devices is installation on floors with concrete bases and thick, especially durable tiles. If there is a possibility of the container moving horizontally during use, then the legs can be fixed to the floor with small anchors. But remember that manufacturers do not provide this possibility; the lower parts of the legs will have to be slightly altered, and additional nuts will have to be used to adjust the height and horizontality. These works are very complex, it is better to use the services of professional plumbers. If possible, buy freestanding bathtubs without legs; such models rest against the floor with the entire surface of the bottom.
Freestanding bathtub rests completely on the floor
When marking holes in ceramic floor tiles, be careful not to place the holes at or near tile joints. In these places, the risk of cracking during drilling increases significantly. Pay attention to the position of all four legs, not just the visible ones. During installation, it is always possible to move the container a few centimeters in any direction and select the desired position of the lower elements of the legs.
The legs of the bathtub should not rest on the joints of the tiles
Remember that the adhesion rates of tile adhesive to front surfaces are much lower than to work surfaces. Before additionally fixing the position of the legs on the surface of the tile with glue, they should be thoroughly cleaned of dirt, dust and grease. If the fasteners are not visible, then it is recommended to remove the glaze from the surface in several places; this can be done with a grinder with a diamond disc or sharp blows with a chisel. Never rush, cracked tiles will cause big problems.
It is much more advisable to install very heavy bathtubs on a concrete base, and only after that lay ceramic tiles on the floor. The only possible problem with this technology is the difficulty of replacing an old bathtub model with a new one. But do not despair, no one in the world has yet been able to provide optimal solutions for all occasions.
In this case, the bathtub is installed first, and the decorative finishing will be done later
And one last piece of advice. Modern bathroom fixtures often contain live parts. To prevent accidents, steel and cast iron bathtubs must be grounded. If the house has three-wire wiring, great. If the wiring is old, then proper grounding cannot be done.
Protection against electric shock when swimming
Important. Never use metal pipes as grounding; this is strictly prohibited by the PUE.
Bathtub grounding
We talked about the main methods of attaching bathtub legs to ceramic tiles. If you follow professional recommendations during use, no problems will arise.
Using a metal corner
Bathtub with metal frame
If the bathroom walls are made of durable materials - brick or concrete, you can secure the bathtub with metal corners. They are fixed to the wall using dowels or anchors. The corner can be mounted either on a bare wall or on the cladding.
Required tools and materials:
- drill or hammer drill with drills (for tiles, concrete, metal);
- metal corner;
- fasteners for metal corners - dowels;
- MS polymer sealant;
- silicone sealant;
- degreaser;
- primer;
- roulette;
- pencil;
- level;
- flat spatula;
- notched spatula;
- hammer;
- screwdriver or screwdriver.
Installation procedure on the cladding:
- First, the wall is completely covered and the tile joints are rubbed.
- Then a metal corner is cut to size and holes are prepared in it for self-tapping screws.
- Degrease the base of the tiles, drill holes in the wall using a special drill for tiles and a drill for concrete.
- Treat the MS corner with polymer sealant - the side that will be adjacent to the wall.
- The composition seals the junction so that in the future water does not penetrate under the bathtub.
- Then degrease the base along the entire perimeter of the installed corner, as well as the lower edge along the perimeter of the bowl. Apply sealant to the corner, remove excess with a notched trowel and install the bath.
- After installation, load it.
- The next day, the water is drained and a seal is made along the upper edge of the bath with silicone sealant.
After installing the bathtub on the corner, all that remains is to connect it to the drain.
Why do you need to raise the bathtub?
In general, the standard height of a bathtub above the floor, according to building rules and regulations, should be 60-65 cm. This standard was calculated in accordance with the average height of a person and has been tested for more than one generation.
If the font is installed at this height, then it is convenient and safe to use. However, situations arise when the bathtub has to be raised above the floor. Most often, this procedure is performed to solve the following problems:
- Water does not drain well. According to the quality standards adopted in our country, the font bowl must have a natural slope towards the drain hole so that the water flows into it by gravity and does not stagnate at the bottom of the bowl. Therefore, the bathtub must be installed strictly parallel to the floor. In some cases, due to a manufacturing defect or an unsuccessful form, water does not flow into the drain. Then you need to raise the legs of the bathtub to give it an artificial slope.
- Additional equipment needs to be installed . Usually there is only 15 cm between the floor and the bottom of the bowl. This space is enough for a compact flat siphon, but not enough for installing any other additional equipment. If you need to install a waste grinder or pump for hydromassage equipment, you will have to raise the bathtub by at least 10-15 cm.
- Inconvenient to use the bathroom . If the apartment is inhabited by people whose height is much higher than average, then using a standard-height font may be inconvenient. The greatest inconvenience is washing in the bathtub, as you have to bend low.
Remember that the standard installation height of the bathtub is calculated and recorded in SNiPs and GOSTs, as it is suitable for most people. However, if there is a need to raise the floor font, this can be done by lengthening the legs, constructing a podium from foam blocks or bricks, or using a frame.
Installation on a profile frame
Required materials and tools:
- guide and rack profile for drywall;
- drywall;
- roulette;
- level;
- pencil;
- polyurethane foam;
- metal screws;
- dowels;
- sealant;
- tool for cutting the profile - it is recommended to use metal scissors or a jigsaw.
The order of work on assembling the frame:
- The legs are pre-attached to the bowl.
- Perform markings for installing the profile on the floor. Since the screen should be flush with the edge of the bathtub, the markings are shifted closer to the wall, taking into account the thickness of the drywall and cladding. If the drywall will be tiled, then the thickness of the tile adhesive is also taken into account - 3 mm.
- To install the frame, a guide and rack profile are used. The first is fixed to the floor using dowels. First, it is more convenient to glue the profile with a sealant, and then attach it to the wall and fix it together with metal screws.
- Rack frame elements are made from the rack profile.
- The strip under the side is made from a guide profile. In this case, it is more convenient to secure the rack elements - they will be inserted into the cavity of the upper and lower profiles. But the frame will be more flimsy. A bar made from a rack profile will secure the bathtub more reliably.
- The gaps under the side between the bathtub and the profile are filled with polyurethane foam.
- Further. The structure is sheathed with plasterboard.
To strengthen the frame, the racks and support for the sides are assembled from two profiles, inserting them so as to form a profile pipe. Metal screws are screwed into the ends, thus fastening the elements to each other. Moreover, they need to be screwed closer to the edge of the end of the profile, which is located inside, otherwise the sides will bend, as a result it will not sew through the profile.
Installation Rules
When purchasing a bathtub, be sure to pay attention to the mounting system it comes with. After purchasing a sanitary container, carefully read the instructions and become familiar with the installation method recommended by the manufacturer for this model.
Visual diagram of bathtub installation
In most cases, the bathroom installation process looks like this:
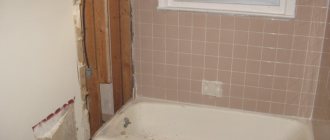
- Before fixing the steel bathtub, it is necessary to prepare the installation site. If ceramic tiles are used as finishing, then you need to lay tiles on the floor and walls where the container is located.
- The bathtub is turned over on its side and then carefully placed on the floor, since in this position it is much more convenient to connect the drain and overflow pipe.
- Without changing the position of the sanitary container, the floor siphon is connected to plastic pipes using a sealant or sealant.
- The legs are screwed or glued to the bottom of the bathroom, adjusting the supports in height.
- The bathtub is placed in such a way that the siphon can be connected to the sewer system.
- If necessary, a podium made of bricks or other moisture-resistant materials is built under the bottom of the bathroom. They make a frame to hide the pipes behind a decorative screen.
- Lastly, you need to hermetically seal the joints between the walls and the sanitary container using sealant, moisture-resistant solution or plastic corner.
After completing the installation, experienced craftsmen check the quality and reliability of the fastening. To do this, the sanitary container is completely filled with water to check whether the drain is working correctly, whether it is swinging or leaking.
Insert into a niche
Bathtub mounted in a niche
To strengthen a bathtub installed on legs, you can additionally cut it into a niche. The insertion is made only along the long side or along one short and long side. For preparatory work you will need a tape measure, a marker, and a level. The groove can be made with a wall chaser, drill, hammer drill, or grinder. They are done manually with a hammer and chisel, but cutting grooves in concrete with a hand tool will not work.
The work order is as follows:
- First, the bowl is placed on its legs. Make adjustments by choosing a convenient installation height. You can do this outside of the bathroom, so you don’t have to take out the plumbing later.
- Measure the distance from the floor to the lower edge of the side and set this distance at the installation site, from the floor, along one or two walls. Draw a line. The length of the groove along a short wall should be equal to the width of the bathtub; it can be done with a small margin for ease of installation.
- Measure the height of the side and set this distance from the first line upward. This is the minimum width of the groove. To make installation more convenient, you can expand the groove upward by 1-2 cm. The depth should be no less than the difference between the length of the bathtub and the distance between the walls if the length of the plumbing fixtures exceeds the width of the room.
- Having made a ditch, they bring in the bath.
- Install it at an angle to the installation site. They put something on one side so that the side that will not be inserted into the groove rises higher, or use the help of a second person.
- The second side is lifted and inserted into the side groove.
- They slide the bathtub into the groove along the long wall.
- Install the legs.
Using this method, you can install a bathtub if it is several centimeters larger than the opening.
How to prepare a bathroom for installing a bathtub ↑
Ceramic tiles in the bathroom on the walls and floor are not only convenient, efficient and hygienic. The final waterproof coating puts an end to the design of the waterproofing system.
Therefore, it is not recommended to leave the space under the bathtub insufficiently protected. A square meter of tile is clearly not worth future worries and regrets. Laying the floor covering must be done with special care. A smooth surface and right angles of joints will greatly simplify the installation of plumbing fixtures and ensure the quality of the work.
Distortions of the bathtub itself can lead to rapid wear, cracks, and chips. Siphon sealing failures are also possible. As a result, there is a high risk of leaks, dampness, and fungus formation.
- tile integrity;
- floor level;
- tightness of the bathtub to the walls;
- thoroughly clean and wash the surface - in the future, access to the space under the bathtub will be limited.
There are often cases when there is a difference in floor level. This indicator must be calculated before installation begins in order to take appropriate measures.
Common mistakes
When installing a steel bathtub yourself, it is not always possible to avoid mistakes. They negatively affect the final result, so you need to know in advance what you can do wrong:
- The drain pipe must be below the bottom of the bowl, otherwise draining will be difficult.
- The screen under the bathtub should not be made absolutely straight. For convenience, it is necessary to make a recess at the bottom.
- Failure to comply with the horizontal installation level. This happens due to the haste of the work and inattention. It is much more difficult to level a bowl that is already secured.
- Installation of drain and overflow after installation. It is better to do this before installation.
- Loose nuts. If the nuts that secure the legs are loose, the bathtub will tilt or begin to wobble.
- Lack of sound insulation of the bowl. Not all models need to be soundproofed. But it is still wiser to cover the outside of the bowl with mounting foam or putty, since these materials also perform a heat-saving function.
Thanks to its weight, a steel bathtub can be installed even alone. But light weight is both an advantage and a disadvantage at the same time. In order to securely fasten the structure and not worry about its stability, it is necessary to use standard racks together with additional fasteners and frames.
Stand made of solid materials
A more stable way to raise a bathtub is to build a good support underneath it. It can be made from anything. Most often used to construct a support:
- tree;
- brick;
- paving slabs;
Securing the bathtub to the side legs
You can use any material that you have freely available to create a support. Whatever material you choose for the stand, you should always remember that metal plates should always be laid between it and the legs of the bathtub. They will help reduce the risk of the legs pressing through the support, and as a result, prevent its destruction.
We should also not forget that the bathroom is a room with high humidity. Because of this, wooden stands will have to be properly waterproofed. To do this, you can simply paint them and then coat them with water-repellent varnish. This will prevent them from delaminating and rotting. Working with wood is much easier than working with tiles or even brick. So, if a wooden block does not suit you, you can saw off the unnecessary part from it. As for tiles and bricks, for good stability of the bathtub they must be solid.
Yes, working with wood is easy, but brick, like paving slabs, is much stronger than wood. But in no case should you create a stand by simply placing bricks on top of each other. For such work you definitely need a binding material. Of course, you can use special tile adhesive as a binding material, but the structure will be stronger and more stable if you prepare a solution. It is done very simply: first, cement and sand are mixed in proportions of 1:3, then water is added in small portions. At this time, we continue to stir the sand and cement. As a result, you should have the consistency of cream (thick sour cream). Using a stand made of solid materials, it is also very easy to adjust the slope for proper drainage of water. There are a little more tiles on the back pairs of legs, and a little less on the front ones. That's it, the bath level will be exactly as you need it.
Securing the bath depending on the material
The material of the bathroom is the main criterion that influences the choice of fastening method and the type of fasteners used. Bathrooms of these types are usually mounted as follows:
- Cast iron bathtubs themselves are considered quite stable due to their impressive mass, so they can be installed anywhere in the room. Typically, installation is carried out on standard legs, securely fixed to the body. In this case, the supports can be fixed either using steel wedges or using bolted fastenings. Additionally, you can fix a cast-iron bathtub thanks to the construction of a brick base, as well as metal corners screwed to the wall.
- Steel bathtubs must have multiple support points, so they must be installed against a wall. Standard legs do not ensure the reliability of the structure, so a brick podium, polyurethane foam, metal profile or insertion into the wall will help increase stability.
- When attaching an acrylic bathtub, it is important to ensure uniform distribution of the load, otherwise, if overloaded, the bathtub may simply crack. It is best to install the bath on a podium or bricks; fastening using brick or metal frames will also be effective.