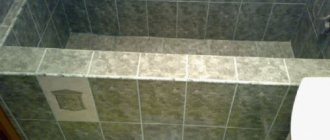
Ceramic tiles are characterized by long-term use, which cannot be said about the surface between the seams. Even high-quality grout applied by professionals absorbs dirt over time and serves as a favorable breeding ground for pathogenic microflora.
Our article will give useful tips on how to update or replace the seams between tiles in the bathroom using special products, as well as home methods.
Why renew the grout in the seams?
The accumulation of microbes in tile joints is facilitated by a constant level of humidity, which is always high in bathrooms. When performing hygienic cleaning of a room, many housewives clean the surface of the walls using detergents. Such methods do not guarantee complete elimination of germs, even with regular use.
In what cases is it necessary to update the tile grout:
- grooves appeared between the seams;
- the grout has dried out and is crumbling;
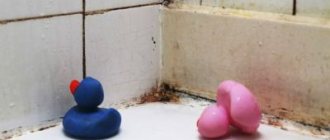
- Mold and dark spots are clearly visible between the seams.
The way out would be to completely or partially replace the tile joint, as well as apply a paint coating. The chosen method should ensure maximum hygiene and long-term operation of the cladding.
Special cleaning compounds
Ready-made cleaning preparations are sold in plastic containers equipped with a sprayer. Use them according to the supplied instructions from the manufacturer.
When purchasing a product, it is important to take into account the tone of the grout. If you have white glue, the presence of a bleaching component in the cleaning solution will not hurt.
Such special compositions may be products called:
- Mellerud (Germany);
- Eco Mist Grout.
It is convenient to use such means due to their complete readiness. However, their cost is quite high, which does not always justify the effectiveness.
Cleaning grout
Removal of the spent layer is carried out manually. It is more convenient to use a special stitcher, which is a sharp knife with a handle. You can also use a regular sharp knife for these purposes. All work is carried out as carefully as possible and takes a lot of time, but this particular method is effective.
Protective equipment must be used, and the room must be cleared of unnecessary items.
Work process:
- the blade is drawn along the center of the seam;
- cut the seam along the marked line at an angle in both directions.
Particular attention is paid to the corners, because this particular area is difficult to access and problematic. If necessary, dismantle old tiles that are damaged. During work, an electric drill with a thin drill, an improvised tool, is also used.
Replacing the solution: partial or complete
Situations often arise in which cleaning procedures alone are not enough to bring the tile gaps into proper shape. Here you can use more complex methods that involve partial or complete replacement of the joint in the gaps.
With this approach, it becomes possible to apply a fresh grout, changing its color. Which will certainly entail changes in the interior design of the bathroom.
To do this, arm yourself with a scraper and get rid of outdated mastic. First you need to wet the layer, and then use a device to carefully scrape out all the grout material.
It is important to be very meticulous in the work process, since it is quite easy to touch the edges of the ceramic. When dismantling epoxy material, it is better to use a special solvent. Antifungal treatment of tile joints is carried out before and after applying mastic.
Household grout cleaners
If the condition is not so critical, you can clean the seam using household chemicals and traditional methods. Special mixtures are used to clean ceramics that do not contain abrasive materials. It is more convenient to remove dirt in hard-to-reach places with a toothbrush or a narrow brush with stiff bristles.
In this case, it will be necessary to use protective gloves to prevent burns when coming into contact with aggressive chemicals.
Important information: Cleaning the ceramic surface with a special steam cleaner works well. You can purchase it or make it yourself. Steam treatment helps get rid of harmful microorganisms and makes the cleaning process easier.
Powdered cleaning products
The basic rule when working with powdered products is to dilute with a small amount of water to obtain a paste-like consistency. In addition to an excellent cleaning effect, most modern mixtures have antibacterial protection, which increases their effectiveness.
Tile cleaning powders:
- Bref.
- Domestos.
- Pemo Lux.
- Comet.
It should be borne in mind that the composition of such cleaners is very aggressive, so it is imperative to protect the skin of your hands, as well as the respiratory system, from possible damage.
Gels for cleaning tile joints
Another popular form of production is gel. After thoroughly processing all the seams, the mixture is washed off after a while and removed with a soft sponge with plenty of water.
Popular bathroom cleaning gels:
- Rayen.
- H.G.
- Mellerud.
This category of products is professional, and therefore has a fairly high cost.
Bathroom cleaning gels will help with severe stains, when removing the grout joint and applying a new one is not possible.
Sprayers for renewing joints
Maximum ease of application with spray products. They can also be used for regular hygienic cleaning.
Compositions with sprayers:
- Tyron Power.
- Ecover.
- ValoClean.
The spray treatment process is extremely simple: apply a thin layer, leave for a while, then rinse with water and wipe with a soft cloth.
It is also advisable to dry the treatment areas well using a hairdryer or fan heater.
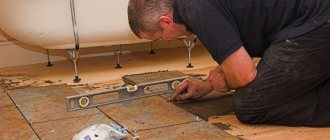
Preparing tiles for grouting
Before applying grout to the tiles, the joints must be prepared for this. After removing the crosses or elements of the tile leveling system , the joints must be cleaned of any adhesive residue. Gently scrape off the dried mixture from the edges of the tiles with a wallpaper knife or a small spatula. You can also use a wooden spatula to avoid damaging the facing material.
The tile adhesive must also be removed from the seams themselves. To do this, use a tool that can penetrate to a depth of 5-7 mm: a spatula, a screwdriver or a wooden stick, but in the latter case the process will slow down noticeably.
To remove residual glue, construction debris, dirt and other debris from the gaps and surfaces, the walls and floor must be thoroughly vacuumed, using a special crevice nozzle for the joints. It is advisable to treat the gaps with an antifungal agent. After this, the seams should be wiped with a soft sponge or a clean damp cloth.
If the tile has a porous surface, then it is better to seal the areas along the gaps with masking tape 3-5 mm wide. This will prevent the grout material from getting into the pores of the ceramic, from where it is very problematic to wash the grout. To avoid having to paint over stains on the tiles using special compounds, it is better to buy a couple of rolls of masking tape.
Next, you need to prepare all the necessary materials and tools so that you can get to work. This doesn’t require much, just:
- the grout mixture itself;
- container for diluting the composition;
- special rubber spatula or bag;
- brush;
- construction mixer;
- pure water;
- foam sponge.
Since you will have to stir a small portion of the paste at a time to avoid it hardening, you need a small container. If the mixture does not harden for a long time, then you can prepare more grout using a mixer. In other cases, a small amount of material is simply thoroughly mixed with a spatula until a homogeneous mass is obtained.
Folk remedies
A good alternative is folk remedies. The quality of processing will be slightly inferior to professional mixtures, while minimizing contact with harmful chemicals, which is important for household use.
Cleaning tile grout with baking soda
Regular baking soda is used to clean various surfaces. It is safe for household use, has no odor or harmful fumes.
For the best effect and antibacterial effect, you need to prepare a paste of soda and pharmaceutical hydrogen peroxide.
It is applied using a small brush. The mixture must be left for at least an hour or two, then washed off with water and a sponge. If a layer of grease has accumulated between the tile joints, add dishwashing detergent, powder or soap to the paste.
This mixture discolors the surface, so it is usually used to clean light-colored surfaces.
Vinegar solution to get rid of fungus
Antibacterial treatment is carried out using table vinegar. Ordinary vinegar of minimum concentration (7-9%) is sprayed, and after drying, brushed and washed with water. If the seams are heavily soiled, you can prepare a solution of vinegar and ammonia, which are mixed in equal proportions.
If vinegar comes into contact with seams made with sealant, it can cause the layer to soften.
Soap and water solution
Using a soap solution is an easy way to remove dirt and antibacterial clean your bathroom. The recipe is very simple: take regular laundry soap, grate it and dilute it with water. The result is a thick paste, which is applied to the surface of the seams, carefully brushing hard-to-reach areas.
The soap solution is harmless to ceramics, but can damage painted surfaces.
Coloring
Few people are aware that they produce special paint for the grout layer. In this case, the water-based composition is ideal in this case. This mixture has a rich color and is also an excellent antifungal preventative. The paint will preserve the color of the seams for a long time. And you won’t have to remember the problem for a long time.
A special coloring composition is applied to the cleaned and sanded surface. Painted seams can then even survive sanitary treatment using special preparations. And what can we say about the use of household care products?
Mechanical cleaning
If it is impossible to remove contaminants, or if fungus penetrates into the deep layers of tile joints, it is necessary to completely or partially update it. Mechanical methods are used to remove used grout, as well as restore the coating with special compounds.
First, the entire surface is washed well with cleaning agents, after which the areas of maximum contamination are cut off with a stitcher or a stationery knife.
When removing the old coating, it must be taken into account that a layer of new grout is applied at least 2 mm thick.
After all areas of contamination and the spread of fungus have been removed, it is also necessary to use a cleaning agent, rinse the surface, and dry it well before starting work.
How to update grout lines between tiles
Unfortunately, nothing stays in perfect condition forever. Everything made by human hands deteriorates, losing its original fresh appearance. This also applies to tile joints. Just five years after the repair, the grout for the joints becomes dirty, turns yellow, or even worse, fungus may appear on it. This is not surprising - water, evaporation, fat.
If you have long noticed darkened seams in your bathroom or kitchen, then it’s time to start restoration. Moreover, the onset of the spring-summer period greatly contributes to this. So how do you update the grout between tiles?
First way. Painting or whitewashing seams
The easiest and fastest method is painting or whitewashing. But keep in mind that such a restoration will last you a maximum of six months. There is also another simple way to update joints - apply a new layer on top of the old grout. This method can be used provided that the old joints are slightly deeper and there is 2mm of space left to apply new grout.
Second way. Complete replacement of old grout But, as you would expect, we are not looking for easy ways. The most effective method that gives 100% results is to completely replace the old grout for joints with a new, white and fresh one! If you have decided on such a noble cause, then go ahead!
First you need to remove the old grout. For this purpose, it is most convenient to use a special seam extender, which should be commercially available. As a last resort, you can use any suitable sharp object. When working, be careful not to damage the edges of the ceramic tiles. In most cases, old grout should come off easily.
But it may also happen that the mixture was mixed with a “super-powerful” cement composition. In this case, you will have to tinker a little. To soften the grout and make it more pliable, it is recommended to use an acid cleaner. Soak a brush in it and apply to the seams. Give the cleaner time to soak in. Don't be afraid, it is completely harmless to tiles. When the first stage is completed, we proceed to the second. Before renewing the seams between the tiles with new grout, thoroughly wash the exposed seams with soap and water and leave to dry for a day. Also, after this, you can apply a penetrating primer inside. If the old grout has been thoroughly and deeply removed, there is no need to use a primer.
With a light heart, we finally proceed to the final and most enjoyable stage - applying NEW grout (choose the color yourself). To do this, make the consistency a little thinner than the previous one and, armed with a rubber spatula, carefully rub the grout inside, trying to fill all the space for better adhesion. Remove excess grout from the tiles with a sponge. That's it, the process of restoring the tile joints is complete! We enjoy the result! Now you know how to update the grout between tiles. As you can see, this work is a little labor-intensive, but not without an element of creativity. New, fresh tile joints will please the eye for you, your loved ones and guests for several more years. Good luck!
Unfortunately, nothing stays in perfect condition forever. Everything made by human hands deteriorates, losing its original fresh appearance. This also applies to tile joints. Just five years after the repair, the grout for the joints becomes dirty, turns yellow, or even worse, fungus may appear on it. This is not surprising - water, evaporation, fat. If you already
Painting seams
A simple way to restore seams is to paint them. It should be noted that such work will need to be repeated as necessary. Typically, the paint layer retains its characteristics for no more than 6-9 months, after which repainting is required.
How to choose paint for seams?
We select paint for the seams as follows:
- the composition must be safe for indoor use;
- It’s worth purchasing special paint that can withstand high humidity;
- The paint color is selected taking into account the tiles, but you can also play with contrasting combinations.
The surface must be thoroughly sanded, degreased with a solvent, and dried. When working with any paint and varnish materials, it is mandatory to protect the respiratory system and skin from contact with the composition, as well as ensure sufficient ventilation of the room.
Step-by-step instructions for applying paint to seams
- A thin layer of paint is applied to the prepared surface (it is more convenient to do this with a small brush).
- If necessary, apply a second layer after the composition has dried.
- Remains of paint that gets on the tiles are washed off with a damp sponge or a solvent diluted with water.
Upon completion of all work, the room must be ventilated and paint stains on the floor must be removed.
It is advisable to use the bathroom for its intended purpose at least a day after applying the paint, so that the coating has time to polymerize.
Paint for seams between tiles, what base to choose
The desire to change the tile cladding appears because the seam begins to look bad. Renewing it will help replace a complete cosmetic repair. Painting the spaces between tiles is the most affordable and easiest way to update them.
When choosing paint for seams, you need to take into account its quality, characteristics and main features
The basic tool can be:
- Special paint for seams;
- Composition of aqueous emulsion;
- Marker;
- Whitewash.
The color of the paint should be slightly different from the previous one. The best choice would be a new color that will mask the wear of the grout.
The light color of the composition will go well with the shape of the tile, and the dark color will help the tile stand out against the background of the seams.
Replacing grout joints
A more effective method for updating old grout on bathroom tiles is to partially replace the composition. For this, a spatula with a soft tip designed for applying grout compounds or a construction trowel is also used.
Removing old grout
Removal of the old layer is done manually; it is important to prevent chipping and damage to the ceramics, and immediately replace old loose squares or securely fasten them in place. Clean the treatment areas from dust, degrease and dry.
When removing the cement mixture, an acidic cleaner is used, which will soften its composition.
Apply the solution with a thin brush, and after a short time the composition is removed mechanically.
Blend selection
All compositions on the market can be divided into two large groups: cement and epoxy grout. It is worth highlighting their main differences and characteristics.
Comparison of cement and epoxy compositions:
- cement is easier to apply and costs less;
- Epoxy is more durable in terms of strength and has a long service life;
- cement is available in the form of dry powder or ready-made pastes;
- epoxy is resistant to aggressive detergents, it is used in areas with high traffic (swimming pools, public places);
- applying epoxy requires qualifications, so for independent work it is better to buy a cement variety;
Epoxy mixture is sold in the form of two substances: epoxy resin and hardener. Before work, you need to mix them until smooth. Working with epoxy grout is more difficult even for a professional, and it hardens quickly, so work is carried out at maximum speed.
The advantages of epoxy materials are durability and exceptional strength of the coating, but they are more often used for professional tiling work.
Helpful information: You can also use silicone or sealant. Despite the trouble-free application, the option has significant drawbacks. This is fragility when exposed to moisture and household chemicals, and a short service life. The sealant is not suitable for restoring an existing tile grout joint, so it is not covered in our information.
How to choose a shade?
For the consumer, this point will be extremely important, because in stores there is a huge assortment of ready-made pigmented mixtures. When choosing a shade, you should focus on the color of the ceramic.
It is usually recommended to choose a color as close to it as possible, because a contrasting shade imposes strict application criteria.
Epoxy mixtures are often sold with a pre-selected color scheme and additional visual effects. Translucent materials and those with shiny inclusions look especially beautiful. Cement grouts can also be purchased in ready-made color variations.
A popular solution is to color it yourself by adding pigment or office gouache.
Advice : if you can’t decide on the color of the composition, it is better to use a neutral white color scheme. This is impractical for the floor, so you can use a gray shade that blends in with most types of floor tiles.
Grouting joints
A new layer is applied using a soft spatula. The process is simple, but requires maximum care when applying. The finished solution retains its properties for a short time, so the work is completed as quickly as possible.
After passing the first layer, it is advisable to immediately eliminate possible defects while the mixture retains its plasticity. A spatula moistened with water will help with this. The mixture that has fallen on the tile is removed with a damp sponge, and the unevenness and voids are passed over again.
If the layer is applied too thickly, after drying it is treated with sandpaper rolled into a tube.
The final polymerization period depends on the selected manufacturer. Usually it lasts at least 3-5 days, during which it is not advisable to wet the seams with water, clean or rub.
Application of protective impregnation
To ensure sufficient sealing and safety of the coating, it is recommended to use special protective substances. They can be purchased at a hardware store; it is advisable to use ones suitable for bathrooms that can withstand conditions of high humidity and contact with detergents.
The final stage
High-quality care and restoration measures will ensure the hygiene of the bathroom and its attractive appearance. Ceramic tiles are famous for their durability, but the space between the tiles is subject to destructive external influences, and therefore requires periodic restoration.
The following video presents ways to update the grout between toilet and bathroom tiles, useful tips and tricks for completing this process.
Replacing the grout mixture in joints
Sometimes the listed cleaning methods are powerless against old contamination, or repeated use of chemicals has caused the destruction of the grout composition. In such a situation, the need to restore the solidity of the ceramic cladding by repairing the grouting of the joints comes to the fore, as a result of which the issue of aesthetics of the finish will be resolved. To repair the arrangement of tile joints, you need to remove the old glue from the seams to a depth that depends on the condition of the grout.
Partial replacement of adhesive in tile joints
If the structure of the grout mixture is homogeneous, durable, and the purpose of the repair is only to update the design of the joints, then there is no need to completely remove the grout from the joints. To reliably fill the gaps between the tiles with new glue, it is necessary to remove the old composition to a depth of at least 2 mm. If the grout is cement, then it is removed with a scraper with a tip of the appropriate shape. After finishing work with a scraper, the edges of the tiles must be sanded with fine sandpaper, and the grooves between the rows of cladding must be cleaned of dust and primed to ensure good conditions for adhesion between the glue and the cavity.
Grouting composition based on epoxy resins is also removed with a scraper, but after treating the glue with a special solvent.
Complete replacement of grout in tile joints
If the old composition loses the necessary technical characteristics, it must be completely replaced. The old glue is removed with a scraper to the maximum depth, trying to completely clean the joints from the mixture that has lost its strength. Before new grouting, the bathroom walls are cleaned of dust with a vacuum cleaner, and the grooves of the tile seams are also primed.
Repair grouting of tile gaps, partially or in full, should be done using conventional technology, taking into account the operating conditions of the room.
Overview of methods
Ways to update without removing grout
The easiest ways to give your decor a fresh look:
- Cleaning with detergents (universal and special household chemicals).
- Painting with paint or a special marker.
- Applying a second layer of grout.
The use of such methods will help renew the seams in the bathroom for up to six months.
With these cleaning methods, it is important not to spoil the appearance of the tiles. Do not use abrasive powders or compounds with a high acid concentration - they will make the glaze dull.
Using traditional methods based on soda and vinegar is ineffective, and in the case of acid it is also dangerous, so it is better to purchase modern products. Many of them are inexpensive and economical to use. You should not use regular soap; its residues on the surface of the seams are a favorable environment for the proliferation of microorganisms.
Before starting work, the room should be cleared of furniture if possible, ensure constant ventilation and protect the skin and respiratory organs from exposure to chemicals.