Advantages and disadvantages of a homemade bath
Compared to purchased designs, a self-made bathtub has a number of advantages.
Firstly, such a bathtub will ideally meet your needs, since it is initially created taking into account the dimensions of the household. You can make your bowl deeper and longer. This solution will especially appeal to cottage owners, because the bathtub can be made deeper and longer, thus turning it into something like a small home pool.
Secondly, you will have the opportunity to save money. When you invite specialists to decorate your bathroom, you will be forced to pay for their labor, whereas when making your own from brick and ceramic tiles, you only need to purchase materials.
Third, the solid brick construction is more durable than a steel or polymer bowl, so you'll enjoy bathing for years to come.
Before you make a tile bath in your home, you need to evaluate some of its disadvantages:
- inconvenience of cleaning. If your bathtub is rectangular in shape, then it will take you longer to clean the corners, because cleaning curved surfaces is easier than getting into the corners;
- insecurity. Corner structures finished with ceramic tiles are unsafe for children. If there are children in your family, then think about how to protect them from possible injuries;
- the need for dismantling during repairs. If, over time, you want to change the bathtub, you will have to disassemble the entire structure, and this event is quite labor-intensive.
However, despite these disadvantages, a bathtub made of bricks and tiles, created by yourself, is a wonderful, convenient and impressive design that will later become your favorite and pride.
So where to start?
Facing material
Using tiles or mosaics to cover the product
As a facing material for finishing, you can choose:
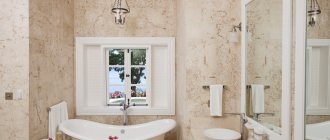
Bathtub made of artificial stone and marble. Advantages and disadvantages of choice
- ceramic tiles;
- mosaic;
- paint or liquid acrylic.
However, the choice of facing material directly affects the technology of finishing plaster.
If you use ceramic tiles for cladding, then try to avoid rounded areas when forming, since it will be problematic to tile them later. Using mosaic, you can afford more rounded shapes, since this material allows you to work with such a surface. If paint or liquid acrylic is used for the final cladding, then the finishing plaster should be carried out using a special reinforcing mesh. It is also necessary to add special additives to the plaster mixture, which give the plaster plasticity and at the same time strength.
Getting ready to create a brick bath
The construction of a brick bath begins with the preparation of the bathroom. You will need to remove all furniture and old plumbing from the room, clean the floor and walls, reaching the main floors, and get rid of previously installed water and sewer pipes. Install new pipes and install a new sewer outlet, placing a siphon in the right place. After this, deliver the following materials to the work site.
- Brick
Any brick is suitable for laying walls , but do not forget to calculate how much material you will need before purchasing. When making calculations, take into account that masonry with a thickness of less than half a brick is a bad decision. Since the structure must withstand water pressure, if the walls are too thin, additional reinforcement and strengthening may be necessary. As a result, the walls will still be thicker, and you will spend time on additional work and money on purchasing materials.
- Cement
The cement mortar holding the bricks together must be strong enough, since the bowl will constantly be in contact with water. Purchase cement in sufficient quantities, taking into account that the seams should have a thickness of 8-12 mm; this thickness will allow you to adjust the masonry while working. - Waterproofing materials
Decide which waterproofing option is right for you. This can be laying roofing felt followed by treatment with bitumen or using a specialized polyethylene film with sizing. , a welded frame made of sheet stainless steel can be convenient . - Tiles
Decide what size tile you will decorate the bowl with and purchase it, having previously calculated the quantity based on the surface area of the font.
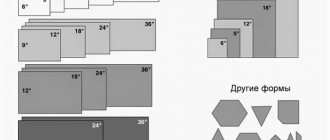
Types of decor
For proper styling of plumbing rooms, you can use a variety of wall decor. It allows you to highlight niches, stylize and separate surfaces. Original additions are of the following types:
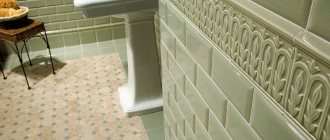
- Mosaic;
Small tiles help highlight parts of the walls. They can be used for pasting the screen, laying out the lower half of the walls, separating them (laid out in a thin or wide strip). Suitable for decorating the space above baseboards, filling niches, and highlighting shower areas.
- Border;
Used for horizontal and vertical division of space. Represents small rectangles.
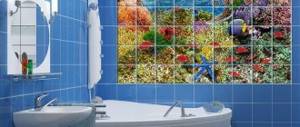
- Panel;
They can have medium and large sizes. They represent a finished image (applying a picture to one element) or are used for laying out large paintings by composing elements with different parts of the picture.
- Piece elements.
They are similar to border elements, but have a greater height and width. They are used to separate walls, complemented by patterns and abstractions.
Brickwork
Start laying bricks from the floor, and then form the walls. Before installing each brick, first dip it in water. This simple procedure is necessary to ensure that the brick is saturated with moisture and does not dehydrate the cement mortar. If you create walls from dry brick, the material will begin to draw water from the cement. As a result, the walls will turn out to be fragile and will not last you long.
While working, be sure to check the evenness of the walls. This is not difficult to do - from time to time check the horizontalness of the masonry with a building level, and in order to make sure that it is vertically correct, use a plumb line.
When forming walls, do not take an excessive amount of mortar. If you find that the solution has come out of the seams, then remove it immediately, since after hardening it will be much more difficult to remove.
Having completed laying the brick and making sure that the structure matches the dimensions and its walls are even, leave the future bowl to dry. As a rule, it takes several days for the materials to get rid of moisture and gain strength.
Waterproofing brick baths
After drying the brick base, start arranging waterproofing. This stage is fundamentally important, because the bathtub will be regularly filled with water, so it is necessary to prevent even the slightest possibility of leaks. The best solution is to order or weld yourself a box made of stainless steel sheets, which will be the most reliable protection against water. If this is not possible, then use either roofing felt or plastic film.
When waterproofing a bathtub with roofing felt, lay it overlapping, making sure to place it on the walls. Afterwards, thoroughly treat all joints with bitumen mastic and dry.
If you choose film, place the material carefully, carefully gluing the joints of the strips with a special glue with increased moisture resistance.
Facing the surface of the font
Concrete font lined with mosaic
After complete drying, the entire concrete surface must be primed in several layers and allowed to dry. Then you can begin cladding with the selected material. If your font has rounded edges, then it is best to use a mosaic that is attached to a fiberglass mesh, this will provide greater adhesion and allow you to lay out the surface evenly. Apply tile adhesive to the surface of the bathtub using a notched trowel, apply a strip of mosaic and press lightly.
This process is, of course, very long, requiring special responsibility and creativity, but as a result, the concrete bath you create with your own hands turns out to be very beautiful. After the tiles are laid, we grout the joints with special mixtures that have a large number of colors and can be matched exactly to the color of the tile. At this point the work can be considered completed, then we put things in order and enjoy the result.
Preparation for finishing
When the waterproofing work is completed, fill the bowl with expanded clay or crushed stone in a thin layer, place a three-dimensional metal mesh on the bottom and walls, in which you first make a hole for the sewer pipe, and pour concrete. Do not forget that a slight slope should be made towards the drain to allow more active flow of water and prevent it from stagnating in the font.
After drying the concrete screed, plaster the bottom and walls inside and out and leave the bath for final drying before laying the tiles.
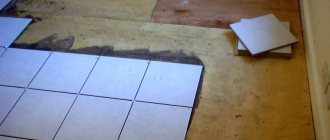
Decorative tiling of bathtub
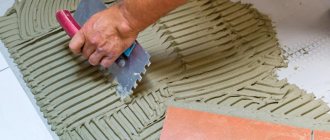
To ensure maximum adhesion of the tiles, before finishing, coat all surfaces with a primer, and then proceed with installation, preferably using tile adhesive with increased moisture resistance. Cement is also suitable for tiling. Depending on your own design wishes, you can use both 10*10 cm tiles and mosaic options. The latter are considered more practical, as they allow you to minimize the number of cut tiles. When laying tiles, proceed from the bottom up, that is, first process the bottom, then move on to the inner walls and at the final stage decorate the outer ones. Once the tiles are in place, grout the seams using a waterproof epoxy-based grout , which prevents water from getting into the joints and under the tiles; Remove any remaining grout with a clean cloth.
After finishing the work, do not rush to use your new font. Leave the bath for a few days so that all parts dry out and harden, and only then fill the bowl with water and admire the magnificent result of your labor.
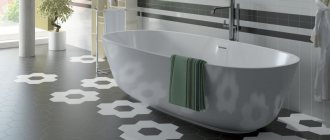
Color spectrum
It is worth moving away from standard white and blue tones when decorating sanitary facilities. They can be perfectly replaced by beige and turquoise shades. To create a warm design, it is recommended to use light brown and pink colors. They combine well with each other and create harmonious zoning of space. For small rooms it is worth choosing pastel and other light colors. For example, shades of lavender, pale green and light yellow will help make the space larger and carry out competent styling. For spacious rooms, it is permissible to use a dark blue or purple shade. The combination of black and gold will be exquisite. But it is not recommended to add silver to the black finish: the finished design will be cold and uncomfortable. The presence of decorations will help make the room original. But there shouldn’t be a lot of it, otherwise the space will be visually reduced. Installing bright lighting will help highlight some parts of the room and emphasize decorations.