Many owners want to make the interior of their rooms unique. In addition to the living rooms and the hall, which should stand out, it is necessary to carry out such work inside the bathroom. A good option is wall painting or drawings. There are many styles that are used. Depending on the wishes of the owner, the bathroom is decorated according to different types. Simple methods and a variety of types of paints will help you do this.
Wall painting
Cleaning and priming walls ↑
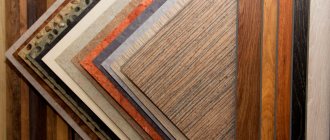
The first thing you must do is select a surface and prepare it for artistic use. Let's say you have an ordinary wall, and the room was renovated quite a long time ago. Somewhere the paint has peeled off or a piece of plaster has fallen out. The first thing that needs to be done is to clean and prime all surfaces. Our walls will be painted, so before priming them, you need to choose a mixture with good hydrophobic properties. The photo shows several different types of bathroom primers for painting.
Types of primer mixture for surface finishing
It is not difficult to list the stages of work: cleaning the surface from old finishing material and greasy stains, plastering, leveling if the walls are made of brick, puttying the walls, grouting. After the last step, re-priming is done to create a holding base before applying paint. The wall is ready, now we move on to painting the main background.
Materials
To decorate a bathroom with your own hands using the decoupage technique, you will need several tools, the main ones being soft brushes, a roller, and scissors. You need to buy a surface degreasing agent, varnish, and glue. First you need to select a thematic picture that will become the main motive. You can speed up drying of the surface using a hairdryer. Tweezers, curly scissors, and toothed rollers will make the work easier. You can buy everything you need at your nearest stationery store. Materials for blending are sold in the form of ready-made kits. You can make them yourself from thick napkins or tissue paper, fabric, ready-made mass for modeling.
A laser printer will help you transfer the design onto tissue paper. It must be glued to a sheet of paper or secured with adhesive tape. Inkjet printers are not suitable for this purpose; their ink loses its durability when it comes into contact with the varnish. The glue is needed on an acrylic basis, since PVA acquires a yellowish tint over time, and the composition becomes ugly. For the finishing coat, polyurethane or acrylic based varnishes are required. Alkyd compositions contain active chemical elements that damage the decor and change its original color. For a damp room, polyurethane varnish is best; it has increased resistance to various external influences.
To decoupage a bathroom with your own hands, you will need many identical illustrations. The size of the paper in ready-made sets does not always match the size of the tiles, so it is better to use table napkins with a suitable pattern. Thin and multi-layered ones are suitable for this purpose. The texture of thin fabrics with bright patterns, such as chintz or silk, will be clearly visible under varnish layers.
Applying the background ↑
Choice of paint ↑
The first condition when choosing paint is its water-repellent properties.
When choosing paint, you should choose one that is moisture resistant. And to prevent mold, purchase paint that contains fungicides. Stores now offer a wide variety of paints and varnishes. Below we note only their types.
Types of paints for bathrooms ↑
For the bathroom it is better to choose acrylic. It is accessible, inexpensive, its colors are represented by a large palette; various varnishes and impregnations are used to protect against moisture. But you can do without varnish. Acrylic has high vapor permeability and practically does not require varnish. It is better not to buy water-based emulsion - it does not withstand a lot of washing, and over time it begins to fade and wear off.
You can use real butter. Then the picture will be almost eternal. However, it takes a long time to dry and can smell unpleasant.
It remains to emphasize one important point. It is better to apply the background in accordance with the original or immediately make it very light: white, blue, light gray - neutral. You can draw anything on this background if you don’t like the selected image.
Variety of colors
Background application process ↑
I want to say a little here. Your wall is smooth, prepared, all that remains is to paint it directly. It is best to do this with a roller. The roller applies a layer of paint thinly and evenly. Of course, you can use a spray gun, but a roller is more accessible. We invite you to watch a video with useful tips for painting with a roller.
Basic rules for bathroom decor
Functionality. Properly distribute the blizzard and plumbing in the room. In a small room it is better to make a choice on one thing. Some people want to install only one huge bathtub, while others find it more convenient to combine a bathtub and a toilet.
Safety. The design of a room is not only about beauty, but also about convenience. If possible, hide all sharp corners if there are children in the house. The white color looks impressive, but it is very easily soiled and gets dirty quickly.
Style. Stick to the same style as the other rooms in the apartment so that it looks harmonious as a whole.
Which brushes to choose for painting on the wall ↑
The surface is dry, you grab brushes, and you will have to buy a lot of them. It all depends on the image. If it is a complex landscape like the one in the photo, then you need to visit an art store.
Seascape
It is better to buy artificial brushes. In addition, buy foam ones with a wooden handle if you plan to draw flowers and grass. These brushes are cheap and make the job very easy. One touch and the petal is ready.
For painting walls, we use large, wide brushes. You need a small brush to draw thin lines. You can’t save money here, otherwise the drawing won’t come out neat. A professional wall painting brush produces a crisp line.
Examples of brushes and what they can do
If you haven't bought paints yet, you need to do it now. In the meantime, let's look at ways to transfer an image.
Image transfer methods ↑
Projector ↑
This is the most common way. But not everyone has a projector; it can only be used in semi-darkness or darkness. The bathroom space is too small, so your image may not reach the desired size.
Translating a picture with a projector
Scale grid ↑
This method is more suitable for our task. First, draw the desired picture with squares. Use a building level or a large ruler to mark the surface area. Draw the same grid here, being sure to respect the proportions. Redraw the image from each square of your picture with a pencil. Color the result.
The closer the details of the picture, the larger they should be. The more distant the composition, the smaller and paler the details.
What to do if you still could not transfer the image accurately enough? Try scanning it onto your computer or finding an image on the Internet. Then place it in any graphics editor, draw it into squares, enlarging each one to A4 size, and print it out. Don't forget to number the squares! Then transfer the picture according to the numbers using carbon paper. You can ask the sellers of a hardware store for the latter - there you can find it in very large sizes, or use a regular one from the office.
Drawing by yourself
Self-adhesive film ↑
This method is good for transferring small patterns or objects with a clear outline. But first, all this must be cut out on film with a plotter. Call the place where they use self-adhesive film, for example, advertisers. There, cutting a stencil will cost you from 200 to 1000 rubles. With this method, we do not need brushes, but a spray gun, an airbrush, or just a piece of foam rubber. We glue the stencil, blow it out or apply color with foam rubber and then remove the self-adhesive (very carefully). The stencil can be made in an interesting way. Find a picture, go to the photo editor. Then the following sequence: filter, sketch, photocopy, set the necessary parameters. you get an outline. You enlarge it using the ProPaster program, divide the image into squares and print it there. Cut out the black outline with a utility knife, leaving jumpers. Your stencil is ready!
IMPORTANT: Test your stencil on a different surface! Modern paint mixtures for bathrooms dry quickly; it will be difficult to correct the flaws of your unsuccessful art.
Drawing by stenciling
By hand ↑
Why not, if your hands grow as they should, and everything is fine with your eye. The easiest but most difficult way - if you're not sure, don't do it!
While working, many people are faced with the problem of how to draw without smudges. There's nothing complicated about it. When applying with a spray gun or spray can, it must be kept at a distance of 30 cm from the surface. When working with other tools, apply minimal paint.
DIY bathroom decor
Nowadays you can create a lot yourself; hand-made items are especially popular. Such things are inexpensive, but the style of your bathroom will be unique.
Photos of handmade style bathroom decor are easy to find on the Internet:
- Decoupage of cups for toothbrushes;
- Decorate the mirror frame with shells, rhinestones, beads, broken glass;
- Hang a painting of your own on the wall;
- Use original items and accessories.
How to draw on tiles: work order ↑
Until now, you and I have been learning how to paint a bathroom using a painted wall. But what if the wall is covered with tiles, you don’t want to remove it, but you really want to freshen up your bathroom. Let's paint on the tiles - nothing could be easier! You just need to remember that there is preparation for drawing for this surface as well.
Cleaning tiles ↑
Wash the tiles and degrease them. Use a metal sponge with a powder like “Comet” or “Pemolux” to thoroughly rub the entire surface - they will remove dirt and lightly sand the tile. It's good to do this with sand. Cleaning products and sand will remove dirt and help damage the integrity of the glossy layer of the tile.
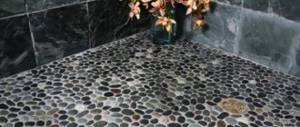
Grinding ↑
Paint will not last long on a smooth surface. Take fine sandpaper or a block and rub. Using a grinder or a special drill attachment will speed up this process. After all the manipulations, your tile has become rough. Don't forget the seams! They need to be cleaned with a sanding mesh.
Primer ↑
Before priming the tiles, rinse the surface with water. There should be no dust. Make sure there are no leaks. It is best to use an epoxy primer. After the primer has dried, lightly sand again with sandpaper or sanding mesh.
Coloring ↑
Painting is the same as on a regular wall, but you need to remember that your drawing will consist of squares. Keep this in mind when choosing a picture. To paint tiles, paint compositions for tiles and glass are used. Solvent paints without firing consist of pigments, additives, and an organic solvent. They are difficult to wash off and retain color. Diluted with a special solvent.
For white tiles, the color can be diluted with a special solvent, which will make it translucent. The image will look very gentle.
Children's bathroom
The paint for ceramic tiles looks like thick sour cream. It cannot be diluted with water - this violates its moisture resistance. The painted surface requires drying for three days.
You can draw using a stencil. The technology is the same as with a regular wall, but you can use aerosol automotive paints.
Lace as a stencil
If the tile was not laid too evenly initially, then you can cover the surface with matte acrylic varnish, then the unevenness will be almost smoothed out.
IMPORTANT: The varnish is applied only after the paint has completely dried, otherwise, when interacting with water-based varnish, it will get wet and irregularities will begin to show through.
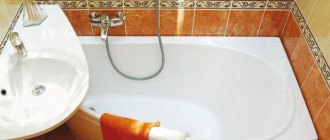
The tile can also be updated by partially painting it.
Partial staining of tiles
Or you can decorate with special stickers for bathrooms
Room decorated with stickers
Tricks in bathroom design
This room should be decorated tastefully and be consistent with the design of the rest of the rooms in the apartment. In order to make it not only beautiful, but also as comfortable as possible, there are several tricks and ideas for bathroom decor:
To prevent numerous bottles of shampoo, gels, and creams from creating a mess, you can organize them in special built-in shelves on the washbasin. You can also build a homemade screen with sliding doors under the bathtub and put all the “chemicals” there.
Bottles of detergents can also be placed on hanging mirror shelves; they will seem to “float” in the air and not overload the space.
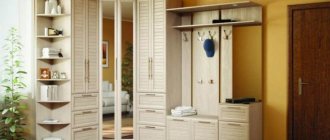
Another solution is hanging cabinets; they are very spacious and can hide unsightly places in the bathroom.