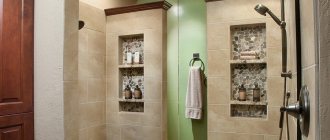
Bathrooms most often have a small area. Therefore, it is necessary to think through the interior most carefully, giving preference to functional solutions. An example of such a solution would be plasterboard shelves in the bathroom. They can decorate a room and also carry a functional load, that is, they can be used to store necessary things.
Many people want to make the interior of their bathroom original. But the small area of the room greatly limits the flight of imagination. Therefore, interior decorations must be functional, that is, bear additional load. An example of such a “useful” decoration in the bathroom would be shelves made of plasterboard.
Advantages of plasterboard shelves
Before we begin to disassemble these structures in detail, it is worth noting that simple drywall cannot be used for this room. For this, there is a special type of moisture-resistant drywall - green slabs, which are impregnated with a special composition that protects the material from fungal formations and moisture. Advantages of gypsum plasterboard shelves:
- You can make individually designed shelves; you don’t need to go shopping looking for the right style;
- you can choose any color and texture, and in any situation you can change the design of the room by simply repainting the shelves;
Plasterboard shelves in the bathroom - shelves, mounted correctly, can support a lot of weight;
- no matter how complex the design, its cost will be small;
- the material is environmentally friendly and harmless to humans;
- you can install the shelves yourself, and quite simply and quickly;
- Thanks to the flexibility of the material, you can create structures of any shape from it: broken, semicircular, angular, rectilinear, curly, built-in.
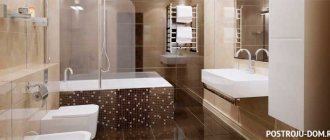
It is thanks to its low cost and ease of installation that plasterboard has gained its popularity among builders and ordinary people. At the same time, a design made according to all the rules will not be inferior to similar objects made from MDF or boards, and working with drywall is much easier. You can create a full-fledged plasterboard shelf in the bathroom using the following structure:
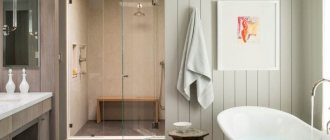
Example of a plasterboard shelf in a bathroom
- Creating a plan.
- Collection of materials and tools.
- Carrying out markings.
- Frame assembly.
- System cladding.
- Finishing.
The above sequence of processes is optimal and makes it possible to carry out construction work to the maximum. In addition, the use of such a structure allows you to obtain a high-quality product that can withstand heavy loads.
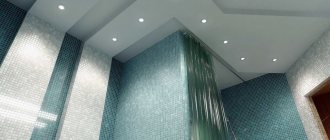
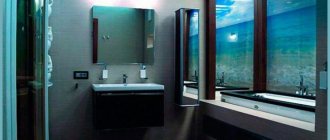
Interior of a room with shelves on a plasterboard wall
Shelves can replace furniture, such as a cabinet or rack. At the same time, they are quite roomy; books, vases, even dishes and flower pots can be placed on them.
Plasterboard shelves save a lot of space and make the room more modern and original:
- Drywall allows you to realize the most daring design ideas; shelves can be used both as a decorative component of the room and as a functional element;
- Most often, shelves are created in rooms designed in a modern style; plasterboard interior elements will complement a living room or bedroom in a minimalist or modern style;
- Drywall is an excellent material for a nursery; shelves made from this material can become the basis for the design of the room; they can be made around the perimeter of the room;
- Such shelves also look great in a library, because they allow lamps to be built into them, which is convenient for those who like to read;
- In the kitchen, plasterboard shelves can serve as a bar counter or table.
Plasterboard shelves are multifunctional, they can be created in any room - they will look creative and interesting.
Preparation for installation
Before you begin installation, you need to prepare everything you need, materials:
- GVL is moisture resistant;
- CD and UD profiles;
- metal screws (“fleas” and 25 mm);
- arched profile, when constructing curved shelves;
- serpyanka;
Tools for installing drywall - moisture-resistant putty if painting is planned;
- gypsum plaster;
- priming.
Each of these materials is responsible for a specific process, the combination of which allows you to get a durable and beautiful bathroom shelf. However, it is impossible to assemble a frame structure without a drywall tool. Therefore, it also needs to be prepared in advance:
- concrete drill (its diameter must match the width of the dowel);
- drill;
- hammer;
- screwdriver;
- screwdriver;
- metal scissors;
- pencil;
- knife;
- building level;
- 2 spatulas (narrow and wide).
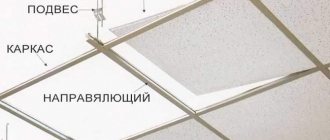
Tools for assembling the frame Having prepared the necessary tools and materials, you can begin the actual process of installing the frame system. It is carried out according to the drawn up plan, taking into account the technical characteristics of the materials and their properties.
Step-by-step instructions for installing a plasterboard shelf in the bathroom
Creating a shelf from plasterboard with your own hands does not fall into the category of difficult tasks. However, to resolve such an issue, it is necessary to show care and responsibility, otherwise the result of the work will be depressing. Step-by-step instructions for installing a plasterboard structure are as follows:
- According to the markings, holes are drilled in the wall for dowels. Moreover, the length of each of them exceeds the size of the dowel by at least 1-1.5 cm. To increase the load-bearing capacity of the object, the distance between the holes must be at least 10-15 cm.
Fastening the profile using dowels - Dowels are inserted into the holes and driven until they are flush with the wall. The UD ceiling profile is adjusted to size, applied to the wall and drilled according to the location of the fastening points. A washer is put on the self-tapping screw, it is threaded through the hole in the profile and inserted into the dowel, after which it is screwed in to the very end. A similar action is performed with all fixation points, and the attached profile is checked against the level.
Fastening the profile for drywall - The UD profile plays a fixing role and sets the direction of the entire structure. It is installed on 2 walls that form a corner, and sets the width and length of the future shelf. On the outside, an angle is formed from it, which is twisted with self-tapping screws. The CD profile is cut to the required length so that there are 2 longitudinal elements and at least 4 transverse strips (our shelf will be about 120 mm long, and they should be placed every 40 mm).
Installation of a profile structure - Longitudinal slats are inserted into the guide profile, with one facing outward and the other inward. They are screwed on both ends with self-tapping screws. In this form, the load-bearing capacity of the shelf leaves much to be desired, so the shelf needs to be strengthened.
Fastening the longitudinal rails of the structure - Starting from the outer edge, retaining strips are screwed to the wall every 40 cm (they are fixed with dowels and self-tapping screws). Their size directly depends on the length of the shelf and must correspond to it. After this, the lower parts of the planks should be connected to the extreme points of the longitudinal planks. A similar action is performed using a rack-mount CD profile, the value of which is determined by calculation using the Pythagorean theorem (which refers to the square of the hypotenuse).
An example of a drawing of a corner structure for a shelf - The parts of the CD profile are connected to the retaining rails and inserted flush with the outer longitudinal strip. In this position it is fixed at 3-4 points on each side. Now the frame of the rack is able to withstand heavy loads.
A properly assembled frame can withstand heavy loads - Sheets of drywall (gypsum board) are cut according to the resulting model. To cover the shelf you will need 5 parts - top, bottom and 3 sides. First, the bottom piece is screwed on and a kind of box is formed. In this case, small grooves are cut out for the retaining slats and only after that, the gypsum board is completely fixed with self-tapping screws in at least 6 places (3 each near the wall and the edge of the shelf).
An example of attaching drywall to a shelf - The side linings are made in the same way. To fix them, 3-4 screws are enough. The top piece of sheet is laid last, giving the structure a finished appearance. If desired, the holding posts can also be covered with plasterboard and painted.
The frame is covered with plasterboard - The finished shelf in the bathroom made of gypsum plasterboard requires additional processing, which consists of sealing the plasterboard seams and fastening points and will be described in detail below.
Processing joints of plasterboard sheets
How to fix a shelf to drywall
To attach a small and lightweight shelf to gypsum board sheets, you will have to use special dowels, which tend to open up and be fixed in the hollow base.
Suitable for these purposes:
Take a close look at how much load a particular dowel can withstand and compare it with your shelf. Wall shelves in plasterboard must be secured using these dowels, as well as self-tapping screws, which should be slightly longer than the dowel itself. When screwing in a screw or self-tapping screw, the dowel head will open and take most of the load.
To hang shelves in drywall, you can use this sequence:
- Drill a hole in the wall of the required size;
- Install the dowel into the hole;
- Install the shelf mount onto the fastener;
- Hang a shelf.
If you have a heavy shelf, you won’t be able to attach it without a profile.
In this case, you need to use the following method:
- Drill holes in drywall;
- Insert a butterfly dowel or a dowel, insert a self-tapping screw;
- Clamp the structure and screw in the dowel, but be careful not to destroy the wall.
Instead of such dowels, you can use anchor bolts. The entire sequence of actions does not change, only bolts are inserted instead of screws and dowels.
Built-in shelves
The complexity of assembling this design is slightly higher than the previous one, so let’s take a closer look at the algorithm of actions:
- Starting from the corner on the ceiling surface, draw a line that will define the inside of the shelves.
- Use a plumb line to mark and draw a straight line on the floor.
- Connect the marks on the floor and ceiling with a line on the wall.
Marking the wall for the future structure - Secure the guides along the lines on the ceiling and floor.
Fastening the guides - Install the wall profile by connecting it to the guides with small self-tapping screws.
Example of built-in shelves design - The resulting frame must be sheathed with gypsum board, having previously cut it to the required dimensions with a construction knife. Installation is carried out using a screwdriver and black screws. Covering the frame with plasterboard
- We install grooves for future shelves; to do this, we cut the guide elements to the required size and attach them to the finished structure. You can check the horizon with a simple or laser level. It is worth noting that the groove elements must be strictly opposite each other.
Installation of grooves for future shelves - Prepare load-bearing elements equal to the size of the shelves, 2 pieces for each. The first part is attached to the wall, do not forget to insert it into the groove first, the second one is on the opposite side - this will be the edge of the structure.
- Install jumpers to strengthen the shelves.
Preparing load-bearing elements and installing jumpers Important! Reinforcement of the structure is carried out only if the depth of future shelves is more than half a meter. - The finished frame is covered with plasterboard.
Covering the frame with plasterboard
Video selection of finished plasterboard shelves in the bathroom.
How to find a profile under drywall
You need to look for a profile under drywall in certain situations.
Namely:
- When you need to hang a picture on the wall;
- Hang a mirror;
- Attach a wall-mounted TV;
- Attach the lamp to the wall;
- Nail the baseboards;
- Attach wall cabinets.
In any of the above situations, it is necessary to find a metal profile under the drywall. If you installed drywall using a frameless structure, then the problem of finding a profile disappears by itself. Otherwise, you will have to search for the profile in different ways, which depend on the material.
In the case of a metal profile, use a regular magnet. You can use it to find the profile if the sheets of drywall are thin enough. A large and powerful magnet is best. Tie a string around a magnet and slowly move it across the drywall; when you feel the magnet not moving, make a note.
If wood was used, you can find the beams by tapping (the sound will no longer be dull above the slats), also try driving a nail.
However, the latter method is less practical; if the hole was made in the wrong place, you will have to fill it with putty. If you have a drawing of the room, study it and find wooden slats.
Curly shelves
These are the most difficult structures to install. To make them, a template is cut out of plywood, according to which a plasterboard sheet is subsequently cut. A special flexible profile is purchased for the frame. The sheathing itself for the shelves is made according to the principle described above, only instead of a rack profile an arched element is used. You should also correctly bend the gypsum board fragments so that they do not break during installation. To do this, you need to walk over the surface of the drywall with a needle roller and wet them well.
Curly shelf made of plasterboard Make sure that the core does not get completely wet. As soon as the third part of the gypsum layer gets wet, you can carefully begin installation. Fastening is carried out from the highest point, gradually moving towards the edges. In this case, the screw pitch should not exceed 15 cm.
Important! If you can’t find an arched profile in the store, you can make a flexible structure yourself; for this, the edges of the guide profile are cut into small fragments, as a result of which it acquires the required flexibility.
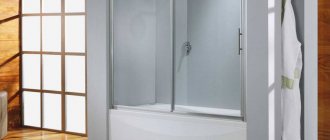
Installing plasterboard shelves in a bathroom
Figured plasterboard shelf
Where to start: preparatory stage ↑
We start with the drawings. In order for them to be done correctly, you need to clearly know what the resulting shelf should look like. We schematically draw it in all details, simultaneously noting which areas need to be measured. We take measurements. We carry them out extremely carefully and correctly, otherwise there may be problems with fitting the shelf in the future. Using the obtained values, we build a drawing of the future structure. With its help you can easily calculate the exact amount of materials needed.
To make shelves you will need:
- drywall;
- galvanized profile (most often 50x25 mm);
- guide rails;
- arched profiles, if a curved structure is planned;
- dowels with spacers, self-tapping screws;
- reinforcing mesh for processing joints;
- primer.
In addition, you should prepare the necessary tools.
Finishing the finished structure
The finishing of plasterboard shelves depends on the overall design of the bathroom, and is done as follows:
- Apply two layers of primer to the finished structure and let it dry thoroughly;
- using putty and serpyanka, seal all joints and connections to the walls so that cracks do not appear later;
- Install perforated corner elements on the outer corners and fix them with a mixture of plaster. Important! For curved structures, buy an arched corner made of plastic; it bends perfectly thanks to the sections applied to one side;
Preparing the shelf for decoration - Apply a layer of putty to the entire surface of the plasterboard structure and let it dry;
- putty the shelves again after 24 hours;
- as soon as the second layer of putty has dried, the structure must be sanded well with an abrasive mesh;
- Apply primer to the finished shelves.
Preparation for the final coating is complete. You can decorate plasterboard shelves in various ways, for example:
- Apply decorative plaster with a water-repellent effect.
- Paint it any shade.
- Place decorative mosaics on the shelves using tile adhesive. This cladding method can be used without prior puttying.
Final finishing ↑
Most often, plasterboard structures are puttied, thereby preparing for finishing. At this stage, you should not forget about the primer, which must necessarily precede the putty. To get a perfectly flat surface, we apply a layer of gypsum or putty to the joints of the sheets and seal them with a special reinforcing mesh. We put putty on top of it again. Don’t forget to cover the corners with special mounting corners and putty. After drying, apply the finishing coat. Let the material dry completely and use an abrasive to smooth out all surface irregularities until completely smooth. Now we apply the primer again, the shelf is ready for painting or any other decoration.
There are several very interesting original options for finishing plasterboard shelves. Playing with color is a traditional solution, but you can also play with texture. To do this, wet putty:
- processed with a large brush with fairly hard bristles, obtaining a kind of ripples
- “stroked with fingers, which gives an intricate convex pattern
- spot-treated with a small spatula, which is rotated around the axis. The result is rounded decorative fragments.
Drywall is a fairly easy-to-process material, making it possible to create almost any structure of any configuration. This statement is absolutely true for those who have some experience in working with it. For everyone else, it will be quite difficult to complete even the simplest product. Of course, everything can be learned. But if you don’t want to waste time and effort, it’s better to invite professionals and get a competent and beautiful embodiment of your own design concept.