Despite the popularity of glass and plastic bathroom curtains, the demand for textile products is only growing. This is explained not only by their affordable price and ease of use - correctly selected curtains play an important role in interior design. But even the most beautiful canvas needs to be hung skillfully, otherwise it’s unlikely to achieve the desired effect. And here the cornice or rod for the curtain in the bathroom comes to the fore - it seems simple and discreet, but such an important accessory.
Bathroom curtain rod
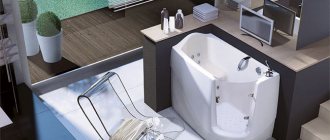
Radial curtain rod for the bathroom
Manufacturers of curtain rods
Choosing a bar for the bathroom
On the domestic market, rods for bathroom curtains are represented by a large number of manufacturers, because this accessory is quite in demand. Not the least important place is occupied by Russian brands, whose products meet the highest requirements, although they are not very diverse. To make your choice, it is worth studying in more detail the range and main characteristics of popular models.
| Manufacturer | Brief characteristics | approximate cost |
| 1MarKa (Russia) | Barbells are semicircular, arched and angular, made in a modern style. The average length of the product is 150-170 cm, the rod diameter is 25 mm, the wall thickness is 1 mm. Made of stainless steel, chrome plated. Mounting method: screws. The manufacturer provides 1 year warranty on all models | 2500-3600 rub. |
| Aquanet (Russia) | Straight and arched rods in modern and high-tech style. The length of the products is 150-170 cm, the rod diameter is 25 mm. Made of stainless steel with chrome plated, fastened with screws. Warranty period – 1 year | 1500-3770 rub. |
| Bacchetta (Italy) | straight telescopic rods, angular and compound arched models. The length of corner products is from 140 to 170 cm, telescopic 125-220 cm, rod diameter 25 mm. The material of manufacture is predominantly aluminum, the coating is chrome and white enamel in glossy and matte versions. Fastening methods: screws, spaced | 760-1840 rub. |
| Carnation Home Fashions (USA) | Straight telescopic rods in modern and retro style. Adjustable to lengths from 104 to 190 cm. Made of stainless steel. The coating has several color options and can be matte or glossy. In expensive models, artificial stone is additionally used, a pattern is applied to the coating, and there are decorative attachments at the ends of the cornice. The rods are attached with screws and spacers | 2200-4700 rub. |
| Grekon (Greece) | Straight and angular models. Telescopic rods are adjustable to a length of 75-125 cm, the length of the corner rods is 160-180 cm. All products are made in a modern style, coated in chrome or white enamel. The surface can be matte or glossy. The rods are made of aluminum and are fastened, depending on the type, with screws or in a spacer | 2900-4300 rub. |
| Ridder (Germany) | The model range is very wide: there are telescopic, angular, U-shaped, and semicircular rods. Products with complex shapes are additionally equipped with ceiling mounts. The length varies between 90-245 cm, the material of manufacture is aluminum. Coating options: chrome, white enamel. Mounted with screws and spring clips. The manufacturer provides a 3-year warranty | 1600-2980 rub. |
| Triton (Russia) | Angled and arched rods in a modern style. The length of the products is 140-180 cm, the material of manufacture is stainless steel. Fastening is done with screws. The manufacturer's warranty period is 1 year | 2660-3260 rub. |
| Radomir (Russia) | Arched and angular models. The length varies from 140 to 270 cm, fastening is with screws. All rods are made of stainless steel, chrome-plated, and have a 1-year manufacturer's warranty. | 2630-3280 rub. |
| Riho (Czech Republic) | Very reliable, comfortable elite class bars. All models have an impeccable design, a smooth arched shape, and are made of stainless steel. The coating has several options - silver, gold, chrome. The rods can withstand loads from 3 to 10 kg, the diameter of the product is 16-25 mm, the wall thickness is 1-1.5 mm. The manufacturer provides a 5-year warranty | From 3500 rub. |
bathroom curtain rod
Types of curtains for bathrooms
The modern market is filled with curtains of a wide variety of types and types, differing in design, construction, and manufacturing material. In this case, corner systems are divided into soft and hard. Soft curtains are usually cheaper and easier to buy, but they don't last long. As for the second option, it is more durable, practical and reliable. Moreover, such designs are very convenient to use.
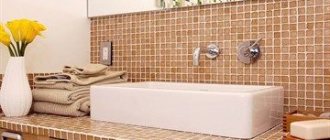
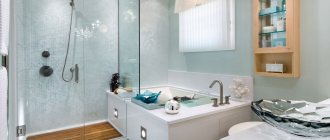
The herbal pattern on the curtain harmonizes with other bathroom accessories
While flexible curtains are usually made of polyethylene or fabric, rigid ones have several options for materials for manufacturing. These include:
- specially tempered glass;
- polycarbonate;
- lightproof plastic.
Both plastic curtains for the bathroom and curtains made from other materials can withstand quite a serious water pressure created by a jet directed at them. At the same time, such structures are quite easy to clean and quickly take on their original appearance. In addition to materials, rigid curtains differ in quality, cost, and ease of cleaning.
Glass curtains for the bathroom are considered the most expensive. They look great in almost any interior and do not rot, but such curtains can be broken very easily, and replacing glass is quite expensive. As for plastic curtains, they are also not susceptible to rotting. They wash well and have a great design. Which option to prefer depends only on your tastes and wealth.
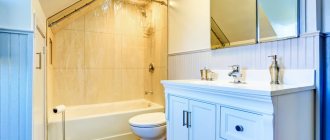
Vertical light stripes on the curtain will visually lengthen a bathroom with low ceilings
As for fabric curtains, they are an affordable budget solution for furnishing. Such curtains are attractive and can be of any size; unlike curtains made of polyethylene, fabric ones can last much longer. By the way, you can sew them yourself, but rigid structures that have a rather complex structure cannot be made by yourself.
Today we can distinguish the following types of such curtains:
- mother-of-pearl;
- satin;
- with photo printing;
- with a metallic sheen;
- with drawings.
The choice of curtains depends entirely on the design you want to choose. Therefore, choose options for their use in advance; for this, bathroom curtains should be shown in the photo so that you can imagine them in relation to the conditions of your bathroom. Try to choose a fabric that is not afraid of exposure to moisture and does not rot, otherwise you will have to change your curtains several times a year.
Boom installation technology
Installing a rod is a fairly simple process, but it also has certain subtleties. Below are options for installing cornices in spacers and on flanges, with ceiling hangers. The nuances of fastening to concrete walls, tiles, drywall and plastic sheathing will also be considered.
Installation of a straight rod in a spacer
To work you will need a tape measure, a level, a pencil and the bar itself.
Step 1. Based on the length of the curtain, select the optimal height for the rod. The bottom edge of the curtain should freely fall into the bathtub by at least 20 cm to avoid water splashing, and there should be a distance of at least 15 cm between the rod and the ceiling. Measure the required height with a tape measure and mark a point with a pencil. Place a mark on the opposite wall in the same way.
Step 2. Unpack the rod and be sure to read the manufacturer's instructions to avoid installation errors. Check how the mechanism works.
Telescopic cornice
Installation of a curtain rod with a telescopic mechanism
Step 3. Extend the tube to the required length, add another 1 cm, string the curtain rings if they are not removable.
Step 4. Lift the barbell and carefully place it in place, bringing one end in first and then the other. Place a level on top and make sure the cornice is positioned exactly horizontally. If it is not, correct it by applying pressure at the base. Then press lightly with your hand in the center - a properly secured rod should not move a millimeter. After that, all that remains is to hang the curtain.
How to install a bar in the bathroom
The optimal way to attach curtains is plastic half rings
Mounting the rod on flanges to a concrete surface
To work you will need:
- drill;
- screwdriver;
- tape measure and pencil;
- level;
- rod and dowels with self-tapping screws, which are included in the kit.
Step 1. Unpack the barbell, check the presence and integrity of all elements. Select a convenient mounting height, taking into account a 10-15 cm wide gap between the ceiling and the rod. Now attach the rod at the desired height to the wall surface and determine the attachment points. The structure should be positioned so that the curtains can completely cover the bathtub, but do not interfere with water procedures. Mark the fastening points with a pencil.
Cornice installation diagram
Marking
Important! Before starting work, you should make sure that there are no electrical wiring, water pipes or other communications in the areas where you intend to drill. You can check this using a special device - a household hidden wiring detector.
Step 2. Using a level, check the position of the marks relative to the horizontal, adjust them if necessary. If the distance between the marks is large, it is most convenient to use a water level.
Step 3. Next, take the first flange and attach it to the wall so that the mark is exactly in the center. Use a pencil to mark drilling points through the holes on the flange. Do the same on the other side.
Step 4. Now, using a drill with a hammer drill mode and a concrete drill, make holes the size of the dowels at the marked points. The diameter of the drill must match the diameter of the dowel. Typically, the rod comes with self-tapping screws and dowels measuring 6 mm. The depth of the hole should exceed the length of the fastener by approximately 5 mm. Typically, standard round flanges have three holes.
Drilling holes
Drilled holes
Step 5. The holes need to be cleaned of dust, insert dowels there, and hammer tightly. Next, attach the flange again and screw it with self-tapping screws. The flange is secured on the other side in the same way.
Installed dowels
Step 6. Next, you need to take the rod, put silicone liners on both ends, and pull decorative caps on them so that they are each turned in their own direction. If the rings for the curtain are non-removable, they need to be threaded before attaching the second cap.
Thread the rings onto the barbell
Step 7. Now loosen the clamping screws on the protruding part of the flanges, insert the ends of the rod one by one. Tighten the clamping screws until they stop on each side, and push the decorative caps close to the wall surface.
Flange for rod
Secure the flanges
Secure the barbell
Fixed rod
Rods are mounted on brackets in a similar way - first the brackets are attached to the wall, then the ends of the rod are inserted into them. The main condition is to accurately take measurements, because correcting errors will not be easy.
Rod holder
Installation of a corner rod
The main difference here is the presence of a ceiling suspension, otherwise the procedure for attaching the rod is almost the same as for the previous option. Hangers, mounting rings, and additional screws and dowels are usually included with the rod.
Corner cornice
Mark the height of the rod mounting
Step 1. Assemble the rod by inserting straight tubes into the corner elements. Try the product on the wall; if the rod is too long, cut off the ends.
Cut off the excess
Step 2. Put on both brackets and lightly secure them to the rod with screws. Place it on the wall at the required height, check the horizontal level, and mark drilling points through the holes in the brackets.
Mark the attachment points
Marking fixation points
Step 3. Remove the brackets from the cornice and put everything aside for now. Next, holes are drilled with a diameter of 6 mm and a depth of 40-45 mm, dowels are inserted and hammered in with a hammer.
Use a 6mm drill bit
Step 4. The brackets are individually screwed to the walls with self-tapping screws, a mounting ring for the ceiling suspension is put on the rod, the ends of the rod are inserted into the brackets and secured with screws.
Tighten the screws. Scheme
Tighten the screws to secure the flange
Step 5. A fastening attachment with holes for self-tapping screws is screwed onto a thin metal tube with a thread that acts as a suspension. Apply it to the rod so that the nozzle rests on the ceiling, and the tube itself adjoins the rod at a right angle in the bending area. It is the corner area that most needs additional support. Mark the cutting point on the tube with a pencil and saw off the excess.
Ceiling mount assembly
Attaching the ceiling suspension
Step 6. The free end of the tube is inserted into the fastening ring on the rod, clamped with a screw, after which the suspension is lifted vertically and pressed to the ceiling. Drilling points are marked through the holes of the nozzle, then holes are made, dowels are driven in, and the suspension is screwed to the ceiling.
Installation of a corner rod
Fixed cornice with fastening to walls and ceiling
If the rod is too long or has a more complex shape, you will need not one, but 2-3 hangers, located at an equal distance from each other. This method is suitable not only for concrete ceilings, but also for plasterboard surfaces, as well as those covered with plastic. The features of such installation will be discussed below. The only exception is suspended ceilings, in which case other fastening options must be used.
A U-shaped rod is also mounted according to the angular type. The only difference is that both ends are fixed on one wall. Typically, small models have only a wall mount that can easily withstand a load of 4-6 kg. But keep in mind that this requires a very strong, reliable base - you cannot hang the bar only on drywall or plastic panels.
Shower room in loft style with U-shaped ceiling cornice
Installation of flexible profile
At the request of the installer, the flexible curtain rod changes shape
Installing an aluminum flexible curtain rod is also not particularly difficult. To give the product the required shape, you must first draw a template. A large piece of thick cardboard is suitable for this. Place its edge against the side of the bathtub and trace the outline, making small allowances along the edges - 2-3 cm.
Step 1. Take the profile in your hands, press in the middle with your knee and bend it little by little. The material bends quite easily, so try not to press too hard. As you work, constantly try on the profile against the template so that you don’t have to straighten excessively bent corners later.
Flexible cornice allows you to fit it into any design
Step 2. The finished profile must be attached to the wall and the mounting locations must be determined. If the profile consists of several parts, they are fastened together using special plates that come with the cornice.
Step 3. Attach the brackets according to the marks and mark points on the wall through the holes with a pencil. Drill, insert dowels, screw the brackets to the wall.
Step 4. Now take the hangers, put the fastening attachments on them and attach them to the fixed brackets so that the attachments rest tightly against the ceiling, and the lower ends are located at the level of the profile fastening. Since the tubes are quite long, you will have to cut them, and to do this, mark the cut line with a pencil.
Advice. To increase the security of the attachment, drill a hole in the tube for the clamping screw located at the bottom of the nozzle. When tightened, the screw will enter the tube, and it will not be able to slip out even with increased load on the cornice.
Step 5. Thread the curtain hooks into the profile, lift the structure and insert its ends into the brackets. Secure them with self-tapping screws on the bottom side.
Step 6. Insert the hangers into the holes on the connecting plates, screw them lightly and mark the mounting points on the ceiling. Drill, secure the dowels, and then insert a long screw into the hole of the nozzle and use a screwdriver to fix it to the ceiling. Now you need to insert the tube all the way and tighten the screw. Secure the remaining hangers in the same way.
Step 7. The free end of the hanger should fit into the hole on the connecting plate. To do this, the profiles are moved apart a little, the end of the tube is threaded through the hole, and they are fixed with self-tapping screws on the bottom side of the profile.
Ceiling flexible cornice on the ceiling
After this, all that remains is to move the profiles back so that there are no gaps left, and screw them to the plate with screws through the corresponding holes along the upper edge.
Features of installation on different surfaces
On concrete walls lined with tiles
To secure the rod to the tile, you first need to make sure that the cladding is strong. If the tiles are weak, the seams are crumbling, traces of fungus are visible on the surface, you cannot attach anything to the wall. First you will have to dismantle poorly secured elements, remove any remaining glue, clean out the seams and re-face everything.
Removing tiles
Laying new tiles on the wall
If the tiles hold up perfectly and there are no defects, you can immediately begin the installation process. You should immediately take into account that the hammer drill mode is not suitable for tiles; they may become covered with cracks. You also need to take a different drill - with a spear-shaped tip, which will allow you to make very neat holes.
Tile drill bit with spear tip
Operating procedure:
- In the designated places, stick a small piece of masking tape onto the tile. Then the points for drilling are placed directly on the tape;
- A spear-shaped drill is inserted into the drill and holes are made at low speeds to the concrete base. From time to time, the tip of the drill is dipped in cold water to avoid overheating;
Be sure to turn off the impact mode of the drill and select the mode with the lowest speed
How to drill tiles in the bathroom
- when the tile is drilled, change the drill and continue to go deeper into the wall to the desired mark;
- squeeze a little silicone into the hole, insert a dowel and fasten the bracket.
Everything else is done according to the technology described above.
On drywall under tiles
As a rule, walls and partitions made of plasterboard adjacent to the bathtub are tiled. Paint and waterproof plaster under direct exposure to water cannot provide reliable protection to such material, unlike tiles. But this design makes it a little more difficult to attach accessories, as it requires special care.
To drill the cladding, it is recommended to use a diamond drill, which makes it possible to make a hole without strong pressure on the surface.
Diamond drill
Instead of standard dowels, butterfly dowels are used.
Dowel
If the rod is large and heavy, the fasteners in the drywall will not withstand the load and will become loose over time, which means that you need to drill deeper - to the concrete base. In this case, the fasteners also need a large length, taking into account the thickness of the drywall, tiles and the gap between the gypsum board and the wall. The kit usually includes self-tapping screws measuring 5x40 mm, so you will need to purchase separately self-tapping screws of the same diameter, but 80-100 mm long. The dowels, accordingly, should have a diameter of 6-8 mm and a length of 80-100 mm.
The marking is carried out as standard, as on other surfaces. A drill should be at least 10 cm long and must be sharply sharpened. You need to drill at low speeds (1000 rpm), holding the tool firmly and preventing it from slipping. Having drilled through ceramics and drywall, the drill is changed to a Pobedit one and continues to go deeper into the concrete. After this, the rod is mounted on the dowels.
We make a hole in the gypsum board, insert a dowel, and fasten the product with wood screws
The diameter of the hole must be selected in such a way that the dowel fits in tightly and does not turn itself when tightening the screw.
After tightening the self-tapping screw, you get this kind of stop on the back side
On plastic panels
Installing the rod on plastic-lined walls is quite simple. Plastic is not afraid of vibrations and is easy to drill. Here, too, you need to use long dowels, since you cannot attach the rod to the plastic itself - it simply will not withstand the load from the cornice and curtain, and the fasteners will tear out of the sheathing. So, take a regular drill and make neat holes in the plastic at high speeds. Then the concrete is drilled using a Pobedit drill in hammer drill mode. When fixing the product with self-tapping screws, it is very important not to overtighten them, otherwise the plastic will be deformed and may subsequently crack.
Installing a dowel on a wall covered with plastic panels
If you plan to install the rod in a spacer, keep in mind that thin plastic will bend and be pressed under such influence. It is best to prepare a stop for the rod at the stage of wall covering: at the location of the rod, fix two strong boards on the wall to the thickness of the sheathing. Otherwise, to avoid pushing through the plastic, the rod will have to be mounted on dowels.
The bar is installed in a bathroom lined with plastic panels
Making curtain rods for bathtubs
Sometimes it happens that the options for bathtub curtain rods that the trade offers do not suit you. This usually happens because the layout of your bathroom is non-standard and standard solutions are suitable for it. In this case, it makes sense to think about how to make a barbell of the size and shape you are interested in. Thus, you can satisfy your most unusual needs.
The simplest solution may be a direct design. It can be used when your bathtub is large and standard curtain rods for it will simply be too small. In order to make a rod of the required length, in this case you will only need to purchase an aluminum profile or stainless pipe. Next, they are cut to the required length and installed in place. Decorative plugs are placed at the ends and the cornice is ready for use.
In the case when you need a shaped design, for example, for a semicircular bathtub, you should think about making it to order. Such services are provided by design bureaus that design bathroom interiors. At the same time, they can complete the project of finishing and equipping your bathroom on a turnkey basis.
Tips for choosing a barbell
When choosing a curtain rod for the bathroom, you need to consider first of all the quality and durability of the product. In order not to change the barbell every 3-4 years, pay attention to steel and metal-plastic models. Inspect them carefully before purchasing: there should be no scratches, abrasions, or other defects on the surface, and the parts should fit tightly at the joints, leaving no gaps. Be sure to check the package contents, availability of fasteners and manufacturer’s instructions.
Steel rod
As for design, a lot depends on the interior of the bathroom. All accessories must be in harmony with each other and correspond to the overall design style. If the faucets and cheap stand are metal and made in retro style, then plastic colored rods do not match them in any way. The shape also means a lot: in a spacious, light bathroom, rods with curly curves and ring options look advantageous, while straight models are more suitable for small rooms.
Bath curtain rod oval
Curtain rings also come in a wide variety of shapes and materials. The most practical are polymer-coated metal rings. Ordinary metal rings rattle, leave abrasions on the rod, and do not glide smoothly. Plastic does not last long and quickly loses its visual appeal. But metal with a polymer coating does not have such disadvantages, so using such rings is very convenient. Find out how to install a bathroom under tiles using the link.
Attaching curtains in the bathroom
Choose polymer-coated metal rings
Curtain mounting options
As for the mechanism for fastening the described products, fabric bathroom curtains can be hung in a fairly simple way, namely, using a corner profile attached to the walls. In this case, the profile can be made of a pipe or replaced with a string. The supporting rod can be sliding or telescopic. In this case, the ends of the pipe are attached to opposite walls.
Bright prints on the curtain will lift your spirits
On a note! To prevent the pipe from folding, a threaded connection is provided, as well as a special spring device.
The pipes themselves are made of plastic and metal. If we consider them separately, then the plastic rod is used much less often than metal products. This is worth keeping in mind when choosing curtains for the bathroom.
If you take corner curtains, they perfectly protect the room from splashes and water, so their design is special. For example, there are:
- Sliding curtains for the bathroom, used when the space allocated for a shower is small and in small rooms.
- Sliding roller blinds. Their design is similar to similar systems used in wardrobes.
- Accordion curtains.
- Swing systems that open in any direction. Thanks to this quality, they are very popular, although they are better suited for medium-sized rooms, since small bathrooms are not intended for them.
You can choose the material, shape and diameter of the structure taking into account the size of your bathtub
If we talk about unusual designs, then we can mention such a product as a roller blind for the bathroom, which has recently become quite actively used. It is worth noting that only a high-quality rubber seal can protect the joints of such curtains from leaks. In addition, a careful selection of the model of one or another curtain can protect against this scourge, because there are now a large number of cheap Chinese fakes on the market that cannot provide high-quality joints between the shutters. As a result, such devices do not provide reliable protection against splashes on the floor.
Roller fastening ring design is convenient and practical
In addition, there are combined curtains, photos of which can be found on thematic resources dedicated to interior design. They simultaneously use several options for opening/closing mechanisms. This makes it possible, for example, to make the front side of the bathtub sliding, and the sides to be roll-type. As a result, the level of convenience and comfort in the bathroom will dramatically increase.
A metal pipe as a frame is a fairly common design solution.