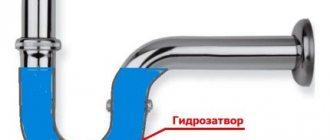
- What is a siphon and why is it needed?
- Dismantling the old system
- Siphon installation
- Leak test
- Siphon selection
- Conclusion
The siphon is a very important element of all plumbing devices. It is used in sinks, showers, toilets, bidets, bathtubs, etc. In some cases, the siphon requires replacement. The cause may be either a breakdown or repair. You can replace an old siphon with a new one without resorting to the services of a plumber, since the design of this device is simple and does not require extensive experience and knowledge.
But it's not that simple. This becomes especially obvious when replacing the siphon in the bathroom. Due to the inaccessibility of the place and the presence of an additional drain, minor difficulties may arise if you do not follow the rules. We offer you step-by-step instructions for replacing a siphon in the bathroom, starting with dismantling and ending with checking the new, newly installed system.
Bath siphon
What is a siphon and why is it needed?
Before considering the process of replacing a siphon, let's understand the device itself and its purpose. A siphon is a transitional link between a plumbing drain and a sewer pipe. This device performs two functions - shutter and filter. Thanks to the presence of a special elbow, the water does not leave the system completely, but partially remains in the pipe. This creates a water plug that prevents foul-smelling odors from passing from the drain into the bathroom. The filtering function is that heavy objects are not able to overcome the elbow and pass further into the pipes, which prevents them from entering the system and clogging it. It also makes it possible to reclaim a precious ring or earring that might fall down the drain. To remove them, you just need to remove the plug from the bottom of the siphon and pick up the loss.
When considering the question of how to replace a siphon in a bathroom, you must also take into account the features of the bath itself. It can be made of different materials and have the most bizarre shapes. In some cases, individual siphon production is even required. But we will not touch on this option, and will consider replacing the simplest siphon on a standard bathtub.
How to install a drain in the bathroom with your own hands - detailed instructions
Correct installation of a bathroom drain with your own hands allows you to reduce to a minimum the possibility of overflowing the water bowl in the water treatment room. It is necessary to maintain order in this area, since water can fill the bathtub faster than it can drain. At the same time, there is not only the possibility of flooding the floor, but also flooding the neighbors. A piping or drain-overflow system allows you to organize the drainage of water from the bathtub into the sewer channel.
Standard drain design and semi-automatic
The design includes several tubes with hoses connected to the sewerage pipe system, as well as 2 bathtub openings:
The top drain is provided to regulate the volume of water in the bath and reduce the likelihood of overflow. Another hole is located at the bottom of the bowl; it serves as a drain. The standard drain model includes the following items:
- siphon in the form of a pipe;
- necks for draining and overflowing;
- a tube for connecting the siphon to the sewage system;
- corrugated hose for pouring water into a siphon.
The siphon, or pipe, is a barrier against the penetration of pungent odors from the bathroom sewer into the apartment. To fill the bowl with water, you will need to cover the hole at the bottom with a stopper. Proper operation of the drain system requires timely replacement of seals that have already worn out. The semi-automatic device differs from the standard drain-overflow model in its modernized design, which includes all of the listed elements, as well as additional ones:
- Valve plug.
- Cable responsible for controlling the plug.
- Rotary ring, valve, button, handle.
- A mechanism that allows the plug to be lowered and raised.
For the entire system to work, the cable must be tensioned and relaxed. This is done by turning the valve or pressing a special button. In the design of the semi-automatic device, the drain-overflow hole is located behind the control unit.
Among the advantages of this system are the design and convenient operation of the structure. The disadvantage of a semi-automatic system is that its level of reliability is not very high.
Automatic drain device
If your budget allows, you can buy an expensive automatic model. It will also be beneficial to purchase an inexpensive standard model. Prices for automatic structures range from $20-55. A distinctive feature of the automatic mechanism is associated with the presence of a special valve. After pressing it, the plug automatically closes the drain hole in the tank.
The provided valve retainer allows you to maintain its position. To drain the water you will need to press a button. The automatic lowering and raising of the valve occurs as a result of spring compression. The automatic drain system has the following main features:
- The drainage is controlled by feet.
- The visible part is compact in size.
- Availability of a large assortment of buttons.
An automatic drainage system is often used to equip baths for children. As a result, the water container does not need to be turned over manually to drain the water. The main disadvantage of an automatic bathroom drain and overflow device is the difficulty of replacing the button.
If a valve breaks down, the system is completely renewed. This is a rather serious drawback, since the price of an automatic bathroom drainage device ranges from $60-280.
Replacing the old siphon and caring for it
If a puddle of water regularly appears on the floor in the bathroom after it has not completely drained into the sewer system, this means that the siphon has begun to leak. In this situation, you cannot hesitate, that is, you will need to immediately begin replacing the old siphon with a new part.
Otherwise, the breakdown will lead to the appearance of mold due to increased humidity levels, an unpleasant odor and many other problems. Replacing the siphon and connecting the bathtub to the sewer with your own hands is done in the following sequence:
- The worn out drainage system is being dismantled.
- The presence of burrs at the location of the neck is checked.
- The rubber gasket is installed.
- The back of the drain pipe is pressed tightly against the gasket.
- The gasket is placed on the front side of the siphon.
- A screw is inserted and carefully tightened.
- The drain and overflow neck is reinforced with corrugation.
- The siphon is connected to corrugated hoses.
- The hose discharged into the sewer is secured to the siphon using a union nut.
The installed system does not require special care, so it is enough to familiarize yourself with some tips that will allow you to keep your drain in perfect order:
- semi-automatic and automatic require periodic processing of parts, which allows you to maintain the shine of the metal;
- regular inspections are organized in order to identify possible leaks;
- broken sealing requires changing the seal or tightening the joints;
- a clogged siphon is cleaned with a plunger or using a small brush attached to a wire;
- Removal of blockages is carried out using alkali contained in chemicals.
Source: https://sovety-vannoy.ru/santexnika/kanalizaciya/kak-ustanovit-sliv-dlya-vannoj.html
Dismantling the old system
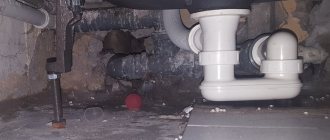
Old siphon
When deciding to install a new siphon, it is necessary to dismantle the old one. Before carrying out this procedure, you need to prepare a small bucket or other container. We need it to collect water, which performs a mixing function in the system. We will also remove the cover from the siphon, and the dirt that has accumulated there may fall on the floor. It is for this reason that you need to place dishes under the structure to be removed.
Dismantling sequence:
- dismantling the old siphon. This is a fairly simple procedure and does not require additional effort. In some cases, the nuts may be over-tightened. So here you can’t do without additional tools;
- Next you need to completely remove the old siphon along with the pipes. Probably, if the system is quite old, they will be “grown in”. This stage must be carried out very carefully so as not to damage the sewer pipes;
- clearing out old places. After completely getting rid of the old system, you need to clean out their locations. There may be pieces of rubber gaskets, rust or any irregularities.
By following these three steps, you'll quickly get rid of your old system and prepare the space for the new one. It is recommended to do everything quickly, since the sewer hole will be open and the toxic stench will pass into the room unhindered.
What you need to replace the drain system
A siphon is necessary to get rid of the smell from pipes, but sometimes it fails for some reason, in which case it is necessary to install a new drain on the plumbing. For installation, you should prepare a list of tools that will help you get the job done quickly and without problems:
- hammer;
- crosshead screwdriver;
- grinder and cutting wheel for it;
- pliers;
- silicone based sealant;
- flat screwdriver;
- hexagons.
You can use pliers to tighten screws and nuts more tightly. It is worth paying attention to models that come with a drain; it is better to purchase just such a siphon.
Siphon installation
New bath siphon
After the preparation has been completed, you can proceed to the second stage - installing a new drain system. It is also performed in several stages. But first, let's look at what should be included in the package:
- exhaust pipe;
- plastic nuts in the amount of 2 pieces;
- rubber gasket for the inlet pipe;
- stainless steel clamping screw;
- conical rubber cuff;
- drain cover;
- drain gasket;
- flask or curved pipe;
- rubber plug.
Once you are sure that the system is complete, you can begin assembly.
From the very beginning, the siphon itself is assembled. If this is a bottle system, then a rubber gasket is put on the flask and the bottom is screwed on. The tubular system does not require preparation. Next, we take the overflow and connect it to the bathtub. At the same time, we tighten all elements tightly. It is important not to forget about padding. After installing the overflow, you need to install the main drain with a pipe. There shouldn't be any problems here either. Don’t forget to put the gaskets here too, having previously coated them with sealant.
After the overflow pipes and the main drain hole are securely secured, you can install the siphon. When fastening it, it is recommended to use only your hands, since wrenches and other devices can tighten the nuts and create excess tension, which will subsequently lead to cracks and leaks.
By connecting the siphon to the pipes, you can connect it to a pipe from the sewer system. If everything is done correctly and there are no problems, then replacing the siphon yourself should not take more than an hour and a half.
How to assemble a bathroom siphon?
Siphon assembly diagram
The bath siphon is assembled to connect any plumbing fixture to the sewer system.
The design of the siphon is made in such a way that it accumulates water in itself, and this, in turn, blocks the path for sewer odor to penetrate into the room. The principle of constructing a siphon for bathtubs of different models is the same.
To assemble the siphon under the bathtub, you must strictly follow the instructions below:
1.2.3.
Place the gasket in the required position and press the pipe tightly to the body of the plumbing fixture.
Important!
If you do not press the gasket tightly, a leak may occur.
4.5.
- Place a plastic coupling nut (8) onto the pipe, and install a conical gasket (9) under it.
Important!Attach the cone gasket with the wide side to the nut
- Place the elbow onto the pipe at the desired height and tighten the nut.
- Attach the elbow to the adapter using a compression nut with a cone gasket inserted. Thanks to the adapter, you can change the height of the siphon.
6.
The marketing review on our website “How to choose a bath siphon” will allow you to cheaply buy the most suitable and easy-to-use product in this category
Read about the different types of bath siphons here:
What to do if the siphon under the bathtub leaks? The solution to the problem is contained in the materials on our website
7.8.
Leak test
After installing the siphon, you must wait a day for everything to “sit” in place and for the sealant to completely harden. Leak tests are carried out as follows: a large amount of water is poured into the bath. The plug should cover the drain. Be sure to check for leaks at the very first stages. If everything is in order, continue drawing water. When the bath is half full, open the plug and watch the siphon. If leaks appear, mark the places so that you can cover everything with sealant in the future. To test the overflow, take a few scoops of water and pour it into the hole. Observe the presence or absence of leaks. This can also be done using a shower, directing it towards the overflow.
The absence of leaks is a sign that the replacement of the siphon in the bathroom was completed successfully. As a rule, if you follow the instructions, everything goes without any problems.
Complete and careful dismantling of the bathroom - video and detailed instructions
When renovating a bathroom in an apartment or when replacing old, worn-out plumbing equipment, it is often necessary to disassemble and dismantle the bathtub on your own - a video of this noisy and dusty stage of repair work, as well as detailed instructions for all steps will help you prepare in advance for possible difficulties and avoid problems. Let's consider two options - preserving the bowl and its complete elimination.
The procedure for dismantling communications and removing a cast iron bath ↑
The most difficult of all possible options is dismantling plumbing fixtures made of cast iron. The task becomes more complicated if the plans include removing the entire bathtub in order to use it later, for example, at the dacha. One person clearly cannot do this - a cast iron product can weigh up to 100 kg, so at least two people will have to work.
There is no trace left of the bath
Dismantling the problematic old harness ↑
After removing all objects that interfere with the work from the room, the bathtub must be disconnected from all fittings, including the drain. Cast iron plumbing has been installed in many homes since ancient times, when drain lines were made of cast iron pipes. It is usually not possible to simply disassemble them after many years, so dismantling a cast-iron bathtub with removal will have to be done in other ways.
Siphon selection
Convenient bath siphon
Having considered the installation process, you can begin to give advice on choosing this device. At the same time, you need to understand that you can replace the siphon in the bathroom with your own hands in accordance with the instructions, but no one writes anything about purchasing it. So, when purchasing, pay attention to the material from which the siphon is made. If you purchase a device made of plastic, then its surface should be uniform, smooth, and without flaws. Do not purchase a siphon made of nickel-plated metal or steel. It will quickly rust, and after a few years it will completely fail. If you take a metal one, then only one made of stainless steel or brass.
Also, when purchasing, try to choose the simplest design possible. It will cost less and is much easier to install. But do not purchase siphons at greatly reduced prices. As a rule, they are made of PVC, and it tends to disintegrate when exposed to high temperatures (hot water with various chemicals significantly speeds up this process). It is better to give preference to siphons that are in the middle and high price range. This device will definitely serve you for several decades.
In almost all configurations there is a lack of pipes, and they have to be purchased separately. Experts recommend choosing corrugated pipes, as they are flexible, reliable and inexpensive. Also, when using them, you don’t have to think too much about the exact distances between centers. More problems may arise when using a rigid pipe. Here everything needs to be measured exactly down to the millimeter, which can cause a lot of trouble.
Another recommendation from experts is the correct selection of sealant. It is worth paying attention to the basis. If it is acidic, then it will not suit us. It is better to take a more expensive one, but one that does not contain acid.
Drain installation
Before fastening, you need to turn off the water and find out the density of the pipelines. If the sewer pipe is made of PVC, a threaded connection with a gasket is used. In the case of a metal pipe or a mismatch in diameter, it will be necessary to buy a rubber adapter. The siphon pipe must extend into it at least 5 cm, and sealant is also used. After assembling and tightening all connections, check the tightness. To do this, fill the bath until water passes through the outlet hole.
Installing a simple overflow system
Before changing the siphon, you need to install the bathtub and secure it firmly. In normal factory-made equipment, the height of the product allows you to insert a drain without difficulty. In a simple overflow system, the siphon can be solid or rotary with a nut fixing the position. There is a hole at the bottom of the bathtub to which the bathtub overflow is connected. There is an internal thread in the lower part, and a grille in the upper part that protects the siphon.
Breaking down a cast iron bathtub for removal in parts ↑
If you need to dismantle an old bathtub and install a new one, then the easiest and fastest way to get rid of outdated plumbing fixtures is to simply break them apart with a sledgehammer. Cast iron is a strong metal, but it cannot withstand a series of strong blows from a heavy hammer and will definitely crack. After this, it will not be difficult for even one person to remove small pieces from the apartment.
The only significant drawback of this method is the extreme noise produced during the breaking process. To reduce the need for knocking, you can use a grinder. The procedure will be as follows:
- As in the previous case, disconnect the plumbing from the communications, cut or otherwise dismantle the drain pipe.
- Free the bathtub from cement mortar around the perimeter. If there is a decorative screen, then it is broken with a chisel and hammer.
- Move the bowl a little away from the edge of the wall. Using a grinder, make cuts on the curved edges in the middle on both sides. It is these edges that give the bowl the necessary rigidity, so you need to saw them completely.
Next, all that remains is to hit the bottom with a sledgehammer a couple of times, after which the bathtub will “fold” exactly in the middle. The only thing that should not be forgotten throughout the entire demolition of sanitary equipment is eye protection. Use special masks or goggles, otherwise chipped pieces of enamel or shavings can cause injury.
Breaking down a cast iron bathtub
Video: How to break a cast iron bathtub ↑
The work of dismantling communications, demolishing and removing an old bathtub is not extremely difficult, although its labor intensity for one person is quite significant. The greatest difficulty is caused by dismantling a cast iron drain, the stuck nut of which is almost impossible to unscrew without the help of, for example, a hammer drill. Breaking will also require significant physical effort, so it is better to do the work with an assistant or immediately seek help from a specialist.
Where to put it with benefit?
You will be surprised, but even from an old, rusty bathtub you can benefit; see how to do this below.
Removal for scrap metal
You can scrap it and get some good money. Some companies even offer free dismantling and removal services, this will save you a lot of time and effort. Read more about how to benefit from this in our special article .
Second Life
If you apply a little imagination and “direct hands”, you can make truly amazing things from cast iron baths. Furniture, ponds and even barbecues. More useful inventions from a cast iron bathtub in our article.


