Home » Household appliances » Connecting equipment » Connecting the shower cabin to electricity
After installing the shower stall, it must be connected to electricity. Connecting a shower stall is a rather complicated process. You will find all the questions about its implementation in our article. You will learn how to connect a shower cabin and consider all the stages of its connection.
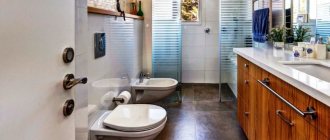
Shower cabins: photo
From the photographs you can understand that the choice of such plumbing fixtures on the market today is very wide, almost limitless. Shower enclosures vary in size, style, color and other characteristics. But regarding how to turn on the shower stall, the device of all models looks approximately the same. We'll look at how to do this using a standard classic cab as an example, this guide will work on any other model over 99% of the time.
Models may differ in their design:
- Type of installation (most often models are corner, but there are also those that are installed not in a corner, but near the wall).
- Shape (most often models have the shape of a square, a square with one rounded corner, or a rectangle).
- Pallet type (high or low pallet).
- Type of door opening (the door can move on rollers, moving to the side, or can be hinged).
- Type of glass (tinted, frosted or regular).
Here are the main division criteria and their distinctive features, this is not the entire list, but the main points have been listed.
Manufacturers' imagination is limitless. The models are very different, there are many of them, and they all look pretty nice. Making a choice is sometimes difficult. Sometimes it is the above criteria that help you decide, because not all options will fit in every bathroom (dimensions, etc.).
Installation of a shower enclosure
If you study the design of a shower enclosure, then remember that in this case the installation process will not be difficult. The shower installation process will consist of the following steps:
- First, prepare the place where the shower enclosure will be installed in the future. The corner of the bathroom must be tiled.
- If you have chosen a shower cabin with a tray, then it must first be installed on the floor.
- Most pallets may have special legs that can be adjusted if necessary.
- Now you can connect the watering can or shower panel. The shower panel will contain all the necessary functionality.
- After this, the installation of shower doors will have to be carried out. Doors can slide apart or be open. During the manufacture of doors, a variety of materials can be used.
View of a closed shower stall
Inclusion
How to turn on the shower? We begin to consider the situation from the moment when everything is already fully installed and connected to all necessary communications (water supply, sewerage).
In the corner of the cabin there is everything necessary for control. Typically, the part that answers the question of how to turn on the water in a shower stall is a small pin. To open the water, you need to turn it up. Accordingly, to close the water, this pin must be turned down. Turning this mechanism to the left or right allows you to control the temperature of the water that is comfortable for you (hotter or colder).
Fastening the fence
The next step is to secure the panels and fencing. Before this, the glass must be checked for defects. In order to understand how to install these elements, you need to find holes, most of which are located in the upper part. Next, you can figure out the guides; the lower one should be thin, it should have curly cutouts, while the upper one should have a wider appearance.
Installation diagram of a drain in a shower stall.
Then the glass must be secured into the grooves of the guides, lubricating the joints with sealant in advance, and then tighten the screw located on the presser foot.
Using self-tapping screws, you have to mate the guides and the stand (bottom and top), only after that the seal is put on the glass.
Sealant should be applied under the surface of the bottom rail to strengthen the pan and allow glass to be installed.
During the application of sealant, it is recommended to ensure that the recesses in the pan, which are used to drain water, are not stained. Using small washers and self-tapping screws, it is necessary to fix the side panels to the pallet (the pallet is equipped with special holes). Silicone will allow you to process the joints. Then you can proceed to installing the back panel, using self-tapping screws. The resulting joints must be treated with silicone-based sealant.
All fasteners should not be clamped at once, as during installation some holes may not match. But if a small gap is left, this will allow for further adjustment.
When installing a shower stall, it is not recommended to put excessive pressure on the metal, as it is quite fragile and such actions can cause damage.
After installation, you need to analyze whether the system functions such as fan, radio and lighting work, only after installation should you leave it until the sealant gains strength.
Modes
We learned how to turn on the water in the cabin. Now let's look at how you can change its operating modes. That is, how to turn on the water in a shower stall from a hand-held or ceiling-mounted shower head or wall-mounted nozzles.
There is another pin to switch modes; it is located directly next to the mechanism for turning on the water. By rotating this pin clockwise, you can switch operating modes. Switching the mode is accompanied by a click in the control mechanism; you need to rotate it until it clicks, so that you do not have two modes turned on at once (each half).
In general, washing in a stall is very comfortable and convenient if you fully understand how exactly it works. Many people who have always washed in the bathtub, having tried at least once to swim in the shower, almost immediately change their minds and believe that this option is much better and more convenient than a bath.
Lighting
Most manufacturers of modern plumbing equipment equip shower cabins with built-in lamps or shower heads with original color LED lighting. Built-in lights can be located in the ceiling of the booth or on the side panels. As a rule, the standard control of the entire lighting system is carried out using electrical switches. To start the lighting system, just press the “Lighting” button.
Shower cabin Esbano ES-L108CKR with LED lighting
Consecutive pressing of this button allows you to easily change the type of lighting in the following modes:
- “background lighting” with the top lamp turned off;
- “top lamp” with background lighting turned off;
- simultaneous operation of background lighting and overhead lamp;
- "lights off"
It should be noted that the most popular is diode lighting, which gives the shower stall sufficient brightness and also makes the lighting soft and comfortable.
Exploitation
There are no special features, everything is simple and clear. If the water in your apartment is not completely clean, and there are no filters to clean it, then from time to time you will have to clean the watering cans and nozzles, which will become clogged with lime.
But it must be said that this is rarely required (usually once every few years). Of course, it will be better if a filter or filter system is installed to purify the water before entering the shower stall. The operating instructions do not require compliance with this item. But you and your loved ones can wash in this water. It is in your interests to create conditions so that your plumbing fixtures will last longer. Clean water is what you need for this.
The same applies to glass. Sometimes during use they will need to be washed, as they will lose their transparency over time. But this does not need to be done every time, however, caring for the bathroom is no easier.
Preparatory work
Connecting the cabin to the water supply and sewerage system does not require special academic knowledge and does not take much time. Having the right tool and knowledge of the theory are two components of successful work.
Usually shower cabins are equipped with all necessary consumables. The only exceptions may be budget or sale models, in which the components may be of low quality or incompletely assembled.
In any case, to successfully connect the plumbing you will need:
- Plumbing hoses.
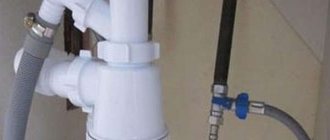
- Siphon and tees.
- Flexible hose for water supply – 2 units.
- Fum tape for winding threaded connections.
- Silicone sealant.
- Construction level.
- Adjustable wrench.
- Screwdrivers and pliers.
Manufacturers
There are three main categories among manufacturers:
- Famous world brands from Europe and the USA.
- Budget brands from China.
- Russian production.
The price usually matches the quality. The cheapest options are models from China. This is not to say that the quality of their performance is always terrible. There are models that will serve you for decades, but this is always a “pig in a poke” purchase.
Shower cabins from Europe and the USA are the most expensive and of the highest quality. These are models from the premium segment. If you can afford such products, then feel free to choose what you like.
Domestic models are somewhere between the two categories mentioned above in price and quality.
Let's say that absolutely all manufacturers have their own customers. As well as positive and negative reviews for all options. China still occupies the largest segment of our market.
How to fit everything in
The main design principle when creating the interior of a small bathroom is to get rid of everything unnecessary.
You should forget about:
- inappropriate placement of items - cosmetics should be placed in a cosmetic bag or next to the trellis, dirty clothes and washing supplies should be placed in a separate closet;
- collecting things “in reserve” - in fact, you don’t need 5 cans of shampoo and 10 cans of shower gel;
- using the bathroom for purposes other than its intended purpose.
Teach yourself to be organized and store excess items in the pantry and separate cabinets in other, more spacious rooms. This is especially true for electrical appliances - hair dryer, curling iron, etc. - keeping them in the bathroom is not only pointless, but also dangerous.
It’s easier to fit essential items into your bathroom if you only fit what’s really necessary. How to organize the arrangement of a minimum set of plumbing fixtures?
Special varieties
There are options that, for example, are equipped with a Turkish bath function or some other similar addition. Such shower boxes are much more expensive. Do you need such a model? You decide for yourself, because some will call it a waste of a significant amount of money, while others will think that this is a great way to relax after a hard day at work.
Also, we will not consider the question of how to turn on a shower stall of this type, because there are no differences. And the above-mentioned functions in these shower boxes are usually activated by turning the tap or using a separate button.
Cable selection and grounding
The electrics for the shower stall are the most important element to ensure your safety in the future use of the shower. So, first of all, you need to select the right cable and protective mechanisms for the cab panel. First, take the shower cabin passport and carefully study the required values of the required power. It is these that you will need to focus on when choosing the cable cross-section. Electrical equipment store specialists will help you figure this out.
Connection diagram for plumbing and electricity when installing a shower stall.
As a last resort, you can use data from special tables that can be easily found on the Internet. It is better to choose a cable brand that is time-tested and well-known in the market. It is best to choose a copper cable itself: it will withstand any voltage. Type of insulation - double. It is better to connect the cable directly from the switchboard.
Don't forget about grounding the cab panel. This is especially true for booths with metal pallets. Most often, grounding is provided, so the cabin will definitely need to be grounded. If grounding devices are not included in the kit, then they must also be purchased. In this case, you need to focus on the general grounding of the entire house and the quality of the electrical wiring in the room. This is where advice from an experienced electrician will come to your aid.
Enabling utility functions
Recently, you can often find relatively budget models that are additionally equipped with:
- Illuminated inside the booth.
- Radio receiver
- Video intercom.
These are the main auxiliary functions, but an incomplete list of “extras”. Of course, most often you will find exactly those pleasant additions that were listed above.
To turn on, turn off and control some of the functions there is always a special panel with control keys. Everything is intuitive, there is no need to dwell on this point.
Tools for connecting a shower stall
To connect the shower stall to the water supply and sewerage system, you need to stock up on tools and consumables. The instructions that accompany each model are also useful: they are needed to know the parameters important during the installation process.
- Flexible or corrugated connecting hoses. These options are best suited for installation: they are easy to work with. Typically, such materials are supplied complete with the booth; if they are not available, then they are purchased separately, of suitable length and diameter.
- Compression fittings. They are needed to connect or separate certain areas on the hose.
- Screwdrivers, knives, adjustable wrenches. Their function is to adjust the length of the hose and fix it at the required point.
- Seals (FUM tape and rubber), sealant. The use of these materials is necessary to prevent leaks.
- Filters. Parts are needed to pre-clean water before entering the sprayer. Cleaners help extend the operating life of equipment and prevent possible breakdowns.
Important! If the plumbing fixtures are additionally equipped with a hydromassage function, you must purchase a special pump. It allows you to create the necessary water pressure.
When purchasing consumables yourself, you should make sure that they fit exactly in diameter and length. Incorrect installation leads to leaks and rapid wear of plumbing fixtures.
Typical faults
- The most common problem is when you add cold water and it gets hotter. This is not mysticism at all. The whole point is that the person who did the installation mixed up the hot and cold water connection inputs. The solution to the problem is to swap the water inlets. But some people simply put up with this problem and over time get used to the fact that cold water is hot and vice versa.
- When you turn on the water it doesn't come out. Check that the connection is correct.
- Flow. Check the tightness; if sources of leakage are found, you can correct the situation with silicone sealant.
Practical advice
It is, in principle, quite possible to independently connect the cabin to the electrical network, with the correct organization of the matter (which implies knowledge of the basic requirements of the PUE). But it is advisable to do this only if we are talking about the simplest models, called budget ones, and also not “branded”. To commission an expensive installation with a complex internal circuit, it is advisable to invite a professional.
There is one more argument “for”, which few people take into account. If the equipment is from a well-known manufacturer, then the instructions (passport, user manual) must contain a clause that stipulates that the product warranty is automatically canceled if installation is carried out by an uncertified specialist.
Installation rules (distances from the ceiling, front door; mandatory high-quality hood, etc.) are a separate topic. But if there is a choice (for example, in a private house, when the bathroom is large enough), then when determining the location, you need to proceed from minimizing the length of the wiring and the number of mounted devices.
Before installing a shower cabin, you should evaluate the capabilities of the inlet machine. If the installation is powerful enough, then AB also changes. Otherwise, under increased load, it will constantly “knock out”.
It is better not to organize grounding in an apartment yourself; invite a specialist from the management company (homeowners association, housing office, public health department). And here the point is not in the low qualifications of the home handyman - many men are familiar with electrical engineering. The reason is different. All apartment buildings are connected to the power supply line according to various schemes (3 typical). Without knowing which one is implemented in this house, it is pointless to look into the entrance panel. Otherwise, the zero will burn out (which most often happens), and you will have to not only pay the fine issued by the Criminal Code and the work of a specialist in eliminating the accident, but also resolve very likely conflicts with neighbors.
Some important tips for connecting a shower stall
You can connect the shower stall to the water supply and sewerage system yourself - the complexity of this process is the same as in the case of a classic bathtub. To ensure that the system functions without failures and does not cause discomfort, you should pay attention to a few tips from plumbers.
- All connections and fittings must be additionally tightened with a wrench. The external reliability of a structure can be deceiving, so such a measure will not be superfluous.
- Check the tightness of all connections and waterproofing. If necessary, all joints must be treated with sanitary sealant. If this point is ignored, there may be a risk of leaks.
- If the drain hole in the pan is located far from the sewer drain, it is necessary to additionally install a pump. This device will allow you to quickly recycle water.
- Sewer and water pipes should be located at an angle. This is necessary so that if the riser is blocked, the water will drain completely.
- Before purchasing a cabin, it is recommended to pay attention to what material the tube for discharging waste water into the sewer is made of. Silumin alloy has a short service life, so it is better to immediately install analogues made of stainless steel.
- If the water is of poor quality, it is necessary to install filters to purify it. Thanks to this part, you can protect the spray nozzles from contamination.
With proper installation of all components, the shower stall will function without interruption. One of the main tasks in the process of connecting water supply and equipment for draining water into the sewer system is selecting suitable parts.
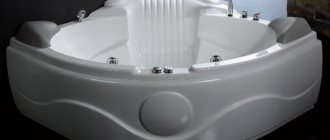
How to install a pallet
Most models of shower cabins require a special tray. In shape and design, it resembles a bathtub into which water flows during a shower. At the bottom there are special supports with the ability to adjust the height - thanks to this, the plane can be set exactly level.
During work, you should pay attention to ensuring that the bath is positioned exclusively horizontally. This is necessary to ensure that all the water flows into the drain and no puddles appear on the floor. The bottom of the pan is designed in such a way that there is a special recess in it where moisture is disposed of.
Some booth models do not require a special tray. In this case, you need to equip it yourself: make a raised platform out of concrete, and then lay it out with tiles and equip it with a drain.
You can construct a bath yourself using the following algorithm.
- Lay out the perimeter of the future pallet from ceramic bricks.
- Install a drain drain inside and connect to the sewer system.
- Fill the area of the pedestal with a concrete screed and make a slope towards the drain. To prevent the concrete from becoming soggy and deformed during operation, it is recommended to add liquid glass to the solution.
- To improve waterproofing properties, all seams are treated with sanitary sealant.
- For sewer drain equipment, it is better to choose corrugated pipes with a standard diameter of 4 cm.
Important! If the pipe leading to the sewer system is too narrow, there is a possibility of frequent blockages.