The shower is the most popular part of water procedures. The main condition for a comfortable stay in the bathroom is the serviceability of the shower head. In working condition, the nozzles should evenly distribute the flow of water around the entire perimeter.
If this part of the headset fails, this is not a reason to replace it with a new product. Sometimes it’s enough to figure out how to disassemble the shower head and clean the cover with nozzles. Timely disassembly will protect the device from complete failure of all components, including the hose.
Step-by-step disassembly instructions
To work, you will need a Phillips screwdriver, an adjustable or gas wrench No. 1, and a special pin wrench for disassembling the shower head.
Often this key comes in a set. If you don’t have one, you can make it yourself or use improvised items. When disassembling the shower body yourself, it is recommended to be extremely careful and put small parts and structural elements aside separately. When dismantling rubber gaskets, they must be handled with extreme care to avoid damage. Do not forget about the presence of a spring in the housing.
So, the algorithm is as follows:
Turning off the shower, removing the shower head from the flexible hose. This is done quite simply: unscrew the nut at the junction with the hose. Before doing this, you must turn off the shower mode on the mixer. In order to disassemble the watering can with the switch, you need a special key. If you look closely at the diffuser mesh panel, you will see 3-5 recesses on the central circle intended for dismantling. The panel unscrews from right to left. You can unscrew the central panel of the shower screen with a special key; if it is not available, you can use scissors with rounded ends for this purpose. But it is best to use a key, this will keep the surface of the mesh intact, without scratches or defects. After removing the central panel, you can see the swirl box underneath, which is secured in the center with a screw. Unscrew it with a Phillips screwdriver. Remove the concentric circles of the shower screen, switch
Pay special attention to the movable diffusers and flow diffusion baffles that may be located under the diffuser. When opening the mesh, they must be carefully removed
Then remove the swirler from the watering can. Pay attention to the rubber gaskets; they must be handled very carefully. Below the swirl ring is usually the switch spring. Removing the case must be done carefully to avoid its loss. The swirl box can be one-piece, not subject to repair, or detachable, with 2-3 plastic latches; in this case, opening the box is not recommended. The latches are quite weak and may not withstand brute force. Screw connections are less common.
Assembly after repair or replacement of parts is carried out in the reverse order: the swirl body is inserted, the screw is tightened, concentric mesh diffusers are installed, and the central panel is tightened. After which the watering can is connected to a flexible hose.
After disassembly, be sure to rinse the inside of the holes in the mesh; usually, during use of the shower, so-called water stone forms in them - a deposit of mineral elements and rust found in tap water.
How nice it is to come home after a hard day at work and take a relaxing shower. However, sometimes situations arise when the shower head stops functioning, thereby depriving us of well-deserved pleasure. Don’t despair, because you can fix the problem yourself, and you won’t have to spend a lot of time. Let's figure out how to disassemble the shower head in the bathroom yourself, and what features should be taken into account.
Watering can for a summer shower: metal or plastic
An outdoor shower differs significantly from a shower in a bathroom, both in the design of the structure itself and in the arrangement of communications and watering can. A shower of this type is a cabin made of lightweight material: wood is often used, but corrugated sheets, slate and other sheet materials intended for external coverings are also popular.
Related article:
Heated shower tank: availability of warm water for a comfortable country holiday Heated shower tank: main selection parameters, pros and cons of different designs. Approximate volume.
Large containers are used as a source of water. They are installed in the upper part, mainly the ceiling. This position ensures maximum heating of the water by the sun's rays. In the simplest designs, the shower head is mounted in the bottom of the tank, and water enters the system under its own pressure. In such cases, a permanent attachment is usually used.
Helpful advice! When installing an outdoor shower with a fixed head, it is necessary to ensure accessibility of opening and closing and adjusting the intensity of water supply by installing the valve or lever toggle switch at the optimal level.
A watering can for a summer shower is mounted in the bottom of the tank, where water is supplied to the system under its own pressure
There are also more complex designs that allow you to refresh yourself with damp coolness after a hot day. The shower head for a summer shower in them can be removable, but it is fixed in the upper position and even has several ways of supplying water, including intense flow and aeration. Manufacturers also offer options with two watering cans – stationary and manual. Such designs require a special location of the tank and the presence of pipes through which water will be supplied to the watering cans.
The main part of the shower heads for summer showers is made of plastic. They are inexpensive, the material is not subject to corrosion, is not affected by temperature changes, and is lightweight. More expensive options can be made of copper and brass. They have a more presentable appearance, but require quite troublesome care.
How is the installation done?
The shower cabin comes with an instruction manual describing how it works. If it is not there, then installation should be carried out based on the following tips:
- You should select a location for assembly. It is advisable not to do this in the bathroom.
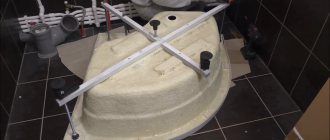
- Installation of the pallet depends on whether there is a frame. If it is present, then fixation will be more difficult.
- It is necessary to turn the pallet over and fix the square beams to it.
- The beams have holes into which the studs are installed. The long side rests against the corner of the product, and the short side against the floor.
- On one side the fixation is carried out with a nut, and on the other - with a thrust bearing. The structure must be turned over and put in place. The height is adjusted using the thrust bearing.
- After installation, everything is tightened using locknuts. To fix the pallet to the wall, you must use brackets. The joints are coated with sealant.
Installation of a product without a frame is carried out as follows:
- When installing a product with a flat tray, a siphon should be installed. You should unscrew the clamp and the joint with the drain hole, and treat it with sealant.
- Then everything is inserted into place.
- On the other side, a sealant treated with silicone is attached to the corrugation.
- Then the hose is inserted into the sewer.
- After installing the siphon, you need to pour water into the pan and check for leaks. If absent, then major fixation is performed.
- The product is attached to the installation site and raised by 5 cm. Polyurethane foam is poured under it. The load must be placed in the installed pallet. Only after a day can you perform the next stage.
Variety of shapes and sizes of shower heads
Modern nozzles can vary in shape and size. Shower heads are produced in the following shapes:
- rectangular and square;
- triangular;
- round and oval.
The size of the watering can is determined by its area of application. For example, those who like to bring down a whole “waterfall” on themselves choose “tropical rain” models, the working area of which is about 50 cm2. Connoisseurs of the classics choose standard manual watering cans, the diameter of which does not exceed 6-8 cm.
The ergonomics of the product is also important. Therefore, when choosing a model, twirl it in your hands to check how convenient it will be in everyday life.
Some stores have a special stand where the consumer can check the functionality of the device by placing his palm under the stream
In terms of practicality, those watering cans in which modes are switched using a button are much more convenient. It's much safer for your hands. And besides, rotary mechanisms are beginning to become a thing of the past.
Variety of attachment options
There are many options for shower heads. The most popular are four types of models: for an overhead shower, from the “tropical rain” series, for a hygienic shower and models with an aeration function.
With one type of model, a shower can turn into a real pleasure, with another - into a normal everyday procedure
The choice depends on the tasks assigned to this element of plumbing. Although aesthetes are of the opinion that the main thing in such a simple subject is beauty, since it is designed to inspire.
Head shower
The main advantage of overhead shower heads is the free hands of the person taking water procedures.
Models of this sample are attached permanently to a permanent place and it is no longer possible to change their position at the time of use
There are two types of overhead showers:
- hinged version - mobile models equipped with a flexible hose or rigid tube that are fixed to a wall or stand;
- built-in models are a stationary version of attachments that are fixed to the ceiling with the ability to adjust the height.
Ceiling models are often chosen for arranging shower stalls.
A watering can with a wall-mounted hose is considered the most preferable option regarding practicality
Wall-mounted models are available in two versions. In the first version, they are connected to a hose, which allows them to be used as “manual” models. In the second case, the installation is fixed to a chrome pipe, which makes it possible to change the angle of inclination and, if necessary, rotate the structure left and right.
Tropical rain nozzle
Today, shower heads from the “tropical rain” series are the most popular type of shower system. This type of device is equipped with many small nozzles, which create the effect of pouring rain. To do this, the structures are suspended directly from the ceiling, and communications are hidden in the grooves.
For this type of shower, large-area nozzles are used, so that water drops do not fall on individual parts of the body, but cover it completely
The operating mode and intensity of “rain” in the range from light drizzle to downpour can be conveniently adjusted using a lever-type toggle switch.
So, for example, to wash your hair you can turn on a soft flow, and then for a body massage - a harder pressure.
Thanks to the large size of the structure, the effect of real rain is achieved, and due to its stationary placement, freedom of movement is ensured
Many models are additionally equipped with a function for mixing modes, using which you can create more intricate configurations.
Models of shower heads with aeration
This type of watering can is an excellent option for residents of high-rise buildings. The principle of operation of the devices is quite simple: water leaks through microscopic holes located on the body, which at the same time mixes with oxygen at the moment of passage. The number of such spray holes can reach more than two and a half hundred.
A water stream that has passed through several meshes becomes lighter and softer at the exit, in some cases it may even have foam
The aerator built into the device performs several functions at once:
- partially purifies water from chlorine and impurities present in it;
- makes the stream smoother and more orderly;
- saturates the stream with oxygen;
- helps save water consumption up to 30%.
Manufacturers claim that a watering can equipped with an aerator helps save up to 10 liters of water in one water procedure.
An aerated jet saturated with air allows you to give real SPA magic to an ordinary water procedure.
Among the advantages of this type of device is the low noise level, since no extraneous sounds are created during the operation of the plumbing fixtures. These models are equipped with a wall mount. They can be fixed to racks and rods.
Watering can for hygienic shower
With proper preparation, even small children can use such devices, freely adjusting the water temperature that is comfortable for the hygienic procedure.
The device can be installed directly on the equipment itself or on the wall. And it is connected through a mixer in the bidet or through a direct connection to the sink. To fix it to the wall, use special holders.
Choosing a shower head
Depending on the installation method, shower heads are either stationary or with a flexible shower hose. Stationary ones can be ceiling or wall mounted. Shower heads with flexible hoses are available in two wall mounting designs. Using a headset (the bracket in which the shower head is installed is mounted on a fixed vertical rod and can be moved in height) and using a bracket permanently fixed to the wall.
Both mounting designs allow you to rotate the watering can around its axis and change the angle of inclination, which makes it possible to direct streams of water in the desired direction. The design of the shower head fastening allows you to quickly remove it from the bracket for manual use. This may be necessary, for example, when washing a child or a person with limited mobility, washing a bathtub and tiled walls near the bathtub or the walls of a shower stall.
There are designs where the shower head is not mounted on the wall, but simply lies on the mixer in a special plug. It is inconvenient to use such a watering can when taking water procedures, since one hand is occupied.
Stationary wall and ceiling shower heads are non-removable, the water supply tube is usually hidden in the wall, and the water mixer is installed on the wall, in a place convenient for turning on the supply and adjusting the water pressure. Wall-mounted watering cans usually provide for adjusting the direction of the water jets. In ceiling-mounted systems, this option is available only in very expensive models. The advantage of ceiling showers is the imitation of real rain, thanks to the large area of flow of water jets. Ceiling-mounted shower heads are typically made of chrome-plated brass, require more water pressure in the plumbing, and are very expensive.
Wall-mounted stationary shower heads, as in the photographs, are also usually made of chrome-plated brass, but they cost much less than ceiling ones. Stationary ones also have the ability to control the direction of the water jet.
If there is a need to wash a child, people with limited mobility or animals, then it is better to refrain from installing a ceiling or wall watering can, or in addition install a watering can with a flexible hose. The photo shows a wall-mounted shower head and an additional one with a flexible hose. The water supply to the watering cans is controlled from one lever mixer tap. Using the button, you can switch the water supply to any of them in turn.
The choice of a shower head with a bracket on a rod is justified only if there are people in the family with a large height range, although the flow of falling jets from any water dispenser of the water head does not expand much towards the bottom, and people of short stature should not experience discomfort when taking a shower. Unless it will be difficult for them, if necessary, to reach the watering can to pick it up. Some people simply like the look of the shower head on a rod design. But this pleasure costs several times more than a shower head with a simple bracket. It should also be noted that if the fixing handles are made of plastic, they will wear out over time.
When choosing a shower head, you need to pay attention to the water divider. There are two types of dividers in shower heads: in the form of a flat plate made of metal or plastic with holes, and in the form of a curved surface, in which not just holes are made, but for each jet a rubber nozzle, which is a short tube, is installed separately
Thanks to the nozzles, the shape of the column of water flowing from the watering can is shaped in such a way that when the water pressure is weak, the jets do not combine. Due to the elasticity of the rubber, the holes in the divider, unlike flat dividers, will not become clogged with limescale. Only large particles of dirt can clog the holes.
Modern shower heads are usually made of plastic. This reduces the cost, the watering can is lightweight and does not damage the enamel coating if it falls into the bathtub. Thanks to the metallized coating, the body of the watering can has a beautiful appearance.
Taking into account the above, a budget option for purchasing a shower head is a plastic shower head with a rubber divider, a flexible shower hose mounted in a bracket on the wall.
Types of switches
In modern mixers, spool, cartridge and exhaust switches are most often installed. Sometimes cork is also installed, but this is rather rare, since it belongs to outdated varieties. But let's talk about each in a little more detail:
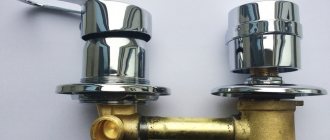
The spool switch is the most popular for two-valve mixers, and has been for a long time. Externally, it looks like a handle, which is located between the valves that regulate the water supply. It is usually made of metal or plastic. Perhaps each of us is familiar with this type of equipment; the cork switch, as mentioned above, is an outdated type. Its handle is longer than that of the type described above; it is also placed between the valves. The switch got its name because the design is based on a special plug with a cutout, which, when turned, coincides with the holes for water supply. In modern stores you can see faucets with a long handle, typical of cork mechanisms. But this is just a tribute to the design; the filling of such equipment is spool-type; the cartridge version is used in single-lever mixers. It can be disk or spherical: in the first case, special ceramic plates with protrusions and holes are responsible for supplying and switching water; in the second, a carefully polished metal sphere, which also contains special holes. If the cartridge itself breaks down, it cannot be repaired. But this does not mean that you have to throw away the mixer. You can simply replace the failed element; the exhaust switch is a button. If you pull it out, water will flow from the shower head, and if you press it, it will flow from the gander. Such a system can operate automatically or be controlled entirely manually. In the first case, the advantage is that the button automatically switches to the gander when the water is turned off. That is, the next time you try to turn on the water, it will definitely not pour on your head from the shower head. With a manual system there is no such guarantee. In general, not everyone likes the push-button system precisely because of the need to pull out the handle. Doing this with wet or soapy hands is not very convenient. But, as they say, there are no comrades according to taste, so this variety is still found in many homes.
We recommend: How to make a sliding wardrobe with your own hands - drawings, manufacturing description, diagrams with dimensions
3
We disassemble the switches - sequence of actions
The first thing that needs to be done when carrying out repair work on the mixer is to turn off the water, and then proceed according to the scheme depending on the type of switch. If you have a mixer installed with a spool or plug switch, disassemble the system as follows:
1. Remove the decorative plug from the switch by prying it off with a knife.2. Use a flat screwdriver to unscrew screw 3. After this, the switch handle can be easily removed.4. Using an adjustable wrench, unscrew the clamping nut that holds the crank.5. Next, unscrew the crank itself and the spool or plug.6. We change or clean the part.
We remove the ball switch from the mixer in the following sequence:
1. At the top of the mixer, unscrew the outlet for the watering can. This is easy to do by hand.2. After unscrewing, you will see the same locking ball, which is sandwiched between two fluoroplastic plates. You can take it out immediately, and then unscrew the handle with the rest of the switch, but you can do it easier.3. Remove the decorative plug from the switch cap.4. Unscrew the screw with a curly screwdriver.5. Remove the handle and unscrew the rod part with the gasket using a wrench.6. From below, using a gas wrench or manually, looking at the degree of density, unscrew the lower threaded fastening that holds the gander. If the thread is difficult to unscrew, lubricate it with oil.7. We take out the locking ball, clean it, change the gaskets if necessary.
Disassembling the shower ball switch
The easiest way to dismantle a push-button switch. To replace a worn spring, proceed as follows:
1. Unscrew the button, first removing the decorative plate and screw.2. We remove the rod with the spring from the hole.3. Replace the old spring with a new one. Attention, the new spring must have an anti-corrosion galvanic coating and be slightly smaller than the diameter of the previous one.4. We assemble the system in reverse order.
If water flows from under the lever with a ceramic cartridge, the handle does not turn well, or you cannot set the desired temperature, only hot or cold water flows, the shut-off valve is broken. Let's consider the sequence of replacing a ceramic cartridge, however, if you have a plastic or metal version installed, nothing will change:
1. We pry up and take out the decorative plug; usually there is a red and blue mark on it.2. Loosen the screw using a shaped screwdriver or a hexagon, depending on the model.3. Remove the lever and unscrew the decorative washer by hand.4. Using a wrench of the required diameter, unscrew the nut, not forgetting to hold the mixer.5. We take out the cartridge and inspect it. If the above problems were present, the part became unusable. We don’t throw away the cartridge, take it with us to the plumbing store and buy the same one.6. We remove blockages and lime that has formed under the cartridge, install a new shut-off valve.7. We assemble the system in reverse order. Do not tighten the nut too tightly, otherwise the cartridge body will burst.
Cleaning products
To clean the head of a regular or more difficult to clean rain shower on your own, you can use:
- special chemicals;
- folk remedies.
Application of chemical compounds
How to clean a shower sprayer from limescale and scale deposits? The easiest way is to use household chemicals, which differ:
- speed of cleaning;
- absence of negative impact on the body and other structural elements;
- efficiency.
The most popular means are:
- Cillit Bang;
- Toilet duckling;
- Mister Muscle;
Lime remover
Cleaning of scale and lime using household chemicals must be carried out in accordance with the instructions indicated on the packaging and in compliance with all safety rules.
Folk remedies
How to clean the inside of a watering can in the absence of specialized products? You can use traditional methods, among which the following are popular:
- vinegar. To carry out the procedure, use 7% vinegar. The use of essence is prohibited, as it negatively affects the body of the plumbing fixture. Cleaning is done as follows:
- the solution is prepared;
- all elements of the watering can are immersed in the solution for 6 – 10 hours (can be left overnight);
The elements are washed with running water.
- lemon acid. Cleaning is carried out according to a similar scheme. For full effect, it is enough to soak the watering can in the solution (1 sachet of citric acid is required for 1 liter of water) for 2 – 3 hours;
Technology of using citric acid
- a solution of soda, ammonia and table vinegar. For 1 liter of water you will need 3 tablespoons of soda, 350 ml of 9% vinegar and 150 ml of ammonia. For quick effects, it is recommended to heat the prepared solution to 60°C. Cleaning time ranges from 40 minutes to 1 hour;
- oxalic acid. In extreme situations, with a high degree of contamination, cleaning can be done using a solution of oxalic acid, which is purchased at a pharmacy. To prepare the solution you will need 1 liter of water and 2 tablespoons of acid. Processing time is 20 – 60 minutes.
Aggressive cleaning agent
After complete removal of contaminants, reassemble in reverse order.
When assembling, it is important not to forget to install all the O-rings and, if necessary, seal the connections of the shower head with the shower hose
To ensure that cleaning of plumbing equipment does not take much time, it is recommended to carry it out once every 6–8 months (if filters are available) and once every 4–5 months if such equipment is not available.
How to disassemble a rain shower
In addition to the classic watering can, a rain shower can be installed in the shower stall. The popularity of this type of plumbing is due to its properties: the ability to have a soft or, conversely, invigorating effect on a person. Rain showers can also break.
Breakage occurs due to the fact that the body is gradually clogged with limescale. Unable to withstand strong water pressure, with a sharp increase in pressure, the tropical shower becomes unusable and requires urgent repairs - a complete replacement of the watering can. But the malfunction can be eliminated without radical measures. It is enough to disassemble the structure.
For this:
- Outside, on the cabin roof, unscrew the nut that secures the water supply hose.
- Remove the nut that secures the rain shower inside the cabin.
- Unscrew the top block. There is a switch cartridge inside.
- Disassemble the cartridge and descale it.
Reassembling the rain shower is carried out in the reverse order.
Shower head disassembly technology
How to disassemble a shower head? This process is considered quite simple and understandable, so even without experience it will not be difficult to carry out the work. The procedure is divided into successive stages:
- the watering can is disconnected from the hose, and to do this it is enough to unscrew the element. If the product is new, then this process will not cause difficulties, but if it has been used for a long time, then usually a lot of scale and alkali have accumulated at the joint, so the process causes difficulties. It is often possible to unscrew the watering can only with a gas wrench;
- Direct disassembly of the element begins. There is a plug in its center. It should be dismantled, and it is quite easy to pry it off with an ordinary sharp knife. As a rule, there are no obstacles to removing it;
- After removing the plug, the screw will be revealed. It is this that holds the mesh, and it is quite difficult to unscrew it, since usually a lot of sediment accumulates here due to the use of low-quality water. First, the recess is cleaned with a blade, after which the screw is unscrewed;
- Then you can begin to disconnect the mesh from the body. This work is carried out carefully, since if you make sudden movements, the gasket can easily be damaged. Although this element has a low cost, the difficulty lies in finding the gasket of the right size and thickness.
First, remove the plug.
Under the plug there is a screw that needs to be unscrewed.
Disassembled shower head
Thus, if you follow the instructions exactly, you will get a disassembled element consisting of several parts. After completing the process, it will be easy to clean them from dirt and blockages.
Cleaning
Various methods can be used to clean a shower head, and you can use all methods at once to achieve the best result. Solutions used for these purposes:
- using vinegar - for this process you need to prepare a regular container with 9 percent vinegar. The amount of solution depends entirely on the diameter of the mesh, and the most common designs are with a diameter of 5 or 6 cm. Therefore, 300 g of vinegar is used. The solution is poured into a container, where the mesh and other parts of the structure are then lowered. It is advisable to keep them in vinegar overnight;
- the use of citric acid - this method is considered more efficient, since this product quickly copes with various blockages. To do this, it is also necessary to lower the mesh into a container with citric acid, and then boiling water is poured, and the part should be completely hidden in the solution. You need to wait for the water to cool, so it will take about 20 minutes. Next, bubbles will begin to appear, after which the mesh will be pulled out. It is cleaned quite easily and quickly after this procedure with a standard toothbrush. This is due to the fact that the plaque softens, so it is easily detached from the mesh.
To clean a shower head, you can use vinegar or citric acid.
Thus, cleaning a shower head is a simple process that involves using standard solutions found in almost every home.
Assembly
Assembly is performed in exactly the same way as disassembly, only in reverse order. To do this, the mesh is placed in the housing and then secured with a screw.
Thus, cleaning the watering can is easy if you figure out how to disassemble and reassemble it. If the room has a switch from the shower to the tap, then often problems with the flow of water are associated with it, so repair work has to be carried out.
Cleaning the watering can - work order
There are several ways to clean a watering can, which, even taken together, can lead to the most remarkable result. To eliminate alkali and scale, experts recommend using:
Vinegar (prepared solution) - to clean the watering can with vinegar, you will need to arm yourself with a simple container into which a 9% solution will be poured. The amount of liquid directly depends on the size of the mesh - the most common variations have a diameter of 5-6 cm. In this case, you will need 0.3 liters of vinegar. Pour the liquid into the prepared container and lower all the elements affected by scale into it. It is recommended to soak the parts for at least 10-12 hours;
Citric acid is another quick mixture that will help get rid of the blockage in the shortest possible time. To clean all the elements, you need to dilute citric acid in water and lower all the parts into the resulting liquid. After soaking, wait 30 minutes until the water cools down. A chemical reaction can quickly remove old plaque. All that remains is to remove all the parts from the solution and wipe them thoroughly - the scale comes off without any problems.
It may be interesting: What to do if boiling water flows from a cold water tap
Attention! Boiling water is used to dilute the solution. So, citric acid will act on the elements more actively.
From all of the above, it becomes clear that disassembling a rain shower head and cleaning it from alkali and other elements is quite simple.
Dismantling sequence
Disassembling a divider of a conventional design begins with unscrewing the union nut, through which the water supply hose is attached to it. In a situation where the watering can has not been in use for very long, this nut can be unscrewed manually. If, due to strong “sticking” of the joint, this was not possible, you will have to use an adjustable wrench.
After removing the nut, you will need to disconnect the supply hose and begin disassembly.
In order to disassemble a shower head with a switch (from Grohe, for example), you will need a special key, instructions for use of which are given below.
First of all, in the center of the scattering mesh you should find several recesses designed specifically for its dismantling. Having inserted the key into them, you need to turn it counterclockwise until this part is completely turned out.
After unscrewing and removing the central panel, the swirl box is removed from under it, which is fixed in the center with a special screw. To dismantle it you will need a Phillips screwdriver. After this, free access to all parts to be cleaned will be provided.
https://youtube.com/watch?v=oEAewZyJV7s
Disassembly of a spool-type switch
If the shower switch is installed with a removable spool switch, then the procedure for disassembling it will have a slightly different form:
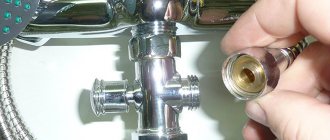
- From the mixer body you need to unscrew the lower part of the structure - the switch and the hose from the shower. To do this, use an adjustable wrench or a wrench of a suitable diameter;
- To disconnect the hose from the switch, you need to remove the nut that holds the structure. To do this, it is convenient to use an adjustable wrench;
- Afterwards the switch is disconnected from the body. It must be carefully removed from the mixer.
Spool-type shower head switches are also very common, which do not need to be completely disassembled for repair or maintenance work. Simply remove the locking or decorative nut from the switch and carefully pull the mechanism out.
Shower diverter design with spool valve
Spool switches are not very popular due to the impossibility of repair. Therefore, if a leak appears on such a mixer, it is easier to immediately change it than to try to repair it.
Watering can device with switch
This watering can is usually a body made of hard plastic, inside of which there is a round-shaped structure equipped with several concentric flow swirlers. Moreover, each of them works for its own regime. The swirlers are installed in the housing according to the “matryoshka” principle and, with rare exceptions, are united by a common housing.
The flow force can increase or decrease depending on the diameter of the swirler and the cross-section of the chamber openings. This achieves different pressures of the water flow at the outlet of the chamber.
On the outside, the water supply chamber is covered with a mesh, which also influences the formation of the stream: for example, intermittent or with the addition of air bubbles. This is achieved by using various kinds of artificial barriers and movable flow dividers.
The mode switching mechanism itself is installed on the outer circumference of the watering can; as a rule, it is multi-sectional. Its task is to open one or two chambers of the swirler, blocking the rest. This achieves switching modes and combining them if necessary.
Causes of clogging
The main reasons for a clogged shower head are:
- low quality of supplied water. Due to the quality of water, limescale deposits form on the body of plumbing equipment, which leads to a gradual reduction in the passage holes;
- the absence of filters in the water supply system that can retain particles of sand, rust and other pollutants at the entrance to the system.
Filtration of water before supply to plumbing
Cleaning and reassembly
The procedure for cleaning a disassembled shower head includes the obligatory washing of the dissecting mesh, on which so-called water stone or scale accumulates during the operation of the shower. Experts advise using special cleaning compounds for this purpose, which are freely available for sale. Acid and products like Santry clean scale well.
After disassembling the divider, its elements on which large accumulations of stone are noticed are washed. Upon completion of these procedures, the previously dismantled and cleaned product is assembled in the reverse order of its disassembly.
When dismantling the shower head for cleaning, you should also check the condition of its other components (mode switch or sealing gasket on the coupling). If any violations are detected in their condition, these elements are either restored or replaced with new ones.
How to clean a drain
Before removing the siphon and cleaning it, it is recommended to remove any remaining water from the shower tray.
Disassemble the siphon and clean it from blockages
To repair a structure, it must be cleaned. Cleaning steps:
- Place some container into which the water will flow, for example, a basin or bucket.
- Remove the closure nut and then the flask. Wait until all the water has drained from the water seal.
- Clean to remove all dirt and debris. Rinse everything thoroughly with water, completely remove all plaque on the walls.
- Put it in place, making sure that the drain pipe does not press against the flask. Tighten all connections tightly.
- Turn on the water and check the connections. If they are dry and the water drains freely, then everything is done correctly.
Photo 1. Disassembling and cleaning the shower siphon will not be easy, since it is located in a hard-to-reach place - under the bottom of the cabin.
It is recommended to clean the siphon not only because of a blockage, but also for prevention, once every 3 to 4 months.
Clean with a plunger
Another way to clear a clogged shower stall is to clean it with a plunger. Procedure:
- Take a plunger and coat it with Vaseline.
- Fill the shower tray so that the water completely covers the rubber part of the plunger.
- Place the plunger on the drain so that the rubber part is tightly covered.
- Make 20-30 movements up and down, remove the plunger and check if the water leaves. If not, then carry out the procedure again.
- If water begins to drain, rinse the drain with hot water.
Using a plumbing cable
If the blockage has formed deep in the pipe or the contamination has become very compacted, a plumbing cable will help eliminate the problem.
But it is recommended to use it only if the drain in the shower stall is made of metal pipes and not plastic.
Procedure:
- Insert the cable into the drain hole. In this case it is necessary to rotate it.
- Push it back and forth with sharp movements about 15-20 times.
- Rinse with hot water.
- Remove the cable along with any debris that is attached to it.
Using household chemicals
Experts do not recommend cleaning the shower drain using household chemicals, but sometimes this becomes the only available option. In this case, you need to carefully and meticulously study the composition of the drain cleaner, and choose a powder, liquid or gel that is suitable specifically for the drain in the shower stall.
Important! It is prohibited to use toilet blockage removers to clear the drain in the shower stall. Most often, the products contain aggressive substances that can not only dissolve debris, but also corrode the rubber parts in the drain and damage the acrylic pan
Having chosen the appropriate product, you must carefully study the instructions for use and follow them. Usually the process of removing the blockage is simple:
- Pour the product into the drain.
- Wait for the specified time specified in the instructions for use. The chemicals contained in the product corrode debris, hair, grease, and soap residue, after which the water begins to drain freely.
- Rinse the drain with a strong stream of hot water.
When using household chemicals, you must use rubber gloves. And also do not forget that some household chemicals can form harmful fumes.
Problems and solutions
So, what to do if the shower switch on the mixer breaks down in each of the cases described above? Let's move on to the common problems with each type of switch.
Suberic
Mixer tap with cork switch.
As already mentioned, these products are extremely fault-tolerant. However, they also have two diseases.
| Problem | Cause | Solution |
| Large force required to switch modes | Clamp nut overtightened | Disassemble the mixer; lubricate the plug with silicone grease; tighten the nut with moderate force |
| Leak along the plug rod | Uneven wear on the plug or body | The solution is the same as in the previous case. Viscous silicone grease will make it easier to turn the handle and fill in uneven areas of rubbing surfaces |
Button
What does repairing a switch with a gander and shower mode look like for a push-button design?
She has three typical malfunctions:
The switch does not hold water: it flows into the gander and shower at the same time. The reason is uneven wear or complete destruction of the rubber valve. It can only be treated by replacing it or, if the corresponding spare part is not on sale, by completely replacing the mixer. The button spontaneously returns to its original state after pressing with a small amount of water pressure. The reason is an excessively tight return spring. It is enough to bite off one or two turns of the spring - and the mixer starts working absolutely normally.
The return spring is clearly visible in the photo.
Finally, if the shower switch on the faucet is leaking, the cause is a worn o-ring. It again changes to a new one; rings, as a rule, are included in gasket sets for repairing domestic faucets. The price of a set rarely exceeds 20 - 30 rubles.
Hint: if the push-button switch is equipped with a gland nut, instead of a rubber seal, you can place a thread of graphite gland under it.
With a keg
Here are the diseases of this design:
The water does not shut off to the gander or shower. The reason is wear of the gaskets or, which happens much more often, destruction of the bolt securing one of them. The problem, as you might guess, is eliminated by replacing the gasket or bolt.
Useful: it’s easy to cut a gasket with your own hands from an old inner tube from a truck wheel.
The switch does not rotate to its extreme positions. The reason is the wear of the barrel or the guides in the mixer body: due to the large gap between them, the barrel stands up askew and jams.
Repairing a shower diverter for a faucet usually involves replacing the barrel; A temporary solution to the problem could be to install improvised guides made from pieces of aluminum wire into the mixer body.
If there is a leak along the rod, the rubber seal is again changed or the oil seal is filled.
A beginner may have a reasonable question: how to remove the shower switch on the mixer if the barrel does not want to leave the body?
The sequence of operations is important here.
After unscrewing the fastening screw, remove the switch lever. We unscrew the oil seal (if there is one). We take out the eccentric.
The eccentric will not allow the barrel to be removed while it is in the mixer body.
Unscrew the nut on the mixer body under the shower hose. We remove the gander. We push the barrel through the hole in the mixer body from the bottom up.
Ceramic
How do I repair a shower diverter whose handle can turn a full rotation?
Of modern mixers, these are the most fail-safe; the author cannot remember a single one of them breaking due to natural wear and tear.
We recommend: Do-it-yourself toilet repair: photos of toilet repairs and the work process
Problems can arise only when two circumstances coincide:
Lack of filters at the entrance to the apartment or house. When repairing the water supply line, scale or coarse sand may get into it, which sooner or later will end up in the mixer. Significant physical strength of the owner with a complete lack of common sense. If you try to turn a cartridge jammed by scale by force, the result will be a little predictable: either one of the ceramic plates or the plastic retainer that holds it will break.
The repair instructions in this case are also quite predictable: the damaged cartridge is replaced with a new one. To replace, simply remove the handle and the fixing nut.
This is what the cartridge looks like.
