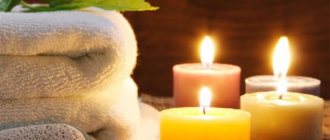
Lying in a warm bath - what could be more pleasant? Maybe a bath with a fragrant bomb. Buying it can be expensive, but making it yourself is quite easy and even interesting. You can make your own bomb exactly according to the recipe or turn on your creativity and create your own unique options: add different aromatic oils and components that are beneficial for the skin: dead sea salts, oils, flower petals and everything like that.
You can find some of the bomb ingredients right in your kitchen, but if you want something more beneficial for your skin, you'll have to go to a health food store or visit a specialized body care section.
You can use your creations yourself or make a great gift for friends and family. Try to make a bomb exactly according to the recipe, and when you understand the technology, experiment with the components.
Simple recipes for making bombs with your own hands
Bath bomb "Anti-stress"
To create an anti-stress bomb you will need a set of the following ingredients:
- Baking soda - 4 tablespoons;
- Citric acid - 2 tablespoons;
- Table salt - 1 tablespoon;
- Powdered milk – 3 tablespoons;
- Almond oil – 2 tablespoons;
- Essential oil (lavender, peppermint, eucalyptus or bergamot) – 10-20 drops;
- Dried herbs (chamomile flowers, green tea, lavender, lemon balm) - 1 tablespoon.
In a mortar or coffee grinder, thoroughly grind the soda and citric acid to prevent large pieces from getting in. Separately, grind the dried herbs to fine crumbs. Using a spoon, thoroughly mix all dry ingredients in a separate bowl.
Next, base oil is gradually added to the resulting powder mixture, literally a few drops at a time. Slowly pour in the essential oil as well. Continue stirring until smooth.
Carefully add water (it is advisable to use a spray bottle to ensure even application) until the mixture begins to foam and sizzle. Take a little mass with a dry hand and squeeze lightly. It is very important that it does not fall apart and holds its shape, otherwise the finished product will crumble after drying. If the mixture is dry, add a little oil or a couple of drops of water, but do not overdo it.
Place the mixture in pre-greased molds and compact well. Leave the molds for 4-5 hours (depending on size) in a dry place. It is important not to over-expose it - it will be very difficult to remove the dried bombs from the mold. After the allotted time, remove the bombs and place them in a dry place for further storage for 1-2 days.
Bomb with honey and oatmeal
Natural honey-oatmeal is made using the following ingredients:
- Baking soda - 4 tablespoons;
- Citric acid - 2 tablespoons;
- Table salt - 1 tablespoon;
- Apricot oil – 1 tablespoon;
- Powdered milk or cream – 1 tablespoon;
- Honey – 1 tbsp;
- Bergamot essential oil – 10-20 drops;
- Ground oatmeal - 1 tbsp.
Honey and oatmeal are great for dry and irritated skin that is prone to flaking. The ingredients used stimulate cell renewal, nourish the skin and improve blood circulation.
As in previous recipes, mix all dry and liquid ingredients separately. It is recommended to first melt the candied honey in a water bath so that it mixes well with the other ingredients.
Combine the oil-honey mixture with the dry ingredient powder and stir thoroughly until smooth. Some of the oatmeal can be used as a decoration when compacting the mixture into molds. This bomb should dry within 4-6 hours.
When making bombs with your own hands, you will be 100% sure of the quality of the ingredients and the absence of harmful additives in their composition. Homemade balls are much more fragrant and healthier for your skin.
Chocolate bomb
To create a sweet dessert bomb you will need:
- Baking soda - 4 tablespoons;
- Citric acid - 2 tablespoons;
- Table salt - 1 tablespoon;
- Jojoba oil – 2 tablespoons
- Cocoa butter or dark chocolate – 1 tablespoon;
- Powdered milk – 2 tablespoons;
- Cocoa powder – 1 tbsp.
Cocoa butter is widely used in cosmetology, and is also included in many natural skin care products for the face and body. It perfectly saturates the dermis, gives it a natural glow, makes it soft and renewed. Combine all dry ingredients and mix thoroughly with your hands to remove large particles.
In a separate bowl, melt cocoa butter or a bar of dark chocolate without additives. You can resort to using a microwave or water bath. Cool the resulting mixture and add base oil a few drops at a time. You should get a homogeneous oily mixture.
Then slowly combine the dry and liquid components and stir thoroughly until smooth. Divide the resulting mixture into molds and place in the freezer for 30 minutes until completely hardened. The finished bomb must be removed from the mold and wrapped in plastic wrap.
An invigorating citrus bomb
The citrus scent bomb consists of the following components:
- Baking soda - 4 tablespoons;
- Citric acid - 2 tablespoons;
- Table salt - 1 tablespoon;
- Sea buckthorn oil – 2 tablespoons;
- Essential oil of lemon, tangerine, grapefruit or orange – 15-20 drops;
- Lemon or orange zest – 1 tablespoon;
Natural oils made from citrus fruits are considered the most effective aid in the fight against cellulite. With regular use of these products, your skin will become smoother and firmer, and the crusty effect will be noticeably reduced.
In a clean bowl, mix soda and citric acid in the given proportions, add fine salt and zest. Carefully pour in the base oil and then the selected essential oil and stir thoroughly.
Your bomb will become even brighter if you add deep yellow food coloring to it. If necessary, add a little water and press the mixture into the molds and let them dry for 2-3 hours.
When making bombs with your own hands, you will be 100% sure of the quality of the ingredients and the absence of harmful additives in their composition. Homemade balls are much more fragrant and healthier for your skin.
The central element is a rug
Of course, the centerpiece of the bathroom is the rug. Although many people think it's not practical, a bath mat is an important element, even from a health standpoint. After taking a bath, it is much more pleasant to stand on a warm and fluffy carpet, rather than on a cold and slippery floor. But such a sharp change in temperature can cause a cold.
A rug in the bathroom is not only warm, but also good for health. Source: dizainmetrov.ru
And with the help of a rug you can also make the bathroom interior positive and cozy, because they are available in a wide variety of colors and designs. For a harmonious decor, it is better to choose a rug that matches the color of the curtain.
A bathroom rug can be of any shape, color and design. Source: dekoriko.ru
When you want to make the interior of your bathroom cozy and cute, it is not at all necessary to do a major renovation by repainting the walls and replacing the tiles. You can add bright accents and cute decorative items that are available at almost all home improvement stores.
Did you like the article? Subscribe to our Yandex.Zen channel
Necessary ingredients for making natural bombs
Making a bubbling bath ball at home is very simple, because for this you will need a set of the most common ingredients. Their composition can be changed depending on personal tastes and preferences.
Ready-made bath bombs will be a wonderful gift for family and friends if you pack them in a beautiful wrapper. They do not require special storage conditions: in a dry place they can remain as long as necessary.
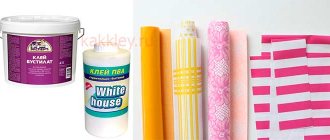
The following ingredients are used to create fizz bombs:
- Soda;
- Lemon acid;
- Table salt;
- Base oil (olive, sea buckthorn, almond, etc.);
- Essential oils;
- Clay, milk powder or cream;
- Natural fillers: dried herbs, oatmeal, green tea, citrus zest, poppy seeds, honey, flower petals, cinnamon and so on;
- Dyes if desired.
Soda and citric acid are usually added in a 1:2 ratio. When combined with water, it is the mixture of these substances that causes the “geyser effect” in your bathroom.
When using essential and base oils, you should follow the recommended dosage, which is usually indicated in the package instructions. Despite all the benefits of this component, you should not overdo it with its quantity.
The last components of the list should be well crushed. You can use several fillers at once, which combine with each other, help improve the condition of the skin, relax or invigorate - depending on the desired effect.
To work, you may also need a variety of molds, a coffee grinder or a mortar for grinding ingredients. It is not necessary to go to the store for special forms, because you can use children’s figures for playing in the sand, baking dishes, small jars of yogurt or cosmetics, and so on.
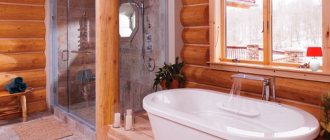
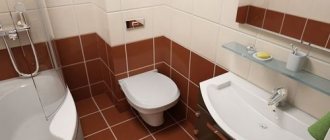
Brick bath
The technology used to make a brick bathtub allows you to build a structure of any size and configuration, since its construction does not require a mold. The technological process includes the following stages:
Bricklaying
- The base is prepared: cleared of debris and leveled.
- Points for water supply and drainage are planned.
- The bricks are laid out dry to determine the size of the structure and the required amount of material.
- The next stage is laying the first row of bricks. For masonry, masonry mortar is used in the proportion of 1 part cement to 3 parts sand. To increase the resistance of the solution to moisture and mold formation during mixing, it is recommended to add a water repellent and an antiseptic for concrete. When laying the first row, gaps are left for laying communications.
First row of bricks. - Next, a siphon is installed and a sewer pipe is laid to drain the water. Be sure to immediately cover or plug the drain hole to prevent mortar, pieces of brick, or other construction debris from entering the drain.
- Brick laying continues with the formation of the side and continuous laying of the bottom.
Laying continues until the sides of the bath reach the desired height.
Plastering and waterproofing
When the masonry work is completed, they begin plastering to smooth out all the irregularities and corners. Waterproofing must be applied over the plaster; the best option is to use polymer or combined coating compositions, as they provide a minimum layer with a high degree of water resistance. Another method is plastering the walls and bottom with cement mortar with the addition of liquid glass or special waterproofing additives, or using ready-made cement waterproofing (for example, Ceresit CR 65).
Note! The use of roll waterproofing or bitumen-based mastics reduces the adhesion strength of the subsequent finishing of the bathtub, so their use is not recommended.
Decorative design
After applying a layer of waterproofing, they begin to decorate the bathtub. For this purpose, ceramic or porcelain stoneware mosaics are used. At the same time, mosaic, due to its small size, allows you to cover surfaces with any bending radius and structures that are complex in shape. The cladding is glued with waterproof glue. Grouting of joints is carried out after the glue has set with epoxy grout.
Such a bathtub turns out to be beautiful in appearance and reliable in terms of the tightness of the structure.