A modern bathroom in a wooden house is a room for rest and relaxation, and not just for hygiene procedures. However, the timber or logs from which the structure is constructed require certain conditions to be met when equipping a bathroom in a wooden house. High-quality protective and finishing materials make it possible to protect rooms with high levels of humidity from the destructive effects of water and steam. The main thing is to choose the right everything you need and do the work according to the instructions.
To equip a small country house or a large cottage with a bathroom correctly, you need to make a preliminary calculation of the area and the required materials. "Plumber Portal" will help you competently arrange a bathroom in a wooden building with your own hands. To do this, carefully study all the stages presented and follow the requirements for waterproofing, installation of walls, floors and ceilings, selection of furniture and plumbing.
Preparatory stage
A bathroom in a country house can be installed in any room of a suitable size. If necessary, two or three plumbing units can be made in a wooden house.
Preliminary diagrams will help you choose the right room size. It is also advisable to make a model of the future bathroom on an appropriate scale. This will help to properly organize the internal space and accommodate the necessary equipment, appliances, and furniture.
To carry out construction and repair work, you will need the following tools and equipment:
- construction tape;
- hacksaw;
- plumb and level;
- Bulgarian;
- electric drill;
- construction mixer;
- container for mixing the solution;
- brushes;
- spatulas;
- gas-burner;
- technical knife;
- hard brush;
- stapler
It is advisable to choose what to decorate a bathroom in a wooden house during the preparation period. After all, facing and protective materials will take up part of the space. This must be taken into account when drawing up a bathroom layout. According to the calculations made, it is necessary to purchase finishing materials, waterproofing and prepare all the required tools.
An old bathtub as a water storage for irrigation
Many summer residents use an old bathtub as a container for storing water in the country. But in order for the old bathtub not to spoil the appearance of the summer cottage, you can easily build a funny cow out of it, like in the photo, which will give a smile and a good mood to all family members and neighbors. This excellent cow can also be used as a mini swimming pool for children.
Related article: Installing lamps in a slatted ceiling with your own hands
In general, you can breathe new life into any old thing, embody it in a different form, and use it for a different purpose. An old bathtub is an excellent material for creating truly amazing and, most importantly, functional decorative elements for a summer cottage, be it a picturesque flower bed, a quiet pond in the thickets of plants, a stylish sofa, an original water storage tank or even a mini pool.
Elvira Goleva for Decorwind.ru
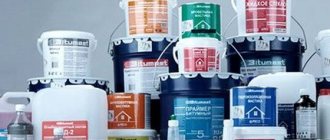
Principles of waterproofing a bathroom
Waterproofing a bathroom in a wooden house is carried out using a special technology. The choice of protective materials must be carried out especially carefully. To protect wooden structures from moisture in the bathroom, special materials are used, for example:
- special film;
- glass wool;
- glassine;
- roofing felt;
- roofing felt;
- isoelast;
- isoplast;
- mostoplast.
Moisture-resistant material must be laid on the floor in two layers. The final thickness of the coating must be at least 18 cm. The floor insulation is carried out with expanded clay, on top of which a mesh or frame is mounted. The floor screed is made from a sand-cement mixture in a ratio of 3 to 1 and water. After the solution has hardened, the surface can be finished.
The walls in the bathroom must be treated with special compounds intended for rooms with high levels of moisture and temperature changes. To prevent the appearance of fungus, a protective mixture must be applied to all wooden surfaces and finishing elements.
What can be done from an old bathtub? Where will an old bath be useful?
Very often, bathtubs that become unusable are simply thrown away, but there is no need to rush to throw away another bathtub, as it can be used for your home or summer cottage.
You can make many good things out of an old bathtub, for example, old manna can be used to make a pond at your summer cottage. This solution will decorate the garden plot, make it interesting and beautiful.
In order to make a pond from a bathtub, you need to find a good place, measure the bathtub, and the place in which the pond will be placed, dig a hole of the required size, then install the bathtub, fill the gaps around the bathtub with sand. The drain hole should be clogged with cement mortar, then treated with sealant.
The inside of the bathtub should be treated with tile adhesive. After which you should let the glue dry well, as soon as everything dries well, the upper perimeter of the bath should be covered with a mesh - chain-link, after which it should be fixed with wire rings. We treat the mesh with diluted cement mortar. You can put sand, clay, various pebbles, shells, and decorative stones on the bottom. After which you should pour the required amount of water.
The pond can be lined with beautiful decorative stones, decorated with pebbles, and perennial flowers can be planted around the pond.
Also, the bathroom can serve as a sandbox for a child. To do this, you should take a bathtub, dig a small hole, put a bathtub, fill it with sand, put shells, and decorate it beautifully with different stones. This sandbox will put children in a good mood.
From an unnecessary bathtub you can make an alpine slide to decorate your garden.
To do this, you need to beat off a smooth surface from the bathtub, after which you should choose a paint and paint the bathtub with this paint. After the paint has dried, you can apply glue, pour sand, put pebbles, and if desired, you can plant different plants and flowers.
You can make a beautiful flower bed out of a bathtub, plant flowers, paint it in any color, which will give a beautiful and interesting look to your garden plot.
If you wish, you can make furniture from a bathtub; to do this, you should cut the bathtub into pieces, rub the corners well, paint the bathtub a beautiful color, and install decorative covers on the legs. When the sofa is ready, you should put a mattress or pillows on the bottom.
Such a sofa can decorate not only a room, but also a garden or gazebo.
So you can make many different crafts from an old bathtub, the main thing is to use your imagination.
Working with moisture-proof materials
For waterproofing wooden bathrooms, the following are usually used:
- Painting mastics and/or emulsions. Painting is applied in 2-3 layers as the surface dries.
- Film and/or roll materials made of polymer or bitumen. They are glued to special compounds.
If everything is clear with painting materials, then the second type has its own secrets.
Film and roll waterproofing can be self-adhesive or weld-on. In the first case, it is necessary to remove the protective film. In the second, the use of a gas burner is required to heat the adhesive composition applied to the material during the production process.
Films and roll products are placed on a flat surface, always overlapping and with careful processing of the seams.
For corners and other hard-to-reach areas, the best solution is to use waterproofing paints. The surface under the sealant must be primed with solutions that penetrate to great depths. After drying, the paint is treated with moisture protection.
Film waterproofing is secured with a stapler. The membrane based on polymers and bitumen is a self-adhesive material. After 24 hours, when the mastic or emulsion has dried, you can lay the film or roll material. The canvases are cut taking into account that the overlap when laying should be at least 10-15 cm.
Step-by-step video instructions for waterproofing a bathroom:
When waterproofing, it is necessary to pay special attention to the area of high humidity. This includes the floor and walls around the bathtub, washbasin, bidet at a distance of at least 0.5 m and in the shower stall. These areas must be heavily waterproofed to protect the wooden base from moisture.
Arrangement of the floor in a wooden bathroom
The floor in the bathroom requires special attention when arranging it. Basic rules that require strict adherence in this case:
- the floor should be at least 2 cm lower than in other rooms of the house;
- beams are laid in smaller increments to increase the cross-sectional area.
The ceilings must easily withstand the weight of a filled bathtub, furniture and other equipment located in the bathroom. Therefore, their thickness must be increased by about 25-30%.
To create the required level difference in height, the beams in the bathroom need to be lowered by about 30 cm. After all, in the bathroom it is necessary to make a concrete screed, lay waterproofing, and a finishing coating. In this case, the floor in the bathroom should be slightly lower than in other rooms of the house. This will protect against water spillage in the event of an accident.
Beams and joists that form the basis of the subfloor must be impregnated with moisture-proof compounds. The foundation is first covered with special plaster or mastic.
The floor pie is made up of insulation, a reinforcing frame or a special mesh. You can use the "warm floor" system. During the arrangement of the rough foundation, it is necessary to lay all the necessary pipes and communications and protect them from moisture, damage, etc.
After the surfaces have completely dried, the rough floor covering can be laid. The finishing floor is placed on top of it.
You can cover the bathroom floor with the following materials:
- tiles - ceramic or tiled;
- linoleum;
- mosaic;
- porcelain stoneware;
- adhesive plug with varnish coating;
- moisture-resistant laminate or wooden board.
Additional treatment of the finishing coating with an antiseptic and waterproofing agent will give it increased strength and protect it from the spread of harmful microorganisms.
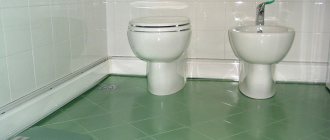
Photo example of a bathroom with tile flooring:
When laying the floor, you need to provide a drain for the drainage. This is done by laying the cake at an angle of 1-2° towards one of the corners. It is necessary to equip a drain hole in it to remove water masses that fall on the floor.
Children's pool from the bathtub
Many will think that this is bad manners. But this is not true, inflatable children's pools break very quickly and often. The reasons are weeds, branches and the children themselves. Frame pools are durable, but require special maintenance and care, and they don't look very good.
Another thing is an old bathtub. Children are very active, and a strong, stable bathtub will come in handy. Firstly, it looks very stylish and vintage. Secondly, such a reservoir is unusually durable.
There is no need to close the drain hole, but drainage can be poured into the recess under the bathtub, and the water itself will go into the soil.
Wooden walls in the bathroom
Nowadays, bathrooms often use wood to finish the walls. The main thing in this case is to choose the right breed. Moisture-repellent wood is:
- yew;
- larch;
- pine;
- spruce;
- fir.
A room with such decoration will always be warm, cozy and comfortable. Walls made of the specified types of wood do not need to be treated with waterproofing, especially if the bathroom will not be used as a Russian bath.
The walls can be sheathed with sheets of plasterboard or wooden slats. It is necessary to lay a waterproofing material under these finishing materials. Film materials can be glued, fused or stapled to the surface. When equipping a shower stall, it is better to line the walls with tiles or porcelain tiles, because the humidity level here will be increased.
Restoring a bathtub using glass
In addition, for the reconstruction of plumbing fixtures, stacryl is used, which is a wear-resistant and impact-resistant material based on liquid acrylic. According to manufacturers, this type of enamel is not subject to mechanical and chemical influences.
Glass acrylic is not applied with a roller or brush. It is poured onto a previously cleaned surface. Approximately 3.5 liters of substance are used per bath. Restoration with glass acrylic is recommended subject to certain safety rules. (See also: restoration of bathtub enamel)
Under no circumstances should you wash your renovated bathtub with various powders that contain acid or abrasive elements.
It is also prohibited to wash in it and do not use bleaches. By adhering to these simple rules, you can achieve a considerable service life of the new surface, which is more than five years.
The materials intended for the restoration of such devices have hygienic certificates, which indicates their quality.
Wooden bathroom ceiling
It is optimal to make the ceiling in the bathroom suspended from a special water-repellent film. You can use PVC panels with a glossy finish or moisture-resistant plasterboard.
The ceiling made of plasterboard or gypsum fiber is laid using a frame made of metal profiles. They must be coated with a special compound to prevent corrosion and rust. For the finishing coating of such a ceiling, you can use glass wallpaper.
The wooden base of the ceiling must be treated with an antiseptic and a special primer. Once it has dried, the finishing coat can be applied.
Ceiling finishing features
Suspended ceiling for bathroom
When finishing a bathroom in a private house made of wood, it is recommended to opt for a suspended ceiling. The fact is that it will allow you to make a kind of shield in the bathroom, which will become a good obstacle to moist air. Among other things, you can hide all communications, such as electricity and ventilation, in the suspended ceiling.
As practice shows, almost all options for suspended ceilings allow installation in rooms with high levels of humidity and help make a bathroom in a private home truly unique. The only exception is the ceiling made of plasterboard. When installing it, you should consider some nuances:
- it is allowed to use only moisture-resistant plasterboard or its modern analogue - gypsum fiber, examples of which are reflected in photos of bathrooms in cottages;
- when choosing a profile, it is recommended to pay attention to the one that, in addition to zinc, is treated with another coating that provides reliable protection against corrosion;
- In order for the result to retain its attractiveness for a very long time, it is recommended to cover the finished suspended ceiling with glass wallpaper.
Arrangement of ventilation and lighting
To prevent the finish from deteriorating under the influence of abundant moisture, good air circulation must be ensured in the room. Ventilation in the bathroom must be forced, supply and exhaust type. To equip it, corrugated pipes are laid along the ceiling for air outlet and air supply.
Fans are installed in holes at the level of the decorative ceiling. To give them an attractive appearance, special decorative grilles are used.
The ventilation device must be selected according to the total volume of the room and taking into account the intensity of its use. Especially if it is not possible to install at least a small window in the bathroom.
For lighting rooms with high levels of moisture, low-voltage halogen lamps (approximately 12-15 V) are better suited. In a small room, a single light source will be sufficient. For a large bathroom, you can use several lamps. This will ensure good illumination of all necessary points: mirrors, dressing table, cabinet for small accessories, etc.
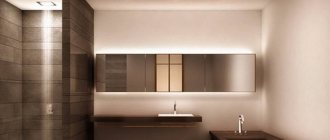
Country bathroom design
Before you start renovating your bathroom, you should make a project and, based on it, choose finishing materials, plumbing fixtures and furniture, creating a unified style for the room.
When designing a bathroom interior, first of all, you need to take into account the area of the room. In a small room, you should limit yourself to installing a toilet and shower, and if space allows, place a sink for washing.
If the room area is large enough, the shower cabin can be replaced with a bathtub, a washing machine and various racks for storing bath accessories can be installed.
Regardless of the size of the room, you should not clutter it with unnecessary furniture and accessories. The more spacious the bathroom, the more comfortable it will be to be in it.
Furniture and plumbing for the bathroom
Equipment can be purchased after finishing work is completed. However, its dimensions must be taken into account at the preparatory stage, as well as the full set of necessary devices. Often they combine a bath with a shower or toilet.
The bathroom can accommodate:
- bath or jacuzzi;
- shower cabin;
- bidet;
- toilet;
- sink;
- dressing table;
- storage system for hygiene items and linen.
Bathroom furniture can be made with your own hands. This will allow you to easily select a set for a specific room.
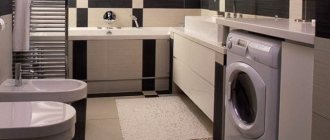
It is better to place the washing machine in the utility room or kitchen. The bathroom should have enough free space after its final arrangement. Otherwise, it will be uncomfortable to be in this room.
Bath - the main object of the room can be made of various materials:
- wood;
- cast iron;
- acrylic
A wooden bathtub has a high cost. After all, only expensive types of wood are suitable for its creation:
- wenge;
- larch;
- red cedar
These breeds are resistant to moisture. A bathtub made of such material will last a long time and will look very extravagant. Especially if you choose the right furniture and other furnishings.
A familiar cast-iron bathtub coated with reliable enamel is a good option. However, the significant specific gravity of this tank, especially when filled, should be taken into account. It is better to install a cast-iron bathtub only on the first floor of the house, provided that the foundation and all ceilings can withstand such weight.
The best option is an acrylic bathtub. It weighs very little. The price of such a plumbing fixture is low. The design possibilities are very diverse. Acrylic bathtubs are available in various shapes, sizes, and colors. This allows you to choose this item to your liking.
About the fate of the old bath
Cast iron bathtubs, like any plumbing fixtures, fail over time - the enamel darkens, chips, scuffs, and even rust appear on the surface. It’s a shame to simply throw away an item that has served faithfully for many years; storage is impractical. Sooner or later, the owners must determine the future fate of the bulky font, and it can be solved in the following ways:
- Rational
. The most obvious solution is to scrap the bathtub. Depending on the dimensions and model, its weight can range from 70 to 150 kg, and the bowl volume can be 150-280 liters. This option allows you to earn some (modest) amount.
- Practical
. If the bathtub has no major defects, it can be restored by covering it with a layer of enamel; another method is to cast an acrylic liner. In both cases, after restoration, the life of the cast-iron favorite will be extended by at least ten years.
- Creative
. If you decide to update all your plumbing, don’t rush to get rid of the old one; it can bring benefits and even pleasure to the owner of a country plot. If you think a little, you can find many interesting (and sometimes unobvious) uses for an old bathtub.
For the avid gardener Source to-p.in
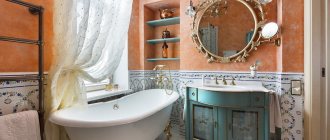
Wooden structure finishing options
Currently, finishing a bathroom in a wooden house can be made of various materials. It’s easy to choose the style and main design line yourself. Bathtub, sink and other equipment must be selected in accordance with the basic decoration of the room. The final composition should combine a single style and harmony.
The finishing can be done in one of the interesting and unusual styles that are most popular at the moment, or vice versa, in a classic design. It could be:
- minimalism;
- Provence;
- eco-style;
- country.
Only low-quality accessories and furnishings are incompatible; all other details can be interestingly combined in a wooden interior.
Consultants at santehnikportal.ru advise planning your budget and arranging the bathroom itself in advance.
Thus, a bathroom in a wooden house requires a special approach in the arrangement process. First of all, it is necessary to perform high-quality waterproofing of the floor and walls, as well as protect the ceilings from moisture. A good ventilation system is equally important. During finishing work, you need to be guided by your own taste, material capabilities and the size of the room reserved for hygiene procedures.
The sequence of arranging a bathroom and toilet in the country
Initially, you will need to choose a certain room in the house for the bathroom and toilet, which will be slightly removed from the kitchen and living rooms and will have the necessary dimensions and qualities. Depending on the projects, small rooms of a country house or storage rooms that are not used are often used for such premises.
Having chosen a room, you should find a way to supply water and sewerage to it, and provide electricity to provide the room with lighting. This is a labor-intensive process, and therefore we strongly recommend that you read about how to arrange sewerage and water supply in your country house. We already have articles on these points on our website, from which you can glean a lot of useful information. After reading them, you will only need to connect the communication to the bathroom and toilet room, and make the wiring inside.
Naturally, at approximately this stage, the room for a bathroom is prepared for renovation, because simply supplying water and installing a shower inside is not at all interesting. Our bathroom in a country house should be very comfortable and attractive, and therefore it is worth taking care of good finishing.
Bathroom design and renovation, interior design and decor, connecting plumbing and communications is the final stage, after which it is quite possible to get a full-fledged bathroom.
Finishing a bathroom in the country
There’s no desire to order a turnkey bathroom at your dacha and pay really big money for it, so we decided to do all the work ourselves, because our hands already know a lot.
First of all, prepare the walls, ceiling and floor for finishing. All surfaces must be cleaned and coated with antiseptics, then the floor should be waterproofed, and the walls and ceiling should be properly plastered and puttied.
The next stage is the selection of materials and finishing of the bathroom in the country house with your own hands. Here, all the cards are in your hands, because we do not intend to decide for you. Determine the best material for surface finishing that will provide protection, create comfort and harmony, and give you a great design. For the ceiling, you can always choose stretch film or plasterboard with painting, but if you don’t want to spend money, and repairs need to be done quickly, we would recommend a plastic ceiling made of special PVC panels. You can lay tiles or stone on the floor, strictly in the style of the room, but you can always cover it with boards and laminate. As for the walls, then in general, whatever your heart desires - inexpensive wallpaper or oilcloth, plastic panels or lining, ceramic tiles or mosaics, wood trim or even cork materials.
When choosing materials for finishing, it is very important to acquire quality and understand the work process, because only then will it be possible to quickly and correctly implement the project.
Country bathroom design
Renovation is a complex and costly process, but it is important not only to be able to glue tiles and lay floors, but also to understand at least a little about design in order to create a really nice and cozy bathroom in the country with your own hands. It is important to choose materials for renovation, furniture and plumbing fixtures at the same time, and combine all their qualities into a single harmony as much as possible.
Of course, it may be difficult at first, since this task is not familiar to all of us, but you can always take advantage of special articles and advice from experts that will help you qualitatively arrange a bathroom in your country house.
So, speaking about the design of a bathroom in a country house, I really want to dwell on the finishing materials. It is advisable to choose natural materials for the walls, floor and ceiling that will meet the requirements of the bathroom, as well as impress each other. Do not forget that the installation of furniture and plumbing is ahead, which means you should think through each step in advance so that you do not invest serious amount into a room that you won’t like later.
Immediately determine the style of the bathroom, calculate the budget and make a design project. Afterwards, choose the material, work with color schemes, try to maximize comfort, because the bathroom is designed for yourself, which means it should be very comfortable. Then all that remains is to make repairs and connect the plumbing, install furniture in the bathroom and decorate the room in order to, so to speak, live it up a little.
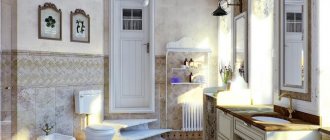
Interior of a bathroom in the country
The interior can be composed of different pieces of furniture and accessories, but it all depends on the budget for decoration and the size of the bathroom.
For the standard version, we recommend a bathtub, sink, toilet, washing machine, mirror, several shelves, a cabinet or rack.
If the bathroom space is small, you should limit yourself to only the essentials - a bath or shower, a toilet, a shelf, a mirror, a rack or a cabinet. In this case, you don’t even have to install a sink, since you can always wash your hands or wash yourself above the bathtub.
If the room is large, you can equip it completely by installing a bathtub and shower, toilet and bidet, sink and washing machine, special shelf and dryer, mirrors and cabinets, benches and stools.
The interior should be comfortable and ergonomic, and for this it is worth choosing the right furniture, plumbing fixtures and accessories. To do this, you should choose everything in advance, at the stage of drawing up the project, do not forget to work with the design, and also take measurements in the future bathroom and try to fit everything you need into the room.
Regardless of the area, it is worthwhile to complete the bathroom very compactly in order to provide the room with everything necessary, but in no case overload it.
Design and decoration
Very often we include in the design a variety of decorative items and accents, window and doorway decoration, decorative bathroom lighting and many little things that can be both beautiful and useful. This is very correct, because it is these little things that build the design, but can also help in everyday life.
We recommend working in accordance with the style and pre-selected design, because at this stage changing something will be very inconvenient and expensive.