Self-leveling floors are the most modern way of arranging flooring in bathrooms. Interest in this technology waxes and wanes. Such fluctuations are explained by insufficient awareness of developers about the performance characteristics of coatings. The information is contradictory, from enthusiastic with laudatory user reviews to critical. How are things really going? In order to have your own independent opinion, you should familiarize yourself in detail with the materials of self-leveling floors, their performance properties and application technologies.
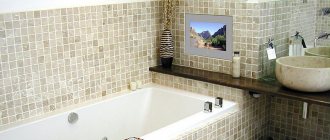
Self-leveling floor in the bathroom
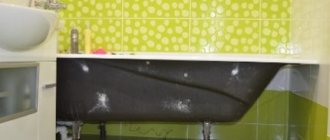
When changing the interior of the bathroom, most people resort to a flooring method such as self-leveling flooring.
We create a self-leveling floor ourselves
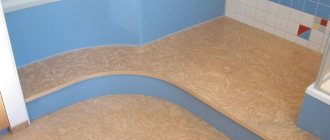
The photo of the self-leveling floor in the bathroom shows how ideal this coating looks. In addition, it is not subject to mechanical damage. 3D self-leveling floors look especially interesting.
Self-leveling floors of any type can be installed in a matter of hours, and they will serve faithfully for many years.
Materials used
The composition of a single mixture for a self-leveling bath floor contains various components, which together give the finished solution its characteristics and properties.
Polymer self-leveling floors are based on polymers, which is clear from the name itself. Among them are epoxy and polyurethane, which give the name to subtypes of floors made by pouring. All coatings are able to withstand sufficient loads per square meter, have a high level of wear resistance, and can act as the final surface layer in any home or building.
It is worth noting that epoxy options have a high degree of fragility, and cracks and chips may appear under mechanical stress. Polyurethane self-leveling floors are considered more reliable. The degree of resistance to shock and vibration is high. Due to elasticity, any created load is evenly distributed over the entire floor area.
Within two weeks, the self-leveling polymer floor will harden to its final form. During this time, even minor releases of harmful substances and toxins are possible.
Types of mixtures
There are only a few options among the types of self-leveling floors in the bathroom. This is 3D and a standard fill. But among the materials from which these floors are made, there are a lot of product lines.
The catalog of beautiful self-leveling floors contains a huge number of options, but the implementation of ideas depends on the type and brand of the chosen solution.
Types of self-leveling floors based on materials of manufacture
During the production of self-leveling floors, several different materials are used, including innovative polymer compounds. The latest technologies make it possible to manufacture products with unique performance properties, significantly expand the scope of use of such coatings, and improve the comfort of living in apartments and private houses.
Table. Types of self-leveling floors.
| Type of self-leveling floor | Brief physical and technological parameters |
| Polyurethane floors | Some of the most common options for bathrooms are considered the most successful both in terms of cost and quality. They are made from the most modern polyurethane compounds with the addition of innovative additives, due to which the amount of chemical compounds released into the air is significantly reduced. According to these indicators, the material fully meets the requirements of sanitary standards. After hardening, the mixture acquires the properties of a single monolith. It is recommended to use only highly filled floors for the bathroom; they are characterized by increased strength, wear resistance, durability and operational safety. You should know that two-component mixtures are of better quality in all respects, but they are much more difficult to use. Such mixtures require not only highly professional builders, but also the presence of special technological equipment and devices. |
| Methyl methacrylate floors | Among consumers, a name that is difficult to remember is replaced by a simpler one. This material is called organic glass and has been used for quite a long time during the construction of various special facilities operating in difficult conditions of high humidity and direct contact with water. The service life of self-leveling floors made of polymethyl methacrylate exceeds forty years. Very high parameters of physical strength allow the use of compositions for creating self-leveling floors in industrial premises with heavy mechanical load. The disadvantage is the rather significant cost of coatings and the complexity of the technology. Another problem is the relatively high concentration of chemical compounds released. It is necessary to equip bathrooms with powerful and efficient ventilation, but this is not always possible for various reasons, including due to additional financial losses for space heating. |
| Epoxy floors | Currently, epoxy resins are used to produce a huge number of materials and products. And not only construction resins, epoxy resins can be the basis for the production of various varnishes and paints, adhesives, which are widely used during the production of OSB boards and plywood, special gypsum panels, wallpaper, etc. The pouring technology is not much different from the materials described above, the only difference is in the chemical composition of the components, hardening time and optimal conditions for performing the work. The fact is that epoxy floors require moisture to harden, which puts forward special requirements for indoor microclimate parameters. Epoxy floors enable designers to create unique compositions, apply designs, ornaments and designs to surfaces. In addition, photographs depicting various animals and plants, mountain landscapes and sea spaces can be filled with epoxy composition. In terms of color solutions, such coatings can be considered very diverse; in addition to standard colors, consumers have the opportunity to order their own shades. |
Main types of self-leveling floors
Mineral mixtures
Produced in accordance with GOST, they consist of sand, cement, and fillers that improve the properties of the material. Mineral mixtures are divided into subtypes:
- Basic – used to form a base for floors. These can be used to fill up to 10 cm thick. The price of such material is the lowest.
- A thin layer under the finishing coating or under warm floors is formed by mixtures with reduced heat conductivity.
- Finishing mixtures. They are the most liquid, since when completing floor repairs, the most thorough leveling of the coating is necessary.
Mineral mixtures provide a durable coating, but they are no better than those created on a polymer base.
However, experts recommend using mineral structures to fill bathroom floors, since such materials best withstand moisture and temperature changes.
Blend selection
Compositions for arranging self-leveling floors can be mineral and polymer.
Mineral compounds are more often used for laying lower layers, replacing traditional screed. The topcoat is usually made from polymers.
What principles should be followed when choosing a material?
When choosing mixtures for filling the floor, it is advisable to be guided by the opinions of experts and give preference to well-known, proven brands. It’s worth remembering: you won’t be able to create a high-quality, durable floor with a cheap mixture.
Pouring self-leveling coatings
The technology for pouring all three options for self-leveling floors is not much different from each other.
The only differences are in the method of preparing the solution - recommendations in this regard are given in the instructions from the manufacturer.
All work comes down to the following steps:
- Preparing the base of subfloors.
- Preparing the mixture for pouring.
- Pouring floors.
- Finishing (if necessary).
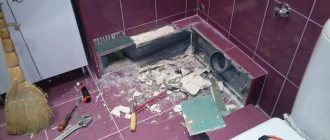
Preparatory work
Preparing the base is one of the main stages in installing self-leveling floors. Preliminary work should not be underestimated, since the strength and service life of the self-leveling coating depends on them. Subfloors should be carefully examined for various defects.
Particular attention should be paid to the horizontal level of the base. If there is a significant horizontal difference, the consumption of expensive bulk liquids will be unreasonably high.
To level subfloors, you should use more inexpensive compounds based on cement and coarse sand. To ensure that the filling level is strictly horizontal, so-called “beacons” are used - metal or wooden slats (profiles, tubes, etc.), placed at the same level in parallel rows from wall to wall in increments of 0.8 - 1 m. These the rows are filled with cement mortar and leveled using the rule according to the level of the beacons.
Dust-free surface will provide better grip
If the floors are mostly smooth, but there are various minor defects - cracks, small depressions, crevices, they can be repaired using putty.
Small bumps and bumps on the concrete surface are cut down with a pick or smoothed out with a grinding machine.
After this, the concrete is cleaned of dust and debris using a powerful vacuum cleaner and primed. This will improve the adhesion between the rough base and the self-leveling finishing compound.
Experts recommend covering the base twice for greater reliability.
Then we proceed to install a thermal seam around the perimeter of the bathroom. It is created as a compensator for thermal expansion of the floor covering under the influence of high temperatures.
For these purposes, you can use a special damper tape, securing it at the bottom of the walls. They also use narrow slats, coated with grease or machine oil, laid around the perimeter of the room before pouring.
After pouring, they are removed, and the resulting gap is sealed with silicone sealant.
Work step by step
After the old covering is dismantled, the floor must be covered with a soil mixture. This is necessary to better set the base material and facilitate the leveling process.
It is known that the mixture for forming a self-leveling floor hardens relatively quickly and you may not have time to level the surface well enough. The primer promotes optimal leveling.
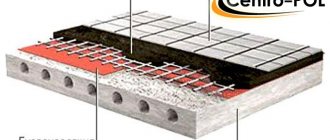
Pouring technology
Rough coating device
Self-leveling of the base is carried out in three stages:
Preparation.
The basic foundation must comply with the requirements of SP 29.13330.2011 and SNiP 3.02.01-87. Necessary:
- clean the surface of debris, dust, paint coatings, bitumen residues, oil, soot;
- fill all cracks, holes, cavities with a cement-sand mixture or quick-drying putty, and trim off the protrusions;
- stick damper tape around the perimeter;
- mark the level of the new floor on the wall using a level and paint cord;
- prime the floor with an adhesive or strengthening compound in 2-3 layers.
Proper preparation of the solution.
For the bathroom or laundry room, it is necessary to use exactly the same compositions that are intended for wet areas. The corresponding indication is always on the label.
According to the instructions, you need to measure out the required amount of clean water, free of impurities or oil, and pour it into a mixing container. Pour in the dry mixture and mix thoroughly with a construction mixer at a speed of no more than 400-500 rpm.
Advice! Do not try to use powerful construction mixers at full strength. The fact is that at a speed of more than 500 rpm, too much air is drawn into the solution. Because of this, it will turn out to be too foamy, and the floor after pouring and curing will be full of pits and bumps.
Next, you need to take a technological break for 5-15 minutes, mix again and use the bulk composition for 30-40 minutes.
Pouring the finished mixture.
Carefully pour the mixture onto the surface and spread it over the surface with a squeegee or a rule. If necessary, place point beacons. To compact and remove air bubbles, roll with a needle roller on a telescopic handle. As a rule, it is recommended to apply the load no earlier than 2-4 days from the moment of pouring. Flooring of finishing materials is allowed after 7-10 days.
Such basic self-leveling floors will be an excellent basis for a decorative polymer self-leveling floor or for any other coating.
Installation of finishing self-leveling floor
If you decide to make a new decorative coating with a 3D effect in wet rooms, then you will need:
- Hand and automatic tools: a level, usually a spatula or squeegee, a deaeration roller, as well as grinders, a construction vacuum cleaner.
- Materials for forming the decorative layer: synthetic fabric with a pattern printed on it, chips, sand, multi-colored marble chips, coins, shells or other fillers (depending on the pattern).
- Primer and polymer compositions.
Stage 1. Preparing the base
Grinding concrete screed or rough self-leveling floor.
Manufacturers of self-leveling decorative floors for domestic and wet rooms do not recommend, but require, that the surface must be dry, durable, and most importantly, perfectly flat, polished literally to a mirror smoothness. This determines how well the coating will “lay down” and its service life. Therefore, even a leveled base must be sanded using industrial units with corundum or diamond cup attachments with a grain size of 300 to 600 units. Loose areas and cracks should be expanded, cleaned and filled with epoxy or gypsum putty. Dust the surface with a powerful construction vacuum cleaner.
The next step is to apply a special composition that is included with the polymer compound. Produced on a polyurethane or epoxy base, they improve adhesion, strengthen the floor, and significantly reduce the consumption of the base material.
Stage 2. Construction of the decorative layer
Formation of self-leveling floor decor.
Banner fabric is glued to the base or fillers are scattered: coins, sand, etc. In the first case, a layer with a thickness of no more than 3 mm is formed, in the second - a so-called highly filled layer, with a cross-section of up to 8 mm.
Preparing the mixture
After priming, prepare the mixture according to the recipe indicated on the package. According to the rules, water is always initially poured into the container, and then the contents for the self-leveling floor are added. You need to mix with a mixer, doing it very carefully.
It is necessary to prepare the entire volume of the mixture at once. It is important to remember that the hardening process begins immediately after mixing, on average it takes up to 50 minutes, depending on the brand of material.
The solution must be left for 5 minutes to better mix the components as a result of the resulting chemical reactions, and then begin pouring work.
- Tiles for the bathroom on the walls - step-by-step installation instructions. Basics and tips for masters (130 photos + video)
Finishing a bathroom with tiles is a stylish and practical solution for a modern interior, recommendations and tips in examples and photos.
Bathroom design - from classic to modern and loft, examples of design and technological innovations in bathroom equipment. ( Photo and video )
According to standards, the floor level in the bathroom is required to be a couple of centimeters lower than in other rooms.
It is necessary to insulate pipes and other communications. You can use construction tape for this. The mixture is poured slowly. You should start from the far corner of the room. The solution must be distributed evenly.
Do-it-yourself self-leveling floor: brief instructions
There is no point in giving general instructions for installing liquid floors, because, depending on the components, the order and conditions of pouring may differ. For a sample, we will describe the process of creating an economical self-leveling coating that hardens quickly and is universal.
One of the versions of the self-leveling floor device can be found here:
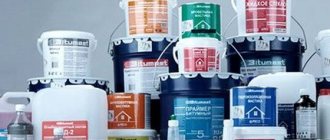
Selection of materials and tools
As the main material for pouring the self-leveling floor in the bathroom, we will take the one-component dry mixture “Nivelir Express” from, which serves to level the concrete floor and is an excellent basis for laying ceramic tiles or installing a decorative polymer coating.
You can choose a cement or gypsum option; in both cases, the mixture will contain synthetic modifying fillers and binders, which enable the solution to “self-level.”
The cost of one bag is $4.5-5, which is cheaper than analogues from foreign manufacturers (Ceresit or Knauf). For the bathrooms of typical urban housing, 3-4 bags of dry mixture will be required, that is, the basic material will cost no more than $20
Mixture characteristics:
- working layer width – 8-10 mm;
- adhesion strength – 2 MPa;
- load – 16 MPa;
- primary setting period – 5-6 hours;
- time of full ripening – 7-10 days;
- packaging – craft bags 20 kg.
In addition to the dry mixture, you will need a primer (for the floor, deep penetration), and if this layer is planned to be the only one, a finishing coating.
Tools:
- vacuum cleaner;
- solution container:
- drill with mixer attachment;
- brush or roller for distributing the primer;
- wide spatula for applying the solution;
- needle roller with telescopic handle.
How to calculate material consumption? With a layer thickness of 10 mm per 1 m², 12.5 kg of dry mixture will be required. Let's assume that the area of your bathroom is 4 m², which means 12.5 x 4 = 50 kg. Therefore, you will have to buy 3 bags of “Nivelir Express”.
Surface preparation
Often the concrete surface in new and old houses is uneven and covered with cracks, so the floor surface must be thoroughly cleaned.
To do this, we remove construction debris, widen cracks (if any), mask large depressions and holes with cement mortar, sand a relatively flat surface, and when finished, vacuum it. Self-leveling floors love a perfectly clean and smooth base: the smoother it is, the smaller the layer of mortar and the better the quality of the coating.
Next, apply the primer with a roller or an ordinary brush - a wide brush, convenient for working on large surfaces.
When choosing a primer, rely on the manufacturer: materials of the same brand are in better contact with each other, which affects the strength of the coating
One of the nuances of the technological process of installing any multilayer coating is the drying period. The primer, like the base material, requires time to dry completely (indicated in the explanation on the packaging).
Preparation of the solution
To dilute the mixture, it is better to take water at room temperature; it is not recommended to use hot water, since the hardening time will be sharply reduced. The amount of water depends on the volume of the mixture; for 20 kg you need approximately 6 liters of water. If you prepare the solution in parts, then accordingly you will need less water (10 kg - 3 liters, etc.).
It is better to divide a large bathroom into technological zones, since it is unlikely that you will have time to fill the entire surface at once.
Pour water into a container (bath, basin, tank), and then gradually, not in one portion, add the required volume of the mixture. The technology involves double mixing. The first time 5 minutes after the dry powder has completely absorbed water, the second time 5 minutes after the first mixing.
This is necessary so that all components, including small fillers and plasticizers, dissolve.
A construction mixer or drill with a special attachment is suitable for mixing the solution. Homogenization is ensured only by thorough mixing of the components, so the “stick” that amateurs like to use is not suitable
There is a practical way to test for optimal thickness. Pour one liter of solution onto the floor - if a circle with a diameter of 0.5-0.6 m is formed, then the mixture is prepared correctly.
Filling order
Despite the fact that the mixture is self-leveling, it can be “helped” with a wide spatula, distributing the composition along the length and width. This method helps control the thickness of the layer, making it optimal (up to 10 mm).
If the room is large, you will need an assistant, thanks to whom the pouring time will be reduced by half: one prepares the solution, the other distributes it over the surface.
If the surface is not immediately smooth, do not try to level it with a spatula to an ideal state - after a few hours, when the entire room is filled, the solution will level out on its own
We apply the solution in squares or stripes along a long wall, as a result the individual fragments will merge and form a monolithic coating. However, you should work as quickly as possible, since the homogeneity of the mass is the key to an attractive appearance (which will be necessary if the floor is left without ceramics).
To remove air bubbles from the solution, we use a needle roller with a long handle.
The larger the bathroom area, the wider the roller; for a typical bathroom, a 20-30 cm tool is sufficient. The length of the spikes depends on the thickness of the working layer
You can level and pour the prepared solution for an hour until crystallization occurs. If you do not have special skills, it is better to prepare the mixture in small portions. Make sure that the windows and vents throughout the apartment are closed, otherwise the draft will cause the floor surface to become covered with small cracks.
After about 4-5 hours you can walk on the self-leveling floor, after 2-3 days you can lay ceramics, and for installing laminate and linoleum it is better to wait about a week. It is also better to wait a little while installing heavy furniture and plumbing fixtures.
The finished result - the Volma self-leveling floor - looks presentable even without further processing, so if the bathroom area is small, you can completely do without decor or tint the solution to match the color of the walls
When can you step on the floor?
This can be done based on the data in the instructions for the mixture, allowing some more time. The strength of the floor can first be checked by palpation, carefully, trying not to damage it if the surface is not frozen.
An important rule: during the hardening period of the floor, it is necessary to avoid drafts. It is advisable to close doors and windows throughout the apartment.
Photo of self-leveling floor in the bathroom
Tell your friends