The screed in the bathroom is necessary to level the upper edges of the floor slabs, which are the base of the floor of the upper floor. Additionally, engineering systems and insulating layers (insulation, soundproofing mats) can be built into it, increasing the quality of living. Under the screed in bathrooms, heated floor systems are often installed for comfortable walking barefoot.
There are several manufacturing methods with different project budgets for different floor coverings.
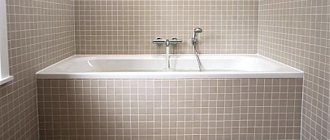
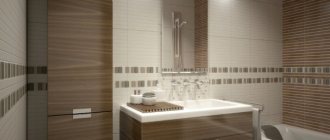
Features of bathroom floors
Diagram of a bathroom floor
If you decide to make a bathroom floor with your own hands, then you should understand how it differs from similar structures in other rooms:
- Since in this place there is a high probability of a large amount of water getting on the floor, the layers of the cake must be reliably protected from the penetration of moisture into the thickness of the structure, and even more so to the interfloor ceilings.
- Due to the fact that there is constant high humidity in the room, the best flooring would be ceramic tiles. When installing the screed, it is necessary to take into account the requirements for the bases for the tiles.
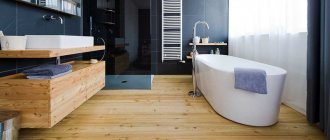
- Engineering communications very often pass through the thickness of the floor and interfloor ceilings in the bathroom, so when installing a screed with your own hands, it is necessary to isolate this place from moisture penetration.
- The surface of the bathroom floor must be strong enough to support the weight of the sanitary equipment and sometimes the washing machine. In the latter case, the screed in the bathroom is subject to a certain vibration effect.
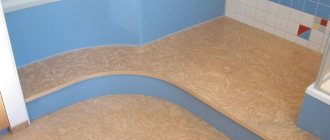
- When installing a screed in the bathroom with your own hands, keep in mind that the floor level in this room should be lower than in the entire apartment, so that in the event of a flood, water does not spread throughout the rooms.
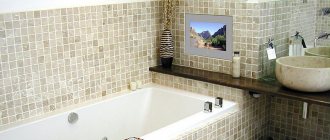
- When laying the screed in the bathroom, it is worth making a slight slope towards the free area of the floor, so that when water spills, it is convenient to clean it up.
- Walking on cold ceramic tiles in winter is not very pleasant, so it is advisable to provide a heating system. The price of such a floor will be higher, but the comfort is worth it.
When installing bathroom floors with your own hands, it is better to use a cement-sand mortar for screeding. It is easy to prepare and has good moisture resistance due to its high cement content. Since it is necessary to provide waterproofing in this room, it is better to make a screed under the tiles that is not connected to the base. The price of such a floor will be quite reasonable. And modern materials and types of waterproofing the floor under the tiles in the bathroom will create reliable protection.
Pouring concrete on a wooden floor
If the bathroom has a wooden base, then it is better to make an untied type of screed. To equip it, you need sand, M400 cement, and dense polyethylene. To improve the properties of the concrete layer, a plasticizer is added to the solution. The mass of such a screed should not be large. Instead of film, it is allowed to use other insulating material.
Before pouring, the base is prepared: all cracks and cracks are filled with cement or putty based on epoxy resin. The joints are treated with silicone sealant. To prevent the wooden base from rotting, a moisture-resistant primer is applied to it.
After this, the waterproofing film is laid. It should cover the joints with the floor and extend onto the walls by 7-10 cm. Now you should set up the beacons, lay the reinforcing mesh, distribute the finished solution and level the surface. The height of the concrete layer should not be less than 5 cm. In this case, it is better not to use a warm floor to avoid the risk of a fire hazard.
Purpose of floor screed
The main function of the screed is to level the surface of floors made of concrete slabs. Elimination of defects in the base of the floor makes it possible to correctly distribute the operational load, lay the tiles efficiently, and reduce to a minimum the consumption of expensive adhesive composition.
Defects in the concrete base
The screed device also allows:
- create a base for tiling over wooden floors, insulation, and soundproofing mats;
- hide utility lines;
- raise the floor level in the bathroom (taking into account the final coating) to the required height;
- install a heated floor system.
Installation technology and budget depend on the type of screed chosen. Doing the work yourself makes it possible to reduce costs.
Semi-dry screed
Semi-dry screed is an alternative to wet and dry screed. A semi-dry screed is a wet screed with a small amount of water. Therefore, we can say that it is poured rather than poured. The main advantage of this method is the ability to create a completely flat surface. Photos of bathroom floor screeds created using this technology amaze with their ideal evenness.
To work with such a screed, special expensive equipment is required for mixing (pneumatic blower) and leveling (finishing trowel). The application of such a screed is carried out using beacons that determine the required level in the room.
When setting, the semi-dry screed should be covered with plastic film. You cannot do this type of work yourself at home. This can be attributed to its shortcomings.
Semi-dry screed is quick-drying. But only 4 days after installation, tiles can be laid on it, and laminate and parquet can be laid only after 28 days, after complete drying.
Thus, modern floor screed technologies are perfect. From the three technologies presented in the review, you can choose the one that is most suitable for your premises.
Warm floor in the bathroom - installation technology and do-it-yourself coating installation (120 photos)Bathroom floor tiles - step-by-step instructions for installing the optimal floor covering (120 photos)
- Bathroom floor: rules and design features of modern floor coverings (140 photo ideas)
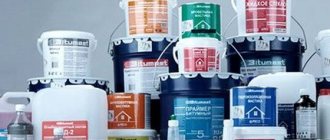
Selection of filling material
Concrete is a popular material for a reason. It's all about its versatility. This is due to the fact that repairs using this material are possible in premises for various purposes.
The choice of material for pouring the floor in the toilet, shower and bathtub depends on the compressive strength. The most acceptable option for filling the floor is cement with a strength grade of M200. The service life of such a floor can reach several decades.
Before pouring the concrete floor in the bathroom, the shower needs to properly prepare the solution. To prepare, you need to know how many components you will need:
- sand;
- cement;
- crushed stone;
- water.
When mixed with cement and subsequent drying, water forms a stone surface, but without supplementing this mixture with crushed stone or expanded clay, as well as sand, it will easily succumb to deformation and shrinkage. Depending on the choice of proportions, the properties of the prepared solution change significantly. As the cement content increases, the strength of the composition approximately doubles. To prepare lightweight concrete in a solution, crushed stone is replaced with expanded clay.
To speed up the hardening process, various additional elements, such as granite, limestone or gravel, can be added to the liquid solution. You can use a self-leveling solution.
How to make electric floors
In order to pour electric floors, you must first of all know that the thickness of the screed must be at least five centimeters. Sand concrete mortar must be prepared with the addition of special substances with plasticizing properties. This is necessary so that the floor does not crack during the first heating. The presence of crushed stone in the mixture is also important. It will add strength to sand concrete.
Warm electric floor in section
To prepare a sand concrete solution you will need:
- cement - one part;
- sand - four parts;
- crushed crushed stone - four parts;
- plasticizing agent - one hundredth part.
It is important to ensure that the solution does not turn out to be too liquid. The most important task when pouring is to prevent the formation of voids. This may have a negative impact on the system. When pouring the sand concrete layer is completely finished, it must be left to dry completely. This period will be about a month. After this, you can test electric floors. You can read more about how heated floors are poured here.
Heating cable installation process
The heating cable is laid in accordance with the diagram and at the calculated distance
Installation of the sensor and thermostat should be entrusted to a professional electrician
Lay the tie carefully so as not to damage the cable
Which technology to choose
When choosing a base leveling method, the following are taken into account:
- type of floors (concrete, wood);
- the presence of living quarters below - to prevent moisture from damaging the finishing of the ceilings, it is necessary to pay special attention to waterproofing or abandon wet technologies;
- the presence of communications that need to be hidden (pipes of hot and cold water supply systems, sewerage systems), underfloor heating systems;
- floor level in the room adjacent to the bathroom (including finishing);
- height difference of the base - for small values it is enough to use a self-leveling floor.
Hidden pipe laying
The budget for repairs is also taken into account. For dry screed, manufacturers offer ready-made solutions - these are self-leveling floors. You can prepare a solution for cement screed yourself.
Wet
This type of bathroom screed is the most common. It got its name due to the fact that a material is poured that dissolves with water. The main components of the screed mixture are cement and sand. The advantages include the ease of mixing the solution, and the disadvantages are the period required to gain strength. This type of bathroom screed is easy to make with your own hands if you know how to use the rules. Wet screed has its own characteristics depending on the room. Among the subspecies are:
- knitted;
- with waterproofing;
- with thermal insulation;
- with additional alignment.
The first type is more suitable for residential premises. This is due to the fact that the screed is poured directly onto the concrete slab without prior preparation. In this case, moisture from above seeps into the slabs, so this option is not the best for the bathroom. An excellent option, which is usually used in the bathroom, is a screed on a waterproofing layer. In this case, the separating layer between the slab and the screed is waterproofing. The third type of screed is also suitable for the bathroom, since it also implies the presence of waterproofing. This screed option will be an excellent solution for a cold floor if the bathroom is located above an unheated room.
Note! The last type of screed involves the use of self-leveling families. With their help, it is possible to achieve an almost perfectly flat surface, which is suitable for laying tiles or other materials.
Types of floor screed
The floor screed in the bathroom is nothing more than a cement mortar with the addition of sand and crushed stone. In some cases, expanded clay granules are added to the structure. Thus, the most common materials are used for floor screeding. Their use will be described below. There are only three types of screeds: dry, semi-dry and wet screeds. Let's consider each type of screed separately.
Wet screed
The simplest option is a wet screed. It is performed by pouring cement-sand mortar. The idea is to pour the mixture onto the subfloor and level the resulting layer. The disadvantage is that such a screed takes a very long time to dry.
There are several types of wet screed:
- knitted - pouring is done directly onto the floor slab and is most often done in dry rooms;
- on waterproofing - this option is ideal for rooms with high humidity, since the screed is created on top of the waterproofing material (more details: “Waterproofing screed - how to do it correctly, choosing a floor option”);
- on thermal insulation - pouring is done over special materials that hold back cold air masses. Intended for rooms on the lower levels of the building, which are located above cold basements or cellars;
- with an additional leveling layer - used in cases where the surface is supposed to be covered with laminate or linoleum, since these materials do not allow the presence of defects on the base.
Dry screed
A prefabricated dry screed in a bathroom is a unique design consisting of several layers that are assembled sequentially. In this case, the first layer is represented by expanded clay or crushed stone. Sheets of plasterboard are laid on top of it.
The advantage of such a screed is that it can be installed within one working day, but the lack of strength is obvious, since it does not contain fastening components, as is the case with a wet or semi-dry screed.
Many coatings simply cannot be applied if a dry screed is used in the bathroom, because... even the load created by ceramic tiles can cause deformation of the base.
Solid screed
The design of a continuous screed involves pouring one or more layers of the mixture. The determining factor in this case is the required thickness of the screed.
However, there are options when the screed is built up by creating layers of different materials. The selection of these materials should be made with an emphasis on the components included in the composition.
The following types of binder components are distinguished:
- cement;
- gypsum;
- cement-polymer;
- gypsum-polymer.
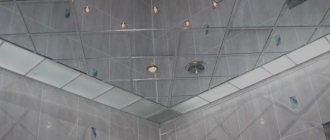
Don't miss: Slat ceilings
If the owner plans to organize a screed in several layers of different materials, then you should adhere to a number of rules:
- if the bottom layer is made of a cement-sand mixture, and the next one is made of gypsum, then between them there should be a dense layer of primer that will protect the gypsum from leaching;
- the gypsum layer cannot be located below the cement layer, since before the cement hardens, the liquid in its composition will soak the gypsum;
- if you have a small budget, it is best to use one material to fill several layers, since priming also costs money, and a lot of it;
- Cement mortar is subject to shrinkage during drying, which is why cracks may form during thorough drying. To avoid this, it is recommended to add as many plasticizers and polymers as possible;
- The gypsum mixture is environmentally cleaner, more elastic, which protects against the formation of cracks, and has better vapor permeability. This base is great for wood floors, but it is absolutely not intended for use in the bathroom. Even an increase in the amount of plasticizers and polymers in the composition will not allow the use of gypsum screed in wet rooms.
Today, cement-sand screed is losing its popularity, since its creation time is very long and its characteristics are inferior to many modern materials for creating a foundation.
Many of the existing ready-mixes have better characteristics, and the hardening process takes no more than 1-3 days.
Prefabricated screed
The prefabricated screed justifies itself by its name, since you can make a floor screed in the bathroom by assembling the purchased components into a single multilayer system.
The most popular system is one containing the following layers:
- waterproofing made of thick polyethylene;
- dry backfill;
- substrate made of high-quality filler: polystyrene foam, mineral wool, etc.;
- gypsum fiber sheets;
- tape for gluing joints and edges.
In turn, prefabricated screeds are classified depending on how the screed is applied:
- directly onto the base (tied) - such a structure can easily withstand heavy loads, but is subject to shrinkage with subsequent formation of cracks;
- on the separating layer - waterproofing material on a paper basis or polyethylene with a thickness of at least 3 centimeters;
- onto the insulating layer (“floating”).
Floating screed
This type of screed is performed on any insulating layer with the function of protection from thermal energy and noise: mineral wool, cork sheet material, etc.
The thickness of the entire structure should not be less than 5 centimeters, which takes up a significant part of the height of the room.
The strength of such a screed is not very high and cannot be used without additional reinforcement.
Installation of beacons
An even screed guarantees the quality of the finishing coating and saves glue when tiling the floor.
To achieve evenness of the screed and create slopes, we install beacons.
A metal profile for drywall, installed on slides of the mortar used for screed, is better suited for these purposes.
Helpful advice! Under no circumstances should beacons be screwed to the base, so as not to damage the integrity of the waterproofing. And also use gypsum or alabaster to secure the profile so as not to compromise the strength of the screed.
We install the first row of beacons at a distance of about 15 centimeters from the wall. Subsequent ones - in increments less than the length of the rule with which we will level the solution, by 10-15 centimeters.
We control the horizontality of the beacons, relative to each other and the marks on the wall, using a building level.
The height is adjusted by pressing the slats into the cement-sand mixture or by placing additional mortar under the slats.
Figure 4. Installation of beacons on an insulated base.
When using wooden slats as beacons, before installation, they should be soaked in water so that the wood does not absorb moisture from the solution.
After the screed has set, the guides should be removed. Seal the resulting cavities with the same solution as the screed and rub it.
You can start installing the screed only after the solution under the beacons has dried.
Preparing the base for pouring the floor
The thickness of the screed for tiles, in accordance with the standards SP 29.13330, ranges from 10 to 120 mm. depending on the facing material (tiles, porcelain stoneware), the quality of the base, the need for hidden installation of engineering systems. It is laid according to the principle that the strength of the base should be higher than the newly formed layer.
At the preparatory stage you need:
- dismantle the old flooring and screed (if the work is not being carried out in a new building);
- clean floors from debris and dust;
- assess the condition of the ceiling - concrete strength, presence of height differences;
- remove loose layers of concrete and fragments protruding above the plane, seal cracks and crevices;
- prime the surface cleaned of contaminants to improve adhesion to the leveling layer;
- determine the required thickness of the screed layer and apply markings to the walls;
- if necessary, install communications.
Base primer Note! If it is necessary to raise the floor level to a significant height, pour a layer of sand or expanded clay up to 100 mm thick. The layer is carefully compacted.
Waterproofing and thermal insulation layers
The quality of the subsequent coating directly depends on the quality of waterproofing. You can use various modern materials, such as roofing felt in rolls or a special membrane. You can use regular polyethylene film. If there is not enough material for a continuous application, then all resulting cracks and joints must be sealed with adhesive tape.
For the bathroom it is also worth using coating waterproofing, the materials for which can be purchased ready-made. When carrying out work, special attention should be paid to the corners.
Thermal insulation can be made with expanded clay or perlite. You can use polystyrene foam or basalt wool. Let's take a closer look at expanded clay insulation.
It is important to insulate with expanded clay on the waterproofing layer, since due to its porous structure it absorbs moisture, and this can negatively affect the structure. To make the insulating layer with expanded clay, it is necessary to align the guide pendulums. When insulating with expanded clay, it is imperative to ensure that the granules of this material are of different sizes, so that smaller particles fill the space between the larger expanded clay.
Waterproofing
Waterproofing is carried out using film, roll, coating and liquid materials on top after the solution has completely dried. The choice depends on the screed installation technology. The waterproofing is a separating layer, so the screed on top of it has no adhesion to the base. Therefore, it is treated with waterproofing material immediately before laying the tiles. In addition to dry screed, since this method uses bulk material. On a note! PVC film is suitable only for arranging a dry screed - upon contact with cement, the material gradually collapses and loses its insulating properties.
Waterproofing under dry screed
Rolled bitumen-based waterproofing is laid in two layers with the strips offset by 15-20 cm to avoid through joints. The material must extend onto the walls at least 20 cm. To securely connect the strips, bitumen mastic is used. The floor surface is pre-treated with a bitumen primer.
Laying roll waterproofing
Coating and painting waterproofing is applied to pipes where they pass through floors and walls at low heights. The same materials can be used to protect the entire surface of the base and the lower part of the walls. For application, brushes of suitable width and a roller are used.
Painting waterproofing
Reinforcement process
To make the floor more durable, it is necessary to perform reinforcement. For this, a mesh made of metal or plastic is often used; you can also make your own base from reinforcement.
If the filling layer is provided with a thickness of 30-50 mm, then for reinforcement it is better to use a metal reinforcing mesh, the thickness of the rod in which is 5 mm, and the dimensions of the square cells are 80-100 mm. The reinforcing belt should fit the thickness of the screed, for which it is best to place the mesh on pads made of concrete or old tiles.
For a thin fill layer, you can use a fiberglass mesh called serpyanka. To ensure that this layer is of high quality, installation is carried out on small elevations.
Beacon distribution
With the help of beacons, the filling is much smoother. The guides can be made from profiles or round pipes. The entire area of the future floor is divided into segments, the width of which does not exceed two meters, which will prevent the solution from spreading during pouring. The distance from the beacon to the nearest wall should not exceed 250-300 mm.
It is very important that the height of the screed under the tiles should not exceed 5 cm. This fact must be taken into account when performing installation work for beacons. But making it too thin is also dangerous. If after some time the concrete cracks, it means that the screed was made incorrectly or too thin.
Don't miss: Crosses for laying tiles. Crosses for tiles - all the subtleties of obtaining an even and beautiful seam
To install beacons, you should not use screws or studs screwed into the floor, as they can damage the integrity of the waterproofing. Wooden slats, which can decompose over time, should not be used as guides.
Installation of guides is carried out on elevations made of sand concrete. Guides are pressed into these elevations. The top point of the beacons should be flush with the line made earlier.
Technology
The choice of base leveling method depends on several factors:
- availability of communications - hidden hot water/hot water pipes, heated floors, sewerage;
- height difference relative to the horizontal - self-leveling floor for small values, other technologies for leveling significant defects (usually no more than 2-3 cm);
- level of flooring in the corridor;
- the type of ceiling covering of the lower neighbor - wet technologies can damage the whitewash and paintwork (measures must be taken).
Commercial lightweight, lightweight concrete can be made on your own; self-leveling floors and materials for dry screed will have to be purchased in the store.
Wet
You can level the base for tiles with your own hands using several types of concrete:
- commodity - crushed stone, sand, cement, water in a ratio of 3.7/1.9/1/0.6 by volume;
- lightweight - sand, cement, water in a volumetric proportion of 3/1/0.6;
- light - sand, filler, cement, water in a ratio of 3/3/1/0.5.
Fillers for lightweight concrete are usually: expanded clay sand, polystyrene foam balls, perlite. In addition to reducing structural loads on the slab floor, a lightweight concrete screed allows you to insulate the floor and increase the sound insulation of the room.
The main disadvantage of lightweight fillers is their high buoyancy. In solution they rise to the surface, making it extremely rough. Subsequently, additional grinding using various methods or finishing with a self-leveling floor is required. According to existing standards SP 29.13330, the thickness of the concrete screed must be at least 30 mm from the base in the highest area or above the underfloor heating pipes or utility systems embedded in it.
Similarly, the floor level rises to the design height:
- a layer of expanded clay is poured below the zero level by 70 mm;
- 50 mm screed is concreted along linear type beacons.
To fill the screed using the classic “wet” technology, you need to perform the following sequence of actions:
- installation of linear beacons - mortar, from a special rolled metal profile;
Beacons in the bathroom. - filling - a solution is placed between the beacons;
- leveling - excess mixture is cut off according to the beacon rule.
Pulling concrete along beacons.
On day 2 you can walk on the screed, on day 29 you can lay tiles, porcelain tiles, and mosaic the floors. The maximum quality of the screed is ensured by the use of a vibrating screed.
Semi-dry
The technology of semi-dry screed differs at the initial stage for a bathroom with heated floor contours and mesh reinforcement without heating. In the absence of a heated floor, the wire mesh/reinforcement is covered with the same solution from which the screed will be made. The mesh is laid on polymer pads. Scraps of reinforcement and rolled metal. The use of brick, concrete, and wooden spacers is prohibited.
When using several meshes of small size and complex configuration, a mutual overlap of at least one cell is required.
When performing a semi-dry screed in a bathroom on your own, the sequence of actions is as follows:
- preparation of a mixture of CPS with polypropylene fiber reinforcement;
Consistency of semi-dry mixture. - laying point beacons;
Point beacon. - combining point beacons into linear ones;
Linear beacons. - filling the space between the beacons with solution;
- compaction of the solution by slamming with a polymer float;
- leveling the solution along linear beacons;
Leveling the mixture. - grinding with a trowel (in a small room you can grind by hand);
Processing with a trowel. - hydration.
The main difference between semi-dry screed and classic wet screed is that semi-dry mortar has a water-cement ratio of 0.35 - 0.43. This allows you to avoid intensive absorption of moisture into the floor slab and damage to the ceiling linings of the lower neighbor. You can walk on a freshly made semi-dry screed in special shoes when grouting at the last stage of the technology.
The proportions of sand and cement remain the same - 1:3 (c/p, respectively). Only cement grade 400 and higher is allowed. Medium-sized sand fraction, PP fiber consumption 150 g per 50 kg of cement.
At the specified W/C ratio, the mixture does not release water when squeezed by hand and retains its shape after unclenching the palm. Instead of mortar beacons, linear modifications from a profile pipe on screw lifts can be used.
A semi-dry screed was invented to reduce the budget, increase productivity, and eliminate wet processes. Initially, a semi-dry screed was created for the mechanized method of carrying out work:
- mixing in a hopper of a special machine, the volume of which is designed for at least one 50 kg bag of cement;
- supplying sand concrete pneumatically through a hose into the room;
- laying out in heaps from a special damper;
- alignment along the beacons using a screed-laying machine;
- surface treatment with a trowel.
Equipment for mechanized semi-dry screed.
The pneumatic compressor and screed layer are very expensive, and rental of this equipment is not practiced. However, the operations performed by these machines can be done manually. But there is no such alternative to a trowel - you will have to rent it from a specialized company.
Without moisture on day 6, concrete may not reach its design strength before tiling. According to professional calculations, the own moisture for hydrating the cement stone inside the mixture is only enough for 5 days.
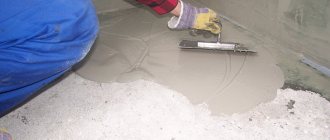
Self-leveling floor
Distinctive features of the technology and material of the self-leveling floor are:
- self-leveling properties - under the influence of gravity, the solution is independently distributed over the surface of the base, the surface is leveled horizontally;
- air saturation - when kneading with a mixer, air penetrates into the solution, which, after being distributed over the surface of the base, is expelled by the spikes of the rubber roller;
- the use of point beacons - a reference tripod, self-tapping screws, mortar marks, plastic sticks (not necessary for a small area);
Benchmarks for self-leveling floors. - walking on mortar - a “paint shoe” is attached to the sole of the shoe - a plastic insole with spikes on the bottom and straps on top.
Paintshoes.
Under the floor coverings, a budget cement-based self-leveling floor is usually poured. Some manufacturers call it a leveler, a self-leveling, self-leveling mixture.
The manufacturing technology for self-leveling floors is as follows:
- mixing the solution in the proportions specified by the manufacturer on the packaging;
- distributing the mixture in buckets around the perimeter of the room;
Pouring the solution. - dismantling beacons on a tripod with a screw reference;
- rolling out the layer with a needle roller to remove air and distribute the solution evenly.
Rolling the floor with a roller.
You can move loads on the surface the next day, glue tiles - on the 4th day.
A detailed article about self-leveling flooring is here.
Dry
The most popular among individual developers is the Knauf Superpol dry screed made from two-layer gypsum fiber boards on top of expanded clay sand. For wet rooms, dry screed is made from GVLV boards with water-repellent properties. The technique is much simpler than other types; tiling the surface is possible on the same day.
This technology is primarily suitable for wooden floors without significantly increasing the structural load. Installation of Knauf superfloor looks like this:
- waterproofing the supporting structure - laying polyethylene film, coating, painting the floors and walls with special compounds to a height of 20 cm;
Film waterproofing. - installation of linear beacons - taking into account the dimensions of the bathroom only near the walls;
Recessed linear beacons for Superpol. - backfilling of expanded clay - sand is distributed between the lighthouses;
- laying gypsum fiber board - two layers with offset seams, fastening with glue and self-tapping screws.
Installation of two-layer GVL blocks.
The classic version of beacons are recessed linear profiles, the grooves of which must then be filled with expanded clay sand.
Dry screed tool kit.
Manufacturer Knauf has improved the tool for Superpol. The rule has side cutouts, beacon slats are laid on top of the zero mark, filling the grooves is not required.
Installation technology
When mixing the components, a drill with a special attachment will help to achieve homogeneity of the mixture. The screed composition is diluted with water, stirred and left for 10 minutes, after which it is mixed again.
Water is added to the dry mixture
Mixing the solution
The system installation process must be completed in one go. The cement base begins to harden after 40-60 minutes, when adding polymers - after 3 hours.
The cement-sand mortar is mixed 1:3. Plasticizers or tile adhesive will allow you to make a better composition.
Rule
Filling begins from a remote corner from the entrance to the room. The solution is placed 0.5-1 cm above the beacons, compacted and leveled using the rule. The ends of the tool are directed towards the beacons, close to the wall and, moving to the sides, moved forward. The resulting excess composition is used for the next strip.
Rule movement direction
The process of pouring concrete mixture
To release air, the screed must be pierced with wire in several places.
When using wet or semi-dry types of screed, the structure is rubbed down after pouring the floor. This will give a smooth surface without defects. The work is done manually or by machine. The area is slightly moistened with water using a roller or spray bottle.
After grouting, the floor is checked with a level for uniformity. The fresh screed is covered with film for 14 days. The humidity level in the room is maintained: temperature 20-25 °C, no heating or drafts.
The final drying of the screed takes up to a month. If there are protruding parts of the insulation, they are cut off at the level of the structure.
If you need to walk on a fresh screed to pull out the beacons, then OSB (particle board) panels are laid on the base so as not to break the floor.
Beacons can be removed or left if they are treated with an anti-corrosion compound
Flooded screed
Installing screed on wooden floors
- prepare a solution of cement, sand, plasticizer;
- fill existing potholes and cracks with putty with an epoxy base, seal the joints with silicone;
- Apply a moisture-resistant primer to the coating, which has been previously cleaned of old cladding and debris;
- place thick polyethylene on the base, the film should cover the wall 7 cm from the floor;
- seal the joints with tape;
- set up beacons;
- lay reinforced expanded mesh;
- pour the prepared solution and distribute it over the entire surface (the thickness of the screed should be at least 50 mm).
ATTENTION! Waterproof a wooden floor by laying 2-3 layers of polyethylene or other moisture-resistant material.
Choose the screed installation option, taking into account future loads on the floor, humidity and temperature fluctuations in the room and the environmental friendliness of the materials used, especially when it comes to renovations in a children's room.
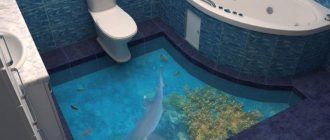
Self-leveling floor
This type is very popular nowadays. It allows you to create an unusually beautiful design. And thanks to its smooth mirror surface, it visually enlarges the room.
- To prepare the base, it must be carefully primed, the surface should be slightly rough, the filling will lie better.
- Then, if desired, a special 3D pattern is attached, and the mixture is poured onto it in thin layers (you should start from the highest point of the floor, so the composition will be evenly distributed over the entire surface).
- After finishing filling the floor, go over it with a roller with needles to remove air bubbles. After drying, the floor can be used.
Self-leveling floor
To the question: “How to fill a 3D self-leveling floor in a bathroom and toilet with your own hands?” we can answer that this process is not too complicated. It is important to make the right choice of material and understand the process technology itself. It is worth noting that a polymer 3D floor would be the most suitable option for this room.
To select the type of self-leveling floor, it is important to calculate the load, assess the condition of the building’s foundation, and the quality of the material.
Self-leveling floor with 3D effect
3D flooring is very popular. This is not surprising, because thanks to it, you can create a fashionable and extraordinary interior. When carrying out renovations yourself using 3D flooring, you should think about using materials such as wood or marble stone; they will look very advantageous against the background of a transparent floor covering.
To make a self-leveling 3D floor yourself, you need to complete several steps:
- preparation of the base - the coating on which the floor will be poured must be clean and dry, slightly rough. Priming the base with a special polymer-based substance. The concrete base and cement-sand screed must be primed, and all cracks must be filled with sealant.
- floor filling - fixing a special pattern that will create a 3D effect. The polymer floor is directly poured, and all work is carried out at temperatures from 5 to 25 degrees. This process is carried out in strips and gradually. The liquid solution must be distributed evenly around the entire perimeter. Filling begins from the highest point of the surface, which will allow the solution to be evenly distributed.
Next, a special roller covered with needles is used, thanks to which all air is removed from the mixture. Also, thanks to this, the color of the 3D floor will become uniform. A self-leveling 3D floor made by yourself will look great in the bathroom, shower, and toilet. This surface looks perfectly smooth and visually expands the parameters of the room.
Final procedures
The dried screed must be sanded to eliminate any defects and prepare it for laying flooring and other work.
It is advisable to use a grinding machine to smooth only defective areas that are visible upon visual inspection. Only in the case of linoleum, as a particularly demanding material, is it necessary to treat the entire site.
The following can be used as bathroom flooring:
- Self-leveling floors;
- moisture-resistant types of linoleum or laminate;
- sheets of cork material or plank flooring;
- ceramic tiles (tiles) are the best and most popular option. This coating has optimal characteristics and looks very beautiful. When using it, bathroom floors are not embarrassing to post in photos on social networks or present to guests.
Bottom line
Having studied in detail the instructions for creating a screed in the bathroom, you can carry out all stages of the work yourself. If difficulties arise, you can always contact specialists who will take responsibility for all stages: from the selection of materials and preparation of the premises to finishing.
Professional builders can also provide a guarantee on the work performed, which is extremely appreciated by many owners who prefer to invest their money wisely.
Screed arrangement
Before you start pouring the solution, you need to decide what the thickness of the screed will be. To do this, it is recommended to use a laser level or a simple liquid level.
Using one of these devices, you need to draw a line, which will become a level for the future surface of the screed. At the same level, beacons will be placed along which the filling will be carried out.
A beacon is a wooden or metal strip that looks like the letter T in cross-section. To leave the beacon in the screed, it must be treated with certain compounds: metal - anti-corrosion, and wood - water-repellent.
It is recommended to secure the beacon using the same solution, applied along the entire length of the slats at intervals of 30-40 centimeters. When installing the first beacon, you need to make a distance from the wall of at least 20-25 centimeters.
After the solution has hardened under the beacons, you can begin pouring the screed. The mixture must be diluted according to clear instructions in the proportions indicated on the packaging.
It is worth remembering that an excess or lack of water in the prepared mixture can lead to rapid deformation of the screed. As for the usual cement-sand mortar, the mixture is prepared in a proportion of 1 part cement to 3 parts sand. It is also recommended to fill it with plasticizers or an adhesive mixture.
Filling is done in stripes. You need to start from the far corner of the room. If the beacons need to be removed, then the strips are poured one at a time, and when they have hardened, the strips are removed and the space between them is filled.
The solution must be poured 0.5-1 centimeter more than the level of the beacon, and then leveled using the rule. If there is not enough mixture, you can add it after leveling one strip. It may happen that there will be holes in the flooded area that need to be filled.
It is also very important to moisten the strip after pouring to improve its adhesion to the substrate. It is advisable to pierce the screed with a thin wire in several places to remove excess air in the coating. The remaining areas are filled in the same way.
It is necessary to cover the entire area in one hour, or prepare the solution in an amount that is enough to fill 1-3 strips. Otherwise, the excess will harden and will no longer be suitable for use, which is unacceptable in conditions of shortage of the mixture. It will be possible to walk on such a surface only after 7-14 hours, but it is better to wait at least a day.
It is important to keep the room airtight, at a temperature of about 25 degrees and a humidity of no more than 80 percent. The room should not be heated. The final characteristics of the coating will be received in about a month. It is advisable to begin further work after this period. Any parts of waterproofing layers, etc. protruding from under the screed must be cut off to the level of the base.
Strengthening the structure
Concrete floors with topping
You can make the base more stable with the help of topping - a special solution applied on top of the screed to make it stronger. The mixture is made with a filler of quartz or metal.
The composition is applied to the screed over its entire surface. The use of topping is necessary if the final covering will not be installed in the future: tiles or other material.
Technology and stages of work in the bathroom
Despite the several available schemes, the floor arrangement is quite unified and can be reduced to the following steps:
- foundation preparation;
- waterproofing;
- pouring screed (leveling);
- laying the finishing coating.
Preparatory work
Preparing the foundation “after the builders” comes down to cleaning it: removing debris, sweeping, etc. It’s a completely different matter when it comes to a bathroom in a residential apartment - you’ll have to work hard here. The floor must be completely cleaned of old coating, most often ceramic tiles, and insulation residues. The work is usually carried out using a hammer drill, after which cracks, splits and other defects will inevitably remain on the screed, so the screed is also removed. Particular attention is required to areas adjacent to walls.
In any case, it is better to remove the old leveling screed; this will help complete all the work better.
After inspecting the base, using the cheapest “tile” adhesive, “roughly” seal all detected cracks and holes. Otherwise, over time they will expand, and problems with screed or waterproofing may arise in these places. Having completed all the work, the surface is carefully cleaned of debris and dust.
Floor waterproofing
Many consider this stage to be the most important, and we can agree with this, because even a microcrack can someday cause wet spots on the ceiling of the neighbors below.
To increase the adhesion of the waterproofing to the base, it must be primed. After applying the primer, installation of waterproofing begins after 1.5-2 hours. All joints through which moisture can leak are sealed with a special reinforcing and sealing tape.
Two types of materials are used:
- pasting;
- coating;
Pasting: savings and disadvantages
Similar materials produced in rolls are divided according to the installation method:
- self-adhesive – they can be installed quickly and easily without additional equipment;
- built-up - a gas burner is used for their installation.
This is the most economical option, which has a number of other advantages:
- panels are installed quickly,
- reliable fixation over the area of the room prevents them from moving,
- You can move on the waterproofed base immediately.
Although it also has some disadvantages:
- bitumen-containing adhesive waterproofing has a persistent rather unpleasant characteristic odor;
- The insulated surface must be perfectly smooth and absolutely dry. It is pre-treated with a bitumen primer;
- the panels must be glued as carefully as possible, since the slightest inaccuracy is enough to negate all the work.
The roll materials are self-adhesive and are laid in the same way as regular linoleum.
- Having cut a strip of the required length and width, remove the protective film from its underside and apply the prepared piece to the base.
- A heavy roller is applied over the laid piece to ensure more reliable adhesion of the insulation to the base surface.
- All subsequent strips of waterproofing material are laid with an overlap of 10–15 cm over the previous one. In places where the floor meets the walls, a significant overlap on the wall is provided - about 30-40 cm.
A similar installation technique is used in the case of surface-surfaced materials, but taking into account certain subtleties.
The roll is unwound directly during the laying process, and a gas burner is used to adhere the material to the base, which, by heating the bitumen layer, securely attaches the sheet to the surface.
For greater reliability, the bathtub is also waterproofed: the joints with the sewer pipe are carefully sealed, the joints of the bathtub and the facing tiles are treated with silicone sealant.
Common mistakes and recommendations
- Laying the semi-dry mixture in the space between the beacons without compacting the surface.
- Failure to maintain the correct ratio of cement and liquid when preparing the mixture.
- Ignoring the procedure for rolling self-leveling floors with a spiked roller.
- Application of a screed layer provided that the thickness is lower than acceptable.
- Application of waterproofing coatings before pouring semi-dry and wet screeds.
- With the dry laying method, not small, but large expanded clay granules are taken.
- Connecting the heated floor system to operation until the screed layer reaches maximum strength.
- While the composition was gaining strength, drafts were allowed.
- Poor level of base preparation (poor cleaning or neglect of priming).
Expansion seams
Photo of expansion joint
When making a concrete floor screed, attention is drawn to an important point: as it hardens, the solution presses on the walls and the fragile screed begins to deform. To avoid cracks, special seams are cut. They are made around the perimeter of the room.
Construction of expansion joints
There are several cutting methods:
- a seam is laid on the “raw” base using a forming strip;
- lines are executed after the initial hardening of the composition.
The seam width is about 2 mm, the depth is 1/3 of the thickness of the screed. If the base does crack when the concrete hardens, this will happen only near the drawn stripes.
The lines are closed after the screed has dried: a special cord is placed in the groove, and the gap is filled with sealant.
Bathroom floor screed is the main and labor-intensive part of the floor renovation job. But if you take into account all the subtleties and nuances, then the implementation of the design will not become an obstacle to self-repair.
Preparing the subfloor
First of all, you should perform a series of actions with the rough base, on which all other layers of the structure will be superimposed:
- it is necessary to eliminate dust, dirt, construction debris, any stains and puddles from chemicals so that the created base does not disintegrate when interacting with them. When renovating a room with an existing floor structure, it is necessary to dismantle the covering, right down to the concrete slab. Any cracks and chips must be repaired with cement mortar or adhesive mixture;
- Next, the flat surface must be primed, possibly in several layers, but then you will have to wait until one dries and only then apply the second;
- if a large area is being poured, it is recommended to first cover the base with a layer of expanded clay or sand 10 centimeters thick. This coating is compacted and performs the most important function of reducing the weight of the screed being created. In this case, the pressure on the main floor will be reduced;
- finally, communications and pipelines should be installed so that the screed can be poured and not broken in the future if it is necessary to supplement the plumbing system or perform other work at this floor level.
Waterproofing works
To perform waterproofing in this room, it is best to use rolled materials or coating insulation. Roofing felt is used as roll waterproofing. It can be on a self-adhesive base (its price is slightly higher) or placed on a special mastic. It’s even better to take roofing felt with a rubberized layer (see video). Although the price of this material is higher than that of conventional roofing felt, the efficiency is many times higher. Laying the material yourself is done in the following sequence:
- Before laying regular roofing felt, the floor in the room must be covered with bitumen mastic. Carefully treat the joints between the floor and walls, corners and the floor near the sleeves. The lower part of the walls in this room is also treated.
Attention: it is prohibited to use tar instead of mastic. It dries quickly and cracks upon contact with a concrete surface.
- When the mastic has dried and the floor can be walked on, roofing felt is laid. After this, the material is rolled with a roller for a tight connection with the mastic. To install self-adhesive roofing felt, it is enough to remove the protective tape from the back side. And the material with the mastic already applied is heated with a burner to melt it and rolled with a roller to the base.
Important: roofing felt must be laid with strips overlapping by 10-15 cm. The material is also placed on the walls of the room to a height that is a couple of centimeters higher than the level of the screed. As a result, you will get a sealed trough made of roofing felt.
Coating insulation is also suitable for doing moisture protection yourself. For these purposes, coating compositions based on bitumen, acrylic, rubber, latex, as well as insulation based on silicate and cement-polymer are used. Application of the mixture can be done with a roller, brush or spatula, depending on the consistency of the composition. We work in this order:
- First, the composition is applied to the joints of the floor and the walls of the room. The walls near the floor are also coated to a height of 15 cm.
- While the coating layer has not dried, sealing tape is glued to the joints of the surfaces and in the places where the sleeves pass. The tape is laid so that it is completely immersed in the coating composition.
- Then the entire floor is treated with the composition. Try to maintain the same direction of movement of the roller or brush.
- After a few hours (indicated in the instructions for the composition), you can re-treat. The direction of movement of the brush should be changed to perpendicular to the first layer. Coat the tape thoroughly with the compound.
- After a day, you can lay the screed.
The next stage of preparation and installation
Regardless of the type of screed chosen, it is necessary to calculate the average consumption of the mixture per 1 sq.m of room area. By the way, the amount of tiles used when applying the decorative layer with your own hands will depend on this. In addition, it is necessary to calculate the thickness of the solution for each section. To do this, you need to adhere to the following sequence:
- Using a level, you can find the highest and lowest points of the floor covering.
- The minimum height of the screed allowed in the shower room is added to the resulting height mark. Then you need to calculate the thickness of the solution for the obtained minimum point.
- The found average value must be multiplied by the mixture consumption per 1 m2.
Base waterproofing
Waterproofing before filling with filler is carried out using a dense construction film or membrane. In the case of the latter, it is important to lay it on the correct side. If the width of the bathroom allows you to lay the waterproofing in one piece, then this will be the best option. It should be understood that the width should not be end-to-end. There must be a certain margin to ensure an overlap of 15 cm on the walls. If it is impossible to lay the waterproofing as a single contour, several separate elements are used. The seam is laid with an overlap of 15 cm and must be taped to seal it.
In the bathroom, changes in humidity and temperature are frequent. In this case, expansion and contraction of the GVL will occur. This movement must be compensated by a damper tape. The latter is foamed polyethylene. It is laid to the height of the future backfill layer with a small margin. It must be glued along the perimeter of the wall below.