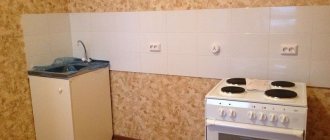
How to choose bathroom tiles
Before starting work, a tile layout plan is drawn up. The choice of design is important. Medium-sized tiles with a square shape are easy to install. It is more difficult to correctly lay a mosaic that includes many small elements of two or more colors and shapes.
Size and type
Tiles are now available in different sizes. There are mosaics on sale, the individual elements of which reach 3x3 and 5x5 cm. There are also larger versions of mosaic tiles. Such small tiles require careful preparation of the walls and floor. Its installation is complicated and takes more time.
Mosaic tiles are quite complex and require more time to install.
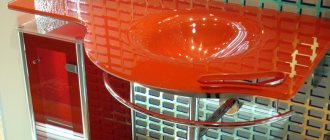
Large-sized tiles are also made, but not every beginner can cope with laying them. Large elements are more easily damaged. They are also more difficult to cut. It is best to use such tiles in large bathrooms, so that as many intact elements as possible fit on the walls and floor.
It is convenient to lay rectangular tiles measuring 40x60 cm on the walls. Such tiles are laid vertically. It can be combined with thin elements that are used to form dividing lines. It is easier to place elements measuring 60x60 cm on the bathroom floor.
Shiny or rough
Rough porcelain tiles can go well with a glossy finish.
There are both glossy and rough options on sale. Smooth, shiny tiles are easier to clean, but even small deposits of water stone and other contaminants are visible on them, so this coating requires careful care. When wet it becomes slippery. In addition, this coating reflects light, which is not always appropriate.
It is better to put rough tiles in the bathroom. Thanks to the features of its top layer, it gets dirty less and does not become slippery. Rough porcelain tiles are recommended to be laid on the floor. It is possible to combine glossy and rough coatings.
Texture, color and pattern
Nowadays tiles are produced in different shades and textures. There are many types of tiles that have both a textured and smooth surface. There are models with patterns in the form of floral patterns or abstractions. Decor imitating natural materials is also on sale, including:
- skin;
- concrete;
- slate;
- granite.
In the bathroom, the tiles can be embossed.
Often, tiles of several colors are installed in the bathroom, separated by a line of tiles of other sizes and styles. Dark brown elements are laid up to the middle of the wall. For the dividing line, you can use elongated beige elements with brown ornaments. The wall is covered with beige material from the middle to the ceiling. A combination of samples of other colors is possible. Both in the photo and in life, this design looks neat.
Grout
The decorative coating in the bathroom is exposed to moisture. Water getting under the tiles will lead to the formation of fungus and elements coming off. To prevent this, it is important to seal the seams correctly. It is not recommended to use cheap cement-based grout in the bathroom. It quickly cracks with frequent contact with water.
To prevent water from getting under the tiles, it is necessary to seal the seams correctly.
The best are two-component compositions based on epoxy resin, which repel water and do not change color. They are not affected by chemicals and fungus. The color of the composition is selected according to the darkest shade. You need to immediately purchase the required amount of grout for the joints (the calculator will help you calculate how much material will be needed in your work).
Apply markings and install guides
To make the job easier, mark horizontal and vertical lines on the wall to align the rows of tiles, and also install guides along them from a drywall profile or wooden slats.
It is recommended to start laying not from the first, but from the second row. This is more convenient, and in case of uneven floors, the risk of the tiles falling over is eliminated.
- Determine the position of the bottom edge of the second row by counting the number of tiles from the ceiling or floor, taking into account the thickness of the joints.
- Draw a horizontal line and secure the metal profile along it with screws or dowels. You can also use a piece of drywall or a wooden strip as a beacon.
- Due to this support, the laid tile will be in a horizontal plane and will not slide down.
Layout methods
Decorative coating elements can be placed in several ways on the floor and walls of the bathroom. There are simple installation methods that allow you to quickly lay tiles in geometrically correct rooms. If you have experience, you can use complex installation patterns. It is advisable to lay out the tiles in advance, taking into account the space for the joints.
The direct installation method is the simplest. It involves laying elements in even rows parallel to the floor. In this way, you can lay both rectangular and square tiles. This installation order is recommended for beginners.
Methods for laying tiles in the bathroom.
It is relatively simple to tile walls and floors using a brickwork pattern. In this case, every second row is mounted with an offset of ½ element. This method is more suitable for rectangular elements. The main disadvantage of the scheme is the need to cut tiles. This increases material consumption.
The option of laying tiles diagonally is more difficult to implement. It involves installing elements at an angle of 45° relative to the line of contact between the floor and walls. Most often this scheme is used for arranging floor coverings, but can also be used for walls. Square tiles are installed in this way. This scheme is better suited for large bathrooms, where a panorama of the intersection of lines will be visible. The installation method requires cutting elements. Due to increased waste, the final price increases.
To obtain an unusual coating, modular masonry is often performed. Square tiles are used in 2 sizes of different colors. Thus, a complex geometric pattern is laid out. The difficulty lies in the need to take into account the size of the seams.
Gather materials and tools
They will be needed for measurements, preparation of the base and installation itself. Almost everything from this list is in every home or is sold in a hardware store at affordable prices:
- tiles, adhesive and grout;
- primer, tray and roller;
- crosses for seams, profiles and screws;
- mixer and kneading container;
- drill, hammer drill;
- serrated and soft spatulas;
- rubber mallet, tile nippers;
- angle grinder with a diamond disc or tile cutter;
- pencil, level, tape measure and square;
- bucket, sponge.
How to correctly calculate the number of tiles
First you need to choose a tile design. You need to write down its dimensions. After this, you can start calculating. Measurements are taken of each wall, and the location of the bathtub, toilet and sink is determined. A detailed plan of the room is made. Each wall is drawn on a separate sheet. In this case, you need to respect the scale. This will allow you to determine the number of elements needed to decorate each wall, taking into account the seams.
The plan will help you accurately determine the number of trimmed elements. They need to be positioned so that they are least visible. The detailed plan helps determine the exact number of tiles. You need to add 10% to the resulting number. A reserve is needed, because when cutting, the tiles may split incorrectly.
Prepare the walls
The smoother the surface of the walls, the better the result will be. You can install tiles on concrete, plastered brick walls, drywall and old tiles.
- Clean the walls from the peeling old coating, remove all debris, and sweep away dust. If the base is smooth, make notches with an axe, chisel or grinder.
- Apply a coat of primer according to the type of wall material.
- If differences in plane are more than 8–10 millimeters over two meters, first plaster the surface or level it with tile adhesive to avoid uneven shrinkage and the appearance of steps.
How to lay tiles in the bathroom with your own hands
By following simple rules, you can complete all stages of the work yourself. First you need to prepare the bathroom and buy tools and materials. The old coating must be dismantled. Before laying tiles, it is necessary to level the walls and floor. It is advisable to install additional waterproofing. After this, you can begin laying the coating.
Preparing the premises
The bathroom needs to be prepared for future tiling. Furniture and decor are removed from the premises. The hot and cold water supply should be turned off. It is advisable to carefully remove the heated towel rail, sink and toilet. It is not necessary to lay material under the bathtub, so it can be left untouched. After this, they begin to dismantle the old covering and prepare the walls and floor.
Before you begin laying tiles in the bathroom, you must turn off the hot and cold water.
Tools and materials
In addition to tiles, you need to purchase a number of building materials. First of all, compositions for leveling walls and floors are selected. You also need to buy mixtures for installing tiles. You should carefully study the manual that comes with them. There is a special adhesive for ceramic, porcelain stoneware and other types of tiles. You need to purchase a primer and waterproofing. Necessary tools and consumables include:
- building level;
- notched spatula;
- containers for preparing solutions;
- mixer;
- tile cutter;
- Bulgarian;
- corundum block;
- starting metal profiles;
- rags;
- crosses;
- putty knife;
- aluminum rule;
- square;
- rubber hammer;
- laser level;
- rubber spatula for grouting joints;
- brush;
- roller
You will also need a vacuum cleaner and bags for construction waste. You need to prepare gloves, a protective mask and work clothes.
Dismantling the old coating
Before you start laying new tiles, the old ones must be removed using a hammer drill.
Laying tiles is not carried out on old flooring. If there are tiles on the walls, they need to be removed with a hammer drill. The device is used in shock mode. The tool is inserted under the lower edge of one of the elements.
Tiles, adhesive and poorly attached plaster are removed. Shards of tiles may fly to the sides, so you need to take precautions: wear gloves and safety glasses.
If the walls are covered with paint, it should be removed. A grinder with a special attachment is suitable for this. In places where the old coating is firmly attached to the wall, you can use a chisel and a hammer.
The walls and floor are thoroughly cleaned of dust and dirt with a stiff brush, as well as with a vacuum cleaner. After this, all trash is removed from the bathroom.
Leveling surfaces
The surfaces need to be leveled with a plaster mixture. Drywall should not be used in the bathroom, because it does not tolerate high humidity. First, level the ceiling and walls. The surfaces are pre-treated with a primer. Using a plumb line, determine the deviation from the vertical. Using a building level, guide beacons are fixed.
Application of guiding beacons.
After this, the plaster solution is prepared. First, it is thrown onto the wall with short, sharp movements using a ladle. The layer of plaster should be no more than 2-3 cm. After this, the surface is leveled using the beacon rule. In this case, you should not put too much pressure on the guides. You need to remove excess composition. Particular attention is paid to the formation of corners. They must be straight (90°). The remaining irregularities are rubbed with a trowel.
When the walls are leveled, using a laser level you need to make marks on the bottom of the walls along which the floor will be leveled. It is better to use a self-leveling compound. After this, the floor screed is poured. When the plaster and screed are dry, you can begin waterproofing.
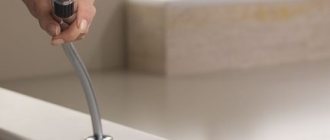
Proper waterproofing
To waterproof bathroom floors and walls, it is better to use a penetrating mixture. Such compositions include:
- "Lakhta";
- "Penetron";
- "Isopron";
- "Hydrosmile."
Penetron.
Hydrosmile.
Lakhta.
Isopron.
It is necessary to prepare a waterproofing solution. Using a brush, they should work on all corners. The walls and floor are covered with the composition using a roller. It is advisable to apply several layers of penetrating waterproofing.
Where is the best place to start?
Using a laser level to determine the bottom line of the first row of tiles.
The laser level is used to determine the bottom line of the first row of tiles. Starting metal profiles are installed along it. They will support the first row until the glue hardens.
There are no rules regarding the choice of where to start installation. Most craftsmen begin laying tiles at the level of the bathtub. However, if it is not adjacent to the wall, then you can start laying from the floor. The greatest difficulty is the installation of the first row of tiles. After this, you need to let the glue harden. This series will become the basis for subsequent ones. The covering is laid on the floor starting from the far corner.
We put the material
The tiles are attached with special glue. First you need to prepare a solution. Water is poured into the container, into which the dry mixture is added in small portions. The glue should have the consistency of thick sour cream. After this, you can begin laying the material. A thin layer of glue is applied to the wall. Use a notched trowel to spread it over the tiles. It should be pressed against the wall so that the glue under pressure is evenly distributed.
The bottom edge of the element should be located on the starting rail. Correct installation is checked using a building level. After this, the next element is placed. Crosses are used to control the size of the gap. When the first row of tiles is installed, vertical strips are installed on both sides. A cord is pulled over them - a horizontal guide for laying the second row. It is better to lay the cut elements in the corners.
After laying the walls, you can proceed to the floor.
After covering the walls, you can start decorating the floor. You need to start from the far wall. To control the location of the elements, a nylon thread is pulled, along which the first row will be installed in the future. A thin layer of glue is applied to the floor. The composition is distributed over the tiles with a notched trowel.
Floor tiles are being laid. Evenness must be controlled using a building level. If necessary, you can straighten the tile by lightly tapping it with a rubber hammer. If the tile is deeply embedded in the mortar, it should be removed and reinstalled. Using the level, all elements of the first row are controlled. Subsequently, the remaining elements are laid out on it until the entire floor is covered. Do not step on it until the glue has completely hardened.
Are crosses necessary for installation?
When installing tiles, crosses should be used. They help make the seams uniform. Crosses come in different sizes, resulting in the desired gaps being created. Without the use of these devices, there is a high probability of the formation of uneven seams. This will cause the rows to shift and the coating to look sloppy.
Crosses will be required when installing tiles.
How and when to rub seams
Both ready-to-use grouting compounds and dry mixtures that need to be diluted with water before application are available on the market. The highest quality grouts include:
- Kesto Kiilto.
- Kerakoll Fugalite Eco.
- Litokol Litochrom Luxury.
- Litokol Litochrom.
- Litokol Starlike.
- Mapei Kerapoxy Design.
- Mapei Ultracolor Plus.
Litokol Starlike.
Litokol Litochrom Luxury.
Kesto Kiilto.
Kerakoll Fugalite Eco.
Mapei Kerapoxy Design.
Mapei Ultracolor Plus.
The grout should be applied with a flexible rubber spatula or sponge. Some masters distribute this mixture with their fingers. The work must be done quickly until the composition dries. Before hardening, it is necessary to remove the remaining grout with a damp sponge. The cleaned tiles are wiped dry with microfiber.
Tile installation: instructions
How to glue ceramic tiles so that the cladding lasts for many years? First you need to complete the preparatory steps:
- Inspect the old covering to see how firmly it is connected to the wall or floor.
- Carefully examine the tiles for chips, cracks and other defects. Even 10-15% of the damaged coating is already a reason for dismantling. If the main part of the tile is strong, and there are damages in 2-3 places, then you can take a chance and install a new tile on top of the old one.
- If the old coating looks to be holding up well, you need to do a test: tap it with a wooden hammer. If cracks and chatter appear, the old cladding must be removed.
- The seams between the tiles should also not wobble or fall out.
The glue adheres well to the porous surface, penetrating its structure. Tiles, especially glossy ones, have minimal ability to absorb moisture, that is, they have few pores. To facilitate adhesion, you need to clean the surface: use a grinder to make notches on the tiles or remove the glossy layer completely. The bottom part of the tile is water absorbent. It must be opened at least 60%. But this method is labor-intensive and messy.
There is another way to make the surface rough: concrete-contact primer. It adheres well to the top layer of tiles and serves as a reliable basis for tile adhesive.
Recommendations for direct laying of tiles on tiles:
- The surface must be cleaned of dirt and grease and wiped dry, otherwise the glue simply will not work.
- Cover fallen or unstable tiles with cement mortar so that the surface is at the same level. Wait until dry.
- Apply primer with a roller or brush. Setting time is 2-4 hours.
- If you choose the method of removing the top part of the tile, then when working with an angle grinder you must wear safety glasses.
- Apply tile adhesive to the dried primer using a notched trowel.
- Lay the tiles in the usual way.
- Due to the low absorbency, the drying speed of the glue will be longer.
- Grout with special compounds using a rubber spatula.
- Allow the glue to dry completely. The final polymerization time is 3-4 days after installation.
Can tiles be glued to tiles? In conclusion, it is worth noting that this installation method is sometimes preferable. But you should carefully inspect the old tile for defects, and also carry out all preparatory and basic work strictly according to the instructions.
Laying errors and how to correct defects
Defects must be identified and eliminated in a timely manner, because after the glue hardens, it will be necessary to break the tiles, and sometimes even dismantle the entire coating.
The tiles lay in steps and not in one plane
This defect occurs when the plane of the wall is disrupted. If the horizontal is shifted, then when laying, the vertical seams will also have a flaw. It can only be corrected before the glue hardens. To properly align the horizontal line, trimming the first row of tiles is often required.
If the violation was discovered too late, when the wall is almost covered, you should find the row where it started and then wedge the seams. The bottom row is straightened with wedges or matches, and the rest - with crosses of different sizes. The flooring may move. This happens when the angle of the walls is not straight. To fix the problem, you need to trim the tiles when laying the first row.
Tile fell out of row
Displacement of the element may occur if a cross was not inserted into the joint when laying the tiles. Less often, the problem lies in a manufacturing defect, in which the corner of the tile is beveled. In this case, the element must be replaced. If the problem is not a manufacturing defect, a cross should be inserted into the seam. The tiles are fixed in the desired position with tape. After the glue dries, the element will take the right place.
Tiles sink deep
The reason the tiles are too deep may lie in poor-quality application of the mortar. Most often this happens when elements are glued pointwise or the composition is applied only to the corners. In this case, individual elements may fail. To eliminate the defect, remove the element that is too recessed, apply glue evenly and install it again.
Dips in seams
This defect often occurs when using low-quality or too liquid grout. To eliminate the flaw, the seams should be cleaned. After this, fresh grout must be reapplied.
What to do if a tile falls off?
If this happens, there are two options - use instant glue or liquid nails or a full-fledged adhesive. In the first case, it is enough to shake off the main dust (if the tiles were laid on a cement mixture), apply glue and carefully press the fallen part back to its original place. This method is not the most reliable.
The ideal option is to thoroughly clean the tile and the area from which it fell from any remnants of the previous adhesive material. Then dilute a small amount of glue and mount the tiles in place. What is the disadvantage of this approach: firstly, it will take more time and effort, and secondly, maximum accuracy will be required. Sometimes trying to clean tiles will result in cracks and chips - so be very careful. If you take into account all the nuances, such a mount will be reliable and durable.
Installation technology
There is no need to dwell in detail on the technological stages of laying new tiles on an old ceramic surface, because the installation process does not differ significantly from gluing ceramics to a traditional base. Let us draw your attention only to the specific points inherent in gluing tiles to tiles. The main difference lies in the preparation of the base for cladding.
During installation, you need to ensure that the joints of the new cladding and the old coating do not coincide. This can be done in two ways: change the layout of the ceramics or choose different sizes of the mounted fragments. It is recommended to distribute the adhesive mixture not onto the tile being laid, but onto the surface to be tiled.
When finishing the floor, you need to ensure that the glue is evenly distributed over the surface to prevent the formation of voids not filled with glue. When choosing a layout for laying floor tiles, it is advisable to give preference to installing elements diagonally. This method, in addition to visually increasing the space of the room, will also allow you to disguise small flaws that may appear during the preparation of the base or installation of ceramics.
Place the trimmings
Once all the entire rows have been installed, lay the edge tiles by trimming them using a tile cutter or angle grinder.
How to cut with a tile cutter
- Measure the exact length of the cut, taking into account the seams.
- Place marks on each side with a pencil and draw a line.
- Place the tile on the tile cutter table according to the mark and press it against the edge of the bed.
- In one movement, move the roller along the cutting line.
- Apply light pressure to the handle to separate the tiles.
How to cut with an angle grinder
- Mark the cutting line on the tile and secure it with improvised means.
- Put on your glasses and grab a grinder with a solid diamond blade.
- Without applying pressure, gradually cut through the tiles, without going deep into the entire thickness at once.
- To avoid raising dust, you can wet the tile and cut through only the top layer, and then place a nail under the tile and break it, as with a tile cutter.
How to drill holes
To drill holes for pipes, use diamond core bits or drills. Shaped cuts can be made using a diamond-coated string for a regular hacksaw. All options are discussed in detail in the video.
The relevance of tiles on the walls in the interior of the apartment
The demand for tiles is due to a large number of positive aspects. The ceramic product is characterized by the following advantages:
- Durability;
- Long service life;
- Reliability;
- Increased wear resistance;
- Moisture resistance;
- Resistant to mechanical damage;
- Variety of color solutions;
- The material withstands chemicals well;
- Ease of installation work;
- Easy to care for;
- Aesthetic appeal.
The finishing material is selected for the room depending on the person’s taste preferences, design and stylistic design of the room. Otherwise, you may end up with an option that will cause irritation. It will be uncomfortable to be in the room.
The finishing material is selected for the room depending on the person’s taste preferences, design and stylistic design of the room.
Features and types of facing material
Ceramic tiles include a variety of finishing materials, characterized by manufacturing and application features:
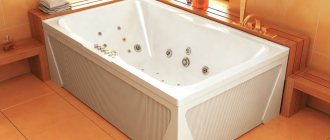
- The tiled variety looks beautiful. It has the shape of a rectangle or square. In production, clay is used and then fired at high temperatures. Glaze is applied on top of the product. The tiles are taken in a small size. With its help, you can lay a kitchen apron and decorate the walls of various rooms in the apartment. The large-sized product is suitable for decorating wall surfaces in the bathroom. With its help, the living room and kitchen will sparkle with new colors.
The living room and kitchen will sparkle with new colors with the help of tiles. - The difference between porcelain stoneware is low water absorption and high frost resistance, so this product is used in all weather conditions. It can easily be used to cover concrete and wood surfaces, brick and even natural stone. Typically, porcelain stoneware is used to lay it on the floor.
The difference between porcelain stoneware is low water absorption and high frost resistance. - The demand for clinker products is growing. It is fired at extreme temperatures. Clinker tiles are used to decorate swimming pools, gutters, and facades.
Clinker tiles are used to decorate swimming pools, gutters, and facades. - The cement variety is becoming increasingly popular. It has an attractive appearance and heavy weight. Therefore, when planning to glue a product, select a powerful adhesive that can perfectly secure cement tiles to the walls.
The cement variety has an attractive appearance and heavy weight. - The appearance of the mosaic is striking. Lay it out, alternating homogeneous or small elements. They use stone, ceramic tiles, glass, and natural stone for this. Use mosaics to decorate a bathroom, a swimming pool, or the surface of a kitchen apron.
Lay out the mosaic, alternating homogeneous or small elements.
There are two more types of tiles: majolica and metlakh. They allow you to decorate your apartment beautifully. Unlike other varieties, the options are expensive.
Which ceramic tile to choose
Ceramic tiles are selected taking into account several criteria:
- External design of the product;
- Technical and operational characteristics;
- Shapes and sizes;
- Compliance of security parameters.
When choosing, they are guided by the general color scheme of the room, furniture and lighting fixtures. If expensive finishing is used for decoration, you need to select tiles painted in pastel colors. For a bright kitchen, they choose colorful variations with large and expressive patterns.
When choosing, they are guided by the general color scheme of the room, furniture and lighting fixtures.
Lay the second row
- Apply adhesive to the first tile with the straight side of the spatula. Level it over the surface with the serrated side, holding the tool at a 45° angle to the tile.
- Following the drawing or focusing on the arrow on the reverse side, attach the tile to the wall.
- Lightly tap the tile with your hand or a rubber mallet so that the adhesive is evenly distributed over the surface.
- Level the tiles horizontally and vertically using a level.
- Lay the remaining intact tiles in the row, placing two crosses on one side at each seam.