Program functions for 3D bathroom design
Interior Design 3D is a universal software in Russian for Windows that will help you plan the furnishings of a private home, apartment or office. A simple, intuitive interface will allow you to quickly get used to the editor and immediately start modeling the layout. The following options are available to you:
- ✓ Construction of premises according to exact dimensions.
You can draw the rooms manually or upload a scanned house plan and trace it in the editor; - ✓ Built-in catalog of standard layouts.
If you need to finish the housing in a standard house, you don’t have to build a model from scratch. Just select the desired option from the built-in library; - ✓ Installation of windows, doors and stairs.
Various types of these elements are available in the catalogue. Made material, color and size can be customized; - ✓ Finishing floors, walls and ceilings.
Choose finishing materials from the built-in library or add your own textures from your computer; - ✓ Adding furniture.
Arrange furnishings from the built-in catalog, customize their size and appearance; - ✓ View the finished project
in 2D design mode (“top view”), in 3D view, in the virtual visit window (the ability to see the room from the inside, as if visiting live), in a photorealistic photo;
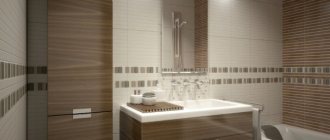
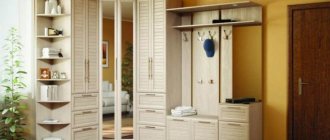
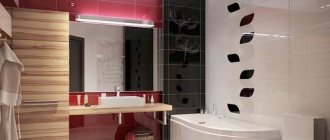
Bathroom layout made in the program
Professional software
Professionals prefer more complex paid programs. The level of elaboration of details in such constructors is better than in free ones. This makes the project more realistic. Modeling is mainly available in 2D and 3D format. In addition, good software has a virtual visit feature to evaluate the results.
ArCon Eleco
The program was created for architects. Therefore, the layout of not only individual rooms, but also the building is available here. Interior details are selected as accurately as possible. The editor has a large selection of materials for covering ceilings, floors and walls.
Tiles, wallpaper and other elements can be painted in any color. The brightness of lighting fixtures is adjusted. It is possible to add your own objects. For detailed design development, the function of adding windows, doors, and suspended ceilings is available.
For the application to work correctly, you will need a high-performance video card. Your hard drive must have at least 2.5 GB of free memory. You will also need 2 GB of RAM.
In the ArCon Eleco program it is possible to design not only individual rooms, but also entire houses.
Tile 6 x PROF + RENDER for bathroom with tiles
The program is specially created for designing bathrooms, toilets, kitchens and rooms in which tiles are used. In the application, the shade, texture, and laying method are selected. You can calculate the quantity and cost of cladding material.
It is possible to use the samples provided in the program for design or download images of products from a number of manufacturers from the Internet. When the virtual decoration of the space is completed, plumbing equipment and furniture can be selected and installed in the 3D model.
The Tile 6 x PROF + RENDER program is designed for working with ceramic tiles.
How to work in a 3D bathroom design planning program
Step 1: Create a room
First you need to create a project and draw the walls. In the 3D Interior Design constructor, you can draw a room manually according to measurements taken in advance, or download a real plan as a template and simply trace it.
Building a bathroom layout
A 3D layout of the created room will appear at the bottom of the screen. If you need to change its size, drag the mouse on any of the walls. This opportunity will come in very handy if you later want to design a private house.
When creating a layout, pay special attention to the choice of doors. The bathroom design program offers a large number of options: from regular and double doors to arches. The application also contains an impressive collection of different types of windows, including balcony blocks.
Installing doors in the program
Step 2. Finish
If you double-click on the created room, the settings panel will appear on the right. Here you can change the name of the room, set the height of the walls and select finishing materials. Tile is best suited for wall cladding and flooring.
Choosing tiles for the bathroom
To set the appearance:
- ✓ go to the menu of the element you want to configure (“Walls”, “Floor”, “Ceiling”);
- ✓ click on the “Material”
and select
“Tile”
; - ✓ select the appropriate option and click “Apply”
; - ✓ adjust the texture scale and evaluate the result in the viewing window.
Setting up finishing materials
Didn't find a suitable material in the catalog? Bathroom Planner allows you to upload materials from your computer. For example, you can download the desired texture on the Internet and add it to your project to make a design that is as close to reality as possible.
Step 3. Arrange the furniture
Now you need to choose furniture. The editor provides several options for bathtubs and showers, Jacuzzis, mirrors, sinks and other elements.
Arranging furniture in the bathroom
In the future, you can customize the appearance of any added item. Adjust the color of the bathtub, rug or sink, change its location and evaluate the result in the preview window.
Don't forget to add a light source: in the catalog you will find about a dozen options for lamps and chandeliers of various styles. Select the appropriate one and add it to the layout.
Step 4. Save the project
The finished visualization can be saved on your computer as an image or printed on a printer. You can also leave the project in the format of the software itself so that you can return to editing if necessary.
Popular PC programs
When choosing a designer, read reviews and reviews on different sites. The downloaded software requires at least 1 GB of RAM. Such editors with schematic images are suitable if expensive repairs are not expected. In situations where it requires large expenses, it is better to turn to a professional who knows how to work with licensed programs.
Astron Design
This free 3D editor is developed by the Russian furniture company Astron. The software will have to be installed on your computer first. Here they create designs for any premises, including the bathroom. The application includes the function of painting ceilings, walls and floors. You can add accessories, doors, windows. The editor contains only product manufacturer samples.
Working in the Astron Design program.
Tile 6 0 HOME
The designer is designed for 3D design of bathrooms and kitchens. It has a large selection of different floor and wall coverings (tiles, tiles, linoleum). Here we select suitable furniture and plumbing fixtures. The app calculates how much material is required. This is convenient when choosing ceramic tiles. You can change the color, pattern and type of masonry. The relief and shine of products and lighting are regulated. The program is also suitable for zoning. The designer allows you to install columns, podiums, partitions of different shapes and heights.
What to consider when planning a 3D bathroom design in the program
In order to be able to design a high-quality layout the first time, when working in the editor you should consider the following features:
1. Create a separate room.
You should not draw one common room with a hallway and a bathroom, and then build partitions. In this case, you will not be able to complete an individual finish for the bathroom, since the finishing materials are installed on the entire room at once.
2. When setting up finishing materials, you can take textures from any section
. If the flooring options offered in the “Floor” category do not suit you, look, for example, at the tiles from the “Walls” category.
3. If the installed tile seems too large for you, adjust the “Scale” parameter. Move the slider to the right to reduce the tile size
.
4. Basic bathroom furnishings
are located in the corresponding section of the furniture catalogue. However, you can find matching items in other tabs. For example, in the “Miscellaneous” section you may need switches, sockets, a gas boiler and other objects.
Kinds
Nowadays, creating a stencil is not difficult even for an ordinary user. But previously, such a procedure took a lot of time, so it was used much less often.
Stencils for decoration can be divided into the following types:
- Simple. In this case, single-color images are created.
- Combined. The stencil consists of several layers, thanks to which you can get multi-color designs. One layer of stencil - one paint.
- Reverse. In this case, paint is applied around the slots, resulting in something like a negative drawing.
- Volumetric. The picture turns out three-dimensional. For this, a polymer film is used. To give the image volume, putty is put into the slots.
Application Technique Types
Painting with paints is a fascinating activity, especially for creative people. However, even pragmatic people can find their joys in this activity and turn it into a hobby.
How to draw patterns:
The easiest way is one-color flat drawing according to a template. You need to go through the prepared drawing with just one color. Perfect for your first experience. This way you can create simple ornaments and complex paintings. The only difference is in the templates used.
An option for those who are patient is a multi-color pattern that uses two or more colors. This option allows you to get a more expressive or cheerful picture. It is expected that the process of preparing and selecting a design will take longer, as will its application. The preliminary stage involves choosing a color palette and planning how to use it in the drawing itself. You may need several blanks for each color.
Volumetric stencils are an art for professionals. The template acts as a standard for arranging parts of the drawing, giving a single shape. Plastic masses or special putties will help to obtain a relief image. Working with color is also possible. This way you can make beautiful three-dimensional images (ships, clouds, mermaids), creating a certain style and atmosphere. Of course, such work will take a lot of time, but you can make a bas-relief yourself if you practice first. The job may not work out right the first time.
Related article: Methods for constructing layered and hanging rafters
Reverse stenciling (negative) is a tricky technique where you need to paint over the area around the template, leaving the selected design in the original color. Helps to work with contrasting colors and textures, creating an interesting deep and multi-level pattern. Also an option for the sophisticated, it is often used in a multi-color format.
Selecting a location
Large stencils look best in large spaces free of furniture and details (on the wall above the bathroom, for example). Small patterns help give an elegant look to a room where there are no bright color accents. This way you can not only decorate unavoidable or bulky, boring objects (ventilation, sockets, shelves, mirrors and cabinets), but also play with them, combine them with the rest of the interior, using the same theme (fish, butterflies, floral patterns). Drawings will also help hide some wall defects.
Stencil drawing
Before applying paint to the wall, you should make sure that the result is close to the plan. Test on old wallpaper or a large piece of paper. This will help relieve a little anxiety before the first experience and get used to the instrument. Make sure the drawing area is dry and clean.
Check the level of the drawing, make light marks with a pencil if necessary, secure the stencil with masking tape or special non-permanent glue (so that it does not leave marks on the surface and comes off easily). “Hide” with tape and paper those parts of the interior that you don’t want the paint to get on. If necessary, cover the floor with newspaper or plastic.
Related article: Stickers for the bathroom - how to choose and stick
Apply the first coat of paint. After complete drying, you can refresh the color with a second layer (if necessary and based on the idea). The sponge and brush must first be blotted, removing the excess so that it does not flow over the edge. Spray paint from a can should be sprayed at a distance of about 25-30 cm (this will give a more even layer and make the consumption optimal).
Further work depends on your imagination: change the color, move the stencil to the next place.
When the work is ready, you can apply a fixing layer of transparent varnish. When it dries, remove the remaining tape and paper and admire your creation!
Features of use in the bathroom
The main feature of the bathroom and its problem is water, or rather a lot of water in a small space.
Hence the nuances of the work:
- Moisture-resistant paints should be used for painting. Since the room is closed, it is better that the paints dry quickly. The same requirement applies to the main wall covering.
- A small space requires a careful approach to choosing a design and its position. Using the correct size template you can increase the size of the room.
Large drawings are good where there is a feeling of emptiness that cannot be filled with voluminous objects.
Adviсe
Despite the name (stencil, template), this technique makes the room one of a kind. In order not to ruin your work, and then your mood, and to enjoy your work, you should pay attention to the recommendations:
- The less experience, the less tricks you should use. Use purchased blanks, they simplify the task. Large, clear lines are better transferred to surfaces; small features and a large number of angles are difficult to transfer and are often “cut off”.
- The size of the design should correspond to the capabilities of the space: large compositions are appropriate for a large area, small stencils are appropriate for the design of details and small areas.
- Paintings made in the same technique or supporting one theme look elegant; the number of colors can be arbitrary. The theme helps to unite the elements of the room and create your own style.
- Reverse stencils help create the effect of depth and volumetric space. They are best done using spray paint. Anti-patterns are good for creating landscapes - falling leaves, tree branches, fireworks, waves, horizon lines. Natural materials can be used as a stencil: expressive branches, large leaves (for example, fern, maple, birch branches). It is better to practice this technique in advance in order to catch a good “angle”: spraying from different points will give new “shadows”.
- Favorite themes for bathroom patterns: stylized flowers, floral patterns, Greek, Roman and Egyptian patterns, marine theme (fish, shells, anchors, etc.), landscapes, African motifs, cartoon characters. When choosing colors, focus on bright, rich, eye-pleasing shades and combinations. Dark, black and dirty shades are the prerogative of experienced craftsmen; beginners can overdo it.
- Drawings can decorate a room, zone it, decorate flaws, and unite disparate details.
Article on the topic: Patterns for patchwork for beginners step by step: video lessons of master classes, techniques, templates and patterns, where to start MK, instructions, photo gallery
It is not always possible to accurately implement an idea. This is not a reason to be upset, because the bathroom has found its face and will become recognizable to your guests. Small mistakes are highlights that were intended to be so. Let others think that way.