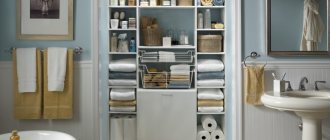
How to properly install a sink with a cabinet in the bathroom
When installing a sink with a floor cabinet, the procedure is as follows: Place the washbasin on the cabinet. Using a level, make it strictly horizontal - adjust the legs of the cabinet.
- Mark on the wall where the washbasin will be fixed.
- Make holes in the wall. Their depth must correspond to the size of the fasteners used. For tiles, take a feather drill, for concrete - with a carbide tip, and use the drill in impact mode. Fix the washbasin with anchor screws or metal pins screwed into dowels.
- Install a mixer and outlet with a siphon. Place the washbasin on the cabinet and press it to the wall with nuts, screwing them onto the studs. Be sure to place plastic spacers under the nuts to protect the housing from damage when tightening the nuts.
- If necessary, make holes in the cabinet for laying pipes.
- Connect the washbasin to the utility systems. Corrugations or pipes can be used to connect to the sewer system. Rubber seals are always used. To connect to the water supply, flexible hoses with union nuts are used. Install instrument taps on the water supply pipes. Check if there are spacers on the nuts. Connect the hoses to the taps, carefully tighten the nuts and tighten them with a wrench.
- Seal the gaps between the bowl and the wall surface with silicone sealant.
- Open the tap and make sure there are no leaks in the area of the threaded connections. If leaky connections are detected, disassemble the connection, add a thin braid of combed flax to the threads or apply 5-6 turns of FUM, re-tighten the connection and tighten it.
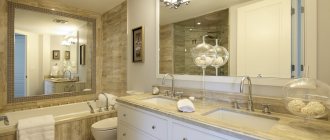
- If desired, attach a mirror to the wall above the sink. Using a tape measure and a level, mark the location of the holes for the fasteners, drill them to the optimal depth, insert the dowels and screw the hooks into them. Hang a mirror on them and check its horizontalness with a level.
Installing a wall-mounted cabinet under the sink in the bathroom has some features, which we will describe below.
No. 2. Mirror wall cabinet
Mirror cabinets are found among vertical, corner and horizontal options. The convenience of such pieces of furniture is obvious, because the cabinet allows you to completely replace the mirror, which is a mandatory attribute of the bathroom. It turns out that when buying a model with mirrored doors, you can save not only space, because you won’t need a separate mirror, but also money.
Assembling furniture from blanks
To assemble the structure, you will need a drill, a screwdriver (or a regular screwdriver), sometimes a hammer and a wrench. It is better to place something on the floor before making the cabinet (fabric, cardboard) so as not to damage the workpiece. What you need to pay attention to:
- in the bathroom, it is better to additionally seal the joints on the frame (especially under the countertop) and with the wall with silicone sealant
- all holes for fittings must be drilled before assembling the frame
- fastening points should be re-tightened after 1-2 days of use to ensure tight lapping of surfaces
By following these simple recommendations for the selection of materials, fasteners and parts, as well as assembly features, you can quickly make an organizer, shelves, cabinet, floor cabinet or wall cabinet for your bathroom with your own hands. It should be noted that the price will be cheaper than the finished product, but you should not count on significant savings. It is better to choose material and accessories for maximum comfortable use, and not for the purpose of saving money.
Product assembly features
First of all, you need to make a drawing of the room and decide where the wall cabinet will be located. Having measured the parameters of the room, you can build on them in creating accurate measurements of furniture.
- Use a jigsaw to make cabinet parts, or order them from a craftsman if you can’t purchase a tool.
- Use a drill to make holes in the sides, top and bottom of the product. If you are going to make shelves, then mark in advance where they will be attached on the sides of the cabinet. Then also make holes and insert screws into them.
- Then secure all parts of the cabinet with screws or self-tapping screws.
- Measure the diagonals of the furniture for the back wall.
- Take a thin sheet of fiberboard, which is much thinner than the structure, and secure it with metal loops on top at the corners. It is on them that the cabinet will hang.
- The doors are attached last. They are fixed using metal canopies for furniture. Use a screwdriver to adjust the position so that the doors close tightly.
- Make armholes for the handles, insert self-tapping screws from the inside, put on the fittings and adjust with a screwdriver.
- Finally, install the shelf on the screws and check the functionality of the doors.
No. 3. Closed and open lockers
Depending on your own preferences and what will be stored on the shelves of the wall cabinet, you can choose one of the following options for its design:
- open;
- closed;
- combined.
A closed cabinet means that the entire contents of its shelves are completely hidden behind the doors. This is the most popular option, as it can provide stored items with protection from condensed drops of moisture. In addition, with closed shelves it is much easier to keep the bathroom tidy.
Open cabinets , as a rule, are used for purely decorative purposes; they are equipped with spacious bathrooms. Combined models are a more practical option that allows you to organize convenient storage of things with different purposes and frequency of use.
Installation of choppers and strips for fastening cabinets
The chopsticks are driven into a regular wall using a hammer. However, there is tile in the bathroom. In addition to the hammer, it is recommended to use a wooden block on which the blows will be made.
You must act extremely carefully. Also, do not forget that in order to effectively distribute the load, an additional bar will be installed between the fastening elements.
In the vast majority of cases, it is made of metal. To avoid scratching the surface of the tile during installation, wrap it in mounting tape.
The video demonstrates an alternative method for installing cabinets in a bathroom:
Tools required for installation
Below is an instrumental set that you can hardly do without:
- marker;
- roulette;
- drill (+ glass drill and wall drill);
- building level.
First, it is recommended to mark out the bathroom area. This is done using a tape measure, a building level and an ordinary marker. After this, you can proceed to drilling holes.
It is extremely important to use a glass drill bit. But even in this case, we start only at a low speed, gradually increasing. We put almost no pressure on the drill. After the drill hits the wall, you will feel it.
There may be several options for further action. If the walls in the house are brick, everything is extremely simple - insert a drill with a Pobedit tip and go!
If the walls are made of reinforced concrete, you cannot do without a hammer drill. To avoid damaging the tile, it is recommended to drill a hole in the tile itself that is larger in diameter. That is, it is necessary to ensure that the drill on the concrete does not transmit impacts to the tiles. This can only be avoided if the drill does not touch the tile in principle.
Installation technology
After communications have been connected to the sink installation site, installation begins. Let's consider the main stages and nuances of installing a sink and a floor cabinet with your own hands.
Step 1
If the stand was delivered disassembled, it must first be assembled, strictly following the manufacturer's instructions, which indicate the order in which all elements should be assembled. For the work you will need a set of screwdrivers of different sizes, as well as a hex one.
Step 2
The next stage is assembling the sink, which includes connecting the mixer and siphon.
The mixer is installed in the following order:
- Flexible hoses are connected to the mixer and tightened with a wrench.
- The supplied O-ring is installed in a special groove on the base of the mixer.
An O-ring is installed in the groove on the back of the tap. - The hoses are passed through the hole in the sink, and on the back side the mixer, depending on the model, is fixed with two or one mounting pins.
Attaching the mixer to the washbasin. View from below.
Note! To secure the faucet to the sink, a horseshoe-shaped metal washer and a rubber seal are used.
Horseshoe washer and seal for attaching the faucet to the sink.
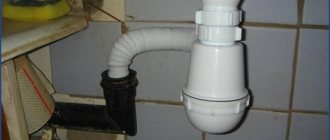
Then a siphon is attached to the sink:
- On the upper side, a metal mesh with a plastic pipe is fixed with a long bolt.
The upper part of the siphon is screwed to the sink with a long metal bolt. - A bottle siphon is screwed to the pipe from below. Fixation is carried out using a plastic nut and a conical washer, which is first placed on the pipe.
The body of the bottle siphon is mounted on a pipe coming out from the bottom of the sink.
Important! Siphons are supplied both assembled and disassembled. You need to assemble it according to the diagram that usually comes with the kit. If you don't have a diagram, watch the video below.
Step 3
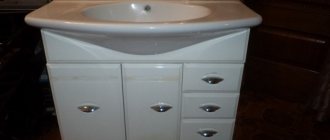
The sink with a siphon and mixer installed on it is installed on the cabinet. Most often, the sink is additionally fixed to the cabinet with sealant or double-sided tape. But an option is possible when the kit includes fasteners from the manufacturer. Fastening the bowl to the wall with studs is not required, but it is better to secure the bedside table with a pair of dowels to the wall through the back wall to avoid displacement.
Then the assembled structure is moved to the wall in the planned location and leveled using adjustable legs. If such an option is not provided and the bedside table is unstable, place plastic pads of the required thickness under the legs.
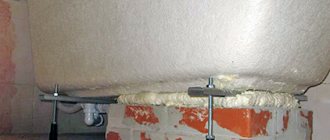
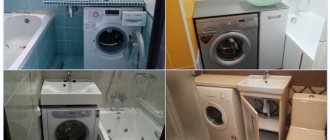
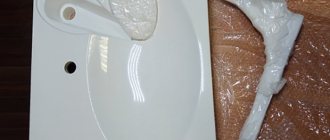
Note! If pipes interfere with the correct installation of the cabinet, it is necessary to carefully cut out the cabinet in this place and make a recess for communications. This is done based on the specific situation, some examples are shown in the photo below. Be sure to treat the cut areas with sealant or wax to prevent the chipboard from swelling from moisture.
Step 4
When the cabinet with sink is installed, the communications are connected: a flexible hose of the siphon to the sewer outlet, and flexible hoses of the mixer to the end fittings of the water supply.
After this, the cabinet doors are hung (it is recommended to install them last so that they do not interfere with the connection). To hang the doors, furniture canopies are used, which make it possible to adjust the closure density and the gaps between the doors.
The tightness of closing the doors and the gap between them can be adjusted using furniture hinges.
The finishing touch is to fill the seam between the wall and the edge of the bowl with white sealant. This will prevent water from flowing behind the sink, damaging the walls and cabinets, and will also prevent the formation of mold in hard-to-reach places.
If you follow the above recommendations, installing a washbasin with a floor cabinet yourself will not cause any difficulties. But, despite the apparent ease of the process, installation must be approached responsibly, since mistakes made often lead to various problems: leaks, unpleasant odors and other sad consequences.
Advice! If you need bathroom renovation specialists, there is a very convenient service for selecting specialists from PROFI.RU. Just fill out the order details, the experts will respond and you can choose who to collaborate with. Each specialist in the system has a rating, reviews and examples of work, which will help with the choice. Looks like a mini tender. Placing an application is FREE and does not oblige you to anything. Works in almost all cities of Russia.
If you are a master, follow this link, register in the system and be able to accept orders.
We make our own hanging version
For toothbrushes and paste, creams, combs and other small items, a small module of several shelves, which will be covered with hinged doors, is enough. This design is often called a pencil case, and it can be combined with a mirror by hanging it on the sash, inside or outside. However, if the shelves are made of glass, the doors can be made sliding, entirely from mirrors. But first of all, you need to make the cabinet body, and for this you will need boards or narrow strips of MDF or fiberboard. We mark the length of the sidewalls, as well as the bottom and top panels.
You should immediately decide whether the module will have 1 or 2 shelves; the distance between them should be sufficient to accommodate tall bottles and containers with shampoo. Based on this, it is determined how long the segments for the walls should be. The shelves can be narrower than the top and bottom panels of the body or equal in width, and at the same time they must be shorter by twice the wall thickness. We make the doors last, according to the dimensions of the body; they can be cut out from MDF or fiberboard sheets, or assembled into rectangular frames from bars and narrow strips laid across them, closely or at small intervals.
Cabinet made of MDF sheets
Assembling the cabinet can be done in an open way, that is, by fixing the sides with self-tapping screws through the top and bottom panels, coating the joints with glue (you can also coat the screws with it). The shelves can be attached using the same method. Or the body and compartments can be fixed from the inside using corners, in which case the screw heads will not be visible from the outside. But the best option is assembly on dowels (round tenons), in this way you can achieve maximum reliability and durability of the cabinet, and the connection is hidden. Holes are drilled in the panels, one part along the edge of the plane, and the other at the end. Then glue is poured into the blind holes of one of the panels and spikes are inserted, which are pushed into the holes of the other part, also filled with glue (the joint is also lubricated with it).
The suspended module should have adjustable awnings very precisely installed, with the help of which the housing is attached to the wall. They are installed under the top panel from the inside.
How to make a rotating cabinet?
The next option is perhaps the most difficult to assemble with your own hands. This floor cabinet will be distinguished by its mobility, since we will install wheels in its lower part. However, the design is also interesting in that each section, including one or 2 compartments, will rotate relative to the bottom. To do this, we assemble all the sections like small bedside tables, and their height can be different.
Base cabinet on wheels
At the base of each (except for the bottom one), using a feather drill, we make holes for rollers, which are often used for heavy drawers. When fixing them, be sure to place them at an angle of 45 degrees to the side edges. We drill a hole in the center of each panel (again, except for the bottom and topmost) and connect the sections with long bolts, tightening them with self-locking nuts and spring washers.