Tile is an attractive type of wall decoration that remains the same throughout its entire service life, but the various grouts and sealants used tend to deteriorate. This is due to the fact that the inter-tile material has not been subjected to high-temperature treatment, which is why it has much less protection against fungus, mold, moisture penetration and other negative factors. As a result, from time to time, the period can be any, there is a need to change the joint filler, but how to properly remove the grout from tile joints at home and not damage the decorative coating?
Does old grout need to be replaced?
The need to replace old grout may arise for at least several reasons:
- You have decided to change the design somewhat and choose a brighter, or, conversely, less shade for the joints in order to emphasize the originality of the tile. Quite often, this method is practiced in cosmetic repairs without changing ceramics, which allows you to create literally new conditions.
- The reason for replacing the old grout is its deterioration, which occurs due to insufficient quality and imperfection of the material processing technology. For example, porcelain stoneware is obtained by firing it in a kiln at more than 1000 degrees, which cannot be done with grout.
- The work on tiling the walls was carried out poorly, as a result of which the material was damaged and began to have an unsuitable appearance.
- Sometimes it becomes necessary to partially or completely replace the tiles, and then the grout is completely removed.
To seal the seams between the dies with a new fugue or other similar material, it is necessary to remove the old one from it. This is necessary in order to ensure a stronger retention of fresh material.
To understand how to remove old grout from tile joints in a bathroom or kitchen, you should first become familiar with all types of materials that are used to seal joints. They are roughly divided into the following varieties:
- Cement-based is the most inexpensive and common type of joint sealer. It has good water-repellent properties, but without special water-repellent components it cannot be used for bathrooms. It is in this type of grout that mold most often occurs if it was chosen incorrectly and not applied according to technology.
- Epoxy-based is a special type of high-strength decorative materials that perfectly protects tiles and walls from getting wet. It is insoluble in water and has a resinous structure.
- Silicone is a highly effective type of joint sealing material that is used to seal surfaces that are in regular contact with water. They do not form cracks, maintain tightness and provide an attractive appearance.
For each of the listed types of materials, a different product is used to seal the seams between ceramics and porcelain stoneware, because today there is no universal one.
The fact is that they have their own specific properties and have a unique composition, and therefore will interact with different substances in different ways.
For example, silicone is dissolved by vinegar, but cement compositions do not change in any way under its influence.
We also recommend watching - Grouting tiles in the bathroom: types, how to choose and use
Causes of premature wear of grout
The seams between the tiles are the weakest point of ceramic cladding, which often loses its color and moisture-resistant qualities, is subject to wear and cracks an order of magnitude earlier than the service life of the finishing material itself is exhausted. This happens especially quickly due to technology violations during installation. In such a situation, regardless of the location of the tiles, after some time the grout between its seams becomes black, and sometimes even mold forms in these areas. This problem may be caused by a number of factors:
- Incorrectly selected grout. The grouting material should be selected taking into account the moisture level, temperature, and purpose of the room.
- Due to mistakes made during application of the composition. The grout was used to seal the seams not to their full depth or with gaps left.
- The composition was not prepared according to the instructions. Grout made too thin loses its strength, and its service life is significantly reduced. When preparing the dry mixture yourself, be sure to follow the recommendations specified by the manufacturer.
- Improper tile maintenance. The use of cleaning mixtures with acid disrupts the structure of the grout.
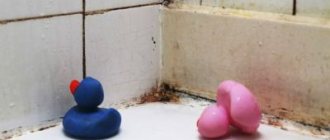
- Mold has formed on the walls of the bathroom, and microorganisms have penetrated into the space between the tiles.
- Increased moisture levels due to insufficient or no ventilation in the room.
- Complete or partial replacement of facing material when the interior is changed or some elements are damaged.
- Light-colored seams get dirty quickly.
Regardless of the reasons that led to the deterioration of the grouting composition, it will not be possible to correct the situation and return the surface to its original qualities. In this case, it is necessary to remove the old layer and lay a new one, but before removing the grout from the joints between the tiles, it is necessary to carefully inspect it and assess the level of destruction.
Individual protection means
To safely remove grout and various grouts from the joints between tiles, you must first of all follow safety precautions.
This is an important point, because means for softening hardened compounds are quite caustic and chemically active.
If it comes into contact with the skin, it can cause irritation and discomfort, not to mention allergic symptoms. Therefore, when starting work on removing old mortars and other putties from the joints between tiles, it is necessary to use personal protective equipment. These include:
- Rubber gloves are the main protective accessory that will protect your hands from all kinds of negative reactions from acids and alkalis. Thin medical ones may not be useful when working with some types of drugs.
- A mask or respirator is an especially important accessory if work is performed in a dry, mechanical manner. In this case, a lot of dust is generated, from which you need to protect your respiratory organs.
- Workwear is an element of personal protection that will protect against contamination generated during work. This also includes shoes.
Useful tips on how to remove grout from joints
To avoid damage to the cladding and ensure a long service life for the new grout, you must follow the technology described above and the following recommendations from experts:
- Before starting work, it is advisable to remove furniture and other objects from the room, since a significant amount of dust is generated during the removal of the grout.
- Compliance with safety precautions by wearing a respirator and other protective equipment.
- Ensuring adequate ventilation in the room, especially in the case of using chemical reagents.
- To whiten the joints between tiles, you can use hydrogen peroxide. This method is recommended for use when restoring white grout and when testing it for the presence of mold.
- The use of acid-based solvents when removing grout between the seams of marble or porcelain tiles is strictly prohibited.
- Before applying the grout, the surface of the cladding must be protected using masking tape or treated with ordinary soap.
Having found out what methods and how to remove grout from the seams between tiles, you will be able to choose the most optimal option for yourself, which, if you follow all the important recommendations and the correct execution technology, will allow you to carry out high-quality removal with your own hands.
Video:
Softening compounds
Depending on the technology and materials, there are 2 ways to remove grout from the seams of wall or floor coverings:
- Mechanical is an effective method, but very labor-intensive. To remove grout from the joints between tiles, you will need the appropriate tools. This can be a spatula, a scraper, and in some situations a screwdriver helps. But for high-quality and quick removal of the composition, it is better to use a universal tool with attachments: various spatulas, scrapers and other devices. For ease of work, it is recommended to use a vacuum cleaner.
- Chemical is a reliable method for removing grout joints. They are various liquid or semi-liquid, gel-like compositions, which, as a result of a certain chemical reaction, literally dissolve the fugue, soften it, making it elastic and pliable, then it still needs to be removed mechanically. Therefore, this method is also called combined.
If everything is clear with mechanical procedures, then with chemical procedures the situation is a little different. Such materials, due to their active formula, literally dissolve solid mixtures, forming a soft or liquid mass, which is then quite easily removed from the seam mechanically.
It is important to know! If epoxy resins were used to seal the seams between the tiles, then it is better to entrust the work of removing it to experienced craftsmen, since after drying such materials become hard as stone.
If you nevertheless decide to use mechanical methods for removing grout from the seams of tiles or porcelain stoneware, then there are several types of reagents on sale that effectively affect the grout:
- Products for cement grout – Valo Clean . A highly effective solvent that has a significant effect on various types of cement compositions. It is usually used if mold has formed in the seams and fungus has developed. The composition has strong antiseptic and disinfecting properties.
- Keranet are special types of acid-based chemicals that are used to dissolve grout, mainly on ceramic tiles. The acid is a dry powder with a high concentration of the active substance, and is also sold in the form of a liquid solution prepared on the basis of organic acid.
- Litostrip is a special active substance that is used to effectively remove epoxy-based grout. They provide a high degree of purification and quality removal of the mixture from the joint. The principle of working with the solution is as follows: the composition is stirred and applied to the seams, after leaving for a certain time it is removed mechanically using a spatula.
It is important to know! When deciding to purchase an organic acid to remove grout, keep in mind that it is not recommended for marble, natural stone, or glazed ceramics. The substance may cause damage to decorative coatings.
Methods for removing grout
Depending on the tools and consumables that will be preferred, the grout can be removed using chemical or one of the mechanical methods.
How to remove grout from the joints between tiles using chemicals
The most convenient way to remove grout, which uses special compounds that destroy the hardened grout mixture and do not harm the cladding. There are a huge number of such products on the market, so you need to first decide and give preference to the most effective of them, which corresponds to the type of grout being removed.
Compositions can be made based on polymers, epoxy, cement and other components, for each of which there is a special solvent.
Note! A properly selected product eliminates the possibility of damage to the tiles. Its application should be carried out strictly in compliance with the recommendations and requirements specified by the manufacturer in the instructions, and also be sure to wear rubber gloves and, in particular, a respirator, especially when the mixture has a pungent odor.
After purchasing a suitable composition, you can begin to remove the grout. The process itself is carried out as follows:
- First of all, if necessary, prepare the composition used.
- Next, you need to apply it to the seams between the tiles using a brush or a special dispenser, being extremely careful and avoiding contact with the facing material.
- After this, you need to wait some time (usually about 5 hours) indicated on the package for the reaction to occur and the grout to soften.
- Next, you need to try to start cleaning a small area using a sharp construction knife that has grout material on it. Once removed easily, work can continue. In case of poor lag, the product should be reapplied. When removing cement-based grout, opening will need to be done twice.
Some solvents used are capable of completely removing the grouting material within the period of time specified in the instructions, after which you only need to rinse the surface to be treated with running water.
Suitable tools for mechanical grout removal
Cleaning the joints between tiles can be done using a number of the following tools:
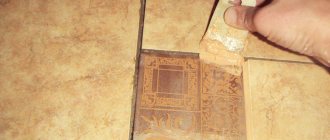
- A construction knife, a screwdriver with a small section and a gravel or small chisel. Using these tools, grout removal occurs very slowly, but there is minimal chance of damaging the tiles.
- Seam opener. This tool is specifically designed for removing hardened grout. It is convenient for them to remove, but purchasing it for one-time use is not advisable.
- Electric drill. Its use allows you to remove old grout in a matter of time. For an electric drill, it is necessary to select a thin drill so that when carrying out work and keeping the tool in working condition, it does not come into contact with the tile. It does an excellent job of removing grout, which is firmly held between the seams of the facing material.
- Dremel. An electric jigsaw equipped with a flat half-disc. When used carefully, grout can be removed in a short period of time.
- A screwdriver. This tool also works well for removing grout between the seams of floor tiles that are abrasion resistant. In this case, an attachment with a brush is installed on the tool, which looks like a small disk with metal fibers.
How to remove grout from the joints between tiles using a knife or squeegee
The most labor-intensive method, giving preference to which you should select the most convenient tool for yourself. To do this, you first need to try to clean a small area with several devices in order to make the final choice towards one of them. The procedure for removing grout should be as follows:
- The selected tool must be installed directly in the middle of the space between the tiles. Further, by pressing on it, it is necessary to achieve penetration of the blade to the optimal depth. If you cannot plunge the blade deep enough, you should lightly hit the handle of the tool with a hammer several times.
- Next, applying force, it is necessary to run the device along the entire length of the facing material, cutting in the center of the seam.
- After this, you need to remove the grout from one side of the finish to the strip of the cut. Next, you need to carry out a similar action on the other side.
- The next step is to remove any remaining putty from the joints using fine-grained sandpaper.
Upon completion of cleaning, it is necessary to treat the seams with an antiseptic composition and an antifungal primer. After they have completely dried, you can begin to fill the joints with new grout.
Removing grout with an electric drill
A quick, but order of magnitude more dangerous method for the facing material, which, when used, can cause damage to the integrity of the tile, which is why it is not suitable for craftsmen with little experience. Basically, the tool used is an electric drill with a thin drill, but in addition to it, grout can be removed using a screwdriver with a special attachment, a Dremel or a grinder.
The work is carried out as follows:
- The first step is to prepare the solution by mixing water and table vinegar in equal proportions. Instead of the second component, you can use citric acid, which eliminates the occurrence of a pungent odor.
- Next, you need to soak the sponge in the prepared solution and thoroughly moisten all the seams with it. The composition containing vinegar should be kept for about half an hour, and with citric acid for 24 hours.
- At the next stage, a pre-selected thin drill should be installed in the electric drill, the thickness of which should be less than the space between the tiles so that it can move freely along it, avoiding damage to the edges of the facing material.
- Turning on the tool at low speed, you need to bring the drill to the grout, carefully passing it between the tiles and cleaning it.
- After completely removing the grouting material, it is necessary to clean the freed joints from dust using a hard brush.
Upon completion, the seams should be washed and treated with an antiseptic.
Removing old grout between tile seams with a grinder
Using this tool, removal is carried out in the same way as when using an electric drill, but the work is a little more difficult, since in this case it will be necessary to maintain an order of magnitude greater precision. Removal of grout is carried out with a disk, the width of which should be smaller than the space of the seams between the tiles, since any careless movement can damage the coating or even cause injury. In view of this, you should not neglect all protective measures that will maximally protect you from all kinds of negative consequences.
Note! Before removing the grout from the joints between the tiles, it is recommended to soften it in advance using one of the suitable means. For this reason, when using an electric tool, significant loosening of the plates occurs, so you should not remove a facing material that does not adhere well to the base using this method.
Folk methods for removing old grout
In this case, one of the following methods is used:
- Using a concentrated solution of vinegar or citric acid. Using the prepared mixture, you need to open the grout and wait for 24 hours, after which you can begin to remove it using a spatula or a construction knife. Instead of these solutions, a composition to combat lime on plumbing or an acid-based dishwashing detergent can be used.
- A solution of glycerin and water in a ratio of 1:3.
The finished composition should be used to treat the seams and wait a while, after which it is necessary to remove the old grouting material using a plastic spatula. This solution can also remove dried grout from tiles. In this case, the removal technology is carried out in the same way - after opening you need to wait some time and wipe it with a rag.
Chemical composition
Each product for removing old grout from joints on a ceramic or porcelain tile has its own properties, which is determined by the components it contains.
It is important to perform all operations correctly so that no traces remain on the surface of the tile after the reagents themselves.
Therefore, we will consider the properties and composition of preparations for each type of fugue.
For cement-based grouts
For cement-based grouts, compositions are used based on organic acids. They are similar in their properties to hydrochloric or sulfuric acid, but are not dangerous to humans, since when interacting with other substances they do not emit acrid smoke or various fumes.
But still, when working with them, you should be very careful so that the composition does not get on your hands, as it can cause allergic reactions.
Suitable not only for grouts, but also for concrete and various adhesive mixtures. Before use, the contents of the bucket must be mixed with water and shaken thoroughly until smooth. Clutoclean and Litoclean Plus products have these properties.
Interesting to know! Do you want to save money, but grout removers are quite expensive? You can use the folk method using citric acid, vinegar and laundry soap. All this is mixed with water and applied to the surface that needs to be cleaned.
For epoxy compounds
Epoxy-based grouts are highly reliable and durable, which is good if the repair is done forever and bad when you want to change it. This is due to the natural physical properties of the resin, which hardens and becomes like stone.
The average service life of such joint sealing is usually at least 30 years.
To combat stains based on epoxy resins, it is recommended to use the product Litocol, you can also use the substance in the form of a gel. In fact, this drug is universal, as it is able to successfully dissolve fat, oil, foam, ink and wax.
The product is universal, as it can be used to clean grout from all types of tiles and is diluted to the required consistency with water. It is a concentrated alkaline solution.
For silicone sealants
To remove silicone grout from joints, it is necessary to use special potent preparations. There are many varieties of them on sale, all of them work approximately the same.
The most common effective actions include:
- Penosil Silicone R;
- Silicon-Entferner;
- Dow Corning OS-2;
- Antisil;
- Penta-840;
- Forch R551;
- R507.
All compositions for combating old silicone in the seams between tiles and in any other places contain acids. It is not without reason that it is present in many varieties, as evidenced by the characteristic smell.
It is important to know ! If the seams were filled with silicone sealant many years ago, then it can probably be dissolved with white spirit. This is an effective remedy, no doubt, but not for modern brands of silicones, because recent developments have become even more reliable and resistant to various chemicals. Only the materials described above can handle them.
Cleaning raised surfaces
It is easiest to get rid of old grout mixtures from smooth tiles, but what if you have to work with tiles that have a rough, decorative or embossed surface? When time is lost after the repair and the excess grout mixture was not washed off in time, it is much more difficult to wash the solution, especially when it comes to textured and porous tiles.
It’s not hard to figure out how to remove grout from embossed tiles: the first assistant in this is moisture. If you can’t wash the tiles with plain water, then it’s time to use special gentle products intended only for cleaning difficult surfaces (SoproAH737 is considered one of the most popular). According to the instructions, the cleaner is applied to the tiled surface and removed with a soft short-bristled brush.
It is not recommended to use aggressive and abrasive substances, powder-type cleaners and strong chemicals, as they may erase the design or decor.
To remove white plaque, simple soap or gel detergents are also used.
Treating cracks with steam and covering with a masking compound
In addition to chemical and mechanical methods of removing sealant from the joint between tiles, you can use hot steam. The fact is that silicone usually withstands temperatures up to 90 degrees, and steam is much hotter, so it has a destructive effect on sealants and effectively removes it.
In such a situation, you need to work as follows:
- Direct the steam stream to the area to be treated and hold for a few seconds. During this time, the sealant literally peels off from the base.
- Afterwards, using a hard-bristled brush and water, the material is removed from the seam with vigorous movements. Typically, exposure to a concentrated jet of steam occurs simultaneously with mechanical removal of the sealant, that is, special brushes are used.
If the place needs to be restored without removing the old grout, then cover it with a special pencil with a waterproof filler or cover it with a water-based composition.
When is it necessary to remove grout?
- When the surface must be beautiful. To ensure that the wall or floor has an aesthetic appearance, excess putty is removed, leaving the gap cells evenly filled.
- If the shade is wrong. Sometimes the grout mixture (fugu) is selected by color to match the tile. And if the shade is not very suitable, then you should get rid of the first option.
- Time, moisture, dust. Over time, the joints darken from moisture and dust. In this case, the old mixture in the joints is replaced with a fresh one.
Removing the fugu in between is quite a hassle. This procedure will require tools and special tools. We will tell you about the most practical and effective ways to remove grout in our article. We will reveal the secrets of the work of professional craftsmen, as well as time-tested folk methods.
Application of chemical reagents
Don't know how to remove old grout from ceramic tile joints? An effective method is chemicals. For each type of fugue, you need to choose your own cleaner.
Let's look at an example of using cement removers using Sopro ESE 548 solvent:
- First of all, you need to apply the composition and wait for at least 20 minutes.
- After the joint filler has softened, mechanical removal begins using a scraper or jointer.
- The separated fugue residues are removed with a wet rag or sponge.
After the surface has completely dried, you can begin filling the new composition.
If the seams were filled with a thick layer of silicone sealant, then a chemical agent, for example, Penta-840, is applied twice, after removing the top layer or most of it from the joint.
Assessing the condition of the grout
First of all, it is necessary to thoroughly clean the seams. If the grout does not have cracks and there is a desire to update the color, then it is not necessary to completely remove it. It is much worse when there is fungus and mold between the seams of the tiles, and deformations have also appeared.
Note! When removing hardened grout from the joints, damage to the ceramics itself may occur, which is why this procedure is necessary only in situations where the composition is completely damaged.
You can determine the need for a complete replacement of the grouting material by a number of the following signs:
- The presence of voids causes the grout to crumble and fall off.
- When cleaning the seams with sandpaper, the color of the top layer does not change, which indicates the presence of mold, due to which it is imperative to completely remove the old grout material and subsequently treat its locations with special antifungal agents.
Mechanical removal
Removing old grout from the joints between the tiles on the floor and walls causes a lot of hassle, because it is already a hardened material that has acquired its maximum strength. Therefore, you will have to work hard, especially if you decide to use a mechanical method.
This is an effective method, but without folk recipes and professional remedies, the process will take much more of your time.
Let's look at the most popular and accessible technologies using familiar tools:
Painting knife
The thin replaceable blade makes it convenient, but when working with cement compounds it quickly becomes dull, so you will have to buy as many replacement blades as possible. Press the tip of the blade firmly against the seam and move along it several times.
Seam opener
A special device for removing silicone and cement compounds from joints. It has a comfortable handle and a specially shaped blade, which is made of very durable hardened steel.
Engraver Dremel
An effective electric tool that can be used to remove various compounds from joints. Equipped with special attachments.
Screwdriver
When using drills that are suitable in size and design, they are ideal for removing old mortar from the seam, but for more comfortable work, it is still better to soften the composition so that it is easier to remove it and not damage the front side of the tile.
Other power tools
In addition to the listed power tools, a multi-purpose tool can be used to remove old grout. This is a device that is equipped with various attachments, including those for sewing seams.
In any case, when using such tools, you should be extremely careful not to damage the coating. Otherwise, you will have to re-lay all the tiles, which will be very expensive.
Many people are interested in the question of how to remove epoxy-based grout? In this case, the use of a purely mechanical method will be ineffective. To combat such grout, professionals use methylene chloride. This is an effective active substance, but it is very difficult to obtain such a reagent. Therefore, it is better to immediately contact specialized companies.
Mechanical methods
A practical, quick and less expensive way to remove new or old grout is mechanical cleaning. This method is better than the traditional one. As a result of mechanical friction, the tiles and seams will be cleaned. Below is a list of the most popular mechanical cleaning tools. They are all equally effective, so choose from what you have.
- A construction (or painting) knife is the safest tool on the list. The blade is inserted at an angle into the layer of old grout and the joints are cleaned with slow movements. You should move like this: from the bottom edge of one tile to the top edge of the adjacent one. And return in the reverse order: from the opposite upper corner to the lower edge. The putty will fall out in chunks. Since the blade is very sharp, be careful. Also, carefully monitor the stroke of the blade so that the edge cleared from the fugue is not scratched or chipped.
- A joint remover is a special tool for removing old putty from joints. Its main advantage is that it does not damage the edge or surface of the tile. The comfortable handle allows you to securely fix the device in your hand, and the sharp blade allows you to apply a minimum of effort. How should they work? Insert the blade into the grout at the top of the tile and move down parallel to the edge. Proceed in the same way on the other side of the seam. Use the sharp edge of a blade to pry the putty from underneath and it should fall out in one piece. Be extremely careful around the corners of the tiles.
- Electric drill. This tool additionally requires the use of a liquid solution. To clean tile joints, apply a solution of water and vinegar (2:1) to them. After 30 minutes, you can begin mechanical cleaning. Select a drill whose diameter is smaller than the width of the seam. At low speeds, use gentle movements to break off pieces of the fugue without damaging the edge of the tile. Remove dry cement residues with a stiff plastic brush. Additionally, you can treat the surface and seams with a chemical reagent. After complete drying, you can apply a fresh layer of putty.
- Dremel or electric chisel (its design resembles a grinder). The appliance should only be used if the seams are wide enough and you can hold the tool confidently. If the Dremel moves from side to side, the tiles will chip. Therefore, it must be kept in a stable position. The advantage of the device is that it can cover a large area in a minimum amount of time.
- A screwdriver is useful if the grout was applied early or if there is debris inside the joint. It easily removes hardened fugue in individual areas. A thin circle with bristles is attached to a screwdriver and the seam is cleaned.
Traditional methods
You can also use folk remedies to remove old hardened grout based on cement and silicone. The most popular include:
Vinegar
To prepare the solution, mix water and vinegar in a 1:2 ratio. Cover the required area with this substance, and after half an hour, remove with a sponge and rinse with water.
Glycerol
An effective household chemical that is diluted in a ratio of 1:3. Cover the area with it for an hour, then clean it with a plastic spatula and rinse with water.
White spirit or kerosene
Suitable for removing old silicone joint fillers. Ineffective against new materials.
Ammonia
Suitable for combating fungus or mold formations. Dilute like vinegar and apply to the damaged area for 20 minutes.
Detergent compositions
Use the available products to help remove unhardened grout from tiles immediately after repairs. Can be used:
- laundry soap. Grate 50 g of brown bar and dissolve in 300 ml of warm water. Apply to the tiles, leave for 5-10 minutes, and then remove the remaining grout;
- baking soda. Moisten the contaminated surface, and then apply a thick paste made from alkali and water to it. You should not wait for a reaction, the abrasive particles of the substance will easily clean the surface, just rub them in;
- ammonia, vinegar and soda. Add 1 tsp to 200 ml of water. soda, pour in 1 tbsp. l. ammonia and vinegar. The product is applied to the contaminated areas pointwise, washed off with a sponge after 10 minutes along with excess grout;
- hydrogen peroxide. Used to wash tiles in their pure form. Moisten a sponge with peroxide and wipe the dirty tiles with it.
Attention! If the grout from the tiles is not immediately removed after repair, the listed remedies may be ineffective. In such cases, it is better to resort to the use of chemical solvents. You can take Atlas Szop, PUFAS CEMENT-EX, Kilto Clean.
Recommendations from experts
Remember, old hardened grout must be removed carefully so as not to damage the front surface of the tile. This can be done either mechanically or chemically, but it is important to choose the right compositions.
For example, substances based on organic acids can be used to remove cement fugues.
To combat silicone joint fillers, acidic substances are also used, which soften the composition, making it mushy.
It is important that when removing any type of grout, you must first take care of your own safety and use at least gloves and a mask, because acid preparations have a negative effect on the human body.
Seam composition
Each type of grout has its own softening option. Chemical cleaners will not completely remove grout, but they make it more pliable and easier to clean with tools. At the same time, the solutions are not universal in their action, and it is very important not to neglect this. The cleaner is selected separately for cement, silicone, epoxy and other types of grout for joints.
For cement-based grouts
It is best to soften cement-sand compositions with acetic, sulfuric or citric acid. Of course, they act more slowly than synthetic ones, but they are much cheaper and, with the right approach, are no different from professional ones.
Method for preparing vinegar solvent:
- Dilute 30 ml of essence in a liter of water.
- Saturate the seams using a sponge.
- Leave for at least 12 hours.
- Carry out grout removal.
As the main composition, you can use 9% table vinegar. Then you need to mix the additive with water in a ratio of 1/2. This solution can soften the grout within a day. However, vinegar does not have the most pleasant smell, so many people prefer citric acid. For a liter of liquid, take a bag of dry mixture. The water is preheated so that the acid can completely dissolve. You can apply the mixture to the tiles with a rag or brush. The grout should be removed after a day.
The liquid with sulfuric acid to dissolve the grout is diluted in a ratio of 1/20. The substance is added to water, but not vice versa, as strong foaming will occur. Before applying this composition, be sure to protect the edges of the tiles with masking tape. Removal is carried out after 6-7 hours. The sulfuric acid solution must be applied with a brush. If the mixture gets on your hands, you can get burned, so gloves must be used.
It is important to remember that acids produce toxic fumes. The room where the work is being carried out must be well ventilated and only enter it with a respirator. After removing the grout, you need to rinse the tiles again to remove acidic substances.
You can prepare a safer softening composition from glycerin by mixing 100 ml of the substance with a glass of hot water. After work, you can wash off the glycerin with a dry cloth, followed by degreasing with kerosene.
Among the special products, you can use industrial developments, which can be purchased under names such as “Mortar Remover”, “Cement Plaque Cleaner”, “Mortar Remover”.
As the experience of craftsmen shows, some types of tiles can be damaged beyond repair if unsuitable solutions are used. Before using any professional composition, you need to read the instructions. You should also test the composition on a small area of tiles.
For epoxy compounds
For epoxy compounds, professional cleaning agents should be used, since resin grouts are resistant to chemicals and do not allow moisture to pass through. In a hardware store you can buy Litostrip, Mapei Kerapoxy Cleaner, Sopro ESE 548 cleaners. Epoxy grouts are good for their resistance, but when removed this becomes a problem. Repeated applications may be required.
For silicone sealants
It is easier to work with silicone compounds. They are removed mechanically or with hot steam. Silicone grouts can be acidic or neutral. In the first case, you need to use vinegar essence or alcohol (technical or medical) for removal. For neutral grout, ordinary solvents are suitable.
You can choose universal compositions - LugatoSiliconEntferner, Penta-840. Some cleaners can break down plastic.
Removing fresh putty
It is easier and more economical to remove fresh putty for joints between tiles, because the composition has not yet hardened and is very pliable. To do this, you need to have several sponges and buckets of water with you. Often wetting the sponges, the surfaces are carefully wiped so as not to damage the fugue already present in the seam.
It is necessary to carry out the procedure until no whitish spots are visible on the surface. The final wash is done after drying with detergent.
Relief tiles
You can remove grout from the surface of relief tiles using home remedies. It is most convenient to use cleaners that contain acids, for example, a bathroom cleaner. A similar substance is applied to a sponge and distributed over the contaminated surface. The acid will quickly dissolve fresh grout; just remove it with a damp cloth.
Overview of methods
Features of the new seam
When starting to work on a new seam, you need to benefit from past experience. Determine what caused the damage to the old composition. In this way, the optimal solution for extending service life can be found.
In places where the seam has been exposed to fungus or mold, compounds with antifungal properties should be used. Or you can use special impregnation. To protect seams that are constantly exposed to moisture, you should use Atlas Delfin or buy sanitary compounds with the required qualities, for example, CERESIT 40 with dirt-repellent technology. You can also consider epoxy grout, which does not require additional impregnation.
You can remove unsuitable grout using tools and compounds, or improvised means. The main thing is to understand the sequence of actions, buy everything you need, and discuss some issues with a professional. You also need to take into account that when using chemicals, people without protective equipment and animals should not be in the room.
Removing old grout from tile joints (2 videos)
Methods and solutions for removing old grout (22 photos)
Removing silicone grout
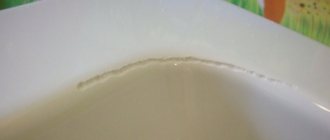
If ventilation is poor, mold will form on silicone grout. Silicone cannot be cleaned, so the only way to renew the joints is to completely remove any remaining silicone and reapply elastic grout. It is also often necessary to remove the old layer due to its incorrect application the first time.
- Silicone sealant is removed mechanically using a knife or a special scraper.
- The seams are completely cleaned with a vacuum cleaner.
- To completely clean the seams, you can use a special silicone remover, for example, Penosil Silicone R. It is applied to the seams using a mounting gun and left for at least 24 hours. After this, the product must be removed with a rag or paper. It is necessary to thoroughly wipe and degrease the surface so that the adhesion of the new silicone is good.
- Cover the edges of the seam with masking tape so as not to go beyond the tape. Leave only a little space in the corner between the wall and the bathtub.
- The tip on the new sealant cartridge must be cut so that it can be applied in one pass. By pressing the trigger of the mounting gun, the grout is evenly applied to the corner.
- Then you need to have time to smooth the seam before it dries using a special rubber tool or a finger dipped in soapy water.
- Immediately after smoothing, remove the masking tape.
