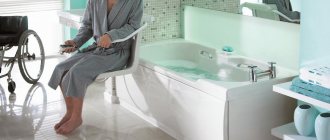
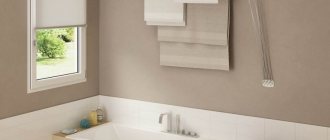
Installing a door to a bathroom is generally no different from other rooms. But there are still a number of nuances that need to be taken into account. The floor covering should have a gap of several millimeters with the canvas so as not to interfere with natural air exchange. A threshold is required; it will protect neighboring rooms from flooding. As a rule, bathroom doors open outward, but if the corridor is too narrow, it is worth opening inward.
Choosing bathroom doors
When choosing a door for rooms with high humidity levels, it is advisable to pay attention to products made on the basis of the following materials:
- doors made of tempered and heavy-duty frosted or stained glass, sprayed or fusing glass;
- a lightweight and reliable plastic product, characterized by durability and a price quite affordable for the average consumer;
- doors with PVC coating, characterized by a lack of tendency to deform, as well as exceptional practicality and ease of maintenance;
- laminated doors, practically indistinguishable in appearance from natural wood textures, resistant to adverse factors, including high humidity;
- wear-resistant products based on eco-veneer, which have high aesthetic characteristics and sufficient moisture resistance.
A modern veneered door, which is covered with a thin layer of valuable wood, contrary to popular misconception, is very reliable and practical, which is due to a special high-tech impregnation and varnish coating.
Doors
106 votes
+
Vote for!
—
Vote against!
The equipment of a modern bathroom differs in many ways from the standard one that everyone was accustomed to in Soviet times. And interior design in rooms where large amounts of water are used has also undergone a noticeable evolution. Doors to a bathroom, mini-pool or toilet are now selected in a single key with plumbing and other equipment. But it is not so easy to select and install a door leaf made of moisture-resistant laminate so that the doors meet all the search criteria.
Table of contents:
- Features of choosing a bathroom door
- Features of choosing a door leaf
- Materials for making a bathroom door
- Installing a bathroom door: step-by-step instructions
Features of choosing a bathroom door
At first glance, it seems that there is nothing simpler than installing a door to the bathroom, but this is a specific room with a high level of humidity and a high probability of water penetrating outside. The doorway must close sufficiently tightly at the bottom, while at the same time allowing for sufficient air recirculation and ventilation. It is these features that are important to consider when installing a bathroom door yourself.
In city apartments with a standard layout, the doorway has standard dimensions. Therefore, the size of the bathroom door, when replacing with a new one, must exactly match the previous model. Additionally, you have to change the entire door frame - in most cases, the design of the new door does not coincide with the old design of the doorway. You can use special solvents to remove old layers of oil paint from the doors or purchase the doors along with the frame.
It is not recommended to install the first doors you come across in the bathroom, especially decorative interior ones - they can warp from excess fumes and lose their attractive appearance. In a room with high humidity, it is best to choose a door leaf made of moisture-resistant laminate or other material that is not afraid of excess moisture:
- plastic;
- glass;
- aluminum;
- composite materials.
When installing doors in a bathroom, home mini-pool or bathroom, it is important to take into account the height of the threshold, which is made a little higher than in other rooms. This is important in case someone forgets to turn off the bathroom faucet or there is a water main leak. The high threshold allows you to keep spilled water on the bathroom floor while the water supply is turned off. But the threshold should not be too high to avoid stumbling.
There must be a small gap between the door and the threshold or at the top of the door to allow air flow for sufficient ventilation. Many people know how saturated the air is with steam after taking a bath, but excess humidity is poorly tolerated by people with diseases of the lungs and cardiovascular system. It is for this reason that sometimes a bathroom is equipped with a fresh air ventilation valve or a sufficient gap is left in the doorway when installing a bathroom door.
In a city apartment, the door block of the bathroom is much narrower than in the interior partitions, and in private houses the wall thickness can be arbitrary. Remember that when purchasing a door frame, the structure must be wider than the wall at the entrance to the bathroom or bathroom. The standard parameters of a doorway are 2.0 x 0.6 m plus a threshold. However, when purchasing, it is important to try everything on thoroughly.
Features of choosing a door leaf
To make the right choice, you first need to understand what kind of doors there are and choose the most suitable ones for your home. Remember that they should look good from both sides and harmoniously fit into the design of the room adjacent to the bathroom or bathroom. Example of decorative bathroom doors photo.
There are 2 types of doors:
- swing (swing open towards and away from you);
- sliding (moves to the side and guide).
There are also single and double doors - they are installed on a wide doorway.
A single swing door is a common type of door for a bathroom or toilet; it opens to the side using a handle. Most often, budget options are of this type, and they are usually installed in city apartments. The choice remains with the material, type of locking mechanism and door leaf design. The swing door to the bathroom opens, most often outward - into the corridor or hallway, where there is enough space for this. Sometimes the door opens into the bathroom, but there must be enough space there.
Also note that there are doors:
- rights;
- left.
Attention: This is especially important when the apartment or house has little space in the adjacent room. If there is another wall nearby that is perpendicular, then the doors should not interfere with each other when opening.
Sliding doors to the bathroom undoubtedly save space; they are installed where it is inconvenient to use a swing door. Their installation is more complicated, the price is higher, this is due to the expensive roller mechanism and guide fixed in the floor. Most often, their installation is entrusted to specialists. When opened, such doors move along the wall.
Any interior door should fit harmoniously into the overall interior design, so when choosing an interior style for the bathroom, it is important to maintain a reasonable balance. If the interior design style of the bathroom and the adjacent room does not radically coincide, then it is better to opt for a neutral option - with modest decor.
Attention: A door made of ordinary, not moisture-resistant materials, on the bathroom side must be coated with a special waterproof varnish or treated with a special compound that increases its resistance to moisture evaporation!
When installing a bathroom door, pre-impregnate natural wood with an antiseptic and a special antifungal compound, especially if it is made of solid wood! Veneered interior doors, as well as chipboard and MDF doors, are also impregnated with a special composition. This is especially important if the doors for the bathroom or bathroom are made by hand or by special order.
Tip: If you want to order a handicraft bathroom door from a small private workshop, be sure to make sure that it is covered with all protective equipment. It often happens that money is paid, but the work is not completed - no impregnation or special protective treatment was carried out.
When choosing a door, also pay attention to the locking mechanism, since the built-in latch tends to close from the inside - be careful not to confuse it! If a latch handle is not provided, there must be a latch or other internal lock.
Materials for making a bathroom door
1. Plastic bathroom doors are very convenient and aesthetically pleasing, although they are not widely used for this type of premises. They are most appropriate for rooms with high air humidity. They are easier to care for - just wipe them when moisture builds up. They are convenient and reliable, and are least susceptible to adverse effects. These are very lightweight doors, so they can also be used for sliding construction. They have an affordable price and practical fittings - you don’t have to invent how the doors to the bathroom should close.
2. Glass doors for the bathroom are a practical decorative option. Do not be afraid that they will break; only heavy-duty glass is used for them. Care – wipe off moisture regularly. A glass door has the added benefit of letting in plenty of light even if it is opaque. This allows you to further save electricity when using the bathroom during the day. If you are confused that the doors can be transparent, then you can choose frosted, mirrored or corrugated glass: photo.
It is also an inexpensive option, and you can even order such a door from thick frosted or sandblasted glass at the nearest glass workshop. But do not forget to purchase special fittings in advance so that the glazier can design all the holes - for the handle, locking bolts and fastenings. A finished door made of decorative glass costs an order of magnitude more.
3. Laminated door with film coating or PVC - excellent performance in protecting against moisture, splashes, drops and fumes. These doors are quite common, they are environmentally friendly and hypoallergenic, and due to their popularity they make up the lion's share of the range of doors for bathrooms and bathrooms.
This door does not deform, is very convenient to use and practical to maintain. Cleaning - with a sponge and any detergent, wipe off moisture with a dry cloth. The decorative properties of the door are also beyond doubt; the surface copies any texture of natural wood. This is important for decorating the interior of adjacent rooms in a single design, and the prices for these doors are attractive. Budget laminated doors of economy class are presented in a large assortment in all construction supermarkets and online stores.
4. Veneered doors are a coating of wood-shaving “halva” with a thin layer of decorative wood of valuable species. Furniture veneer is beautiful and reliable, the only thing that many manufacturers do not take into account is the practicality of such doors in rooms with high humidity. But if a layer of protective high-tech impregnation or multi-layer water-repellent varnish is provided, then the selected model will be good for adjacent rooms and practical for the bathroom.
5. Doors made of natural solid wood (wood) are high-quality, reliable, but everything mentioned about veneer is true for natural wood. Can only be used in the bathroom with a reliable protective coating. Such doors are expensive, they are not available to everyone, but they can be ordered from a carpentry workshop and all stages of impregnation can be monitored. When purchasing, it is important to read the instructions or technical description in detail to make sure that you can use a solid wooden door in a bathroom or bathroom.
Attention: In any hardware store, do not hesitate to ask what is not clear. It is better to contact consultants to obtain both general background information and a detailed description of the selected door. If the product fits perfectly in all respects for your bathroom, but is a little longer, it can be shortened on a special machine and trimmed. Check to see if this store provides this service. It’s worth asking how to install a door to a bathroom, do they have a technician come to your home, is this included in the price of the door? If you intend to install the doors yourself, make sure that you do not automatically overpay for their installation.
When installing a door, you need to consider whether this will be the first time after completing the main stages of building a house, or whether the old door will need to be dismantled? In this case, the process and all stages of installation will be organized differently - installation of a bathroom door video at the end of the article.
There are several options for installing a door, but remember that the bathroom definitely needs a threshold, and if you don’t have one, you should also familiarize yourself with this process in detail. It must be installed correctly and also receive sufficient sealing. Keep in mind that old doors are usually dismantled without the door frame, but if it does not match in style and it is difficult to redo anything, then you will have to remove the entire structure, along with the threshold.
Advice: It is important to eliminate wall defects before installing the door frame, and unevenness and discrepancies at the doorway can be covered with platbands or extensions.
Installing a bathroom door: step-by-step instructions
This is a responsible and time-consuming process, regardless of whether it is a door to a small bathroom or an extensive renovation of a large bathroom or home mini-pool. However, it is not recommended to experiment with this if you do not have similar experience and carpentry tools at hand.
When a door is purchased together with a frame, experts recommend assembling the entire structure on the floor and then installing it in the doorway. You can purchase an already assembled version when it matches your doorway size - then installation is much simpler:
- prepare the doorway;
- install the finished structure and wedge it, checking it with a level and plumb line, fasten the wedges between the wall and the door block and the wall;
- secure the frame in the doorway with anchors or screws;
- fix the structure with foam on one side and place spacers in the box so as not to deform it;
- check the verticality of the structure again - this is important when closing the door;
- after 2-3 hours the first layer will set, after which the mounting foam is applied on the other side, removing the excess;
- seal the threshold on the bathroom side;
- cover the mounting foam with the external decorative elements of the door frame;
- After a day, check the reliability of the installation - the box should not wobble; if this is noticeable, you need to strengthen the fastening to the wall.
Attention: When setting, the polyurethane foam increases fivefold, so it is better to apply it slowly in small portions until the space between the structure and the wall increases. Experts recommend foaming a third of the space. If foam creeps out in unwanted places, you can scrape it off with a knife and wash the surface of the finish with a sting solution.
If the door frame does not require replacement, then the purchased door remains to be fitted to the door frame and hung on the hinges. They are secured to the door leaf and frame with self-tapping screws. Usually 2-3 door hinges are enough, but they need to be installed correctly by making indentations with a chisel - watch the video.
How to install a door to a bathroom (toilet) with your own hands?
Installing a door in a bathroom or toilet yourself does not cause any difficulties, even if you do not have sufficient experience in such work.
However, it is necessary to prepare all the required materials and tools, as well as strictly follow the installation technology at all stages of installation.
Installed door
Selecting a canvas
The first step in installing doors to the bathroom and toilet is choosing good quality material and a comfortable design. The bathroom is the most humid room in the house, so pay attention to moisture resistance and sound insulation.
Materials
First of all, decide what your door will be made of. There are several options depending on cost, design and level of durability.
- Polyvinyl chloride. Or, more simply, plastic. The most affordable option on the market, it looks attractive in the interior, despite the low cost. Keeps its shape well even with direct contact with water and is easy to clean.
- Glass. Moisture-resistant, durable material. It looks presentable, but is not suitable for all interiors. Glass breaks easily, but now there are options on the market made of tempered glass; they are resistant to minor impacts.
- Tree. The material is not friendly to moisture and, as a rule, is not suitable for baths and toilets. It can rot, become deformed and moldy. But if the layout is such that water will not get on the canvas, and the bathroom has a powerful one, you can safely consider wooden varieties.
- Chipboard. It looks like wood, but is essentially made from sawdust and wood debris. Lightweight, budget-friendly design, it will not last long in a damp room and is not recommended for installation in a bathroom.
Constructions
The second stage is the choice of design. The number of square meters and your personal preferences play a role here. There are two most common ones.
- Sliding and hidden systems. Good for tight spaces because they save space. In terms of strength and sound insulation, they are inferior to classic swing doors.
- Swing systems. Classic version with an opening door. Takes up additional space when opening, but is more reliable and durable. A threshold is definitely needed.
Required tools and materials
Proper installation of a door with your own hands involves the use of materials and standard tools presented:
- screwdriver;
- self-tapping screws;
- nails for platbands;
- miter box;
- wood hacksaw;
- hammer drill;
- chisel;
- mounting knife;
- building level;
- feather drill;
- polyurethane foam;
- wooden or plastic backing;
- silicone sealants.
The standard thickness of walls in a bathroom, as a rule, does not exceed 50 mm, so the door frame must be thicker, only one and a half centimeters. Otherwise, it will be necessary to carry out additional work to thicken the walls or remove extra centimeters from the purchased product.
In some cases, a standard set of working tools may well be supplemented if necessary, which is explained by the characteristics of the material and the thickness of the walls in the plumbing room, as well as the main characteristics of the door being installed.
Selection of doors
Initially, you should decide on the theme of the door, its design and structure based on the overall interior of the room. In addition, it is necessary to measure the height and width of the openings in advance so that when you arrive at a specialized store you can accurately select the door to the bathroom. Taking into account all the above parameters, you need to select a product from the following materials.
Glass
It is an environmentally friendly material that is excellent in quality. This material is resistant to many negative factors, such as temperature changes or high humidity. In addition, glass does not deform over time, does not transmit noise and retains heat well. It can be different in structure, color, as well as texture or other external features. Glass doors can be installed with your own hands or with the help of specialists.
Caring for this material is very simple, since glass is not afraid of any chemical cleaning agents, with the exception of compounds with abrasive additives. Today, the modern market offers a wide variety of toilet glass to choose from, for example:
- matte;
- embossed;
- tinted;
- mirror or simple;
- framed with plastic or metal inserts.
In any case, it will be a fashionable and stylish door with high performance characteristics
.
Laminated MDF and chipboard
Products made from MDF and chipboard are currently one of the most popular options on our market. These representatives excellently withstand high humidity, do not deform under load, and also have an affordable price. It is often recommended to install them in the same panel house or other small buildings, for example, sliding doors. This option will allow you to functionally use the surrounding space.
Plastic
Installing PVC doors correctly with your own hands is not difficult. This material withstands cleaning agents, is resistant to thermal influences, is not prone to deformation, and is not afraid of constant contact with moisture. Plastic doors reliably retain heat and have high sound insulation properties. The modern market offers a wide range of different PVC doors.
They can have different colors, shades, take any shape and size. In addition, if necessary, you can select special coatings that imitate any materials, for example, wood, glass, granite and others.
It is worth noting that in terms of their quality, PVC products are only slightly inferior to their direct competitor – glass. However, they have a significant advantage - price.
Wood
Wooden doors are the most common option, however, not for bathrooms and toilets. They are easy to install with your own hands, but their purpose will be completely different. Such material, even when treated with special protective films or means, will not be durable. Wood is afraid of constant exposure to high humidity, so its use for a shower room is hardly suitable.
Preparatory work
Before you begin installing a bathroom door, you must carefully prepare the doorway. If the opening is too large, standard extensions are used, and if it is very small, it is expanded to the optimal size using a hammer drill and chisel.
At the next stage, the frame and door leaf are carefully prepared. Initially, the box is assembled using self-tapping screws, which are screwed into holes pre-drilled using an electric drill.
Calculation of the doorway in the bathroom
The drill used for this purpose should be a couple of sizes smaller than the diameter of the fasteners, which will help prevent cracking of the surface during the process of tightening the screws.
If necessary, at the preparatory stage, work is carried out to dismantle the old door and door frame, but the walls should receive minimal damage.
Step-by-step DIY installation guide
Door installation begins with dismantling the old panel. To do this you need:
We recommend: Do-it-yourself polycarbonate canopy: consider the drawings and process of installing a polycarbonate canopy
remove the trim; remove the door leaf; make several cross cuts in the structure; break out parts of the door frame using a crowbar or chisel; break out the top part of the frame.
Also, do not forget to check whether the wall where the platbands will be installed is level. If the surface is uneven, this area should be leveled. After this, you can install the box, fixing it with wooden wedges, which will protect the product from deflection when it is fixed with screws. Vertical installation should be checked using a building level.
Installing a door frame
Next, we fasten the frame with screws and anchors, for which we need to pre-drill 6-8 holes on each side of the door block. We insert dowels into the resulting holes and fix the product, using a screwdriver for convenience. The free space between the structure and the walls should be filled with polyurethane foam (remove the remainder with a sharp knife). At the same time, there are several recommendations, following which will make foam fixation even more reliable.
The foam should be placed in a warm place the day before installation. If you forget about this, the foam may not set well and will lie unevenly. Lubricate the opening with a damp cloth, which will improve the adhesion of the material to the foam. Shake the foam thoroughly before use.
After this, you can begin installing the hinges. We attach the loops to the end and mark their location with a pencil, then cut out the recesses for the loops. Having screwed the hinges, we install the handle and the canvas in the box. The last step remains - we put the door on the installed hinges and fasten the structure with self-tapping screws.
Which way does the bathroom door open: inward or outward?
The process of inserting door hinges and locking elements yourself directly depends on where the door is supposed to be opened. In any case, it will be much more difficult to embed a lock on an already assembled structure.
Tapping technology:
- Using a chisel, cut grooves for installing hinges flush with the frame and the surface of the canvas;
- screw in the self-tapping screws in a trial manner, which will allow you to mark the places where they are screwed in after the frame is installed in the doorway;
- on the end part of the door leaf, mark a place for the location of the lock;
- protect the frame base of the canvas from cracking with a clamp.
Bathroom doors should open outwards
A locking mechanism is placed in the cavity cut out according to the markings, and only after checking its functionality is the handle installed and screwed to the blade.
Inserting a lock yourself will be successful only if during the work process the entire sequence of actions specified in the instructions supplied by the manufacturer is strictly followed.
Installation
In order to install doorways, it is necessary to initially distribute the installation stages. In addition, you first need to assemble the entire future structure on a horizontal plane to avoid unevenness and distortions. The primary task is to assemble the box itself, i.e. in fact, the foundation of the future door. After which the door frame is secured into the opening between the rooms. The next important step will be to secure or fix the entire structure with the wall and flooring.
When the doorway is completely secured and in a stable position, then the work is practically done, small but important touches remain. First you need to take polyurethane foam and fill the remaining gaps with it.
This will not only hold the materials together, but also improve the soundproofing properties of the bathroom. Then there are decorative works in the form of inset door handles and locks. The finishing touch will be the installation of platbands. Installation diagram:
Lay out all the components on the floor. Measure the required dimensions for the door frame in all parameters. Carry out markings for awnings. Fastening the canopies using a chisel, cutting grooves on the frame and door. Installation of a doorway into a single structure. Fastening the door frame using self-tapping screws. Combining the doorway with the frame. Fixing the structure with plastic pegs. Inspect the resulting structure for irregularities and inconsistencies.
Installing a bathroom door
The door can be installed either with or without a threshold. The first method has some disadvantages and certain advantages, so the installation option is performed individually in each specific case.
Installation with threshold
The threshold is designed to perform several functional tasks:
- creating an obstacle to water leaks and flooding of other premises as a result of an emergency;
- preventing the spread of any unpleasant odors and moist air throughout residential premises.
Door with threshold
The practice of self-improvement involves installing a threshold based on materials that are similar to the door leaf, so plastic doors are supplemented with plastic thresholds, metal doors with metal thresholds, and wooden doors with wooden blocks.
Due to the identity of the materials used when decorating thresholds in the bathroom, it is possible to maintain the design of the sanitary room in a single style, but wood is short-lived, and therefore requires mandatory treatment with special compounds.
Installation without threshold
Installing a door without a threshold is not the most rational solution, so in practice such installation options are very rare.
However, in order to prevent an increase in humidity in the plumbing room, if there is a standard threshold under the door leaf, it is necessary to install an electric fan in the ventilation duct or leave a standard gap of approximately 4-5 mm between the bottom end of the door and the threshold.
Flat threshold for the bathroom
The lack of proper floor slope when installing a structure in a bathroom without a threshold often causes the door to cling to the surface of the floor finish during the opening process.
Procedure
Removing the old door
In principle, nothing special, but there is a small nuance. The box should not be broken out; if it does not give in, then cuts are made in several places, and it is removed from the opening in parts. Passages to bathrooms are in internal walls or partitions. Unlike load-bearing structures, they are not as strong. Excessive efforts and carelessness will only increase the amount of work - you will have to level and strengthen the ends of the walls.
Preparing the opening
- Complete stripping down to the base. This will allow, firstly, to determine the condition of the wall and draw up a list of necessary measures. Secondly, select the necessary materials and preparations.
- Formation of the opening. The door blocks have the correct geometry, and therefore significant curvatures and bevels are not allowed at the ends of the walls. In addition, the dimensions of the passage must correspond to the dimensions of the door frame, with only a small difference providing a technological gap around the perimeter (recommended within 10 mm).
- Processing the base. The fire protection agent and the method of its application are determined by the wall material. One of the effective methods is impregnation; Such preparation for door installation is more appropriate, since we are talking about damp rooms.
Fabric preparation
- Marking the frame for installing canopies. Considering the light weight of the doors, two hinges are enough.
- Drilling holes.
- Attaching hinges to the sash.
It is advisable to equip the canvas with fittings after installing the box; There will be plenty of time while the sealant dries.
After finishing work with the sash, it is recommended to prepare the jamb in the same way. After placing it in the opening, holding the door in a canopy, it is difficult to accurately mark it.
Box installation
- Markings are made to determine the locations of fasteners. This is necessary to ensure that the fixation of the jamb is as reliable as possible. The walls are not uniform everywhere, there may be individual defects, and therefore the anchors must sit “rigidly”.
- In the jamb, according to the diagram, holes are drilled for fasteners.
- After placing the box in the opening, it is leveled and fixed in the desired position with spacer wedges.
- Through the holes in the timber at the end parts of the wall, the fastener locations are marked.
- The jamb is removed and drilling is done in the opening.
- After installing the dowels, it is returned to its place, it is given the proper position, and the box is fastened. It is recommended to tighten the anchors through one, from different sides. At the same time, the spatial orientation of the jamb is controlled in order to prevent distortions in the structure. Otherwise, it will not be possible to install the door correctly - the door will not close tightly, difficulties will arise with attaching the canopies, installing the latch, and a number of other problems.
- Sealing the opening. The gap (around the perimeter) between the box and the wall is filled with polyurethane foam.
Hanging the sash
This stage can be started only after the sealant has completely dried. As a rule, at average temperatures and humidity in the room, a day is enough.
The work is not difficult, but you can’t do it without an assistant. The canvas is raised, the second half of the hinges are aligned with the cutouts in the box, and they are screwed to it with self-tapping screws.
All that remains is to check the correct operation of the door and eliminate any identified shortcomings. Everything else - platbands, finishing of the opening - is at the discretion of the master, based on the general design style of the corridor. In principle, there cannot be a single recommendation for the final stage of installation.
Installing a bathroom door without trim
Platband is a decorative element represented by rounded, curly or straight strips. The final stage of installing a door in a bathroom is framing the installed structure with platbands, which will mask unaesthetic cracks filled with polyurethane foam.
Door trim
Recently, door blocks without platbands or special door leaves with a hidden frame have been actively used. In this case, the canvas is mounted on secret or hidden hinges, which makes it possible to obtain a lightweight and elegant design. The door frame in this design is fixed without external jumpers.
Dismantling the old canvas
Before installing a new canvas with a box, you need to remove the old structure. This requires proper dismantling so as not to damage the doorway. You need to prepare a chisel, axe, hammer, pliers, pry bar, wood saw (you can use a hand-held circular saw or chainsaw).
Procedure:
- The old structure needs to be removed. To do this, you need to open the door. Insert a pry bar under its base to create a lever. Press down on the other end of the tool. If the blade does not lift, the hinges need to be lubricated with motor oil or WD-40. If the opening mechanism is secured with bolts or screws, it is enough to unscrew them to remove the blade.
- It is necessary to dismantle the platbands, extensions and frame. Platbands and extensions are removed using an ax, chisel, pliers, and hammer. It is enough to pick up one edge of the wooden plank and tear it off the box. It is better to replace wooden trims rather than reuse them.
- You need to start disassembling the box by removing the fasteners, if any (bolts, screws). The box is cut with a wood hacksaw, chainsaw or hand-held circular saw in the middle along the right or left slope. Using a pry bar, the box is carefully torn away from the wall along the perimeter.
Plastic trims are fixed to the wall using silicone or sealant. They need to be cut off with a sharp knife, and the remaining adhesive should be removed from the wall with sandpaper or a blade.
Installation cost
The average cost of installing a door in a bathroom is quite affordable, and qualified workers will complete the installation quickly and with guaranteed quality.
Standard door installation including:
- assembly and installation of the door frame;
- hanging canvas;
- insertion of hinges and locking element;
- cladding with platband.
It will cost approximately 2500-3000 rubles. Additionally, there is a fee for dismantling the old door leaf and frame, as well as widening the opening and some other work.
It is important to remember that, regardless of heat resistance and water resistance, even the most expensive doors can quickly become unusable if the plumbing room ventilation regime is not followed.
Installation of sliding doors
A sliding mechanism is a great way to save space. If you have a cramped bathroom, such designs are definitely worth a closer look. As a rule, the product itself includes all the necessary parts: guides, rollers, fittings, fasteners. If you need a lock - it is ordered additionally - this is another wooden stand into which the canvas will go and snap into place. Hanging a coupe structure is no more difficult than working with a classic mechanism. Follow the sequence of actions.
Step-by-step instruction
- Rollers are installed on top of the canvas and secured with screws.
- A small cut is made along the bottom edge, 1.5 centimeters deep and 3 millimeters wide.
- Measure the height, plan the gap between it and the floor, take into account the presence and size of the rollers on top.
- A guide is attached at the resulting distance from the floor. You can pre-install a wooden block and secure it to it, or use corner brackets.
- On the side, the rollers are placed on the guide and the product is hung.
- Finally, stabilizing stops are installed. To correctly calculate the distance, the product is expanded to its maximum width and a stop is inserted into the groove on the left, securing it with self-tapping screws. After all work, you should measure the vertical level again.
- Due to the fact that there is high humidity in the bathroom and constant contact of surfaces with water, the operating rules differ from the usual ones. First of all, this concerns cleaning. The surface often gets dirty from the inside - the dirt needs to be washed off with a soft material soaked in ordinary water. Do not use products with abrasives to avoid damaging the material.
- If you have a plastic product, prepare a solution for cleaning with alcohol or vinegar at the rate of 1/9 (1 part vinegar and 9 parts water).
- Lacquered doors cannot be cleaned using solvents.
- Veneer products are cleaned with wax polish or a spray with a similar composition.
- The wood is wiped with water and then impregnated with a protective agent.
- The glass will shine if you wipe it with vinegar water or window spray.
- It is better to rub the fittings with a dry soft cloth without chemicals.
Bathroom doors differ from ordinary doors in that they are made of moisture-resistant material. Installing doors in a bathroom is also a little different from installing doors in other rooms. This is due to the fact that in the bathroom the threshold height must be higher than usual, so that in the event of flooding, water does not flow into other rooms.
You also need to make the gap between the floor and the door larger than when installing a regular door for better ventilation.
This is due to the fact that bathroom doors are constantly exposed to moist air. Therefore, their surface must be moisture-proof and water-repellent. Doors are made of moisture-resistant chipboard, MDF, PVC. To imitate natural material, they are covered with veneer.
Veneered bathroom doors must be varnished. Doors can also be aluminum or metal-plastic.
Should be purchased in advance. It usually comes in standard sizes, but you may have to have it made to order.
The door block for the bathroom is slightly narrower than that of ordinary interior doors. Its size can be 60 cm wide, 2.0 m high or 1.90 m high, 10 cm lower than usual, taking into account the threshold.
The bathroom should have good air ventilation. Therefore, between the door and the threshold there should be a gap of 6-8 mm, and preferably 10 mm.
Door frame installation
When the waterproofing is applied, the surfaces are leveled, the opening is prepared, you can begin installing the box. The sequence of actions will depend on the material. When installing a plastic box, it is enough to level the finished structure and place plastic spacers. It is necessary to fix it with anchor bolts to the walls and foam the empty space between the wall and the box. It is important not to forget about the direction of opening the canvas, so as not to do unnecessary work.
The wooden box is measured initially. After this, its height and width are reduced so that a technological gap remains between the box and the wall. Also, we must not forget about the hole for ventilation, which should be located between the door leaf and the threshold. A lath is placed along the contour of the opening or a profile is secured. This is the base on which you need to attach the box. To do this, use anchor bolts and foam.
Tips for choosing door models
There are some features when choosing a door for a bathroom.
They differ in type of construction , and can be:
- swing type - the most common option;
- sliding type - this design is good when the room does not have the necessary space to install a swing type. Undoubtedly, the design is very comfortable, but it completely lacks sound insulation;
- folding type or the so-called “book” and “accordion”. They do not require free space when opening due to their design. However, it’s worth knowing that when folded, depending on the type, they take up up to ten centimeters of space in the doorway;
It is important to remember that the width of doors for plumbing rooms larger than the standard one. In view of this feature, before installation it is necessary to calculate and prepare the space of the required size.
Preparing the doorway
Before starting the main installation work, you need to prepare the doorway. To do this, working surfaces are checked with a level and tape measure. If there are differences in size, depressions or bumps, they need to be leveled. At the stage of preparing the doorway, you can change its width.
Important! When expanding the opening, you need to use a large grinder. Builders recommend not using impact power tools (jackhammer, hammer drill). It creates a powerful vibration that can destroy the wall.
After determining the dimensions of the opening and leveling the working surfaces, it is necessary to apply waterproofing. It will protect the box from the destructive effects of moisture and prevent fungus from developing. For this, waterproofing tape is used, which has a self-adhesive side. It needs to be glued around the perimeter of the opening.