Types of waterproofing for bathrooms
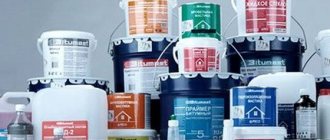
Currently, the industry offers developers several types of waterproofing, all of which reliably cope with their tasks. We will discuss which specific type to choose below and use examples of each material to describe detailed instructions for carrying out waterproofing work.
Types and types of waterproofing
| Type | Kinds | Brief characteristics |
| Painting room | Bituminous. Acrylic. Rubber. Silicone. Polyurethane. | Forms a thin waterproof film; depending on the specific type, it can be applied heated or cold. Surfaces require a primer; the compounds are applied with a brush or pneumatic remote control. |
| Pasting | Rolled. Synthetic membranes. | Rolls are made of various materials and have several layers of coating with modified bitumen or polymers. Synthetic membranes can be used for waterproofing vertical and horizontal surfaces. |
| Coating | Two-component. One-component. | Widely used for waterproofing premises; depending on the composition, it can consist of one or two components. Used on concrete or brick structures, can withstand significant water pressure. |
| Plastering | Cement. Asphalt. | Cast asphalt is used for waterproofing pipe outlets. Plastering - special compositions with polymer additives. |
In addition to these types of waterproofing, penetrating, spray and injection insulation can be used in bathrooms. But their use is justified only in rare cases and is not economically feasible for an ordinary bath.
Sprayed waterproofing
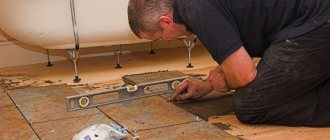
Let us consider in detail the technology for performing work with all types of waterproofing. The initial data is assumed to be that the surfaces have already been pre-prepared. The material used to make the bathroom is concrete floor, brick walls or reinforced concrete panels.
Bathroom before renovation
Painting waterproofing
One of the most affordable methods of waterproofing concrete pavements, in terms of cost it is a budget option. In terms of efficiency, bathrooms are quite satisfactory. The total thickness of the insulation is within 2 mm, it is recommended to apply at least two layers. Materials made on the basis of polymer varnishes and paints or modified bitumen, liquid rubber are used. Bitumen can be used using hot or cold technology; for bathrooms it is better to use cold bitumen.
Painting waterproofing
Step 1 . Clean the surface from dust and dirt. If there are wet areas, they must be dried.
Step 2. If the finishing of the floors requires a flat surface, then large protrusions should be cut off and the recesses should be sealed.
Floor screed repair
Step 3. Prepare the material according to the manufacturer's recommendations. Do not cook a large quantity at once, evaluate your capabilities.
Step 4. Start waterproofing work from the corner farthest from the exit from the room, divide the entire floor area into sections and paint them one by one. Painting can be done with a roller or brush.
Step 5. After the first coat has completely dried, apply the second. Due to this, it will be possible to cover gaps or low-quality areas with a high probability.
Step 6. When waterproofing the floor, be sure to treat the walls to a height of approximately 10–20 centimeters.
DIY bathroom paint insulation
Next, a screed is made with semi-dry concrete and the finished floor is laid.
liquid rubber for waterproofing
Adhesive waterproofing
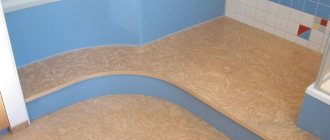
Pasted waterproofing
A universal method of insulating not only bathrooms, but also other rooms to protect against increased moisture. It can be applied using cold or hot methods; the specific technology must be chosen taking into account the characteristics of the bathrooms. There are many types of adhesive insulation, the classification depends on the materials of manufacture.
Types of adhesive waterproofing
| Type of waterproofing material | The most famous brands |
Bitumen based | Brizol, Gidroizol, Stekloruberoid, Ruberoid, Izol, Gidrostekloizol. |
Bitumen with polymer additives | Isoplast, Armobitep, Ecarbit, Bikroplast, Filizol |
Polymer | Bernizol, Elastomeric geomembranes, polypropylene and polyethylene films, Elon, Cromel. |
Gidroizol
Floor waterproofing TECHNONICOL
Various mastics are used for gluing. How should it be applied?
Step 1 . Spread the prepared surface with mastic. Apply in sections to suit the size of the waterproofing. Work begins from the farthest section.
Important. Be sure to waterproof the walls near the floor to a height of approximately ten centimeters.
Step 2: Carefully roll out the insulation layer. Constantly straighten it, do not allow wrinkles or air pockets to appear. Over the entire surface, the material should fit snugly to the base. To remove air, use a roller to press the insulation against the mastic with sufficient force.
Step 3. Near the wall, cut off the excess length with a carpenter's knife. The cut must be smooth, without mechanical breaks.
Step 4. Apply mastic to the next section of the floor. Make an overlap of the waterproofing layers of ≈ 15 cm. The overlaps of the layers are also coated with mastic.
Step 5. If there are risks of leaks, then apply a second layer of waterproofing in a direction perpendicular to the first. The production technology is the same.
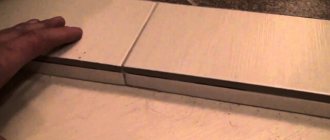
Rolled or adhesive insulation
Tapered waterproofing cannot withstand significant tensile loads. In this regard, it must be protected. You can use a screed made of semi-dry concrete. We will describe how this is done below.
Coating waterproofing
Coating waterproofing covers the base with a mechanically strong layer, which reliably protects the structure from water penetration. The composition includes cement, fine sand, polymer fillers and chemical plasticizers. The name and ratio of components depends on the specific brand. Due to plasticizers, mechanical stability increases, polymer fillers impart elasticity. Coating waterproofing materials can be one-component or two-component.
Types of coating waterproofing for bathtubs, showers, toilets
The latter have improved performance, but require more attention during operation. It must be remembered that two-component waterproofing grades must be developed within the time frame specified by the manufacturer. After the polymerization process is completed, they become unsuitable for further use. Before applying one-component surfaces should be wetted. Use spray bottles or wet rollers for these purposes. The thickness of the waterproofing is approximately 2 mm; at least two layers must be applied. An additional advantage of two-component products is that the development of various microorganisms is inhibited. But it should be remembered that not all two-component materials are approved for indoor use; carefully read the instructions on the packaging.
Ceresit CR 65. Waterproofing coating
The material is universally used and can be applied cold or hot (depending on the specific type) method. Advances in construction chemistry have made it possible to create unique materials that completely cover cement voids. A carefully selected fractional composition of components penetrates relatively deeply into the thickness of concrete and creates a durable waterproof film in the upper part of the cement matrix.
Important. Concrete floors in the bathroom must be left to stand for at least three months before insulation; one is enough for screeding. This time is necessary for the concrete or mortar to reach a strength of at least 15 MPa, otherwise pushing through and breaking the tightness of the floor covering is possible.
Step 1 . Check the quality of the base; if large cracks or irregularities are found, eliminate the problems. The floor must be completely dry and clean; oily stains are strictly prohibited.
Step 2 . To improve the quality of processing, it is recommended to make fillets (roundings) with a radius of 3–4 cm at the corners of the floor. The presence of fillets facilitates the waterproofing process and eliminates omissions. How to make curves?
- Prepare the required amount of cement-sand mortar at the rate of one part cement to three parts sand. The sand must be clean, without stones or clay.
- Wet the corners between the floor and walls. Wet generously, otherwise the adhesion coefficient of the solution to existing surfaces will be insufficient.
- Using a wide spatula, press the solution into the corners in a circular motion, trying to apply maximum effort. Remove the protruding solution for further use.
- Allow 1-2 hours for the cement to set. As soon as it hardens a little, remove the spatula marks with a damp sponge and make the surfaces smooth. It will take at least two days for final setting.
Step 3: Prime the base. The specific type does not matter, the main thing is that its properties correspond to the material used to make the floor. Please note that there are primers for interior or exterior use. Waterproofing should not be applied to wet surfaces; allow time for the primer to dry thoroughly.
Step 4. Prepare a waterproofing solution following the manufacturer's recommendations. If the material is applied with a brush or roller, then the solution should be liquid; if you plan to work with a wide spatula, then the consistency should resemble thick sour cream.
Practical advice. In order to minimize the number of dry lumps, first pour water into the container, and then pour in the dry mixture. You can stir manually with a trowel (long, difficult and poor quality) or with a mixer.
Be sure to let the mixture sit for at least five minutes. During this time, all cement grains will absorb moisture and chemical polymerization reactions of the material will begin to occur. After a pause, stir the mixture thoroughly again.
Important. Do not prepare large quantities of the mixture; it should be used within a maximum of three hours. Otherwise, the polymerization process will end; repeated dilution with water is not allowed. The air temperature in the room cannot be lower than +5°C. Drafts and direct sunlight are not allowed.
Waterproofing can be applied in one or several layers, the total thickness can be 1–5 mm. For bathrooms, it is enough to make a layer 2 mm thick. Each subsequent layer can be applied every other day.
Step 5. Glue the corners with a special waterproofing tape. These areas are the most difficult to treat; it is advisable to use additional water protection.
Ceresit CL 152. Waterproof tape for sealing seams
Step 6. Apply a layer of waterproofing material with a brush or spatula. Avoid gaps and level surfaces as much as possible. If you need to apply a second layer, it should be located perpendicular to the first. If the room temperature is very high and the waterproofing dries quickly, then its surface should be moistened with a spray bottle and covered with film. The fact is that for high-quality polymerization of the composition, water is required. In its absence, the solution will never have factory characteristics.
Step 7. After two days, check the quality of the work performed. If gaps are found, they should be enlarged and waterproofed again.
The result of the applied waterproofing
One of the advantages of this method of waterproofing is that ceramic tiles can be laid immediately, no cement screed is required.
Plaster waterproofing
It is rarely used due to its high labor intensity and insufficient efficiency by modern standards.
Plaster waterproofing
Step 1. Make a cement-sand mortar based on two parts sand and one part cement. Mix it thoroughly.
Step 2. Sprinkle the prepared floor surfaces with dry cement and water. Using a broom, mix the cement with water until milk forms. In this way, the adhesion coefficient increases.
Practical advice. You can use modern impregnations, but if the base screed is thick, they are ineffective. It is better to use self-prepared cement laitance.
Step 3. Set up beacons. To do this, it is not advisable to use factory metal slats. The fact is that after removing them, it is very difficult to hermetically seal the formed depressions. Prepare beacons from cement-sand mortar according to the following algorithm:
- fill the grooves with mortar. The distance between them is 15–20 cm less than the length of the rule;
- Use a water or laser level to mark the floor zero, and generally level the surfaces of the grooves to this level. Work carefully, do not allow depressions to form;
- between the outer beacons, stretch a rope in several places and install the rest under it;
- To speed up the hardening of the beacons, sprinkle dry cement on their sides and top surface. It will absorb excess moisture, and the hardening time will be significantly reduced. Once the cement is wet, carefully scrape it off with a trowel. If the beacons are still wet, repeat this operation;
- check the position of the beacons. Everything is normal - start making the screed.
Beacons from solution
Distribution of the mixture between beacons as a rule
In specialized construction stores there are special additives to improve the waterproofing properties of the solution; if you wish, add them during preparation. The amount of additives varies depending on the purpose of the room; follow the manufacturers' recommendations.
Waterproofing a bathroom in a wooden house
Bathroom in a wooden house
These works are quite complex and require an individual approach. What are the features of waterproofing the floor in the bathroom of a wooden house?
- Presence of wooden structural elements. The tree is very afraid of high humidity, especially in combination with high temperatures.
- It is not always possible to install vents under the bathroom, which causes additional problems.
- The option of a cement floor only under the bathroom is not always acceptable given the architectural features of the house.
- Wooden houses are constantly “moving”. Such features exclude the possibility of using waterproofing containing cement.
Waterproofing a bathroom in a wooden house
To waterproof rooms in wooden houses, you can only use plastic (liquid rubber) or rolled materials. Along with the floor, the walls must also be treated; moisture should not get under the finishing. And one more note for all cases - wooden load-bearing elements should always be impregnated with antiseptics.
Treating walls with antiseptic
It is allowed to lay polyethylene film or other waterproofing material of this type on the subfloor. The overlap of the joints should be at least 15 cm; seal the joints very carefully. For these purposes, it is better to use any special tape, with the exception of metallized tape. Metallized does not stretch and does not compensate for inevitable fluctuations in linear dimensions.
Izospan KL - sealing connecting tape
As soon as possible, try to use cement screed in bathrooms. It is advisable to provide for this at the design stage of the house; cement screed significantly increases the load on the joists; large-sized lumber should be used for their manufacture.
To improve the quality of insulation, the seams between the tiles must be grouted with special grouts. They should only be plastic and compensate for linear expansion without the formation of microcracks.
Grout CERESIT CE 40 elastic, water-repellent, antifungal
And lastly, the floor should be as stable as possible; use all construction technologies to increase its load-bearing characteristics. What to do if the floor in the bathroom is wooden?
Step 1. Inspect the condition of the wood covering, remove all oily stains and dirt. Oily stains are difficult to remove; they will have to be scraped off, removed with sandpaper or a cylindrical grinder.
Step 2 . Seal any cavities and cracks that appear with special wood mastic.
Ventilation failure
Installation errors
Removing cracks
Sand the surface thoroughly and allow time for the floor to dry.
Step 3: Saturate the boards. Prepare the solution exactly as recommended by the manufacturers. You should not experiment for the sake of saving; the consequences of such actions can be very sad.
Impregnation of a wooden floor
Step 4. Place waterproof OSB boards on top. Leave a gap of approximately 1–2 mm between them; fill the gaps with plastic, waterproof wood putty.
Installation of OSB boards on a wooden floor
Gluing the slab to the floor
OSB is an excellent flooring material
Step 5. It is recommended to apply another layer of waterproofing to the slabs. It must meet two requirements: have good adhesion to tile adhesive and compensate for minor thermal expansion.
The use of bathrooms in wooden houses requires special care. No matter how reliable the waterproofing is, immediately remove water from the floor. If for some reason it gets under the ceramic tiles, then there will be no chance of drying. And then unpleasant consequences will inevitably appear.
Application of bitumen or polymer based compositions
This method, used for walls, floors, and foundations, is as follows: ready-made ceiling mastic, which has water-repellent properties, is placed on the prepared base. After drying, a durable moisture- and vapor-permeable film is formed on the surface.
This method has a number of advantages:
- low cost;
- simple application technology;
- wide range of coating waterproofing.
We can’t help but mention the following disadvantages:
- deterioration of steam exchange in the room, resulting in the need for reliable exhaust ventilation;
- in the event of a leak, water collects inside the ceiling, which ultimately leads to deterioration of adhesion, destructive processes in concrete and the proliferation of fungus and mold;
- Basically, mastics have a dark shade and if further painting in light colors is necessary, additional plastering will be required.
Coating insulation is used for concrete surfaces of loggias and balconies with a ventilated upper side of the ceilings, as well as in bathrooms or toilets to prevent the appearance of condensation. Forced ventilation will be required.
You can use these materials when creating suspended structures, but provided that the gap between the ceiling and the finished surface is ventilated.
For wood ceilings, latex-based substances with the addition of antibiotics are used, which make the material moisture-resistant, protecting it from rot and insects.
Is it worth waterproofing bathroom walls in a wooden house?
There is no definite answer, but most professionals advise not to be lazy and waterproof them, regardless of the type of final finish. Moisture-resistant plasterboard sheets can be used under ceramic tiles.
Drywall moisture resistant
Important. Drywall does not have high bending strength; even with average effort it is deformed. The adhesive under the tiles does not have plasticity; during bending, it cracks and the tiles can fall off. You will have to not only make repairs, but also change the foundation, and this is expensive and time-consuming. In order to insure against such situations, place the supporting slats at a distance of no more than 20–30 cm. In ordinary cases, slats for drywall are installed at a distance of up to 50 centimeters.
Scheme of plasterboard cladding on a wooden frame
To waterproof walls, you can only use rolled materials, including aluminum foil. How are they installed?
Step 1. Measure the length and height of the walls in the bathroom. Keep in mind that the material should overlap by approximately 10–15 cm.
Step 2. Calculate the amount of materials, taking into account overlaps. Cut the pieces to the length of the wall. The number of pieces depends on the height of the wall and the width of the waterproofing material.
Step 3. Start fixing from the bottom row. It is advisable to have an assistant, this will greatly speed up the work and improve its quality. Fix the material with a stapler at a distance of approximately 30 cm. Make sure that it lies flat without large folds.
Step 4. Tape the joints. The more effective the waterproofing, the more reliably the wooden elements are protected.
Fixed insulation and sheathing battens mounted on top of it
Next, using existing technology, load-bearing wooden or metal profile slats are installed, to which slabs of moisture-resistant plasterboard are fixed.
Technology for installing drywall on a wooden frame
Recommendations from experts
- Both walls and floors need to be protected. It is necessary to cover with a layer of insulating materials, but only the horizontal surface. The floor and other areas around the bathtub itself, sink, cheap stalls or other plumbing fixtures also need to be treated;
- You can combine floor waterproofing with future finishing. It is better to paint the surface with a water-repellent emulsion (whitewash, which includes a water-repellent agent);
It is necessary to treat all weakened areas of the bathroom. This applies to every joint, even a small joint in structures, panels, blocks, slabs. It is also worth remembering about temperature margins and insulation of holes through which important communications will pass in the future.
- Make decisions in advance about where the waterproofing will be applied. It is better to create a plan that you will use during the actual application and will be useful in the future;
- Even if a waterproofing element can treat both walls and floors, the methods will be different. It is worth studying all application methods and choosing the appropriate one.
We recommend reading the article: Decorating the bathroom with plastic panels.
How to make a screed on a waterproofing barrier
Advantages of the semi-dry leveling option
A very important question; the technology for applying screeds for various types of waterproofing has its own characteristics. Let's look at the process in detail.
Step 1. Prepare tools and materials.
For bathroom screed, we recommend using a semi-dry mortar, thickness ranging from 5–10 cm. To make the mortar, use sand (three parts) and cement of at least M300 grade (one part). Add water portionwise, the solution should be well mixed and not have a lot of moisture. Check the consistency with your hand; after clenching in a fist, water should not seep through between your fingers and at the same time maintain its shape.
Components for the solution
Making a solution for semi-dry screed
Step 2 . Carefully install the beacons. Do not damage the waterproofing; walk on it carefully and wear soft shoes. Beacons are made according to marks.
Mortar beacons for semi-dry screed
Step 3. Using a level and the length of a level strip, determine the highest point of the floor in the bathroom. The height of the screed above this area should be approximately 2–3 cm thick. Using a level on the walls, mark a strictly horizontal line at this height. Beacons can be placed from metal profiles or from a cement mixture. The first option is preferable; working with metal beacons is easier and faster. Count the number of beacons. The distance between them should be 10–15 cm shorter than the length of the rule.
Step 4. Place the two outer beacons according to the marks. Constantly monitor their level and double-check that they are positioned correctly. Walk on the waterproofing carefully, do not damage the integrity of the layer.
Step 5. Pour the prepared solution onto the first area; it should be located on the wall farthest from the door. Level it with a trowel. For inexperienced builders, you should not start work on a large area at once, let it be within one square meter.
Step-by-step implementation of semi-dry floor screed
Practical advice. You will have to work on your knees. Make a wooden stand for yourself and cover it with soft fabric on both sides. The stand will prevent damage to the waterproofing, your knees will be dry, and your work will become safer and easier. Constantly move the stand to a place free from the solution, rest your knees on it.
Step 6 . First level the solution with a trowel; its height should be several centimeters higher than the level of the beacons. It will be difficult to adjust the height the first time, but after a few hours of work, practical skills will appear.
Step 7. Take the rule, put the ends on the beacons. Slowly move it towards you, at the same time making movements left and right. If there are recesses in some places, take the solution one by one and pour it into the recesses. Level the surface again using the rule. Do not bend over too much; it is very uncomfortable to work in this position.
The optimal thickness of a semi-dry floor screed should not exceed 5-7 cm
Leveling the solution with a trowel
Step 8 . Once the sketched area has become smooth, begin working with a trowel. With its help, you can not only make the surface smooth, but also slightly compact the top layer of the screed. Do not press the iron too hard, make sure that no indentations appear. If such a problem occurs, then fill the hole with mortar and level it again with a trowel. At first, the work will go slowly, but over time, confidence and skill will appear.
Step 9. Continue screeding the entire floor area in the bathroom. We remind you again - do not damage the top layer of waterproofing. If the screed plane has differences of up to two millimeters, it’s not scary. These irregularities are eliminated with ceramic tile adhesive.
Using a trowel on a semi-dry screed allows you to get a perfectly flat, smooth surface.
The next day, it is advisable to moisten the surface generously with water and wait another day. The fact is that a semi-dry solution does not have enough moisture for the normal course of chemical reactions, and this negatively affects the strength indicators. The screed has hardened and dried - start laying the tiles.
Practical advice on the use of certain types of waterproofing materials
Coating waterproofing
In all respects, the material is excellent, but the price is appropriate. In order to improve reliability and reduce the cost of work, use the following tips:
- try to level the base as much as possible. The insulation is applied with a large spatula; it automatically levels the surface. If there are many depressions on it, then the consumption of expensive material may increase by 30% or more;
- professional builders apply coating waterproofing in two stages. The first one uses a comb spatula.
Comb spatula
Example of waterproofing application
With its help, the layer has the same thickness over the entire area; the thickness indicators are adjusted by the angle of inclination of the tool. At the second stage, the ridges are smoothed out with an even large spatula. The surface is smooth and of the same thickness; waterproofing savings can reach 20%. Move the spatula at an angle of approximately 45° to the direction of the ridges. The inclination of the spatula plane is adjusted depending on their height. Due to this, not only the surface is better leveled, but the depressions are also filled more evenly. If you have no experience, no problem. After a short time it appears, the speed of work increases significantly;
- Carefully and at least twice waterproof the outlets of pipelines, drains and sewers.
Painting waterproofing
It is best to apply it using a pneumatic spray gun.
Diagram of the external device of a pneumatic spray gun
Particles of waterproofing hit the surface of the floor or wall at high speed and fill all micropores. In addition, skips due to surface unevenness are completely eliminated.
Pneumatic spray gun
It will not be possible to achieve such a quality coating with a roller, but with a brush it is very difficult and time-consuming. Make the insulation liquid and be sure to apply at least two layers. Each subsequent one is applied only after the previous one has completely dried.
Pasted waterproofing
Choose physically durable materials. Bathroom leaks can be difficult to detect, but that makes them even more dangerous. Prolonged exposure to moisture has an extremely negative effect on the performance of all building materials.
A good option is to use ordinary plastic film.
Polyethylene film for waterproofing
Why?
- Low cost of construction work. The film is much cheaper than other materials, and in terms of the quality of protection against moisture penetration it is in no way inferior to them.
- Manufacturability. Laying floors with film is much faster and easier. There is no need to use mastics to seal overlaps; they are expensive and time-consuming. In addition, additional places appear in the overlaps with increased risks of leakage.
- The width of the film in rolls can reach three meters, and it is produced in a sleeve. After cutting the sleeve, the width of the material doubles. This is quite enough so that the floor surface does not have joints.
The polyethylene film must be strong enough
But there are two conditions. First, the film thickness must be at least 45 microns; it is undesirable to use anything thinner, as the likelihood of breakouts is too high. Three times - the surface should not have sharp protrusions. Minor deflections are not critical; the film will stretch and lie tightly over the entire surface.
Plaster waterproofing
It is advisable to use it in large bathrooms with high loads on the flooring. It is advisable to add special plastic modifiers to the solution, due to which the tightness of the coating does not deteriorate even with mechanical damage to the surface.
The reliability of any waterproofing largely depends on the quality of surface preparation. It is advisable to remove dust using a vacuum cleaner.
Application of a construction vacuum cleaner
The presence of dust greatly reduces the adhesion coefficient of waterproofing materials. In these places they will definitely peel off or will not be absorbed to the required depth (depending on the type). Remember one axiom: careful execution of all technological operations is done much faster than eliminating defects. There is no need to talk about cost.
Tips for laying tiles
Immediately clean the seams between the tiles from glue.
The glue from the seams must be cleaned off immediately
First, the glue can change the color of the grout. Secondly, it does not retain moisture, and it needs to be grouted with special compounds. Otherwise, the installation technology does not differ from the usual one.
Applying grout
Seal grout joints with great force. The recommended rubber spatulas cannot always create them; it is better to use wooden ones. There are no factory ones - use an ordinary thin lath about 5 cm wide. Press the grout into the cracks until the excess protrudes at the edges of the spatula. It is better to do final grouting and cleaning of surfaces after a few hours. During this time, the material will harden a little and will be easier to remove. Wipe the seams with a damp sponge. Read the link for cast iron bathtubs with hydromassage.
Liquid membranes
To apply them, it is advisable to level the base. It should be said that liquid membranes, like mineral sealants, can be laid not only on the floor. With their help they protect the walls from moisture. Before installation, it is recommended to eliminate any unevenness using special compounds. As when working with other materials, the surface must be cleaned and primed. The corners are also sealed with sealant.